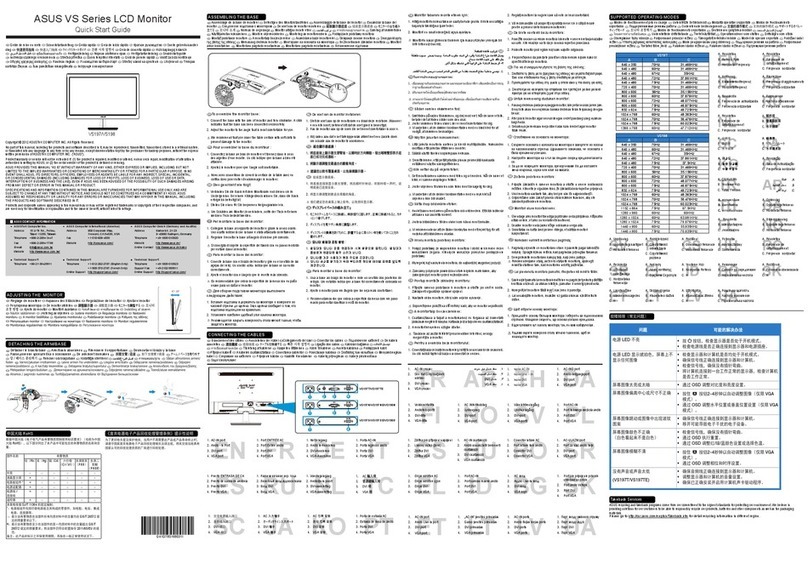
Asus PB248Q User manual

PB248 Series
LCD Monitor
User Guide

ii
Contents
Contents ....................................................................................................... ii
Notices......................................................................................................... iii
Safety information ...................................................................................... iv
Care & Cleaning........................................................................................... v
Chapter 1: Product introduction
1.1 Welcome! .................................................................................... 1-1
1.2 Package contents......................................................................... 1-1
1.3 Monitor introduction .................................................................... 1-2
1.3.1 Front view ....................................................................... 1-2
1.3.2 Back view........................................................................ 1-3
1.3.3 QuickFit Function ............................................................ 1-4
Chapter 2: Setup
2.1 Detaching the arm/base (for VESA wall mount)........................ 2-1
2.2 Adjusting the monitor.................................................................. 2-2
2.3 Connecting the cables................................................................. 2-3
2.4 Turning on the monitor................................................................ 2-3
Chapter 3: General instructions
3.1 OSD (On-Screen Display) menu ................................................ 3-1
3.1.1 Howtorecongure.......................................................... 3-1
3.1.2 OSD function introduction ............................................... 3-1
3.2 Specicationssummary(PB248Q)............................................. 3-6
3.3 Troubleshooting(FAQ)................................................................ 3-8
3.4 Supported operating modes ....................................................... 3-9

iii
Notices
Federal Communications Commission Statement
This device complies with Part 15 of the FCC Rules. Operation is subject
tothefollowingtwoconditions:
• Thisdevicemaynotcauseharmfulinterference,and
• Thisdevicemustacceptanyinterference received including interference that
maycauseundesiredoperation.
Thisequipmenthasbeentestedandfoundtocomplywiththelimitsfora
ClassBdigitaldevice,pursuanttoPart15oftheFCCRules.Theselimits
aredesignedtoprovidereasonableprotectionagainstharmfulinterference
inaresidentialinstallation.Thisequipmentgenerates,usesandcan
radiateradiofrequencyenergyand,ifnotinstalledandusedinaccordance
withmanufacturer’sinstructions,maycauseharmfulinterferencetoradio
communications.However,thereisnoguaranteethatinterferencewill
not occur in a particular installation. If this equipment does cause harmful
interferencetoradioortelevisionreception,whichcanbedeterminedby
turningtheequipmentoffandon,theuserisencouragedtotrytocorrect
theinterferencebyoneormoreofthefollowingmeasures:
• Reorientorrelocatethereceivingantenna.
• Increasetheseparationbetweentheequipmentandreceiver.
• Connecttheequipmenttoanoutletonacircuitdifferentfromthattowhichthe
receiver is connected.
• Consultthedealeroranexperiencedradio/TVtechnicianforhelp.
Theuseofshieldedcablesforconnectionofthemonitortothegraphicscardis
requiredtoassurecompliancewithFCCregulations.Changesormodications
tothisunitnotexpresslyapprovedbythepartyresponsibleforcompliancecould
voidtheuser’sauthoritytooperatethisequipment.
AsanEnergyStar® Partner,our companyhas determinedthatthis
productmeetstheEnergyStar® guidelinesforenergyefciency.
Canadian Department of Communications Statement
ThisdigitalapparatusdoesnotexceedtheClassBlimitsforradio
noiseemissionsfromdigitalapparatussetoutintheRadioInterference
RegulationsoftheCanadianDepartmentofCommunications.
ThisclassBdigitalapparatuscomplieswithCanadianICES-003.
ThisClassBdigitalapparatusmeetsallrequirementsoftheCanadian
Interference-CausingEquipmentRegulations.
CetappareilnumériquedelaclasseBrespectetouteslesexigencesdu
RéglementsurlematérielbrouillerduCanada.

iv
Safety information
• Beforesettingupthe monitor,carefullyreadallthe documentationthatcame
withthepackage.
• Topreventreorshockhazard,neverexposethemonitortorainormoisture.
• Nevertrytoopenthemonitorcabinet.Thedangeroushighvoltagesinsidethe
monitormayresultinseriousphysicalinjury.
• Ifthepowersupplyisbroken,donottrytoxitbyyourself.Contactaqualied
servicetechnicianoryourretailer.
• Beforeusingtheproduct,makesureallcablesarecorrectlyconnectedandthe
powercablesarenotdamaged.Ifyoudetectanydamage,contactyourdealer
immediately.
• Slotsandopeningsonthebackortopofthecabinetareprovidedfor
ventilation.Donotblockthese slots. Never place thisproductnearorovera
radiator or heat source unless proper ventilation is provided.
• Themonitorshouldbeoperatedonlyfromthetypeofpowersourceindicated
on the label. If you are not sure of the type of power supply to your home,
consultyourdealerorlocalpowercompany.
• Usetheappropriatepowerplugwhichcomplieswithyourlocalpowerstandard.
• Donotoverloadpowerstripsandextentioncords.Overloadingcanresultinre
or electric shock.
• Avoiddust,humidity,andtemperature extremes. Do not place the monitor in
anyareawhereitmaybecomewet.Placethemonitoronastablesurface.
• Unplugtheunitduringalightningstormorifitwillnotbeusedforalongperiod
oftime.Thiswillprotectthemonitorfromdamageduetopowersurges.
• Neverpushobjectsorspillliquidofanykindintotheslotsonthe monitor
cabinet.
• Toensuresatisfactoryoperation,usethemonitoronlywithULlisted
computers which have appropriate configured receptacles marked between
100-240VAC.
• Ifyouencountertechnicalproblemswiththemonitor,contactaqualified
servicetechnicianoryourretailer.
Thissymbolofthecrossedoutwheeledbinindicatesthattheproduct(electrical,
electronic equipment, and mercury-containing button cell battery) should not
be placed in municipal waste. Please check local regulations for disposal of
electronic products.

v
Care & Cleaning
• Beforeyou liftorrepositionyourmonitor,itisbetter todisconnectthecables
and powercord.Followthe correctliftingtechniqueswhenpositioning the
monitor.Whenliftingorcarryingthemonitor,grasptheedgesofthemonitor.
Donotliftthedisplaybythestandorthecord.
• Cleaning.Turnyourmonitoroffandunplugthepowercord.Cleanthemonitor
surface with a lint-free, non-abrasive cloth. Stubborn stains may be removed
with a cloth dampened with mild cleaner.
• Avoidusinga cleaner containing alcohol or acetone. Use acleanerintended
forusewiththemonitor.Neverspraycleanerdirectlyonthescreen,asitmay
drip inside the monitor and cause an electric shock.
The following symptoms are normal with the monitor:
• Thescreenmayickerduringtheinitialuseduetothenatureoftheuorescent
light. Turn off the Power Switch and turn it on again to make sure that the
ickerdisappears.
• Youmayfindslightlyunevenbrightnessonthescreendependingonthe
desktoppatternyouuse.
• When the same image is displayed for hours, an afterimage of the previous
screenmayremainafterswitchingtheimage.Thescreenwillrecoverslowlyor
youcanturnoffthePowerSwitchforhours.
• Whenthescreenbecomesblackorashes,orcannotworkanymore,contact
yourdealerorservicecentertoxit.Donotrepairthescreenbyyourself!
Conventions used in this guide
WARNING:Informationtopreventinjurytoyourselfwhentryingto
complete a task.
CAUTION:Informationtopreventdamagetothecomponentswhentrying
to complete a task.
IMPORTANT:InformationthatyouMUSTfollowtocompleteatask.
NOTE:Tipsandadditionalinformationtoaidincompletingatask.

vi
Wheretondmoreinformation
Refertothefollowingsourcesforadditionalinformationandforproductand
software updates.
1. ASUS websites
TheASUSwebsitesworldwideprovideupdatedinformationonASUS
hardwareandsoftwareproducts.Refertohttp://www.asus.com
2. Optional documentation
Your product package may include optional documentation that may have
been added by your dealer. These documents are not part of the standard
package.

1-1ASUS PB248 Series LCD Monitor
1.1 Welcome!
Thank you for purchasing the ASUS®LCD monitor!
The latest widescreen LCD monitor from ASUS provides a crisper, broader, and
brighter display, plus a host of features that enhance your viewing experience.
With these features, you can enjoy the convenience and delightful visual
experience that the monitor brings to you!
1.2 Package contents
Check your package for the following items:
LCD monitor
Quick start guide
Warranty card
Power cord
VGA cable
DVI cable
DisplayPort cable
USB 3.0 cable
Audio cable
Cable tie
If any of the above items is damaged or missing, contact your retailer
immediately.

1-2 Chapter 1: Product introduction
1.3 Monitor introduction
1.3.1 Front view
6
2
7
1
4
5
3
1. QuickFit button:
Activates the QuickFit function designed for alignment.•
The QuickFit function contains 7 pages of common grid patterns and paper•
and photo sizes. (Please refer to 1.3.3 QuickFit Function).
Enacts the selected OSD menu item.•
Increases/Decreases values or moves your selection up/down/left/right.•
MENU button:2.
Turns on the OSD menu.•
Exits the OSD menu or goes back to the previous menu when the OSD•
menu is active.
Exits the QuickFit patterns.•
The OSD menu is not available when the QuickFit function is in use.
Shortcut3.
Default: Brightness hotkey•

1-3ASUS PB248 Series LCD Monitor
To change the hotkey function, go to the Shortcut > Shortcut 1 menu.•
Shortcut4.
Default: Contrast hotkey•
To change the hotkey function, go to the Shortcut > Shortcut 2 menu.•
5. button:
Selects a desired preset mode.•
Automatically adjusts the image to its optimized position, clock, and phase•
by pressing this button for 2-4 seconds (for VGA mode only).
6. button:
Selects an available input source.•
Press button (Input Select button) to display HDMI/DisplayPort
signals after you connect HDMI/DisplayPort cable with the monitor.
7. Power button/power indicator
Turns the monitor on/off.•
The color definition of the power indicator is as the below table.•
Status Description
White On
Orange Standby mode
Off Off
1.3.2 Back view
123 4 5 6 87 9 10
11
Rear connectors
Power switch1. . Press the switch to turn on/off power.

1-4 Chapter 1: Product introduction
AC-IN port2. . This port connects the power cord.
DisplayPort3. . This port is for connection for a DisplayPort compatible device.
HDMI port4. . This port is for connection with an HDMI compatible device.
DVI port5. . This 24-pin port is for PC (Personal Computer) DVI-D digital signal
connection.
VGA port6. . This 15-pin port is for PC VGA connection.
Audio-in port.7. This port connects PC audio source by the bundled audio
cable.
Earphone jack8. .
USB 3.0 upstream port9. . This port is for connection with a USB upstream cable.
The connection enables the USB ports on the monitor.
Kensington lock slot10. .
USB 3.0 downstream ports11. . These ports are for connection with USB devices,
such as USB keyboard/mouse, USB flash drive, etc.
1.3.3 QuickFit Function
The QuickFit function contains three kinds of patterns: (1) Grid patterns (2) Paper
size (3) Photo size. To activate the patterns, press the QuickFit button. Press the
button again until a desired pattern is selected. You can move the button up/down/
left/right to change the pattern’s position if needed. Note that all the patterns can
be moved left/right accroding to your need, but may have limited range for moving
up/down.
Grid patterns1.
The grid patterns facilitate designers and users to organize content and layout on a
page and achieve a consistent look and feel.
Alignment Grid
Paper size2.
QuickFit provides numerous commonly used standard paper sizes for users to view
their documents in real size on the screen.

1-5ASUS PB248 Series LCD Monitor
A4 Letter
Photo size3.
The various real photo sizes displayed in the QuickFit function provides
photographers and other users to accurately view and edit their photos in real size
on the screen.
Photo 4x6, 3x5, 2x2 Photo 8x10, 5x7

1-6 Chapter 1: Product introduction

2-1ASUSPB248SeriesLCDMonitor
2.1 Detaching the arm/base
(for VESA wall mount)
The detachable arm/base of this monitor is specially designed for VESA wall
mount.
Todetachthearm/base:
1. Have the front of the monitor face down on a table.
2. Useascrewdrivertoremovethefourscrewsonthearm(Figure1),andthen
detachthearm/basefromthemonitor(Figure2).
Werecommendthatyoucoverthetablesurfacewithsoftclothtoprevent
damagetothemonitor.
(Figure1) (Figure2)

2-2 Chapter2:Setup
2.2 Adjusting the monitor
Foroptimalviewing,werecommendthatyoulookatthefullfaceofthe•
monitor,thenadjustthemonitortotheanglethatismostcomfortableforyou.
Holdthestandtopreventthemonitorfromfallingwhenyouchangeitsangle.•
Youcanadjustthemonitor’sanglefrom+20˚to-5˚,anditallows• 60˚swivel
adjustmentfromeitherleftorright.Youcanalsoadjustthemonitor’sheight
within+/-10cm.
10cm
60°
0°
60°
+20° ~ -5°
Pivoting the monitor
Liftthemonitortothehighestposition.1.
Tiltthemonitortoitsmaximumangle.2.
Pivotthemonitorclockwisetotheangleyouneed.3.
+20° ~ -5°
Itisnormalthatthemonitorslightlyshakeswhileyouadjusttheviewingangle.
(Tilt) (Swivel) (Heightadjustment)

2-3ASUS PB248 Series LCD Monitor
2.3 Connecting the cables
1. Connect the cables as the following instructions:
To connect the power cord• : connect one end of the power cord securely to
the monitor’s AC input port, the other end to a power outlet.
To connect the VGA/HDMI/DVI/DisplayPort cable• :
Plug one end of the VGA/HDMI/DVI/DisplayPort cable to the monitor’sa.
VGA/HDMI/DVI/DisplayPort jack.
Connect the other end of the VGA/HDMI/DVI/DisplayPort cable to yourb.
computer's VGA/HDMI/DVI/DisplayPort jack.
Tighten the two screws to secure the VGA/DVI connector.c.
To connect the audio cable• :connect one end of the audio cable to the
monitor’s Audio-in port, the other end to the computer’s audio-out port.
To use the earphone:• connect the end with plug type to the monitor’s
earphone jack when an HDMI or DisplayPort signal is fed.
To use the USB 3.0 ports• : Take the supplied USB 3.0 cable, and plug
the smaller end (type B) of the USB upstream cable to the monitor’s USB
upstream port, and the larger end (type A) to your computer’s USB 3.0 port.
Make sure your computer is installed with the lastest Windows 7 operating
system. That will enable the USB ports on the monitor to work.
When these cables are connected, you can choose the desired signal
from the Input Select item in the OSD menu.
2.4 Turning on the monitor
Press the power button . See page 1-2 for the location of the power button. The
power indicator lights up in white to show that the monitor is ON.

2-4 Chapter2:Setup

3-1ASUSPB248SeriesLCDMonitor
3.1 OSD (On-Screen Display) menu
3.1.1 How to reconfigure
PresstheMENUbuttontoactivatetheOSDmenu.1.
Move the2. buttonup/downtonavigatethroughthefunctions.Highlight
the desired function and press the button to activate it. If the function
selectedhasasub-menu,move the buttonup/downtonavigatethrough
thesub-menufunctions.Highlightthedesiredsub-menufunctionandpress
the button to activate it.
Move3. the buttonleft/right tochangethesettingsoftheselectedfunction.
ToexitandsavetheOSDmenu,presstheMENUbuttonrepeatedlyuntilthe4.
OSD menu disappears. Toadjustotherfunctions,repeat steps 1-3.
3.1.2 OSD function introduction
Splendid1.
Thisfunctioncontainssixsub-functionsyoucanselectforyourpreference.
EachmodehastheResetselection,allowingyoutomaintainyoursettingor
return to the preset mode.
Standard Mode•:bestchoicefordocumenteditingwithSPLENDID™
VideoEnhancement.
sRGBMode• :compatiblewithsRGBcolorspace,sRGBmodeisthebest
choicefordocumentediting.

3-2 Chapter3:OSD(On-ScreenDisplay)menu
Scenery Mode• :bestchoiceforsceneryphotodisplaywithSPLENDID™
VideoEnhancement.
Theater Mode•:bestchoiceformovieswithSPLENDID™Video
Enhancement.
User Mode 1/User Mode 2•:MoreitemsareadjustableintheColormenu.
Function Standard
Mode
sRGB
Mode
Scenery
Mode
Theater
Mode
User
Mode
1/User
Mode 2
Brightness Yes Yes Yes Yes Yes
Contrast Yes No Yes Yes Yes
Saturation No No Yes Yes Yes
Hue No No No No Yes
Color Temperature Yes No Yes Yes Yes
Gamma Yes No No No Yes
Advanced
Setting
Six-axis
Hue No No No No Yes
Six-axis
Saturation No No No No Yes
Gain No No No No Yes
Offset No No No No Yes
Color2.
Setadesiredcolorsettingfromthismenu.
Brightness• :theadjustingrangeisfrom0to100.
Contrast• :theadjustingrangeisfrom0to100.
Saturation• :theadjustingrangeisfrom0to100.
Hue• :shiftstheimagecolorbetweengreenandpurple.
Color Temp.• :contains4modesincluding9300K,6500K,5500Kand
5000K.
Gamma• :allowsyoutosetthecolormodeto2.2or1.8.
Advanced Setting• :

3-3ASUS PB248 Series LCD Monitor
6-axis Hue adjustment.*
6-axis Saturation adjustment.*
Adjusts the gain levels for R, G, B.*
Adjusts the black level offset values for R, G, B.*
Color Reset• :
Current Splendid color mode reset:*
Resets the color settings of current color mode to the factory
default value.
All Splendid color mode reset:*
Resets the color settings of all color modes to the factory default
value.
Image3.
Set the image related setting from this menu.
Sharpness• : the adjusting range is from 0 to 100.
Trace Free• : adjusts the response time of the monitor.

3-4 Chapter 3: OSD (On-Screen Display) menu
Aspect Control• : adjusts the aspect ratio to full, 4:3, 1:1, or OverScan
(only available for the HDMI input).
ASCR• : turns on/off the ASCR (ASUS Smart Contrast Ratio) function.
Position• : adjusts the horizontal position (H-Position) and the vertical
position (V-Position) of the image. The adjusting range is from 0 to 100.
Focus• : reduces Horizonal-line noise and Vertical-line noise of the image
by adjusting (Phase) and (Clock) separately. The adjusting range is from
0 to 100.
AUTO Adjust• : Automatically adjusts the image to its optimized position,
clock, and phase.
• Phase adjusts the phase of the pixel clock signal. With a wrong phase
adjustment, the screen shows horizontal disturbances.
Clock (pixel frequency) controls the number of pixels scanned by one•
horizontal sweep. If the frequency is not correct, the screen shows vertical
stripes and the image is not proportional.
Input Select4.
In this function, you can select your desired input source.
System Setup5.
Allows you to adjust the system.
Splendid Demo Mode• : splits the screen into two for Splendid modes
comparison. (Scenery mode/theater mode only)
Volume• : the adjusting range is from 0 to 100.
This manual suits for next models
1
Table of contents
Other Asus Monitor manuals

Asus
Asus VE198TL Series User manual

Asus
Asus DX201 User manual

Asus
Asus PA34VCNV Series User manual

Asus
Asus BE24DQLB User manual

Asus
Asus VS248HR User manual

Asus
Asus B19 Series User manual

Asus
Asus VK193 Series User manual

Asus
Asus VS208N-P User manual

Asus
Asus VG289 Series User manual

Asus
Asus VW247H User manual

Asus
Asus VG248QG Series User manual

Asus
Asus MG248QR User manual

Asus
Asus MB17AHG User manual

Asus
Asus VX279 Series User manual

Asus
Asus VG259 Series User manual

Asus
Asus PA32UCR Series User manual

Asus
Asus VA24EHF Series User manual

Asus
Asus VG2471A Series User manual

Asus
Asus VA27EHF Series User manual

Asus
Asus VA279HAL User manual