Asus PCI-L101 User manual

R
PCI-L101
10/100 Fast Ethernet PCI Card
USER’S MANUAL

ASUS PCI-L101 User’s Manual
2
USER’S NOTICE
No part of this manual, including the products and software described in it, may be repro-
duced, transmitted, transcribed, stored in a retrieval system, or translated into any language
in any form or by any means, except documentation kept by the purchaser for backup pur-
poses, without the express written permission of ASUSTeK COMPUTER INC. (“ASUS”).
ASUS PROVIDES THIS MANUAL “AS IS” WITHOUT WARRANTY OF ANY KIND, EI-
THER EXPRESS OR IMPLIED, INCLUDING BUT NOT LIMITED TO THE IMPLIED
WARRANTIES OR CONDITIONS OF MERCHANTABILITY OR FITNESS FOR A PAR-
TICULAR PURPOSE. IN NO EVENT SHALL ASUS, ITS DIRECTORS, OFFICERS, EM-
PLOYEES OR AGENTS BE LIABLE FOR ANY INDIRECT, SPECIAL, INCIDENTAL, OR
CONSEQUENTIALDAMAGES(INCLUDINGDAMAGESFORLOSSOFPROFITS,LOSS
OFBUSINESS,LOSSOFUSEORDATA,INTERRUPTIONOFBUSINESSANDTHELIKE),
EVENIFASUS HASBEENADVISEDOFTHE POSSIBILITYOFSUCH DAMAGESARIS-
ING FROM ANY DEFECT OR ERROR IN THIS MANUAL OR PRODUCT.
Product warranty or service will not be extended if: (1) the product is repaired, modified or
altered, unless such repair, modification of alteration is authorized in writing by ASUS; or
(2) the serial number of the product is defaced or missing.
Products and corporate names appearing in this manual may or may not be registered trade-
marks or copyrights of their respective companies, and are used only for identification or
explanation and to the owners’ benefit, without intent to infringe.
• Intel, LANDesk, and Pentium are registered trademarks of Intel Corporation.
• IBM and OS/2 are registered trademarks of International Business Machines.
• Symbios is a registered trademark of Symbios Logic Corporation.
• Windows and MS-DOS are registered trademarks of Microsoft Corporation.
• Sound Blaster AWE32 and SB16 are trademarks of Creative Technology Ltd.
• Adobe and Acrobat are registered trademarks of Adobe Systems Incorporated.
The product name and revision number are both printed on the product itself. Manual revi-
sions are released for each product design represented by the digit before and after the period
of the manual revision number. Manual updates are represented by the third digit in the
manual revision number.
For previous or updated manuals, BIOS, drivers, or product release information, contactASUS
at http://www.asus.com.tw or through any of the means indicated on the following page.
SPECIFICATIONS AND INFORMATION CONTAINED IN THIS MANUAL ARE FUR-
NISHED FOR INFORMATIONAL USE ONLY, AND ARE SUBJECT TO CHANGE AT
ANYTIME WITHOUT NOTICE,AND SHOULD NOT BE CONSTRUEDASACOMMIT-
MENT BY ASUS. ASUS ASSUMES NO RESPONSIBILITY OR LIABILITY FOR ANY
ERRORS OR INACCURACIES THAT MAY APPEAR IN THIS MANUAL, INCLUDING
THE PRODUCTS AND SOFTWARE DESCRIBED IN IT.
Copyright © 1998 ASUSTeK COMPUTER INC. All Rights Reserved.
Product Name: ASUS PCI-L101
Manual Revision: 1.03
Release Date: January 1998

ASUS PCI-L101 User’s Manual 3
ASUS CONTACT INFORMATION
ASUSTeK COMPUTER INC.
Marketing Info
Address: 150 Li-Te Road, Peitou, Taipei, Taiwan 112, ROC
Telephone: +886-2-2894-3447
Fax: +886-2-2894-3449
Email: [email protected]
Technical Support
Fax: +886-2-2895-9254
BBS: +886-2-2896-4667
Email: [email protected]
WWW: www.asus.com.tw
Gopher: gopher.asus.com.tw
FTP: ftp.asus.com.tw/pub/ASUS
ASUS COMPUTER INTERNATIONAL
Marketing Info
Address: 721 Charcot Avenue, San Jose, CA 95131, USA
Telephone: +1-408-474-0567
Fax: +1-408-474-0568
Email: [email protected]
Technical Support
BBS: +1-408-474-0569
Email: [email protected]
WWW: www.asus.com
ASUS COMPUTER GmbH
Marketing Info
Address: Harkort Str. 25, 40880 Ratingen, BRD, Germany
Telephone: 49-2102-445011
Fax: 49-2102-442066
Email: [email protected]
Technical Support
BBS: 49-2102-448690
Email: [email protected]
Hotline: 49-2102-499712

ASUS PCI-L101 User’s Manual
4
BY USING THIS SOFTWARE, YOU ARE AGREEING TO BE BOUND BY THE TERMS OF THIS
AGREEMENT. DO NOT USE THIS SOFTWARE UNTIL YOU HAVE CAREFULLY READ AND
AGREED TO THE FOLLOWING TERMS AND CONDITIONS. IF YOU DO NOTAGREE TO THE
TERMS OF THIS AGREEMENT, PROMPTLY RETURN THE SOFTWARE PACKAGE AND ANY
ACCOMPANYING ITEMS.
LICENSE: Intel Corporation (“Intel”) grants you the non-exclusive right to use the enclosed software
program (the “Software”).You will not use, copy, modify, rent, sell or transfer the Software or any portion
thereof except as provided in this Agreement.
You may:
1. Install/use the Software on a single computer or on a single local area network (“LAN”) server;
2. Copy the Software solely for backup or archival purposes, including copying the Software into memory.
RESTRICTIONS:
1. You Will Not Sublicense the Software;
2. You Will Not Reverse engineer, decompile, or disassemble the Software;
3. You Will Not Copy the Software, in whole or in part, except as provided in this Agreement.
TRANSFER: You may transfer the Software to another party if the receiving party agrees to the terms of
this Agreement and you retain no copies of the Software and accompanying documentation. Transfer of
the Software terminates your right to use the Software.
OWNERSHIPAND COPYRIGHT OF SOFTWARE: Title to the Software and all copies thereof re-
main with Intel or its vendors. The Software is copyrighted and is protected by United States and interna-
tional copyright laws. You will not remove the copyright notice from the Software. You agree to prevent
any unauthorized copying of the Software.
DUAL MEDIA SOFTWARE: If the Software package contains multiple media, you may only use the
disks appropriate for your single-user computer or LAN.
WARRANTY: The Software is provided “AS IS.” Intel warrants that the media on which the Software is
furnished will be free from defects in material and workmanship for a period of one (1) year from the date
of purchase. Upon return of such defective media, Intel’s entire liability and your exclusive remedy shall
be the replacement of the Software.
THE ABOVE WARRANTIES ARE THE ONLY WARRANTIES OF ANY KIND EITHER EXPRESS
OR IMPLIED INCLUDING WARRANTIES OF MERCHANTABILITYOR FITNESS FORANYPAR-
TICULAR PURPOSE.
LIMITATION OF LIABILITY: NEITHER INTEL NOR ITS VENDORS SHALL BE LIABLE FOR
ANYLOSS OF PROFITS, LOSS OF USE, LOSS OF DATA, INTERRUPTIONS OF BUSINESS, NOR
FOR INDIRECT, SPECIAL, INCIDENTAL OR CONSEQUENTIAL DAMAGES OF ANY KIND
WHETHER UNDER THIS AGREEMENT OR OTHERWISE, EVEN IF ADVISED OF THE POSSI-
BILITY OF SUCH DAMAGES.
AUDIT: Intel reserves the right to have audits conducted to verify your compliance with thisAgreement.
TERMINATION OFTHIS LICENSE: Intel may terminate this license at any time if you are in breach
of any of its terms and conditions. Upon termination, you will immediately destroy the Software or return
all copies of the Software and documentation to Intel.
U.S. GOVERNMENT RESTRICTED RIGHTS: The Software and documentation were developed at
private expense and are provided with “RESTRICTED RIGHTS.” Use, duplication, or disclosure by the
Government is subject to restrictions as set forth in FAR 52.227-14 and DFAR 252.227-7013 et seq. or its
successor.
EXPORT LAWS: You agree that the distribution and export/re-export of the Software is in compliance
with the laws, regulations, orders or other restrictions of the U.S. Export Administration Regulations.
APPLICABLE LAW: This Agreement is governed by the laws of the State of California and the United
States, including patent and copyright laws. Any claim arising out of this Agreement will be brought in
Santa Clara County, California.
LICENSE AGREEMENT
ASUS PCI-L101 User’s Manual 5
CONTENTS
I. INTRODUCTION...........................................................................7
Item Checklist ..................................................................................7
Features ............................................................................................7
Software Driver Support ............................................................7
LED Indicators ...........................................................................8
II. INSTALLATION ............................................................................9
Jumper Setting .................................................................................9
Installation Procedures...................................................................10
Connect the Network Cable ...........................................................11
Connect the Wake On LAN Power Cable......................................11
III. DRIVERS ....................................................................................12
DOS and Windows 3.1 Setup for Novell .......................................12
Windows NT Server or Workstation ..............................................14
Windows 95 ...................................................................................16
Installing Multiple LAN Cards ......................................................18
Select Duplex Mode (optional)......................................................18
IV. TROUBLESHOOTING ..............................................................21
Troubleshooting .............................................................................21
If the adapter can’t connect to the network ........................21
Testing the adapter..............................................................22
Common problems and solutions .......................................22
Technical Information....................................................................24
PCI Installation Tips.................................................................24
Fast Ethernet Wiring ................................................................25
Fast Ethernet Hubs and Switches .............................................25
Shared hubs ........................................................................25
Switching hubs ...................................................................25
V. APPENDIX ....................................................................................26
Using Wake On LAN .....................................................................26
Question and Answer ...............................................................26
Pin Definitions ...............................................................................27
RJ45 Connector ........................................................................27
Twisted-Pair Cable ...................................................................27
Glossary .........................................................................................28

ASUS PCI-L101 User’s Manual
6
FCC & DOC COMPLIANCE
Federal Communications Commission Statement
This device complies with FCC Rules Part 15. Operation is subject to the following
two conditions:
• This device may not cause harmful interference, and
• This device must accept any interference received, including interference that
may cause undesired operation.
This equipment has been tested and found to comply with the limits for a Class B
digital device, pursuant to Part 15 of the FCC Rules. These limits are designed to
provide reasonable protection against harmful interference in a residential installa-
tion. This equipment generates, uses and can radiate radio frequency energy and, if not
installed and used in accordance with manufacturer’s instructions, may cause harmful
interference to radio communications. However, there is no guarantee that interfer-
ence will not occur in a particular installation. If this equipment does cause harmful
interference to radio or television reception, which can be determined by turning the
equipment off and on, the user is encouraged to try to correct the interference by one
or more of the following measures:
• Reorient or relocate the receiving antenna.
• Increase the separation between the equipment and receiver.
• Connect the equipment to an outlet on a circuit different from that to which the
receiver is connected.
• Consult the dealer or an experienced radio/TV technician for help.
WARNING! The use of shielded cables for connection of the monitor to the
graphics card is required to assure compliance with FCC regulations. Changes or
modifications to this unit not expressly approved by the party responsible for com-
pliance could void the user’s authority to operate this equipment.
Canadian Department of Communications Statement
This digital apparatus does not exceed the Class B limits for radio noise emissions
from digital apparatus set out in the Radio Interference Regulations of the Canadian
Department of Communications.

7ASUS PCI-L101 User’s Manual
Item Checklist
ASUS PCI-L101
3-pin wake on LAN cable
This User’s Manual
ASUS Driver & Utility Diskette
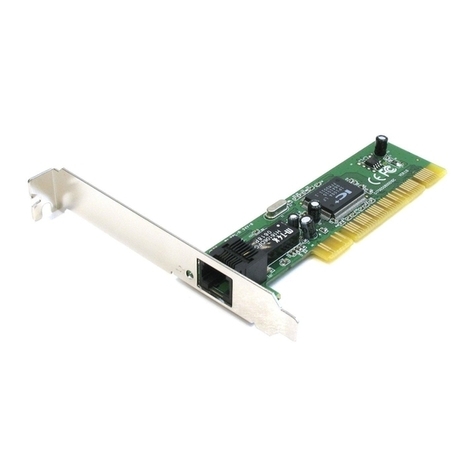
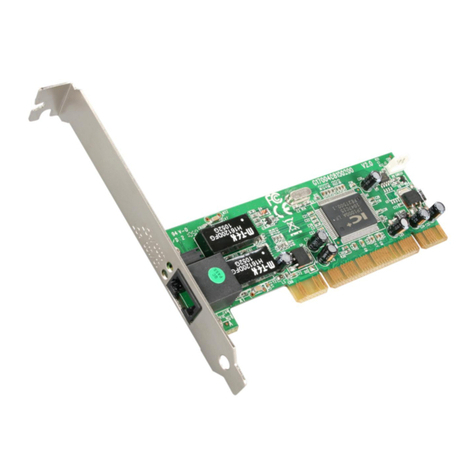
The ASUS PCI-L101 is a 32-bit 10/100Mbs Ethernet network interface card for PCI
local bus-compliant computers. It supports the bus mastering architecture, and auto-
negotiation feature which make it possible to use the common twisted-pair cabling
with RJ45 connectors for both 10Mbps and 100Mbps connections. Extensive driver
support for commonly used network operating systems is also provided.
Features
• Intel 82558 Ethernet LAN Controller (Fully integrated 10BASE-T/100BASE-TX)
• Wake-On-LAN Remote Control Function Supported
• PCI Bus Master Complies to PCI Local Bus Rev. 2.1 specifications
• Consists of MAC & PHY (10/100Mbps) interfaces
• Complies to IEEE 802.3 10BASE-T and IEEE 802.3u 100BASE-TX interfaces
• Fully supports 10BASE-T & 100BASE-TX operations through a single RJ45 port
• Supports 32-bit Bus Master Technology / PCI Rev. 2.1
• Enhancements on ACPI & APM
• Adheres to PCI Bus Power Management Interface Rev. 1.0, ACPI Rev. 1.0, and
Device Class Power Management Rev. 1.0
• IEEE802.3uauto-negotiationfor 10Mbps/100MbpsNetworkDataTransferRates.
• Provides LED indicators for monitoring network conditions
• Plug and Play
Software Driver Support
NetWare ODI Drivers - Novell Netware 3.x, 4.x; NetWare LAN WorkPlace TCP/IP;
Novell LAN Analyzer for Netware
Packet Drivers - FTP PC/TCP, NCSATCP/IP, Accton LANSoft
NDISDrivers-LAN ManagerV2.x;Windows3.x,95,NT(Server/Workstation)V3.x,
V4.0; IBM LAN Server 2.x, 3.0; IBM LAN Support V1.x; IBM OS/2 EE V2.0; DEC
Pathworks V4.x & V5.0; Sun PC-NFS; Banyan VINES; IBM TCP/IP for DOS & OS/
2; Wollongong Pathway Access
Unix Driver - SCO Unix
I. Introduction
Features
I. INTRODUCTION

ASUS PCI-L101 User’s Manual8
LED Indicators
Green Speed LED -This LED lights when connection is made to a 100Base-TX host.
YellowActivity LED -This LED lights when there is network packets sent or received
through the RJ45 port. The rate of flashing is proportional to the amount of network
traffic.
Green Link - This LED monitors 10Base-T and 100Base-TX connections. This LED
lights to indicate a successfull network connection, and remains steady if the connec-
tion is stable.
I. INTRODUCTION
I. Introduction
Features
green
green
yellow

9ASUS PCI-L101 User’s Manual
II. Installation
Jumpers
WARNING! Computer boards and components contain very delicate Integrated
Circuit (IC) chips. To protect the computer board and other components against
damage from static electricity, you must follow some precautions.
1. Make sure that you unplug your power supply when adding or removing ex-
pansion cards or other system components. Failure to do so may cause severe
damage to both your motherboard and expansion cards.
2. Keep all components such as the host adapter in its antistatic bag until you are
ready to install it.
3. Use a grounded wrist strap before handling computer components. If you do
not have one, touch both of your hands to a safely grounded object or to a metal
object, such as the power supply case. Hold components by the edges and try
not to touch the IC chips, leads, or circuitry.
4. Place components on a grounded antistatic pad or on the bag that came with the
component whenever the components are separated from the system.
II. INSTALLATION
Jumper Setting
If you are using the ASUS PCI-L101 on an ASUS motherboard, leave the jumper on
its defaut setting of “ASUS.” If you are using another brand of motherboard, set the
jumperto“Other.”ConnecttheWakeOnLAN(WOL) outputsignaltotheWOL_CON
in order to utilize the Wake On LAN feature of the motherboard. Connect the LAN
activity output signal (LAN_LED) to the motherboard’s LAN_LED (if available) in
order to display the LAN data activity on the system’s front panel LED.
LAN Activity
Output Signal
RJ45
LEDs
Motherboard type
Wake on LAN
Output Signal
ASUS
Other
Intel
Chipset
BIOS
RJ45
Speed
Link
Activity

ASUS PCI-L101 User’s Manual10
Installation Procedures
These procedures describes basic installation procedures for typical computer systems.
Your computer may require slightly different procedures.
1. Turn off the computer and unplug the power cord. Then remove its cover.
WARNING!Turnoffandunplugpower tothecomputerbeforeremoving itscover.
Failure to do so could shock you and may damage the adapter or computer.
2. Remove the cover bracket from a PCI busmaster adapter slot. In most computers,
all slots are busmaster-enabled. If you have configuration problems, see your
computer’s documentation to determine if the PCI slots are busmaster-enabled.
5. Ground yourself to an antistatic mat or other grounded source.
6. Pick up the board (still in its protective bag) by grasping the edge bracket with one
hand and then remove the protective bag.
7. Position the card directly over the PCI slot and insert one end of the board in the
slot first. Firmly but gently press the bus connector on the bottom of the card down
into the slot. Be sure the metal contacts on the bottom of the host adapter are
securely seated in the slot.
8. Anchor the board’s mounting bracket to the computer chassis using the screw from
the slot cover that you set aside previously.
9. Attach the twisted-pair cable using the RJ45 connector
10. Replace the computer’s cabinet cover.
11. Power on the computer.
12. Run the diagnostics program to check the card’s configurations.
13. Install the driver.
II. Installation
Procedures
II. INSTALLATION

11ASUS PCI-L101 User’s Manual
II. Installation
LAN / WOL Cables
II. INSTALLATION
Connect the Network Cable
Twisted Pair Ethernet (TPE) - Connect a single network cable to the ASUS PCI-
L101 PCI adapter as shown below. For 100BASE-TX, your network cable must be
category 5 (not category 3), twisted-pair wiring with RJ45 connectors. If you plan on
running the adapter at 100 Mbps, it must be connected to a 100BASE-TX hub (not a
100BASE-T4 hub). For 10BASE-T, use category 3, 4, or 5 twisted-pair wiring.
WARNING:Turnoffandunplugpowertothe computerbeforeinstallingtheWOL
cable.TheWOLconnectoronyourmotherboardislivewhenthecomputerisplugged
in to a power outlet. Failure to do so could damage the adapter or computer.
Connect the Wake On LAN Power Cable
In order for the Wake On LAN (WOL) feature to work correctly, the adapter must be
connected to a continous power source. This allows the ASUS PCI-L101 adapter to
“listen to” the network even when the computer is turned off. To install the WOL
powercable,carefully followtheprocedurebelow.Warning:Turn offandunplugpower
to the computer before installing theWOLcable. TheWOLconnector on your mother-
board is live when the computer is plugged in to a power outlet. Failure to do so could
damage the adapter or computer.
Installing the WOL Power Cable
1. Make sure your computer is completely unplugged from the power outlet.
2. Locate the WOLconnector on theASUS PCI-L101 adapter.Attach one end of the
WOL cable to the adapter. Note that the connector is keyed.
3. Locate the WOL connector on your motherboard. The location varies, depending
on vendor and model of motherboard.
4. Connect the other end of the WOL cable to the connector on the motherboard.
Note that the connector is keyed.
5. Some computers may require you to change a setting in your computer’s BIOS or
Setup program to enable the WOL feature. Check your computer owner’s manual
or contact your dealer for more information.
6. Replace the computer cover and plug in the power cord. Install only one active
WOL adapter per computer. You can install additional, non-WOL adapters.
IMPORTANT! The ATX or NLX power supply must deliver at least 720mAmp on
the 5volt standby lead (5VSB) in order for the Wake On LAN to work properly.

ASUS PCI-L101 User’s Manual12
DOS and Windows 3.1 Setup for Novell
Automatic configuration
PCI computers automatically detect and configure PCI-compliant adapters while boot-
ing. The ASUS PCI-L101 PCI adapter IRQ level and I/O memory address are auto-
matically set by the BIOS each time you start your computer.
Start your computer to automatically configure the adapter. Configuration is complete
when the DOS prompt appears. You can now continue with the procedure below.
If your computer displays an error while booting, it may require additional steps to
configure a PCI adapter.
Run Setup to install network drivers
Setup can automatically install NetWare DOS ODI client drivers for you or display a
README file with installation instructions for other NOS drivers.
1. If your computer already has network drivers installed, restart the computer with-
out loading them. If the drivers are loaded from the AUTOEXEC.BAT or
CONFIG.SYS file, type REM in front of each line that loads a network driver. Or,
with DOS 6.x or later press “F5” as DOS starts, to bypass the drivers.
2. Insert the ASUS Configuration and Drivers disk in a floppy drive, switch to that
drive, and at the DOS prompt, type “SETUP”.
3. If you have more than one ASUS PCI-L101 PCI adapter in your computer, an
adapter selection menu appears on the screen. Select the adapter you want by not-
ing the Ethernet address.
4. Select Automatic Setup from the Main menu. Then follow the instructions on the
screen. (If you want to test the adapter with a responder on the network, see the
next procedure.)Setup displays the adapter’s configuration, then runs a series of
diagnostic tests that makes sure the adapter and network are functioning properly.
If Setup finds a problem, it displays the results and some possible solutions.
5. When Setup finishes the tests, you’ll see the Install Network Drivers screen.
6. Select the driver you want to install. Setup can install a NetWare client driver for
you. If you’re installing other drivers, Setup displays a README file with instal-
lation instructions.
III. DRIVERS
III. Drivers
DOS / Win 3.1

13ASUS PCI-L101 User’s Manual
Troubleshooting
If you can’t connect to a server, first try the suggestions here, then turn to the Trouble-
shooting section if necessary.
• Make sure you’re using the drivers for this adapter. The driver filename contains
the letter B (for example, E100BODI.COM).
• If you’re replacing an existing adapter, make sure the LINK statement in your
NET.CFG is correct for the new adapter. For example, the LINK statement for a
NetWare client should be: “LINK DRIVER E100BODI”
• Verify that the frame type in your NET.CFG file matches your network.
• If setting up a server, check your LOAD and BIND statements.
• Test the adapter by running diagnostics in Setup.Additional testing is available by
using a responder.
• Check the README files.
Responder testing on the network (optional)
Setup can test the adapter more thoroughly if you have a responder on the network
while running the tests.
1. Go to a computer on the network with any EtherExpress adapter installed (except
EtherExpress 32 or EtherExpress 16 MCA).
2. Run the appropriate configuration program for the installed adapter and set it up as
a responder.
3. Return to the computer with the new adapter. Run Setup and make the new adapter
a sender. Test the adapter.
III. DRIVERS
III. Drivers
DOS / Win 3.1

ASUS PCI-L101 User’s Manual14
Windows NT Server or Workstation
Automatic configuration
PCI computers automatically detect and configure PCI-compliant adapters while boot-
ing. TheASUS PCI-L101 PCI adapter IRQ level and I/O address are automatically set
by the BIOS each time you start your computer.
Start your computer to automatically configure the adapter. Configuration is complete
when Windows NT starts or the DOS prompt appears.
If your computer displays an error while booting, it may require additional steps to
configure.
Install network drivers - Windows NT Version 4.0 only
After putting the adapter in the computer and starting Windows NT, you need to install
the device drivers. Have the Windows NT CD-ROM disk available for this procedure.
NOTE: If you are installing Windows NT 4.0 at this time, click the Start Search button
when the network adapter installation window appears. This allows NT to auto-detect
the adapter. You may then skip steps 1 - 4 below.
1. Double-click the Network icon in the Control Panel.
2. Click the Adapters tab in the window that appears.
3. Click Add. A list of adapter appears.
4. Select the “Intel EtherExpress PRO Adapter” and click OK.
III. DRIVERS
III. Drivers
Windows NT

15ASUS PCI-L101 User’s Manual
Install network drivers - Windows NT Version 3.5x only.
After putting the adapter in the computer and starting Windows NT, you need to install
the Intel drivers and test the adapter.
1. Double-click the Network icon in the Control Panel.
2. Click Add Adapter.
3. When the list of adapters appears, scroll to the end of the list and select <Other>
Requires disk from manufacturer.
4. Insert theASUS Configuration and Drivers disk in the A: drive and click OK.
5. Select the “Intel EtherExpress PRO Adapter” and click OK.
6. Click OK in the Network Settings dialog box and remove the installation disk.
When prompted, restart Windows NT.
To install multiple adapters, repeat this procedure for each new adapter.
Troubleshooting
IfWindows NTreports an error or you can’t connect to the network, try the suggestions
here first, then turn to the Troubleshooting section if necessary.
• Make sure you’re using the drivers for this adapter. Drivers are located on the
Windows NT CD-ROM or on theASUS Drivers and Configuration disk.
• Make sure the driver is loaded and the protocols are bound. Check the Network
Bindings dialog box in Windows NT.
• Check the Windows NT Event Viewer for error messages.
• If you are attaching to a NetWare network, check your frame type and verify that
NetWare client software has been installed.
• Check with your LAN administrator — you may need to install supplemental net-
working software.
III. DRIVERS
III. Drivers
Windows NT

ASUS PCI-L101 User’s Manual16
Windows 95
Automatic Configuration
PCI computers automatically detect and configure PCI-compliant adapters while boot-
ing. TheASUS PCI-L101 PCI adapter IRQ level and I/O address are automatically set
by the BIOS each time you start your computer.
Start your computer to automatically configure the adapter. Configuration is complete
when Windows 95 starts. If your computer displays an error while booting, it may
require additional steps to configure.
Install Network Drivers from Diskette
HaveyourWindows95installationCD-ROMordisksavailable,asWindows95prompts
for them when you install the new adapter.
1. After you put the adapter in the computer, start Windows 95. The New Hardware
Found dialog box appears. If this box does not appear and Windows 95 starts nor-
mally, you may need to manually add the adapter.
2. Click “Driver from disk provided by hardware manufacturer,” then click OK. The
Install From Disk dialog box appears.
3. Insert the ASUS Configuration and Drivers disk.
4. Specify A:\ (or B:\) as the path, then click OK.
5. Follow prompts for any Windows 95 installation disks and restart when prompted.
(If you installed from CD-ROM, the installation files are typically located at
D:\Win95, where D is your CD-ROM drive.)
After restarting Windows 95, you should be able to connect to your network by double-
clicking the Network Neighboorhood.
III. DRIVERS
III. Drivers
Windows 95

17ASUS PCI-L101 User’s Manual
III. DRIVERS
III. Drivers
Windows 95
ManuallyAdding a LAN Card
If the New Hardware Found dialog box does not appear at startup and you cannot
connect to the network, check the Device Manager list to see if the new adapter is
present. If it is not, use the following procedure.
1. From the Control Panel, double click the System icon.
2. Click the Device Manager tab in the window that appears.
3. Double-click Other Devices (question mark icon) in the list area.
4. Double-click PCI Ethernet Controller.
5. Click the Driver tab, then click Change Driver.
6. Select Network Adapters and click OK.
7. Click Have Disk from the window that appears. Insert the ASUS Configuration
and Drivers Disk and click OK.
8. Select the “Intel 82558-based Integrated Fast Ethernet for WfM” and click OK.
9. Follow any prompts forWindows 95 installation disks and restart when prompted.
Troubleshooting
If you can’t connect to a server or if Windows 95 reports an error after you double-click
Network Neighborhood, try the suggestions here first, then the Troubleshooting section
if necessary.
• Make sure you’re using the drivers that are on the drivers diskette that ships with
this adapter.
• Make sure the driver is loaded and the protocols are bound. Check Device Proper-
ties list for trouble indicators (an X or ! symbol).
• Check with your LAN administrator — you may need to install supplemental net-
working software.
NetWare Server, Client 32, UNIX, OS/2, Banyan, and Other Operating Systems
For these, refer to our online documents. On a DOS computer, view the appropriate
README file for information on installing your network driver.

ASUS PCI-L101 User’s Manual18
Installing Multiple LAN Cards
All users: The adapter’s 12-digit, hexadecimal Ethernet address is on a sticker on the
back of the adapter. The Ethernet address is sometimes called the node address or the
MAC address. Note that the PCI slot number may not correspond with the physical
connector in your computer.
Install only one active WOL adapter per computer. You can install additional, non-
WOL adapters.
NetWare users: The server drivers use the PCI slot number to identify each installed
adapter. You can correlate the PCI slot number to the adapter by using the Ethernet
address that is printed on a label on the adapter. Run Setup from theASUS disk to view
the Ethernet address and slot number for each installed adapter. For more information,
see the README files. NetWare 4.11 server installations use unique slot numbers that
are assigned during sever setup.
Windows NT and Windows 95 users: Repeat the configuration procedure for each
adapter you want to install (add only one adapter at a time). You need to perform the
configuration process on each adapter. In Windows NT, be sure to click the Show all
PRO Adapters box in the Configuration window. See the README file for more in-
formation.
Select Duplex Mode (optional)
Duplexing is a performance option that lets you choose how the adapter sends and
receives data packets over the network. The ASUS PCI-L101 adapter can operate at
full duplex only when connected to a full duplex 10BASE-T, 100BASE-TX switching
hub, or another full duplex adapter. To summarize:
•Auto (requires a full duplex adapter or switching hub with auto-negotiation
capability). The adapter negotiates with the hub to send and receive packets at the
highest rate. This is the default setting. If the hub does not provide auto-negotia-
tion, the adapter runs at half duplex.
•Full duplex (requires a full duplex switching hub or adapter). The adapter can
send and receive packets at the same time. This mode can increase adapter perfor-
mance capability. If the full duplex hub provides auto-negotiation, the adapter runs
at full duplex. If the full duplex hub does not provide auto-negotiation, you need to
set the adapter duplex mode manually (see following paragraphs)
•Half duplex. The adapter performs one operation at a time; it either sends or re-
ceives.
III. DRIVERS
III. Drivers
Multiple Cards

19ASUS PCI-L101 User’s Manual
III. DRIVERS
III. Drivers
Full Duplex
NOTE: If your hub is running at 100 Mbps and half duplex, your potential bandwidth
is higher than if you run at 10 Mbps and full duplex.
Manually Configuring for Full Duplex
If your switch supports auto-negotiation with the N-way standard, duplex configura-
tion is automatic and no action is required on your part. However, few switches in the
current installed base support auto-negotiation. Check with your network system ad-
ministrator to verify. Most installations will require manual configuration to change to
full duplex.
Configuration is specific to the driver you’re loading for your network operating sys-
tem (NOS), as shown in the following paragraphs.
To set up the duplex mode, refer to the section below that corresponds to your operat-
ing system.
Adapter performance may suffer or your adapter may not operate if your hub does not
support full duplex and you configure the adapter to full duplex. Leave the adapter on
half duplex if you are not sure what type of hub you are connected to.
DOS ODI, NDIS 2.01 Clients
Edit the NET.CFG or PROTOCOL.INI file. Add kewords to Link Driver section:
FORCEDUPLEX 2
SPEED 100 (or 10 if 10BASE-T)
NetWare server
In AUTOEXEC.NCF, Load E100B.LAN and add the following statement (you must
include the equal sign for servers):
FORCEDUPLEX=2
SPEED=100 (or 10 if 10BASE-T)
For more information, see the README file for NetWare servers.
Windows NT
While running Windows NT:
1. From the Control Panel, double-click the Intel PROSet icon.
2. PROSet examines your system and displays the Adapter Setup window.

ASUS PCI-L101 User’s Manual20
If you have multiple adapters, click the “Show All Adapters” box and then select the
adapter you are configuring (you can identify it by its Ethernet address). Each adapter
must be configured separately.
3. From the window that appears, click Change.
4. From the Adapter Setup window, click the menu for Network Speed.
5. Click 100 or 10 Mbps, depending on hub speed.
6. Click the menu for Duplex Mode
7. Click Full.
8. Click OK when finished.
9. Click Restart Windows NT.
Windows 95
While running Windows 95:
1. From the Control Panel, double-click the Intel PROSet icon.
2. PROSet examines your system and displays the Adapter Setup window. If you
have multiple adapters, click the adapter you are configuring (you can identify it
by its Ethernet address). Each adapter must be configured separately.
3. From the window that appears, click Change.
4. From the Adapter Setup window, click the menu for Network Speed.
5. Click 100 or 10 Mbps, depending on hub speed.
6. Click the menu for Duplex Mode
7. Click Full.
8. Click OK when finished.
9. Click OK to restart Windows 95.
Other operating systems
See the Adapter Installation and Special Configurations README file. “Push” Instal-
lation for Windows 95
If you are a LAN Administrator setting up server-based push installation of Windows
95 as defined in Microsoft Windows 95 Resource Kit, additional steps are required for
this adapter.
III. DRIVERS
III. Drivers
Full Duplex
Table of contents
Other Asus PCI Card manuals

Asus
Asus SpaceLink WL230 User manual

Asus
Asus AAEON PER-T499 User manual

Asus
Asus PCI-SIU2 User manual

Asus
Asus HYPER M.2 X16 User manual

Asus
Asus WL-130g User manual

Asus
Asus AAEON Myriad UP AI Core X Series User manual

Asus
Asus T2 3-in-1 Upgrade ET1605 User manual

Asus
Asus Hyper M.2 x16 Gen 4 User manual

Asus
Asus PS3-150 User manual

Asus
Asus NX1101 User manual

Asus
Asus XONAR DX User manual

Asus
Asus PCE-N53 User manual

Asus
Asus SpaceLink WL230 User manual

Asus
Asus SpaceLink WL230 User manual

Asus
Asus PCE-AC55BT User manual

Asus
Asus XONAR D1 - Sound Card - Low Profile User manual

Asus
Asus PCI-SC896 User manual

Asus
Asus WL-138gE User manual

Asus
Asus Xonar D-Kara User manual

Asus
Asus Xonar DG SI User manual