manuals.online logo
Brands
  1. Home
  2. •
  3. Brands
  4. •
  5. ATAGO
  6. •
  7. Measuring Instrument
  8. •
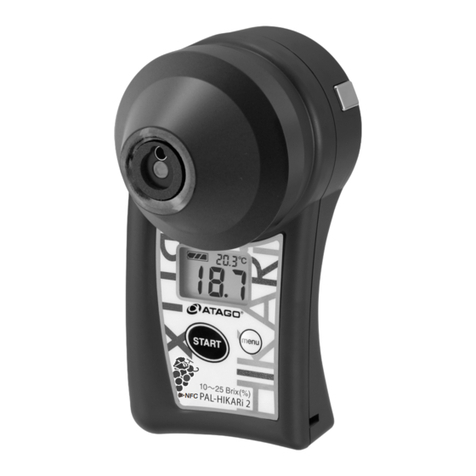
  9. ATAGO PAL-HIKARi 7 User manual

ATAGO PAL-HIKARi 7 User manual

Cat.No.5457
Introduction
Parts
Contents
Measurement Tips And Precautions
Installing Small Sample Stage S / Removing Offset Function
Safety Precautions
Thank you for purchasing the instrument.
Read and follow all safety instructions before operating the instrument.
Fairure to comply with the following instructions may result in personal injury or property damages.
This instrument measures amount of light absorbed by shining the near infared light to the fruit then
converts to Brix (sugar level) to display.
Brix (sugar level) can be measured with no need to cut and squeeze the fruits.
Measurment variance may be seen depending on the variety and harvest timing. This instrument is equipped
with offset function to match the value in such cases.
・Do not aim it at a face when measuring.
・Do not attempt to repair, modify, or disassemble the instrument.
・Before use, carefully read this instruction manual and fully understand the function and operation for
each part of the instrument.
・ATAGO is not liable for any or all damages as a result of use of the instrument for those other than its
intended purposes (measurement of Brix, of fruits).
・Do not hit or protrude the light emitting or receiving section with a sharp object.
・ATAGO is not liable for any loss and damage caused by the measurement and use of this instrument.
・Do not expose the instrument to a rapid change in ambient temperature.
・Do not use the instrument where there is much dust.
・Do not subject the instrument to strong vibration.
・Do not place the instrument under anything heavy.
・If the instrument is dropped or subjected to a strong impact, contact your supplier for inspection.
・Loosen the battery compartment cover for air transportation.
・Main unit (with Silicon Cover) ・・・・・・ 1
・Small Sample Stage S ・・・・・・・・・・・・ 1
・Instruction Manual(this book) ・・・・・・ 1
・Inspection Report・・・・・・・・・・・・・・・・ 1
・Silicon cushion S (for replacement)・2
・Condensing C ・・・・・・・・・・・・・・・・・・・ 1
・AAA alkaline batteries ・・・・・・・・・・・・ 2
※AAA alkaline batteries are included.
WARNING
CAUTION
●Removal method
Small Sample Stage S
Align the hole for the radiation temperature sensor with
the radiation temperature sensor and push the Small
Sample Stage S straight.
Pull the Small Sample Stage S
straight up.
Hole for radiation
temperature sensor
Radiation
temperature sensor
Same serial number
●Installation method
Do not turn the Small Sample Stage S after mounting. Measurement can not be performed
correctly if the hole for radiation temperature sensor and the radiation temperature sensor
are misaligned.
Note
Make sure to carry out the measurement with the Small Sample Stage S installed. With
Small Sample Stage S removed, correct measurement can not be performed.
Note
NoteNote
Note
This function modifies the measurement value by a constant. Use this function to match the
measurement value to the refractometer (Brix meter).
How to set addition/subtraction number [Range:-9.9~9.9]
1. Hold down menu while
it is turned on.
(While the measurement is
 displayed.)
2. Press menu to select
either addition or
subtraction.
No plus sign will be displayed.
Current
addition/subtraction
number is displayed
and “-“ will flash.
3. Press START
 to confirm.
4.
Enter the addition/subtraction
number.
The first digit:
Press menu to
changethe number.
Press START to
confirm and move
to the next digit.
The second digit:
Press menu to
change the number.
5.
Press START to confirm the
 addition/subtraction number.
The entered
addition/subtraction
number will flash
first then remains
lit once confirmed.
(Example)
Press START or side
button to begin
measuring
・Screen image during   
 measurement when   
 offset is on.
The
first
digit :
0 to9
The
second
digit :
0 to9
(Example)
For default
Press the side button while setting up the Off-Set feature.
Small Sample
Stage S
Silicon cushion S
Radiation
temperature
sensor
Light emitting
part
Receiver
Sample stage with
Small Sample Stage S removed
Side button
LCD
menu button
When the Small Sample Stage S is attached
Lanyard hole
START button
Battery
compartment
The measurements are displayed.
Beep
<LCD Auto Shut-off>
The instrument will turn itself off after 30 seconds of inactivity.
To manually turn it off, hold down the START button for more than 3 seconds.
Depending on the variety, there may be a difference between the refractometer (sugar meter) and the
measured value. Please confirm the difference from the value measured with your refractometer (PAL
- 0 of the set when purchasing IR Brix Meter x Brix Meter) and use the offset function as necessary.
(Refer to “Offset Function” )
Measurement
* Condensing C (10 sets) may be used with commercially available white paper cup (about 100 mL).
Not keeping the fruit still
while measuring will result in
inaccurate measurements.
Tip (calyx) Position the
fruit so that it
covers the
radiation
temperature
sensor hole.
Place the fruit.
Cover with a paper cup.
Press the START button.
Press the
START button
Beep
Place the tip of the blueberry
(calyx) face up and cover with
a paper cup.
QR code
5457-E02
Instruction Manual
Digital Hand-held “Pocket” IR Brix Meter
PAL- HIKARi
7
The warranty period extension method 1 year  2 years
The warranty period will be extended from 1 year to 2 years when you register customer information.
ATAGO Logger NFC can also be downloaded at the same time.
Trouble scanning the code? Access this link https://www.atago.net/ur/index.php?l=en
(Example)
13.8
●Acclimate the fruit and this instrument to
ambient temperature.
The temperature difference between the
surface and the inside of the fruit, and
temperature difference between this
instrument and the fruit may affect the
measurement values.
Especially when measuring refrigerated fruits,
be sure to let the fruits acclimate to the
ambient temperature.
● Clean the surface of the fruits.
Do not measure the spoiled spots.
The instrument may not measure correctly
when there is water droplets, dust or scar,
and bruising soft spots.
● Place the sample stage to the fruit.
Recommended sample size is 15 mm
or more in diameter.
Measure the part where there is no dent with
diameter that is 15 mm or more.
Be sure to avoid any spacing between the
fruit and the silicon cushion to avoid the
external light interference. If the silicon
cushion is deteriorated, please replace it with
a brand new silicon cushion. (Refer to“How
to change the silicon cushion”)
● Sugar level varies depending on the
measured area.
Example for measurement value:
Measure a few berries and use the average
value as the result.
●When taking measurements, avoid
changing external light intensity.
If the intensity of external light changes, it
will result in inaccurate measurements.
13.8
12.4
11.6
Replacing The Batteries
Error Meassages
When The Measured Values Are Off
Brix Scale
Cleaning
Automatic Temperature Compensation
Never splash
water on the
unit.
Do not use organic
solvents (paint thinner,
benzene, gasoline,
etc.) on the plastic
body case.
The measurement values are temperature dependent. This unit is equipped with automatic
temperature compensation to correct the readings that are within the range to display
measurement value at 20℃.
The unit displays temperature at the fruit surface.
Brix represents the weight of sucrose in 100 grams of sucrose solution as percentage by
weight. When other dissolved solids are present in the solution, Brix conversion may be
applied.
Brix is a measure of the total dissolved solids in a solution and indicates the combined
concentration of all soluble substances, such as sugar, salt, protein, and acids.
①Are there any difference between the fruit, unit, and ambient temperature?
②Are there any water droplets or soiled area in the measurement section? Is the fruit spoiled?
③Does the fruit and silicon cushion have a good contact? Especially when using the side key,
is it out of alignment?
④Interference by sunlight
⑤Are there any difference depending on measured section?
①~⑤ → Refer to “Measurement tips and precautions”
⑥Are there any damages or soil on the light emitting or receiving section? → Refer to
“Cleaning”
If light emitting or receiving section is damaged or soiled, contact ATAGO.
⑦Is the silicon cushion wet? → Refer to “Cleaning”
Replace silicon cushion to a new one if there is any deterioration. → Refer to “How to
Change the Silicon cushion”
⑧Check the offset feature → Refer to “Offset Function”
・To clean the main body, use a wetted tissue or soft cloth.
· Small Sample Stage S can be removed and washed with water.
Completely dry the silicon cushion area.
Avoid using ethyl alcohol. It may compromise the adhesion on the silicon cushion.
Remove when radiation temperature sensor is dirty.
How To Replace The Silicone Cushion Cover
Note
Gasoline
Storage
Repair And Warranty
Specifications
Measurement fruits
Measurement range
Resolution
Measurement accuracy
Repeatability
Automatic temperature
compensation range
Ambient temperature range
Measurement time
Backlight
Blueberry
Brix 8.0 to 20.0% 
Temperature 5.0 to 45.0℃
Brix 0.1% Temperature 0.1℃
Brix±2%(10.0~30.0℃)* 
Temperature
±
1℃
Brix
±1%
10.0~30.0℃
10 to 30℃
Approx. 1 second
The backlight stays on for 30 seconds then turns off after 30 seconds.
The backlight is off when measurements are taken.
Do not keep:
●
In a hot and humid place ●
Close to a heater
●
In direct sun light ●
Extreme low temperature
●
Inside a closed car
The instrument is warranted for one year from the date of purchase. This warranty is void
if the instrument shows evidence of the following. Send the included batteries as well if
they are still in use.
・Having been disassembled by unauthorized personnel
・Water damage or having been dropped
・Having been misused and/or operated outside the environmental specifications
・Leakage from batteries other than those included with the unit
Repair services are available for a fee after the warranty expires.
Contact an ATAGO authorized service center for service and support.
ATAGO instruments are rigorously inspected to ensure each unit meets the highest standards of quality assurance.
*Blueberry varieties and measurement environment may affect accuracy.
Measurement was taken when the
unit’s temperature was 4℃ or
lower.
Measured when the main
unit’s temperature is
exceeding 45℃.
Measurement was taken when the
fruit’s temperature was 4℃or
lower.
Measured when the fruit’s
temperature is exceeding 45℃.
When it is outside of temperature
compensation range.
※Main unit’s temperature error will
preferentially display when the main unit’s
and fruits’temperatures are both out of
range.
1.
Insert a coin in the groove on the battery
  compartment cover. Turn the coin
  counterclockwise to remove the cover.
2. Insert two batteries
3. Align the cover and push it down.
4.
Close the battery compartment cover by
  pushing the cover in with a coin in the groove
  and turning it clockwise until it stops.
Observe the correct polarity.
Note
When the cover
is open
When the cover
is closed
・About battery indicator
When the battery icon indicates the low
power level , replace both batteries with
a brand new set of AAA alkaline
batteries (1.5V).
* Check the expiration dates on
batteries before purchase.
The battery is low.
Measurement was taken for fruits with Brix lower
than the measurement range.
Measurement was taken for fruits with Brix
highter than the measurement range.
Measurement was taken while the sample stage
was not in contact fruit.
When correct measurements are not achievable
due to interference from external light.→Refer
to “Measurement tips and precautions”
The instrument is faulty.
Replace the batteries. Contact ATAGO if
this error persists.
Groove
When there is an operation error or malfunction, the below error message will show with alarm
sound for warning.
There is a temperature difference between the
fruit and the main unit.
The silicon cushion and silicon cover of the Small Sample Stage S
can be replaced. Please contact us for purchase.
RE-39008 Spare silicon cushion S (2pieces)
1.Remove the old silicon cushion from the Small Sample
Stage S.
2.Peel the paper backing off the sticker. Place the silicon
cushion on the Small Sample Stage S.
Do not block hole for radiation temperature sensor with
the silicon cushion.
RE-39415 JORDAN for PAL-HIKARi(Silicon Cover)
2109K Printed in Japan
Headquarters: The Front Tower Shiba Koen, 23rd Floor 2-6-3 Shiba-koen, Minato-ku, Tokyo 105-0011, Japan
TEL: 81-3-3431-1943 overseas@atago.net http://www.atago.net/
TEL: 1-425-637-2107 [email protected]
TEL: 91-22-2833-8038 / 8076 [email protected]
TEL: 662-982-8718-9 [email protected]
TEL: 55 16 3916-6000 [email protected]
TEL: 39 02 36557267 [email protected]
TEL: 86-20-38108256 [email protected]
TEL: 7-812-777-96-96 [email protected]
TEL: 234-707-558-1552 [email protected]
TEL: 7-727-257-08-95 [email protected]
Hole for radiation
temperature sensor
Silicon cushion S
1. Press and hold menu then press the side
  button while it is turned on.
3. While pressing menu, use the side button
 to select ON/OFF.
2. Release the side button while
 continuing to press menu.
Press START or
side button to
begin measuring.
Do not press menu for 5 seconds or more before
pressing the side button. Holding menu will activate
the addition/subtraction number setting.
Note
4.Release finger from menu.
 Confirm setting.
Pressing the side button will switch it between ON/OFF.
(Example)
(Example)
Side button
ON/OFF will flash first then remains lit
once confirmed.
* Keep menu
pressed until step
3 is completed.
How To Set Alarm Sound And Alarm Vibrationcan
Buzzer sound and Vibration can be set to alarm when measurement error is displayed or at the beginning and end of measurement.
Buzzer
sound
ON/OFF Buzzer
sound
Vibration
ON/OFF
Vibration
Snd Snd Snd Snd
vbr vbr vbr vbr
Switch it between Sound or Vibration
Press and hold menu then press the
start button.
Pressing the start button will switch it
between Buzzer Sound or Vibrationcan.
FullWhen the history of measured data
reaches 100. Turn OFF the NFC
Function or Delete Data History.
Power supply
International Protection class
Dimensions and weight
Maximum number
of data history
Output
100
NFC Forum Type 4 Tag ISO/IEC 14443 Type A
Output category:Date Time, Brix [%], Temp [degC]
(e.g.) 2017/08/17 09:30:45, 12.3, 20.4
Two (2) AAA alkaline batteries
IP64
61(W) x 64 (D) x 115 (H)mm, 153g (main unit and Small Sample Stage S only)

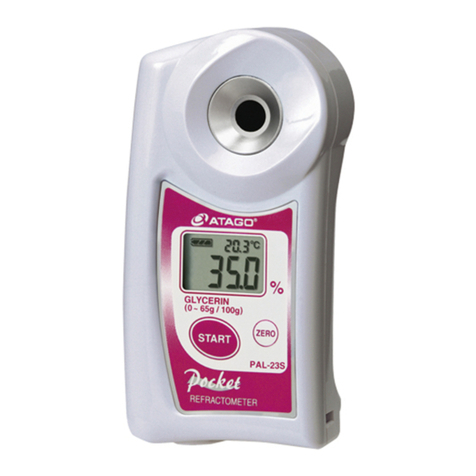
This manual suits for next models

1

Other ATAGO Measuring Instrument manuals

ATAGO PAL-33S User manual

ATAGO

ATAGO PAL-33S User manual

ATAGO PAL-Ramen Meister User manual

ATAGO

ATAGO PAL-Ramen Meister User manual

ATAGO PAL-87S User manual

ATAGO

ATAGO PAL-87S User manual

ATAGO PAL-Easy ACID7 User manual

ATAGO

ATAGO PAL-Easy ACID7 User manual

ATAGO PAL-18S User manual

ATAGO

ATAGO PAL-18S User manual

ATAGO PAL-41S User manual

ATAGO

ATAGO PAL-41S User manual

ATAGO PAL-29S User manual

ATAGO

ATAGO PAL-29S User manual

ATAGO PAL-Grape Must User manual

ATAGO

ATAGO PAL-Grape Must User manual

ATAGO PAL-Easy ACID5 User manual

ATAGO

ATAGO PAL-Easy ACID5 User manual

ATAGO PAL-26S User manual

ATAGO

ATAGO PAL-26S User manual

ATAGO PAL-37S User manual

ATAGO

ATAGO PAL-37S User manual

ATAGO 4439 User manual

ATAGO

ATAGO 4439 User manual

ATAGO PAL-Easy ACID101 User manual

ATAGO

ATAGO PAL-Easy ACID101 User manual

ATAGO 4430 User manual

ATAGO

ATAGO 4430 User manual

ATAGO PAL-121S User manual

ATAGO

ATAGO PAL-121S User manual

ATAGO PAL-83S User manual

ATAGO

ATAGO PAL-83S User manual

ATAGO PAL-HIKARi 3 MINi User manual

ATAGO

ATAGO PAL-HIKARi 3 MINi User manual

ATAGO PAL-Easy ACID181 User manual

ATAGO

ATAGO PAL-Easy ACID181 User manual

ATAGO PAL-Easy ACID1 User manual

ATAGO

ATAGO PAL-Easy ACID1 User manual

ATAGO PAL-Easy ACID40 User manual

ATAGO

ATAGO PAL-Easy ACID40 User manual

ATAGO PAL-64S User manual

ATAGO

ATAGO PAL-64S User manual

ATAGO MASTER-M Series User manual

ATAGO

ATAGO MASTER-M Series User manual

ATAGO PAN-1DC User manual

ATAGO

ATAGO PAN-1DC User manual

ATAGO PAL-34S User manual

ATAGO

ATAGO PAL-34S User manual

Popular Measuring Instrument manuals by other brands

ETS SM3-RM instructions

ETS

ETS SM3-RM instructions

Keysight Technologies N9030B Installation note

Keysight Technologies

Keysight Technologies N9030B Installation note

Eltako electronics DSZ12DZ-3x65A operating instructions

Eltako electronics

Eltako electronics DSZ12DZ-3x65A operating instructions

Grant-bio DEN-1 operating instructions

Grant-bio

Grant-bio DEN-1 operating instructions

Adronic V55N user manual

Adronic

Adronic V55N user manual

Gulf Coast Data Concepts X16-1C manual

Gulf Coast Data Concepts

Gulf Coast Data Concepts X16-1C manual

fluenta FGM 160 operating instructions

fluenta

fluenta FGM 160 operating instructions

Sonin 10075 Pocket reference guide

Sonin

Sonin 10075 Pocket reference guide

BW Technologies GasAlertQuattro 3 Operator's manual

BW Technologies

BW Technologies GasAlertQuattro 3 Operator's manual

Lumax LX-1371 quick start guide

Lumax

Lumax LX-1371 quick start guide

HP 4155A Print/Plot Guide

HP

HP 4155A Print/Plot Guide

Texas Instruments TMP116METER-EVM user guide

Texas Instruments

Texas Instruments TMP116METER-EVM user guide

Racelogic Performance Box Touch V2 quick start guide

Racelogic

Racelogic Performance Box Touch V2 quick start guide

Endress+Hauser Hart Cerabar PMP71B operating instructions

Endress+Hauser

Endress+Hauser Hart Cerabar PMP71B operating instructions

Dual TG12A instructions

Dual

Dual TG12A instructions

Extech Instruments CO52 user guide

Extech Instruments

Extech Instruments CO52 user guide

JDS Uniphase RM3 Series user manual

JDS Uniphase

JDS Uniphase RM3 Series user manual

Snazzy KICK_ME manual

Snazzy

Snazzy KICK_ME manual

manuals.online logo
manuals.online logoBrands
  • About & Mission
  • Contact us
  • Privacy Policy
  • Terms and Conditions

Copyright 2025 Manuals.Online. All Rights Reserved.