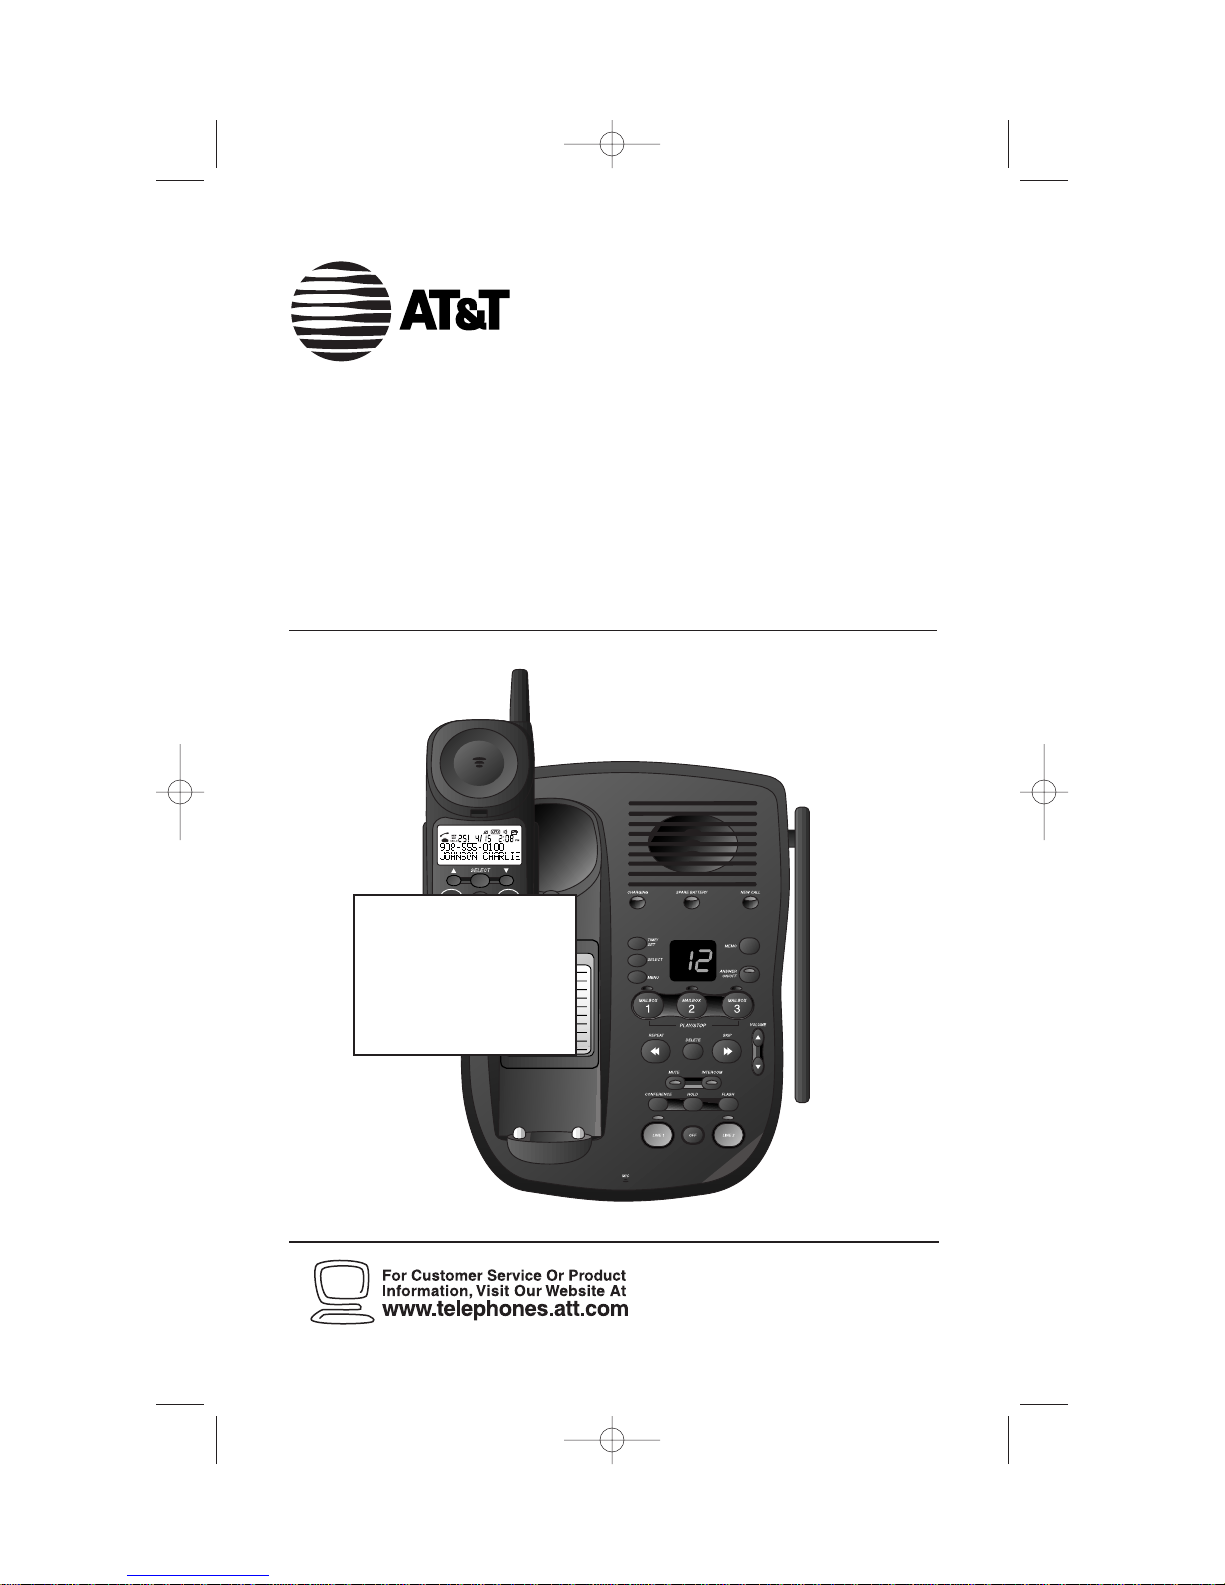
AT&T 9452 User manual

900 MHz Digital Two-Line
Cordless Speakerphone with
Answering System 9452
with Caller ID/Call Waiting
Please also read
Part 1 — Important
Product Information
USER’S MANUAL
Part 2
AT&T and the globe symbol are registered trademarks ofAT&T Corp.licensed toAdvancedAmericanTelephones.
REVISED
10/3/00
SCREEN WILL
BE UPDATED
9452_book_1ATT 10/5/00 3:17 PM Page ii

© 2000AdvancedAmericanTelephones. All rights reserved.
Printed in China. 850004409 Issue 1AT&T 10/00
9452_book_1ATT 10/5/00 3:17 PM Page iii

CONTENTS
1
BEFORE YOU BEGIN . . . . . . . . . . . . . 3
About Caller ID with CallWaiting.. 3
About the Data Port.......................3
About the Spare Battery Charger.. 3
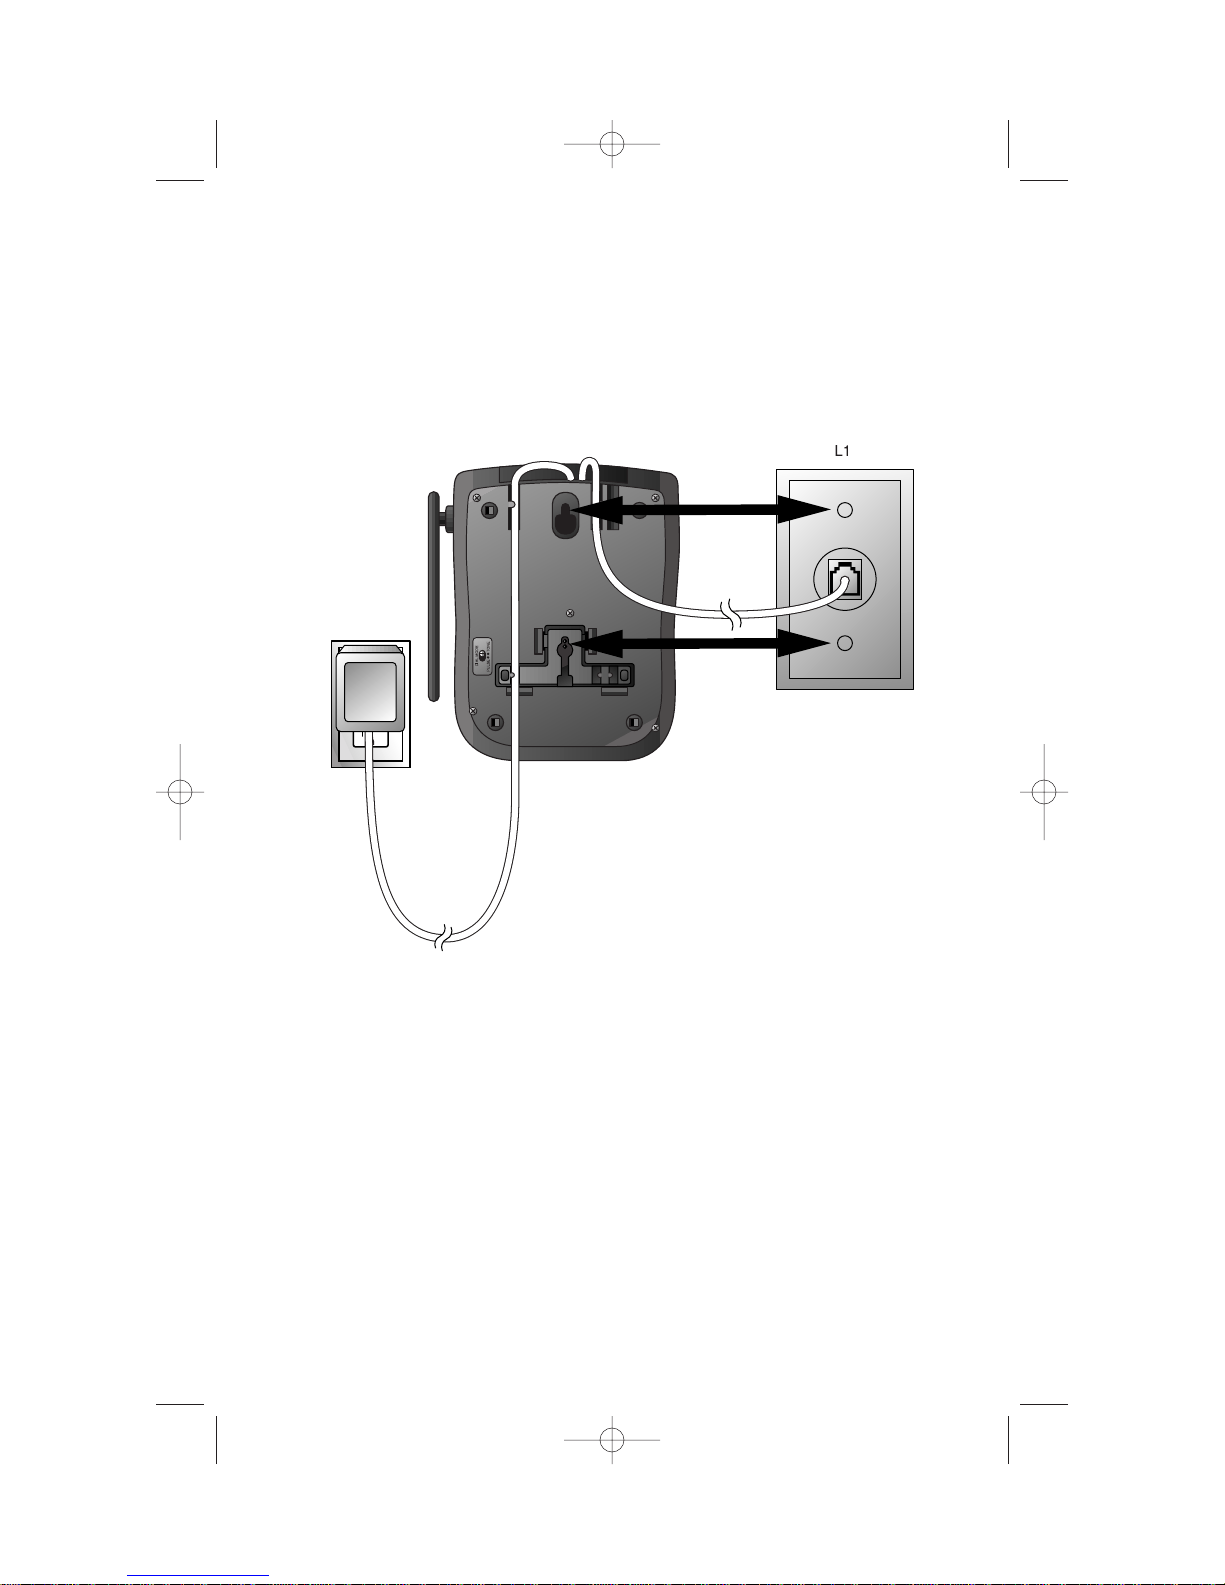
INSTALLATION . . . . . . . . . . . . . . . . . . . . . . 4
BeforeYou Install.......................... 4
Table/Desk Installation...................6
Wall Installation ............................ 7
FEATURE SETUP . . . . . . . . . . . . . . . . . . . 9
Telephone Feature Setup.............. 9
Telephone Features........................9
TELEPHONE OPERATION
AT THE HANDSET . . . . . . . . . . . . . . . . . . . . . 10
Make a Call.................................. 10
Answer a Call.............................. 10
End a Call.....................................10
Hold ............................................ 10
Flash/CallWaiting........................ 10
Redial .......................................... 10
Intercom ..................................... 10
HandsetVolume.......................... 10
TemporaryTone Dialing.............. 11
Conference Calls......................... 11
Switching from Handset to
Base Speakerphone ................. 12
CallTimer.................................... 12
Headset Jack................................ 12
Operating Range......................... 13
TELEPHONE OPERATION
AT THE BASE . . . . . . . . . . . . . . . . . . . . . . . . . . . 14
Answer a Call.............................. 14
Switching from Base
Speakerphone to Handset....... 14
Mute............................................ 14
Conference Calls......................... 14
End a Call.................................... 15
Base RingerVolume..................... 15
Hold ............................................ 15
Page/Intercom............................. 15
SpeakerphoneVolume................ 15
Flash/CallWaiting........................ 15
CALLER ID OPERATION . . . . . . . 16
View Call History........................ 16
Dial a Number from
Call History.............................. 16
Erase a Call Record..................... 17
EraseAll Call Records.................. 17
Display Screen Messages............. 17
TELEPHONE DIRECTORY . . . . . 18
Store a Directory Name
& Number................................ 18
Edit a Directory Name
& Number................................ 19
Erase a Directory Name
& Number................................ 19
Store a Call History Record
in Directory............................. 19
Dial a Directory Number............ 19
ANSWERING SYSTEM
OPERATION . . . . . . . . . . . . . . . . . . . . . . . . 20
Audible Indicators....................... 20
About Mailboxes......................... 20
AboutAnnouncements ............... 20
RecordYourAnnouncement....... 21
Answering System
Feature Setup........................... 22
Feature Summary.........................22
ListenTo,Save,& Delete
Messages.................................. 23
Call Screening/Intercept............. 24
Record a Memo........................... 24
Connect with theAnswering
System...................................... 24
Voice Menu................................. 24
RemoteAccess Commands......... 25
MessageWindow Display............ 26
BATTERIES . . . . . . . . . . . . . . . . . . . . . . . . . 27
Charging the Handset
Battery Pack............................. 27
Replacing the Handset
Battery Pack............................. 28
Installing a Spare Battery.............29
IN CASE OF DIFFICULTY . . . . . 30
9452_book_1ATT 10/5/00 3:17 PM Page 1

9452_book_1ATT 10/5/00 3:17 PM Page 2

3
BEFORE YOU BEGIN
About Caller ID with Call Waiting
This product has a Caller ID with CallWaiting feature that works with
service from your local phone service provider.
Caller ID with CallWaiting lets you see who’s calling before you answer the
phone,even when you’re on another call.
You may need to change your phone service to use this feature. Contact
your phone service provider if:
• You have both Caller ID and CallWaiting,but as separate services
(you may need combined service)
• You have only Caller ID service,or only CallWaiting service
• You don’t subscribe to any Caller ID or CallWaiting services.
You can also use this product with regular Caller ID service,and you can use
this product’s other features without subscribing to either Caller ID or
combined Caller ID with CallWaiting service.
There are fees for Caller ID services,and they may not be available in
all areas.
This phone can provide information only if both you and the caller are in
areas offering Caller ID service and if both telephone companies use
compatible equipment.
About the Data Port
If you want to connect another device (such as a modem or fax machine)
to the wall jack,you can use the jack on the phone labeled DATA PORT.
This convenience port uses Line 2;a call picked up on Line 2 at this or
another extension,or incoming Caller ID information,may interrupt a fax,
modem,or message transmission.
About the Spare Battery Charger
This phone is equipped with a built-in spare battery charger in the base
unit. The spare battery charger allows you to always have a charged
battery available should the handset battery charge become low. For
complete information,see page 29.
9452_book_1ATT 10/5/00 3:17 PM Page 3

INSTALLATION
4
Before You Install
1Choose a location for the base near an electrical outlet and a
telephone jack.
This phone requires a modular telephone jack and a standard electrical
outlet (110vAC) not controlled by a wall switch. For optimum
performance,install the base on the highest floor of your home.
b) Place the battery
pack in the
handset. Align the
metal contacts on
the battery with
the contacts in the
battery
compartment.
c) Replace cover by
sliding it on its track
up over battery case
until it snaps firmly
into place.
a) Remove battery
compartment
cover by pressing
on the indentation
and sliding
downward.
9452_book_1ATT 10/5/00 3:17 PM Page 4

INSTALLATION
5
2Install the handset battery.
3 Attach the belt clip to the cordless handset (optional).
4 Set the dial mode.
The dial mode switch on the side of the base comes set toTONE.
If you have touch tone service,the phone will be ready to use when
installation is complete. If you have dial pulse (rotary) service,set the
switch to PULSE.
5Select base ringer volume for each line.
Set the RINGER switches on the side of the base to HIGH,LOW,or OFF.
To attach To remove
9452_book_1ATT 10/5/00 3:17 PM Page 5

INSTALLATION
6
Table/Desk Installation
1Connect the power cord.
Use only the power cord supplied with this product. If you
need a replacement,call 1 800 222-3111.
2 Charge the handset battery.
Place the handset in the base. Charge the battery for at least 16 hours
the first time. After the first charge,the battery is typically fully
charged overnight.
3Connect the telephone line cord(s).
If you have a two-
line jack, use only the
4-wire (RJ-14) line cord.
Connect the line cord
from the wall jack to
the jack labeled
L1/L1+L2 on the base.
Make sure the plugs
snap firmly into place.
If you have two separate
jacks, use both long line
cords. Connect a line cord
from the wall jack you
wish to designate as
your Line 1 to the jack
labeled L1/L1+L2 on the
back of the base.
Connect the other line
cord from the remaining
wall jack to the jack
labeled L2 on the back
of the base. Make sure
the plugs snap firmly
into place.
Standard
electrical
outlet
L1/L1+L2 jack
Power cord
Modular
telephone
jack
Standard
electrical
outlet
Modular
telephone
jacks
L1/L1+L2 jack
L2 jack
Power cord
9452_book_1ATT 10/5/00 3:17 PM Page 6

4Check for dial tone.
After the batteries are charged,pick up the handset,press L,and
listen for a dial tone. Then press l. If you don’t hear a dial tone,see
“IN CASE OF DIFFICULTY.”
Wall Installation
1Position the wall mount adapter on the base.
2 Connect the power cord to the phone.
Use only the power cord supplied with this product. If you
need a replacement,call 1 800 222-3111.
3Connect the telephone line cord(s). See illustrations on previous
page for connections. Use the short line cord instead of a long line
cord for the connection to the L1/L1+L2 phone jack.
INSTALLATION
7
Align tabs on wall mount
adapter with holes on bottom
of base. Snap wall mount
adapter firmly into place.
Wall mount
adapter
9452_book_1ATT 10/5/00 3:17 PM Page 7

4Mount the base on the wall.
4 Plug the power cord into the outlet.
5 Charge the handset battery.
Place the handset in the base. Charge the battery for at least 16 hours
the first time. After the first charge,the battery is typically fully
charged overnight.
6Check for dial tone.
After the batteries are charged,pick up the handset,press L,and
listen for a dial tone. Then press l. If you don’t hear a dial tone,see
“IN CASE OF DIFFICULTY.”
INSTALLATION
8
a) Align holes on
base with
mounting studs
on wall jack.
b) Place power cord
as shown,guiding
it through tabs on
base.
c) Pull base down on
mounting studs
until it locks into
place.
9452_book_1ATT 10/5/00 3:17 PM Page 8

FEATURE SETUP
9
Telephone Feature Setup
1Make sure the handset is off.
2Press G.
3Press -until the feature you want to set is flashing on the screen.
(Features are described in the chart below.)
4Press S.
5Press -or +until the setting you want flashes.
6Press S
— OR —
If necessary,use the keypad to enter numbers (for example,when you
program the area code),then press S.
Telephone Features
Feature: Directions:
AREA-HOME Select HOME.The screen displays ENTER AREA CODE.
If you live in an area where you make calls within your
own area code by dialing seven digits,enter your three-digit
area code,then press S
— OR —
If you live in an area where all local calls require 10 digits
(area code plus phone number,without dialing“1”first),
enter 000 for the area code,then press S.
AREA-LOCAL An area code is local if you do not dial“1”before the area
code. Enter up to five three-digit local area codes. Select
LOCAL,use -or +to move from area code #1 through
area code #5,and enter area codes. Press Sto save.
KEY BEEPS If you turn this feature on,the handset sounds a tone
every time you press a button. Select KEYBEEPS,press -
until OFF or ON is flashing,then press S.
RINGER You can choose from four different ringers for each line.
Press -or +until LINE 1 or LINE 2 is flashing,then
press S. Press -to hear the different ringers,then
press Sto save the last ringer heard or choose OFF.
Repeat for the other line,then press O.
NOTE: When editing an area code, use +to delete existing digits, then
enter the new area code. Press Sto save.
9452_book_1ATT 10/5/00 3:17 PM Page 9

End a Call
Exit
programming
Cancel a page
Handset
Volume
Adjust volume of
what you hear
through the
handset.
Make a Call
Press Lor
land wait for
dial tone
— OR —
Dial the phone
number (use +to
backspace and
edit),then press a
LINE button.
Answer a Call
Press the flashing
LINE button. Flash/
Call Waiting
Access special
telephone company
subscriber services.
TELEPHONE OPERATION
AT THE HANDSET
10
Hold
Press to put a call
on hold. To return
to the call,press
the lit LINE button
on handset or base
— OR —
Lift the handset of
another phone
connected to the
same line.
Redial
Press to display
last number
dialed. Use +
and -to scroll
through last five
numbers dialed.
Press a LINE
button to call
the displayed
number.
Intercom
Press to signal
base;intercom call
is automatically
connected.
Conference
Calls
SCREEN WILL
BE UPDATED
9452_book_1ATT 10/5/00 3:17 PM Page 10

TELEPHONE OPERATION
AT THE HANDSET
11
Temporary Tone Dialing
If you have dial pulse (rotary) service,you can change from dial pulse to
touch tone dialing during a call by pressing *. This is useful if you need to
send touch tone signals for access to telephone banking or long-distance
services.
1Dial the number.
2Press *. Buttons pressed after this send touch tone signals.
3After you end the call,the phone automatically returns to dial pulse
(rotary) service.
Conference Calls
Three-Way Conference Calls
You can use both lines at the same time to set up a three-way conference
call from the handset.
1Answer or make a call on one line.
2Press H.
3Press the other LINE button,and make or answer another call.
4Press cto connect all parties. Both LINE buttons flash during a
conference call.
5Press Oto end the entire conference call.
NOTE: If you want to end the call with just one side of a conference, press
that LINE button, press O, and then press the other LINE button to speak
with the other party.
Four-Way Conference Calls
You can set up a four-way conference call with Line 1,Line 2,the handset,
and the base speakerphone.
1Establish a conference call at the handset (see“Three-Way Conference
Calls”above).
2Press Lon the base.
3Press lon the base.
4Press con the base to connect all parties.
9452_book_1ATT 10/5/00 3:17 PM Page 11

12
TELEPHONE OPERATION
AT THE HANDSET
Switching from Handset to Base Speakerphone
1At the handset,make or answer a call on Line 1 or Line 2
— OR —
Establish a conference call.
2Press Hon the handset.
3At the base,press the appropriate LINE button
— OR —
Press cto pick up a conference call.
Call Timer
While the handset or base is on a call,the screen displays the approximate
duration of the call.
Headset Jack
You can use this telephone hands-free when you install a 2.5 mm headset
(AT&T SKU# 24099),purchased separately.
Plug the headset into the jack located on the left side of the handset
(under the small rubber flap). Do not force the connection,but make sure
the plug fits securely.
SCREEN WILL
BE UPDATED
9452_book_1ATT 10/5/00 3:17 PM Page 12

Operating Range
This cordless telephone operates within the maximum power allowed by
the Federal Communications Commission (FCC). Even so,this handset and
base can communicate over only a certain distance — which can vary with
the locations of the base and handset,the weather,and the construction
of your home or office. For best performance,keep the base antenna
fully upright.
If you receive a call while you are out of range, the handset might not
ring — or if it does ring,the call might not connect when you press L
or l. Move closer to the base,then press Lor lto answer.
If you move out of range during a phone conversation, you might
hear noise or interference. To improve reception,move closer to the base.
If you move out of range without pressing O,your phone will be
left“off the hook.” To hang up properly,walk back into range,periodically
pressing O.
TELEPHONE OPERATION
AT THE HANDSET
13
9452_book_1ATT 10/5/00 3:17 PM Page 13

TELEPHONE OPERATION
AT THE BASE
14
Answer a Call
Press the flashing LINE
button and speak
toward the
microphone.
Mute
Press to prevent your
caller from hearing you
(you can hear your
caller). Press again to
return to the
conversation.
Conference Calls
See“Conference Calls”
and“Switching from
Handset to Base
Speakerphone”in
TELEPHONE
OPERATIONATTHE
HANDSET.
Indicates handset
is charging in base
Switching from
Base Speakerphone
to Handset
1While on a call,
press Hon
the base.
2Press the
appropriate
LINE button
on the handset.
9452_book_1ATT 10/5/00 3:17 PM Page 14

TELEPHONE OPERATION
AT THE BASE
15
Speakerphone Volume
While on a call,adjust the
volume of what you hear.
Base Ringer Volume
Use switches on side of phone to
adjust how loudly the phone rings
for each line. Set each base ringer
to HIGH or LOW,or turn OFF.
Page/Intercom
Press to ring the handset.
Handset presses ito respond,
Oto cancel.
End a Call
End a telephone or
intercom call.
Hold
Press to put a call on hold. To return
to the call,press the lit LINE button
— OR —
Lift the handset of another phone
connected to the same line.
Flash/Call Waiting
Access subscriber
services while on a call.
Indicates spare
battery is installed
9452_book_1ATT 10/5/00 3:18 PM Page 15

The handset stores up to 50 Caller Identification records in the call history,
with the most recent call record displayed first.
View Call History
1Make sure the handset is off.
2Press +or -. The screen displays the
number of new,unreviewed and old calls
in the call history.
3Continue to press +or -to view all
call information.
Dial a Number from Call History
1Make sure the handset is off.
2Press +or -until the screen displays the number you want to call.
3Press a LINE button. You will hear a dial tone and the displayed
number will be dialed automatically.
CALLER ID OPERATION
16
SMITH JOHN *
123-4567
NEW 01 7.07
L10:21AM
Caller’s number
Time of callDate of call
Caller’s name
CORRECTED SCREENS
TO COME
9452_book_1ATT 10/5/00 3:18 PM Page 16

Erase a Call Record
1Make sure the handset is off.
2Press +or -until the screen displays the call record you
want to erase.
3Press S.
4Press -until ERASE is flashing,then press S.
5Press -until YES is flashing,then press S.
Erase All Call Records
1Make sure the handset is off.
2Press +or -until the screen displays a call record.
3Press S.
4Press -until ERASE is flashing,then press S.
5Press -until ALL is flashing,then press S. The screen displays
ERASE ALL? NO YES.
6Press -until YES is flashing,then press S.
Display Screen Messages
Screen Displays: When:
PRIVATE NAME The other party is blocking name information.
PPP The other party is blocking number information.
PRIVATE CALLER The other party is blocking name and
number information.
UNKNOWN NAME Your phone company is unable to receive
information about this caller’s name.
OUT of AREA Your phone company is unable to receive
information about this caller’s number.
UNKNOWN CALLER Your phone company is unable to receive
information about this caller’s name and number.
EXTENSION USED An extension phone on this line is being used,so
call information cannot be received.
CALLER ID OPERATION
17
9452_book_1ATT 10/5/00 3:18 PM Page 17

TELEPHONE DIRECTORY
18
This cordless phone can store 50 telephone numbers,each up to
16 digits long.
Store a Directory Name & Number
1Make sure the handset is off.
2Press Gon the handset. The screen flashes DIRECTORY.
3Press S. The screen displays ENTER NAME.
4Use the chart below to enter a name to be stored with the number.
Press -to move to the next space;press +to back up for correction.
5Press S. The screen displays ENTER NUMBER.
6Enter the telephone number you want to store. (Press rto enter
a two-second delay in the dialing sequence).
7Press Sto store.
Presses
Dial Key 1 2 3 4 5
11
2A B C 2
3D E F 3
4G H I 4
5J K L 5
6M N O 6
7P Q R S 7
8T U V 8
9W X Y Z 9
00
**
##’ , - .
Change/Replace a Stored Directory Number
Store a new number in its place.
9452_book_1ATT 10/5/00 3:18 PM Page 18
Table of contents
Other AT&T Telephone manuals

AT&T
AT&T CL2909 User manual

AT&T
AT&T Plant Series Service manual

AT&T
AT&T 1527 User manual

AT&T
AT&T TL72108 User manual

AT&T
AT&T 135 User manual

AT&T
AT&T Definity Generic 3 User manual

AT&T
AT&T Definity 7406 Plus User manual

AT&T
AT&T CRL32102 User manual

AT&T
AT&T 1856 - Corded Speakerphone User manual

AT&T
AT&T 7620 User manual