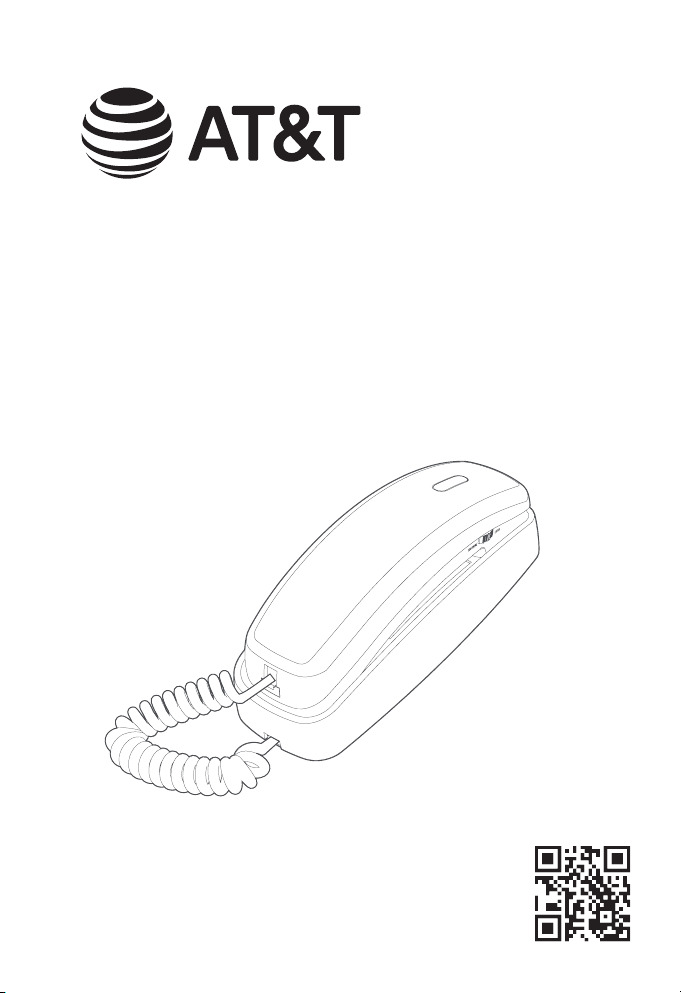
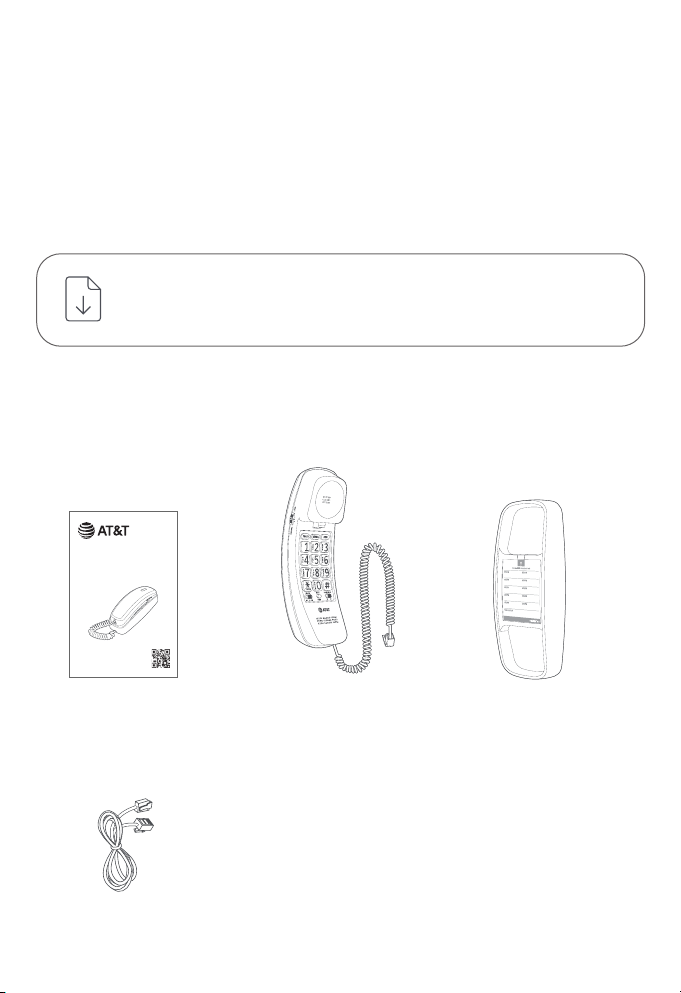
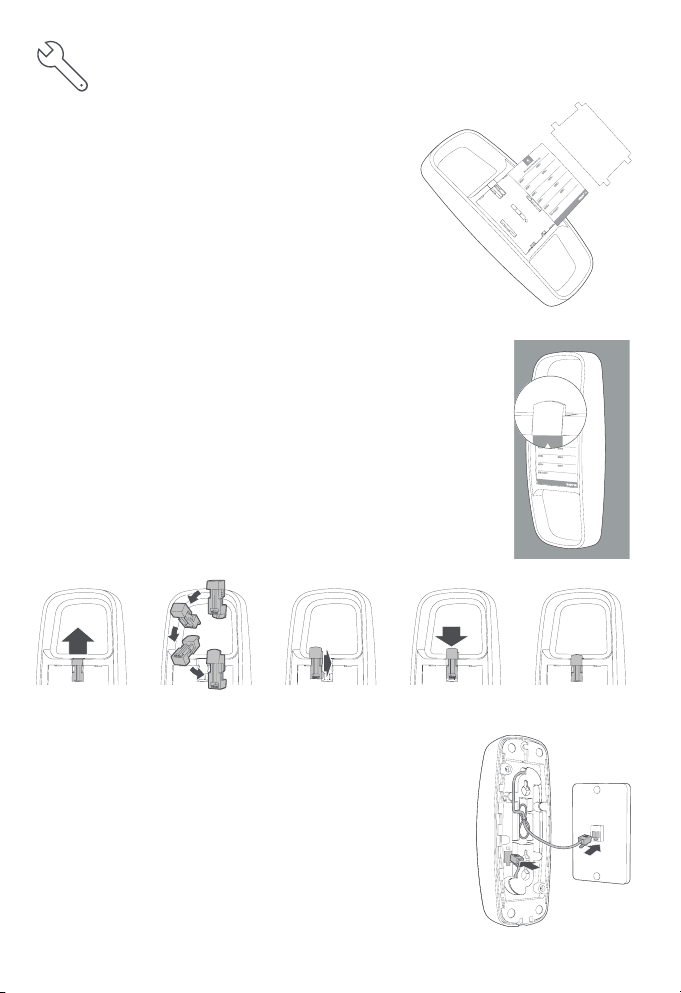
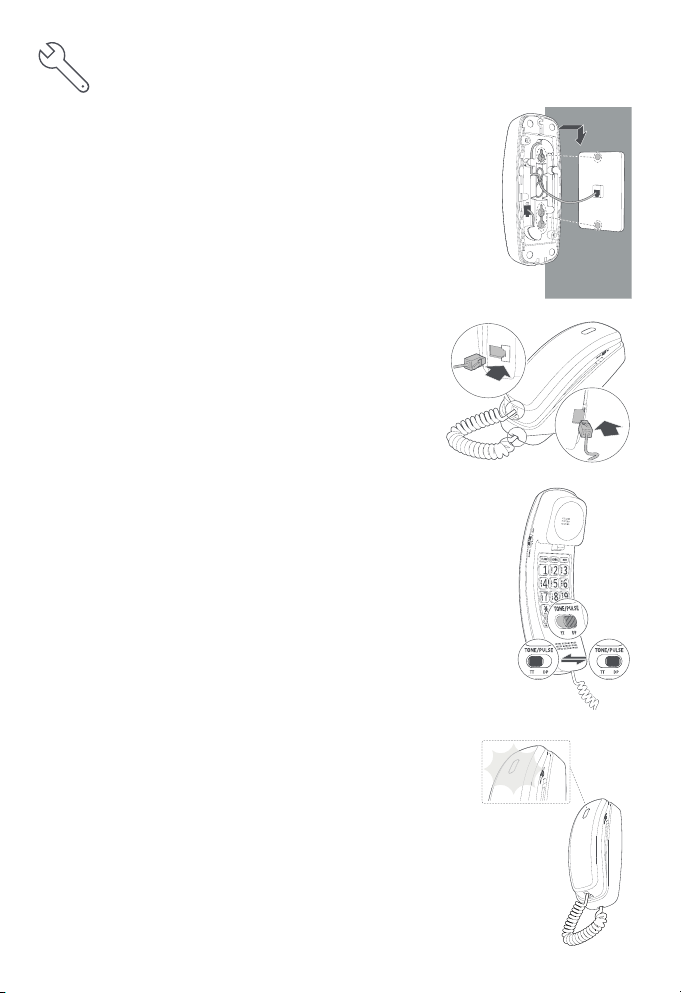
AT&T TRIMLINE 213 User manual

User's manual
TRIMLINE® 213
Memory telephone
Scan the QR code for
support information

Congratulations
on your purchase of this AT&T product. Before using this AT&T product, please read
the Important safety information section on pages 1-2 of this manual.
Both the model and serial numbers of your AT&T product can be found on the
bottom of the telephone base. Save your sales receipt and original packaging in
case it is necessary to return your telephone for warranty service.
For customer service, please visit our website at https://telephones.att.com
or call 1 (800) 222-3111. In Canada, dial 1 (866) 288-4268.
Parts checklist
Your telephone package contains the following items.
Telephone line cord
User's manual
This TRIMLINE® 213 Memory telephone user’s manual can also be
downloaded at https://telephones.att.com/manuals.
Corded handset with
coiled handset cord
Telephone base
User's manual
TRIMLINE® 213
Memory telephone
Scan the QR code for
support information

1
Important safety information
This symbol is to alert you to important operating or servicing instructions
that may appear in this user’s manual. Always follow basic safety precautions
when using this product to reduce the risk of injury, re, or electric shock.
Safety information
fRead and understand all instructions in the user’s manual. Observe all markings on
the product.
fAvoid using a telephone during a thunderstorm. There may be a slight chance of
electric shock from lightning.
fDo not use a telephone in the vicinity of a gas leak. If you suspect a gas leak, report
it immediately, but use a telephone away from the area where gas is leaking. If this
product is a cordless model, make sure the base is also away from the area.
fDo not use this product near water or when you are wet. For example, do not use
it in a wet basement or shower, nor next to a swimming pool, bathtub, kitchen sink
and laundry tub. Do not use liquids or aerosol sprays for cleaning. If the product
comes in contact with any liquid, unplug any line or power cord immediately. Do not
plug the product back in until it has dried thoroughly.
fInstall this product in a protected location where no one can trip over any line or
power cords. Protect cords from damage or abrasion.
fIf this product does not operate normally, see the Troubleshooting section of this
user’s manual. If you cannot solve the problem, or if the product is damaged, refer to
the Limited warranty section (pages 21 - 23). Do not open this product except
as directed in your user’s manual. Opening the product or reassembling it incorrectly
may expose you to hazardous voltages or other risks.
fIf this product has user-replaceable batteries, replace batteries only as described
in your user’s manual. Do not burn or puncture batteries — they contain caustic
chemicals.
fIf this product has a three-prong (grounding) plug or a polarized plug with one wide
prong, it may not t in non-polarized outlets. Do not defeat the purpose of these
plugs. If they do not t in your outlet, the outlet should be replaced by an electrician.
fFor pluggable equipment, the socket-outlet shall be installed near the equipment
and shall be easily accessible.
CAUTIONS:
fUse only the power adapter provided with this product. To obtain a replacement,
visit our website at https://telephones.att.com or call
1 (800) 222-3111.In Canada, dial 1 (866) 288-4268.
fThe applied nameplate is located at the bottom or near of the product.

2
Important safety information
Especially about corded telephones
fElectrical power: The telephone base of this corded telephone must be
connected to a working electrical outlet which is not controlled by a wall switch.
Calls cannot be made from the handset if the telephone base is unplugged,
switched o or if the electrical power is interrupted.
fPower adapter: The power adapter is intended to be correctly oriented in a
vertical or oor mount position. The prongs are not designed to hold the plug in
place if it is plugged into a ceiling, under-the-table or cabinet outlet.
Especially about telephone answering systems
Two-way recording: This unit does not sound warning beeps to inform the other
party that the call is being recorded. To ensure that you are in compliance with any
federal or state regulations regarding recording a telephone call, you should start
the recording process and then inform the other party that you are recording the
conversation.
SAVE THESE INSTRUCTIONS

3
Table of contents
Important safety information....................................................................................................1
Install...........................................................................................................................................................4
Wall-mount installation (optional) .........................................................................................6
Handset overview..............................................................................................................................8
Telephone base overview...........................................................................................................10
Operate....................................................................................................................................................11
Redial.....................................................................................................................................................11
Call waiting / three-way calling ..........................................................................................11
Mute.......................................................................................................................................................11
Ringer volume................................................................................................................................12
Ringer tone......................................................................................................................................12
Receiver (handset) volume...................................................................................................12
Temporary tone dialing...........................................................................................................13
Memory dialing..................................................................................................................................13
Memory features.........................................................................................................................13
Speed dialing..................................................................................................................................14
Troubleshooting................................................................................................................................15
For C-UL compliance......................................................................................................................16
FCC, ACTA and IC information.................................................................................................18
FCC Part 15...........................................................................................................................................20
Limited warranty ..............................................................................................................................21

4
Table/desk installation
This telephone includes a 7-foot line cord with a modular plug on each end. Use this
cord to connect the telephone to a modular wall jack.
1. Fill in directory card
Remove the directory card and write in
your own telephone number. Also write the
telephone numbers (or names) that you want
to store in each memory location (See Page
13). Reinstall the card and clear plastic
cover.
2. Connect handset to base
Plug one end of the coiled handset cord
into the handset, and the other end into
the base.
3. Connect line cord to telephone
Plug the long line cord into the jack on the
underside of the telephone base. Then, feed the
line cord through the channel provided so the
telephone sits at on your table or desk during
use.
4. Connect line cord to wall jack
Plug free end of the line cord into a modular wall
jack. Make sure it snaps rmly into place.
Install

5
5. Set dial mode switch
This product comes set in tone dialing (TT) mode. Make
sure you choose the correct dialing method (TT or DP);
touch tone dialing will not work if you have dial pulse
service.
6. Check for dial tone
Li the handset and listen for dial tone.
When there is an incoming call, the visual
ringer indicator light on the handset
ashes.
If you cannot hear a dial tone, refer to the
Troubleshooting section (Page 15) and
try to correct the problem.
To disconnect the telephone, squeeze the
clip on the modular plug and pull it out of
the jack.
Install

6
Wall-mount installation
1. Fill in directory card
Remove the directory card and write in
your own telephone number. Also write the
telephone numbers (or names) that you want
to store in each memory location (See Page
13). Reinstall the card and clear plastic
cover.
2. Reverse handset tab
To install the telephone on a wall jack, you must reverse
the small tab above the directory card. This tab holds the
handset in place when you hang up.
With the directory card and plastic cover removed, lift and
remove the handset tab.
Reverse the tab and reinstall it, as shown below. Then,
replace the directory card and cover.
3. Plug the line cord into the jack on the underside
of the base
Feed the line cord into the channel and wind it
around the mounting area. Feed the last portion
(as short as possible), through one of the slots in
the mounting area.
Wall-mount installation (optional)
180°

7
4. Install telephone base on wall jack
Hold the base up next to the wall jack, and plug in the line
cord. Then, push the base against the wall jack and down
until it is held securely by the mounting studs.
NOTE: If you cannot t the base onto the wall jack,
remove the four non-slip pads.
5. Connect handset to base
Plug one end of the coiled handset cord into the
handset, and the other end into the base. Then,
hang up.
6. Set dial mode switch
This product comes set in tone dialing (TT) mode. Make
sure you choose the correct dialing method (TT or DP);
touch tone dialing will not work if you have dial pulse
service.
7. Check for dial tone
Li the handset and listen for dial tone. When there
is an incoming call, the visual ringer indicator light on
the handset ashes.
If you cannot hear a dial tone, refer to the
Troubleshooting section (Page 15) and try to
correct the problem.
To disconnect the telephone, squeeze the clip on the
modular plug and pull it out of the jack.
Wall-mount installation (optional)

8
Handset overview
Handset
1Visual ringer
indicator
ÌFlashes when there is an incoming call.
2
Switch hook ÌLi the handset from the telephone base to
make a call.
ÌPlace the handset to the telephone base to end
a call.
3
MEM ÌWhen the telephone is not in use, press this key
and followed by a dialing key (0-9) to dial the
stored speed dial number.
4
REDIAL ÌPress to call the last dialed number.
5Dialing key pad
TONE ÌPress to switch to tone dialing temporarily during
a call if you have pulse service.
2
3
4
6
5
8
9
10
1
7
2
3
4
6
5
8
9
10
1
7

9
6TONE/PULSE ÌSwitch to le for tone dialing (TT); or switch to
right for pulse dialing (DP).
7PROG/MUTE ÌWhen the telephone is not in use, press this key
followed by a dialing key (0-9) to store the speed
dial number.
ÌWhile on a call, press to mute the microphone.
The other party cannot hear you, but you can
hear the other party. Press again to return to
two-way conversation.
8Receiver (handset)
volume switch
ÌSwitch between NORMAL and LOUD listening
volume.
9
FLASH ÌPress to activate custom calling services such as
call waiting or 3-way calling.
NOTE: You may have to press other buttons
before or aer pressing FLASH, as explained
in custom calling instructions provided by your
local telephone company.
10
Ringer volume
switch
ÌSwitch to middle to set the telephone to ring at
low volume (LO).
ÌSwitch to right to set the telephone to ring at
high volume (HI).
ÌSwitch to le to turn o the telephone ringer
(OFF). You can dial or answer calls normally when
the ringer is o. Other telephones in your home
will still ring; they are not aected by the switch.
Handset overview

10
Telephone base overview
2
1
Telephone base
1
Reversible handset
tab
ÌReverse the handset tab for wall-mounting. This
tab holds the handset in place when you hang up.
2Directory card ÌYou can write the telephone numbers (or names)
that you want to store in each memory location.

11
Redial
This telephone stores the last phone number dialed in redial memory. However, if
the phone is disconnected from the wall jack or if you are without phone service for
more than 30 minutes, redial memory will be lost.
The redial memory can accept numbers up to 31 digits long. The number will remain
in redial memory until you change it by dialing another telephone number.
f To dial the same number again, li the handset, and press REDIAL.
Erasing redial memory
f For privacy, you can erase the redial memory. Li the handset, then press 1and
hang up.
Note: If the number is more than 31 digits long, no digits will be stored in the redial memory.
Call waiting / three-way calling
f Press FLASH instead of pressing the switch hook to activate custom calling
services such as call waiting or 3-way calling.
f You may have to press other buttons before or aer pressing FLASH , as
explained in custom calling instructions provided by your local telephone
company.
Mute
f While on a call, press PROG/MUTE to mute the microphone. The other party
cannot hear you, but you can hear the other party.
f Press PROG/MUTE again to return to two-way conversation.
Operate

12
Ringer volume
The ringer volume switch allows you to turn the
telephone ringer OFF, or set it to ring at LO or HI volume.
You can dial or answer calls normally when the ringer is
o. Other telephones in your home will still ring; they are
not aected by the switch.
Ringer tone
You can choose from three dierent ringer tones. The phone comes set to Tone 2.
1. Press PROG/MUTE.
2. Press #.
3. Press 3for Tone 1.
- OR -
Press 6for Tone 2.
- OR -
Press 9for Tone 3.
- OR -
Press 0 to temporarily turn o the ringer.
Liing the handset and replacing it onto the base will turn the ringer back on.
Receiver (handset) volume
The receiver volume switch on the side of the
handset can be adjusted for a comfortable listening
level. The switch has three volume positions.
Operate

13
Temporary tone dialing
Temporary tone dialing is used only when you have rotary service. It allows you
to access to services that require tone signaling, including some tone-activated
computer systems (e.g., telephone banking).
To change from pulse (rotary) to tone dialing during a call:
1. Dial a telephone number with the dial switch set to DP (pulse).
2. Press TONE ; all buttons pressed aer this will send tone signals.
3. Aer you hang up, the phone automatically returns to rotary service.
Memory features
This telephone can store up to 10 dierent phone numbers, each up to 21 digits
long. Numbers will remain stored in memory unless you erase or change them by
entering other numbers.
Note: Numbers programmed into a memory location might not be retained if the telephone has
been unplugged from the line jack for a half hour or more.
Directory card: Remove the directory card. Write
your telephone number in the space provided.
Also write the telephone numbers (or names)
that you want to store in each memory location.
Reinstall the card and clear plastic cover.
Operate
Memory dialing

14
Speed dialing
Ten telephone numbers can be stored in standard speed-dialing locations. You can
dial any of these numbers by pressing two buttons.
To program numbers into memory:
1. Li the handset.
2. Press PROG/MUTE.
3. Press MEM.
4. Enter a digit (0-9) for the memory location where you want to store the number.
5. Enter the telephone number. You will hear a click when each button is pressed.
6. Press PROG/MUTE.
7. Hang up aer the number is entered correctly.
8. Repeat Steps 1-7 to store another number.
To dial:
1. Li the handset and listen for dial tone.
2. Press MEM.
3. Press memory location (0-9).
To erase numbers from memory:
To erase any number from memory, you can enter another number in the same
location.
Memory dialing

15
Troubleshooting
If you have diculty operating this phone, try the suggestions mentioned below.
For Customer Service, visit our website at https://telephones.att.com
or call 1 (800) 222-3111. In Canada, call 1 (866) 288-4268. Have the
serial number, found on the underside of your phone, available when contacting
Customer Service. Please retain your receipt as your proof of purchase.
To purchase accessories or replacement parts, contact Customer Service. Visit
our website at https://telephones.att.com or call 1 (800) 222-3111. In
Canada, call 1 (866) 288-4268.
No dial tone
f Make sure all plugs are connected properly. Inspect the line cord connections at
the modular wall jack and at the telephone. Also inspect the coiled handset cord
connections at both ends.
f Unplug the telephone and connect it to another modular wall jack. If it still does
not work, try another telephone; if neither telephone works, the problem is not
in your telephone. The trouble may be caused by local telephone company lines,
central oce equipment, or the wiring in your home.
Calls cannot be dialed, or are dialed slowly
f This product comes set in the tone (TT) mode. Make sure you choose the
correct dialing method (TT or DP) for the dial switch.
Touch tone dialing will not work if you have dial pulse service.
If you have tone dialing service, you can use either tone or dial pulse mode. If you
set the switch to TT, numbers are dialed much more quickly.
You can hear the other party, but other party can’t hear you
f The Mute feature might be activated.
f Try pressing PROG/MUTE.
f If this doesn’t work, try pressing PROG/MUTE again.
f If you program a number into memory while on a call, the other party will be
unable to hear you.
Telephone does not ring
f Make sure the ringer volume switch is not set to OFF.
f You may have inadvertently turned o the ringer. Press PROG/MUTE, #, 6,
PROG/MUTE.
f If there are several other phones on the same line, try disconnecting some of the
other telephones. Having too many telephones can also create problems such as
low ringer volume or impaired quality during calls.

16
For C-UL compliance
In compliance with the bilingual requirements for safety, caution, and warning
markings of Canadian Federal and Provincial/Territorial statutes and regulations,
the French version of Important safety information is included.
Mesures de sécurité importantes
Ce symbole vous alertera d’informations importantes ou d’instructions
d’entretien pouvant apparaître dans ce guide d’utilisation. Respectez
toujours les mesures de sécurité et de sécurité de base lorsque vous utilisez
ce produit, an de réduire les risques de blessures, d’incendie, ou
d’électrocution.
Information relative à la sécurité
fVeuillez lire et comprendre toutes les instructions de ce guide d’utilisation.
Relectez toutes les inscriptions apparaissant sur le produit.
fÉvitez d’utiliser le téléphone pendant un orage. Il pourrait y avoir un faible risque
d’électrocution.
fN’utilisez pas un téléphone près d’une fuite de gaz. Dans certaines circonstances,
une ammèche pourrait se produire lorsque l’adaptateur est branché à une
prise de courant, ou lorsque le combiné est déposé sur son chargeur. Ceci
est un événement fréquent associé avec la fermeture d’un circuit électrique.
L’utilisateur ne devrait pas brancher un téléphone dans une prise de courant,
et ne devrait pas déposer un combiné chargé dans le chargeur, si le téléphone
se trouve dans un environnement comportant une concentration de gaz
inammables ou ignifuges, à moins de se trouver dans un endroit où la
ventilation est adéquate. Une ammèche dans de tels environnements pourrait
provoquer une explosion. De tels environnements peuvent comprendre :
les endroits où de l’oxygène à des ns médicales est utilisé sans ventilation
adéquate; des endroits où se trouvent des gaz industriels (dissolvants de
nettoyage, des vapeurs de gazoline, etc.), une fuite de gaz naturel, etc.
fN’utilisez pas ce produit près de l’eau ou lorsque vous êtes mouillés. Par
exemple, ne l’utilisez pas dans des sous-sols humides ou sous la douche, ou
près d’une piscine, d’un bain, d’un évier de cuisine, ou d’une cuve de lavage.
N’utilisez pas de liquides, ou de vaporisateurs aérosol de nettoyage. Si le
produit entre en contact avec du liquide, débranchez immédiatement le l
téléphonique ou le cordon d’alimentation. Ne rebranchez pas le produit avant
qu’il soit complètement sec.
fInstallez cet appareil dans un endroit protégé où personne ne peut trébucher sur
les cordons d’alimentation ou la ligne téléphonique. Protégez les câbles contre
les dommages ou l’abrasion.
fSi le produit ne fonctionne pas correctement, consultez la section Dépannage
(Troubleshooting) du guide d’utilisation. Si vous ne pouvez pas régler le
problème, ou si le produit est endommagé, consultez la section Garantie limitée
(Limited warranty) des pages 21-23. N’ouvrez pas ce produit, sauf tel
qu’indiqué dans le guide d’utilisation. L’ouverture du produit ou le remontage
inadéquat pourrait vous exposer à des tensions dangereuses ou autres dangers.

17
For C-UL compliance
fRemplacez les piles uniquement tel que décrit dans votre guide d’utilisation.
N’incinérez pas et ne percez pas les piles — elles contiennent des produits
chimiques caustiques.
fL’adaptateur de courant est conçu pour être orienté verticalement ou installé
sur le plancher. Les broches ne sont pas conçues pour se maintenir en place si la
che est branchée dans une prise de courant au plafond, sous la table ou sous
une armoire.
fPour les produits à brancher à une prise de courant, la prise de courant doit être
installée près du produit, an d’assurer une accessibilité sécuritaire à la prise de
courant.
MISES EN GARDE:
fN’utilisez seulement l’adaptateur inclus avec ce produit. Pour obtenir une pièce
de rechange, visitez notre site Web au
https://telephones.att.com ou composez le
1-800-222-3111. Au Canada, composez le 1-866-288-4268.
fLa plaque signalétique appliquée est située au bas ou à proximité du produit.
Spéciquement en rapport avec les téléphones avec l
fAlimentation électrique : La base de ce téléphone sans l doit être branchée à
une prise de courant électrique fonctionnelle. La prise électrique ne doit pas être
contrôlée par un interrupteur mural. Les appels ne peuvent pas être eectués à
partir du combiné si la base n’est pas branchée, si elle est hors fonction ou si le
courant électrique est coupé.
fAdaptateur de courant: L’adaptateur de courant est conçu pour être orienté
verticalement ou installé sur le plancher. Les broches ne sont pas conçues pour se
maintenir en place si la che est branchée dans une prise de courant au plafond,
sous la table ou sous une armoire.
Spéciquement en rapport avec les répondeurs téléphoniques
Enregistrement deux voies : Cet appareil n’émet pas de bips d’avertissement qui
permettent de prévenir l’autre partie que vous enregistrez la conversation. Pour
assurer votre conformité aux règlements fédéraux ou provinciaux en rapport avec
les enregistrements des conversations téléphoniques, vous devriez informer l’autre
partie lorsque vous activez l’enregistrement.
CONSERVEZ CES INSTRUCTIONS

18
FCC, ACTA and IC information
If this equipment was approved for connection to the telephone network prior to July
23, 2001, it complies with Part 68 of the Federal Communications Commission (FCC)
rules. If the equipment was approved aer that date, it complies with the Part 68 rules
and with the Technical Requirements for Connection of Equipment to the Telephone
Network adopted by the Administrative Council for Terminal Attachments (ACTA). We
are required to provide you with the following information.
1. Product identier and REN information
The label on the back or bottom of this equipment contains, among other things,
an identier indicating product approval and the Ringer Equivalence Number
(REN). This information must be provided to your telephone service provider
upon request. For equipment approved prior to July 23, 2001, the product
identier is preceded by the phrase “FCC Reg No.” and the REN is listed separately.
For equipment approved aer that date, the product identier is preceded by
“US” and a colon (:), and the REN is encoded in the product identier without
a decimal point as the sixth and seventh characters following the colon. For
example, the product identier US:AAAEQ03T123XYZ would indicate an REN of
0.3.
The REN is used to determine how many devices you may connect to your
telephone line and still have them ring when you are called. In most, but not all
areas, the sum of all RENS should be ve (5.0) or less. You may want to contact
your telephone service provider for more information.
2. Connection and use with the nationwide telephone network.
The plug and jack used to connect this equipment to the premises wiring and
the telephone network must comply with the applicable part 68 rules and
technical requirements adopted by ACTA. A compliant telephone cord and
modular plug are provided with this product. It is designed to be connected to
a compatible modular jack that is also compliant. An RJ11 jack should normally
be used for connecting to a single line and an RJ14 jack for two lines, see
installation instructions in the user’s manual. This equipment may not be used
with coin telephone lines or with party lines. If you have specially wired alarm
dialing equipment connected to our telephone line, ensure the connection of this
equipment does not disable your alarm equipment. If you have questions about
what will disable the alarm equipment, consult your telephone service provider
or qualied installer.
3. Repair instructions
If this equipment is malfunctioning, it must be unplugged from the modular jack
until the problem has been corrected. Replacement to this telephone equipment
can only be made by the manufacturer or its authorized agents. For replacement
procedures, follow the instructions outlined under the limited warranty.
Table of contents
Other AT&T Telephone manuals

AT&T
AT&T 927 User manual

AT&T
AT&T EL52103 User manual

AT&T
AT&T 1477/1177 User manual

AT&T
AT&T Four-Line Intercom Speakerphone 944 User manual

AT&T
AT&T 922 User manual

AT&T
AT&T CRL32202 User manual

AT&T
AT&T 983 User manual

AT&T
AT&T MERLIN LEGEND Release 3.1 Calling Group User manual

AT&T
AT&T Velocity 3 User manual

AT&T
AT&T Four-Line Intercom Speakerphone 955 User manual