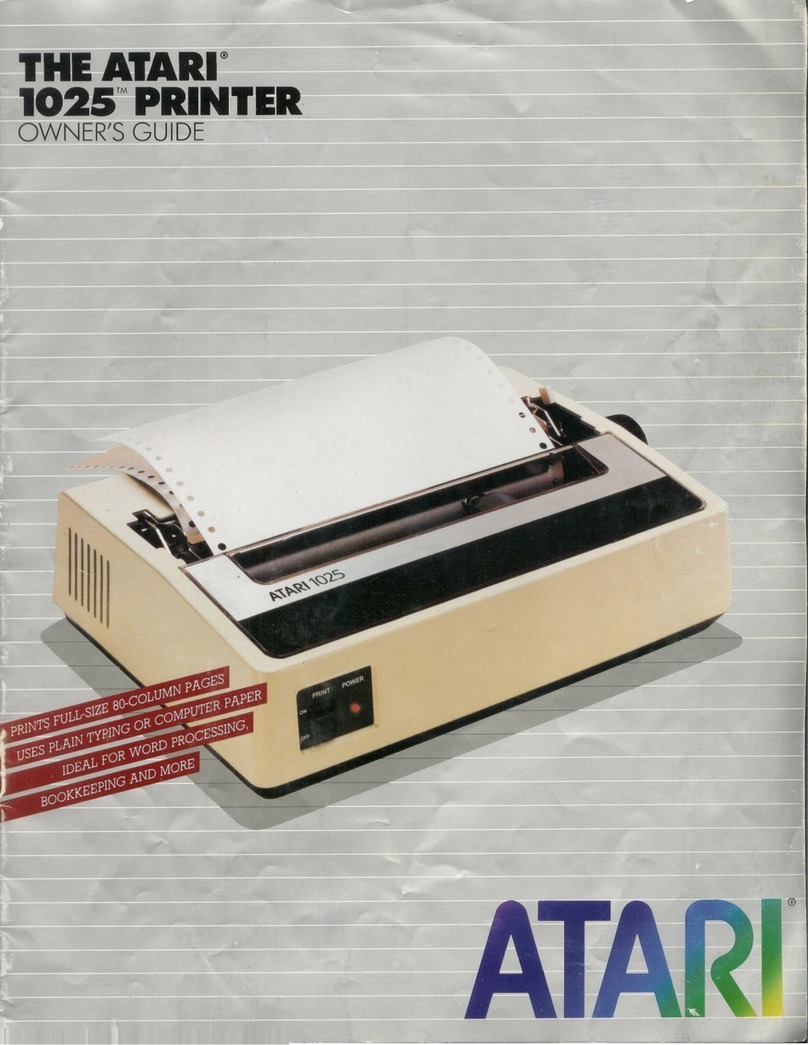
Atari 1025 User manual

AACP21 08979
TECHNICAL SERVICE DATA
FEATURES: COMPLETE SCHEMATICS •PRELIMINARY SERVICE CHECKS •TROUBLESHOOTING TIPS
EASY-READ WAVEFORMS •REPLACEMENT PARTS LISTS •SEMICONDUCTOR CROSS-REFERENCE

5AM5COMPUTERFACTS" ATARI
MODEL 1025
PRELIMINARY SERVICE CHECKS
This data provides the user with atime-saving service tool
which is designed for quick isolation and repair of printer
malfunctions.
CM
O
cc ^
CM
O
Check all interconnecting cables for good connection and
correct hook-up before making service checks.
Replacement or repair of CPU board or connectors may be
necessary after the malfunction has been isolated.
TEST EQUIPMENT AND TOOLS
TEST EQUIPMENT
Digital Volt/Ohm Meter
Scope
Logic Probe
TOOLS
Phillips Screwdriver
Small Screwdriver
Low Voltage Soldering Iron
Desoldering Iron
REPLACEMENT PARTS AND DESCRIPTION
ITEM NO. DESCRIPTION
D1 Diode, GP15B
D2 Diode, GP15B
D5 Diode, GP15B
D6 Diode, GP15B
F1 Fuse, 1.75A @250V Fast Acting
F2 Fuse, 1.75A @250V Fast Acting
M1 Print Head
M2 Carriage Motor
M3 Line Feed Motor
OSC1 Crystal, 7.37MHz
Q1 IC, HA17805P
Q8 IC, iP8051
T1 Power Transformer, 4LP-45191-137
SAMS Howard W. Sams &Co.
4300 West 62nd Street, P.O. Box 7092, Indianapolis, Indiana 46206 U.S.A.
The listing of any available replacement part herein does not
constitute in any case a recommendation, warranty or guaranty by
Howard W. Sams &Co. as to the quality and suitability of such
replacement part. The numbers of these parts have been compiled
from information furnished to Howard W. Sams &Co. .by the
manufacturers of the particular type of replacement part listed.
Reproduction or use, without express permission, of editorial or pictorial
content, in any manner, is prohibited. No patent liability is assumed with
respect to the use of the information contained herein.
vp) 1986 Howard W. Sams &Co.
4300 West 62nd Street, P.O. Box 7092, Indianapolis, Indiana 46206 U.S.A.
Printed in U.S. of America 86CP14977 DATE 8-86

PRELIMINARY SERVICE CHECKS (Continued)
@®@ '.'..:
PINS 18, 19
7.37MHz
Q8
10.5V AIN CONTROl
(2H)@)(4F

MISCELLANEOUS ADJUSTMENTS
FIRST CHARACTER PRINTING POSITION ADJUSTMENT
Loosen screws fastening Carriage Motor to bottom cover.
Turn motor assembly alittle one way or the other so that
when the power is turned ON, the print head returns and
stops at the home sensor position within tolerance, see
Figure 1. If changing position of motor assembly does not
correct the print position, change the engagement position
of the carriage synchro-belt on the pulley by one or two
teeth.
1mm
1mm I
CN10>- #e
•0.55-0.75mm
Home
Sensor
DETECTOR
LEVER
aFigure 1
PLATEN/PAPER SEPARATOR ADJUSTMENT
Remove the upper cover, loosen the paper separator
screws. Adjust the clearance between the platen and the
paper separator for approximately 0.5mm. Tighten the
paper separator screws, see Figure 2.
Figure 2
PRINTHEAD ADJUSTMENT
Print head adjustment should be performed after repair of
printer mechanism, carriage assembly frame, or print head.
Loosen carriage shaft screws on the sides of the printer
mechanism. Move carriage shaft forward or backward until
gap between platen and print head is between 0.45mm and
0.5mm.
ATARI
MODEL 1025

©
©
PRELIMINARY SERVICE CHECKS (Continued)
SERVICE CHECKS
MATCH THE NUMBERS ON THE INTERCONNECTING DIAGRAM AND PHOTOS WITH
THE NUMBERS ON THE SERVICE CHECKS TO BE PERFORMED.
POWER SUPPLY
(A) If the Printer is dead check Fuse F2.
(B) Check Diodes D5 and D6 for shorts.
(C) If Diodes D5 and D6 are good, check Power
Transformer (T1) by substitution.
(D) Check for 26V at anode of Diodes D26 and D46.
If 26V is missing check Main Control Board by
substitution.
(E) Check for 5V at pin 2of Regulator IC (Q1), if 5V is
missing check Fuse F1.
(F) If Fuse F1 is open, check Diodes D1 and D2 for
shorts.
(G) If Diodes D1 and D2 good, check Regulator IC
(Q1) for ashort.
(H) Replace Fuse F1 and check for 10.5V at pin 1of
Regulator IC (Q1).
PRINTER CARRIAGE ASSEMBLY DOES NOT MOVE
(A) Turn Printer OFF, move carriage assembly to the
right. Turn Printer ON. Carriage assembly
should move to Home position.
(B) If carriage assembly does not move, check for
26V at pins 5and 6of Connector CN4.
(C) If 26V is missing, check the power supply.
(D) If the 26V is present, check for 7.37MHz at pins
18 and 19 of the CPU IC (Q8).
(E) If frequency is not correct, check Crystal (OSC1)
by substitution.
(F) Check resistances of Carriage Motor winding
<M2).
(G) Check CPU IC (Q8) by substitution.
(H) Check the Main Control Board by substitution.
®
©
©
PRINT HEAD WILL NOT PRINT
(A) Check the print head cable Connector CN3 for
good connection.
(B) Check for 26V at anode and cathode of Diode
D26.
(C) Check resistances of print head.
(D) Check CPU IC (Q8) by substitution.
(E) Check Main Control Board by substitution.
MISSING DOTS IN THE PRINT PATTERN
(A) Clean print head face.
(B) Check print head Connector CN3 for good con-
nection.
(C) Check the flat cable for broken or pinched lead.
(D) Disconnect print head cable and check re-
sistances of the print head.
(E) Check the print head by substitution.
(F) Check Main Control Board by substitution.
LINE FEED WILL NOT OPERATE
(A) Check Connector CN5 for good connection.
(B) Check resistances of Line Feed Motor (M3).
(C) If the resistances of Line Feed Motor are good,
check for 26V at pins 5and 6of Connector CN5.
(D) Check Main Control Board by substitution.
(E) If Line Feed Motor is erratic or stops, check the
gear assembly on the left hand side for broken
gears.
PRINTER WILL NOT PRINT BY COMPUTER
COMMAND
(A) Check Connector CN6 or CN7 whichever is used
for good connection.
(B) Check the cable between the Computer and the
Printer by substitution.
(C) Check Main Control Board by substitution.
Ill
PRELIMINARY SERVICE CHECKS (Continued)
CNS
CN10
CN7
111 ©
©0SC1 ©
i.rrmt ©
\
SP1
mj XPIN IS
PIN IS
CNS
QE
C5
(5A)
(2H) (3Ej (4F) (5D) (BC)
MAIN CONTROL
BOARD
1i"«»<d ©
^•2SV
2SV\CN4
(2B) F*....l 1
(1E) 1.7SA
DS
35 CMS
^©
C2
2SV „ssv LS4S
B(3B) D26 ©10
CNS
12V 12V W
10.5V D4 -M- 10.SV
~* D3 -M- 10.5V
D2 -•§- 4.3V
(TF) D1 -M-4.3V
©
(is)
2G'
IE) 3n;
PLATEN
RIBBON
PROTECTOR
SNAP LEVER
PRINT HEAD
CARRIA6E TOP
SHAFT
CNS-3
•iON/i
©
F2
1.7SA
ON/OFF
SWITCH
POWER
TRANSFORMER
T1 :ic)
CN10>-
4A>
HOME
,|
rj—ISENSOR
i-t LU
h.WDETECTOR
LEVER
a
©
PRINT HEAD
®14 13 12 11 9 8 10
Ii I I I1'
4D ©
CARRIA6E
ASSEMBLY
(3A) (4B) (4C)
PLATEN
CN4-1
-<CNl-4
;cni-3
'CN1-2
-<CN1-1
CN4-:
CN4-3
CN4-4
PLATEN
0.3-0.35MI r
0.45-0.!
PRINT HEAD
PLATEN/PRINT HEAD
ADJUSTMENT
t- >
-* 5
o
N3
INTERCONNECTING DIAGRAM
IV
INTERCONNECTING DIAGRAM

PRELIMINARY SERVICE CHECKS (Continued)
DISASSEMBLY INSTRUCTIONS
UPPER COVER REMOVAL
Remove platen knob, remove top cover by pulling upwards.
Loosen two screws holding switch assembly and slide
switch assembly backwards. Remove two screws from in-
side the front of upper cover. Tip upper cover back and lift
upper cover from Printer.
PRINT HEAD REMOVAL
Remove upper cover, slide carriage assembly to right end of
Printer. Carefully remove print head cable plug from flat
cable connector located on the carriage assembly frame
beneath the print head. Push down print head lock lever
and lift head straight up from the carriage assembly frame.
PRINTER MECHANISM REMOVAL
Remove Printer upper cover. Slide carriage assembly to far
right. Disconnect print head cable plug and remove print
head. Remove the flat cable connector screw and the con-
nector from carriage frame assembly. Cut plastic tie-wraps
that fasten flat cable to side of printer mechanism. Dis-
connect all connectors attached to P.C. board. Remove
P.C. board. Set Printer up side down on asoft cloth and
remove four screws holding mechanism to the bottom of
cabinet. Carefully remove bottom case and set printer
mechanism upright.
MAIN CONTROL BOARD REMOVAL
Remove upper cover assembly. Disconnect all connectors
from Main Control Board. Remove print head assembly.
Remove flat cable connector from carriage frame assembly.
Cut the tie-wrap which fastens the flat cable to the right
side of printer mechanism. Remove two screws holding
Main Control Board. Lift Main Control from Printer.
PLATEN REMOVAL
Remove cabinet top cover. Lift scale bar to highest posi-
tion. Remove two screws holding paper separator and
remove paper separator. Remove Cring and platen bearing
from right end of platen. Pull left bearing side ways from
side plate. Turn platen bearing 90° and pull out platen.
CARRIAGE MOTOR REMOVAL
Remove the upper cover. Remove the Main Control Board,
disconnect Connector CN4. Cut the tie wraps securing the
Carriage Motor leads. Remove two screws fastening the
Carriage Motor to the bottom cover. Remove carriage belt
from Carriage Motor pulley. Lift Carriage Motor from
Printer.
PAPER FEED MOTOR REMOVAL
Remove upper case. Remove Main Control Board. Remove
two phillips screws fastening Paper Feed Motor to left side
of printer mechanism. Remove Paper Feed Motor from
Printer.
VI

.IMINARY SERVICE CHECKS (Continued)
PREVENTATIVE MAINTENANCE
ENVIRONMENT
Computers perform best in aclean, cool area that is below 80 degrees Fahrenheit and free of
dust and smoke particles. Even though home Computers are not affected by cigarette smoke
as much as commercial Computers are affected, it is better to maintain asmoke-free area
around the Computer. Do not block cabinet vents of any of the Computer system; Computer,
Monitor, Printer, or other power devices.
ELECTRICAL POWER
Variations in the line voltage can affect the Computer. Try to avoid these fluctuations by using
an AC receptacle that is on apower line not used by appliances or other heavy current demand
devices. Apower-surge protector, power-line conditioner, or non-interruptable power supply
may be needed to cure the problem. Do not switch power On and Off frequently.
KEYBOARD
Liquids spilled into the Keyboard can ruin it. Immediately after aspill occurs, disconnect the
Computer power plug from AC power outlet. Then, if circuitry or contacts are contaminated,
disassemble the Keyboard and carefully rinse the Keyboard printed circuit board with distilled
water and let it dry. Use acotton swab to clean between the keys. Use anon-abrasive contact
cleaner and lint-free wipers on accessible connectors and contacts.
DISK DRIVES
Clean the read/write heads of the Disk Drives about once amonth or after 100 hours usage.
Use only an approved head cleaning kit.
Handle carefully to preserve proper disk head alignment. Asudden bump or jolt to the Disk
Drives can knock the disk head out of alignment. If the disk drive must be transported, place
an old disk in slot and close door during transport.
Store disks in their protective covers and never touch the disk surface. Observe the disk
handling precautions usually found on the back of disk protective covers.
PRINTERS
Carefully vacuum the Printer regularly. Wipe surface areas clean using alight all-purpose
cleaner. Do not oil the machine. The oil will collect abrasive grit and dust. The dust will act as
ablanket. This can cause components to overheat and fail.
STATIC ELECTRICITY
Static electricity discharge can affect the Computer. In order to minimize the possibility, use
anti-static mats, sprays, tools and materials, and maintain good humidity in the Computer en-
vironment.
MONITOR
Use an isolation transformer with any Monitor that does not come as part of the system since
some Monitors use aHOT chassis (chassis connected to one side of the AC line). The face of
the Monitor should never be left on for long periods of time at high brightness level except
when pattern is being changed periodically. Use caution when cleaning anti-glare screens, to
preserve the glare-reduction feature.
VII

PRELIMINARY SERVICE CHECKS (Continued)
CHASSIS-TOP VIEW
VIII
ATARI
MODEL 1025

$fiMSCOMPUTERFACTS ATARI
MODEL 1025
_o
S
CM
CL
OPRELIMINARY SERVICE CHECKS
ENCLOSED
INDEX
SAFETY PRECAUTIONS
See page 29.
Page
Block Diagram 17
Disassembly Instructions 14
IC Pinouts and Terminal Guides 16
Line Definitions 15
Logic Chart 13
Miscellaneous Adjustments 14
Parts List 7,8,9
Photos
Chassis-Top View 4
Page
Photos (Continued)
Main Board 5,6,11,12
Safety Precautions 13
Schematics 2,3
Schematic Notes 13
Test Equipment 10
Troubleshooting 10
o
D
§5
i- >
-> 5
o
to
en
SAMS. Howard W. Sams &Co.
4300 West 62nd Street, P.O. Box 7092, Indianapolis, Indiana 46206 U.S.A.
The fisting of any available replacement part herein does not
constitute in any case arecommendation, warranty or guaranty by
Howard W. Sams &Co. as to the quality and suitability of such
replacement part. The numbers of these parts have been compiled
from information furnished to Howard W. Sams &Co. by the
manufacturers of the particular type of replacement part listed.
Reproduction or use, without express permission, of editorial or pictorial
content, in any manner, is prohibited. No patent liability is assumed with
respect to the use of the information contained herein.
£1986 Howard W. Sams &Co.
4300 West 62nd Street, P.O. Box 7092. Indianapolis, Indiana 46206 U.S.A.
Printed in U.S. of America. 86CP14977 DATE 8-86

T
c
M
P
CN6
<— DATA IN -
5
CN6 _
«C—COMMAND -
7
CN6
<SV READY-
10
CNB
<DATA OUT-
3
CNS
<
2
UCNB
T
E
R
£-
I-
13
ONE
12
CNB
a
CN6
3
cm
A
CN6
<r
B
CN5
<— DATA IN -
5
CN5
^—COMMAND -
7
CN5
4—SV READY -
10
CNS
4—DATA OUT-
3
CNS
2
i
CN!
11
CN
I
t
3
12
t
s
CNS
8
CN
£•
4
CN5
B
L17<£>
^$
<—«r
<r-4
<—(;
A PHOTOFACT STANDARD NOTATION SCHEMATIC
with MIUHHUJJU
©Howard W. Sams &Co., Inc. 1986
2SC2001K
TR7 SWITCH HD74LS05P
PART 0FQ2
DATA IN
COMMAND
5V READY
DATA OUT
TAKEN DURIN6
LINE FEED
ATARI
MODEL 1025

Bih'c
ST"
-et
5tMf
en
an
uj «
i
£S
iS as®
si 5
IAm
©
^
37' l
CNN
SE
<DCN
IHMHIHIIHIHHIIItlllHI
-wv—)
©L_
irfSx
r-UU
R
*
uicn
R
rg
*—
—inu.
Go—
in
0)1-
it
&—-WV—1>
3>
r-O
r-O
eeoi
O
o
o
a:
o
o
<
UJ
X
(_>
CD
APH0T0FACT STANDARD NOTATION SCHEMATIC
w.th nna
©Howard W. Sams &Co., Inc. 1986
"=8
!«©• O
o
10
g>
r- >
_,. 3
o
Ol
in
UJ
Q
I9
rUJ
UJ <
t- a.
CC 111
OUJ
u. en
POWER SUPPLY

UJ
<c o
2= °S
Uw «™» ^^
C.,5
O.60
I— Q
Q=UJS
WW
"T800
CO
5
yj CJ o
yUJ ^D.
Mixi *™^
mmJ U™ !«-««.
CO
2=
CM
Cv:
UJ
OGO
CHASSIS-TOP VIEW
4

5.0V
D5 D6 BCE F1 8CED27
TR12 TR11 TRA2 030 CN5 B C
TR2 L17 D55 034 CN6 BC
TR3 B C E
TR4
lit Iill
BCE CN7 ECB
TR5 TR6 TR1
EC B CN9
TR8
26.0V
NOTE: ARROWS ON IC'S INDICATE PIN 1UNLESS NOTED
AHoward W. Som« tflUtt!IMMaJ Photo
12

C13 C2 R3 D51 C3 PD50 D20 D18 D17 D15 D26 D22 D24 052 D54 031 033 C7 C10 C8 RM3 RM1 RM2 R32 R33 R20 RM5 C13 C14
O3*
r- >
o
012 R6 R7 R8 C17 R29 C6 D29 R30 R9 D43 C5 D45 D44 R15 R14 R13 R12 R11 R10 R19 R17 R18 C11 C21 C12 R21 C15
n

a>
Q
n
c
en
z*j~
oa>
JQ
fc
3H-
Q. Z
«* ^j
cc CO
o0-
(0 "53
111 o
a5
a
z<o
<<n
hCO
</> a.
U)
-J c
k-
(0 T3
1- O
QC C
<0)
0. §
to
UJ
1—
O
z*-*
Ooco i~- *
•V OCM CM •— CO r— \o in —VO in
?2 OCM? 1©1*co CO ^o-*
in vO Ov O——o\ ^en Ain —©—
££ —VO r~ o\ mmr~ m—OV —
to 1— cm r~- CM M—*—
»
CM N•* •* —M—
A A in,M in in min AI1*l*_JLX
a. ©—o«- oooo O oCM LU UJ CM CM CM
Ov CM —CM •~ T— *— •™ *~ —CM XX0\v- <3\
G<<
6<<< <<v-* Ov o
ITl —vo in oin r» r~ or- Oco ov in
<<Z
*5
<M in —K> ——r- r~ •— r-- VO mCM CM Ov
t-
<v— o«- —©©»- •— oir— ov mr- ^^^
•V in "^ min m^ \in \vom
££ \^ \«- v. —co CO *•>*• Ov
a<CO »- x—CM Ov 5\ OV OV _l _J CM —*-
t-
z
UJ
a. Oin ^in ©< <Oo<oin **—.- 00
K\ mCM in cm in vo ov a\ in en 2S
co 35
r- in in in
55 co 55 CO CO CO lo co CO CO CO CO i^ ^: ^
35 55 co
S
UJ
oin «-•
<6^^ in r~r>-
_i of <<< <<VO om^
a»— in omoCO CO CM <<
_UJ °tin vo mVO in *- «- r~ r~ *— r~ o-J _j in Ov o
(A q; UJ cc CM —o——© ©r- r» or-- vo t•«*• r- co ov in
<*— «— m«- in in m—m«M ov r~
88 r~- cm CM CM CO
2? a. CD CO
OO88 88 88 88CD
O88 888
3UJ UJ LU UJ UJ UJ UJ UJ UJ UJ UJ UJ UJ UJ UJ UJ UJ UJ
V)
a
i_ 6^^ m
To UJ Z<<<<<VO oin w
m o moN^ CO CO CM <<
a> h- 1- in VO K\ VO in <— ^- r- l»- l~ O-J _i in Ov O
XI ZOC <M —O—*- o©r» r~ or~ vo *•* r» co ov m
<
OL UJ UJ in in tn —in ov r~ t~ CM CM CM CO
UJ UJ LU
Ul UJ Ul UJ LU LU UJ UJ UJ UJ UJ UJ UJ
te 1- 1- 1— 1— H- 1— \~ \- H- i- h- i- i- H- 1- 1- 1- h-
ozzzzzzzzZzZzzzzzzz
*^
c
V
E
a> d
uirz
(0 t3H-
a. iL.
sCC
<
Va
k.
«*-»
o
CD
CD
<0
</> ^> vo >*
cc iuss QS5 a. -J ^
2Jm5
oi. d0. m
>zco co CO ^^ m©r~ in ©
1-
OCM < < <oco o»- CM Oj CM
CO CQ If— CM CM co -i minO<0
in cm uj uj CM CQ CO UJ ~M r~- •* in ©^ — ~
SH^Ii CD N
3° ©"• 1Ilii CO CO CO CO
D. CM CM CM
a
z
o
COO Scoco cm in vo CO in co co -v^^w
s333s3
o•£d
z
3i- L.
x: 3
Jb
1-
^™ iuJC CM -t- oo +•* +- CM +•
s¥+- Ov •«•i t- «
•o—i"> *mvo r» ON O"- *tn mvo co in ——in *eg
Cp CC Qi CC QC
S-K- 1^—1—1
—
UJ
(0
»- f» CO —•- ~*— MCM CM cm mm m •* sss in <•- cm mvol-
aaaoo QQQQQq o a a aQQ OOO-O-o
o
a
§5
r->
-> 5
o
N)

V)
3
(/>
0)
V)
d>
<
UJ
5
HI
o
<
-1
a.
LLI
rx
O
z
z•""
o
<c 2
°t
on cc
<
a.
o
UJ oc
0L
UJ *
I- r-
ZDC
<
a.
oS
co
Zw
gl
Q. z
oc £
o"\
</) «
UJ E
as
a>
E
a>
u
iS
Q.
a>
o
a>
a>
(0
oc
O
.o
DC Z
OI-
s<
Q.
Ui
aa
>- z
<«r O
-I .£
AC c
<i
a. 5
a
z
o
o
UJ
to
5,.
co <<co
< O 1*1 <
OO
co co co co
to
-8
o
o
—a>
u
•« CTI
dc
£1
—E
3CO
o-i_
CD O)
I- O
too.
t- o
cn —
>en
l_
>- 0>
en >
FCI)
cF
8
to ez
L. —
3
OI T3
Si
fT 3
OCD
.a
CO >-
o. a
in
i.
en —
<- O
oo
OK>
co—
c
+- xi c
<J *~ —
3
cCCD
c
C"~ J3
V®—
ep^ .o —
—L. CO CO
0)0 —>
c1<
OCO
V) 3>—
D<T3
C «
O—TJ
NOtl c
11—CO
00 —l
*o•-
l_ 1—Crt to
O-' •-- w
00 0> CN
OONN
^cm in m
00 00 CD 00
••
oo
zz
z z
Id LU
o o
_l _J
££
4) O
jn tn
>r
«
>
>
i_
*
»a.
3
|
:i
X
a!*
Lo
3:«>
<Cix:
Hien
<1
JC c
:3
aS:•
iin
oT3
)1
z4!«
£1L.
>e
c
£i<?
8

PARTS LIST AND DESCRIPTION (Continued)
When ordering parts, state Model, Part Number, and Description
ELECTROLYTIC CAPACITORS
ITEM
No. RATING MFGR.
PART No.
C3,C4
C11,
CI 2
2.2UF 35V
luF 35V
ITEM
No. RATING MFGR.
PART No.
CI 3
C15 2.2uF 35V
1uF 35V
CAPACITORS
ITEM
No. RATING MFGR.
PART No.
C22 .1 250VAC
RESIS1rORS (Power and Special)
ITEM
No. RATING
REPLACEMENT DATA
MFGR.
PART No. NTE
PART No. WORKMAN
PART No.
RM1,RM2
RM3
RM4
RM5
RM6
Resistor Network (1)
Resistor Network (2)
Resistor Network (3)
Resistor Network (4)
Resistor Network (3)
IHR-4-102 (5)
IHR-8-102JA (5)
IHR-8-512JA (5)
IHR-6-512 (5)
IHR-8-512JA (5)
(1) Contains four (4 ea.) 1000 ohms.
(2) Contains eight (8 ea.) 1000 ohms, 5%.
(3) Contains eight (8 ea.) 5100 ohms, 5%.
(4) Contains six (6 ea.) 5100 ohms.
(5) On unit number.
FUSE DEVICES
§5
r- >
o
in
ITEM
NO. DESCRIPTION
MFGR.
PART NO. NOTES
DEVICE HOLDER
F1.F2 1.75A @250V
Fast-Acting
COILS &TRANSFORMERS
ITEM
No. FUNCTION MFGR.
PART No.
OTHER
IDENTIFICATION NOTES
T1 Power Transformer 4LP-45191-137
MISCELLANEOUS
ITEM
No. PART NAME MFGR.
PART No. NOTES
LI 7Ferrlte Bead
LED 1LED Power, Red
Ml Print Head
M2 Carriage Motor
M3 Line Feed Motor
M4 Home Position Sensor
0SC 1Crysta
1
7.37MHz
SK Network
SW1 Switch Power
SW2 Switch Print
SW3 Switch Paper End Detector

TEST EQUIPMENT
Test Equipment listed by Manufacturer illustrates typical or equivalent equipment used by SAMS' Engineers to obtain
measurements and is compatible with most types used by field service technicians.
TEST EQUIPMENT (COMPUTERFACTS)
Equipment Name B&KPrecision
Equipment No.
Sencore
Equipment No.
OSCILLOSCOPE 1570A,1590A,1596 SC61
LOGIC PROBE DP51
LOGIC PULSER DP101
DIGITAL VOM 2830 DVM37,DVM56,SC61
ANALOG VOM 277
ISOLATION TRANSFORMER TR1 10,1604,1653,1655 PR57
FREQUENCY COUNTER 1803,1805 FC71.SC61
COLOR BAR GENERATOR 121 1A,1248,1251, 1260 CG25.VA62
RGB GENERATOR 1260
FUNCTION GENERATOR 3020
HI-VOLTAGE PROBE
VOM/DMM
Accessory probes
HV-44 HP200
TEMPERATURE PROBE TP-28
CRT ANALYZER 467,470 CR70
TROUBLESHOOTING
POWER SUPPLY
If Printer is dead, check AC Fuse (F2). If Fuse F2 is open,
check Diodes D5 and D6 for shorts. If Fuse F2 is good,
check for 31.5V AC between pins 3 and 4and 9.8V AC be-
tween pins 1and 2of Connector CN1. If voltages are not
correct, check Power Transformer (T1), Power Switch (SW1)
and AC Line Choke (RC).
Check for 26V at cathode of Diode D13. If voltage is not cor-
rect, check SCRs D7 and D10 and associated components.
Check for 10.5V at cathode of Diode D4. If voltage is miss-
ing check Fuse F1. If Fuse F1 is open, check Bridge Recti-
fiers (D1 thru D4), Voltage Regulator IC (Q1) and associated
components.
LINE FEED MALFUNCTION
Turn platen knob by hand, if platen does not turn smoothly,
check the gear assembly on the left side of the Printer. If
platen turns smoothly, check resistance of Line Feed Motor
(M3). Check for about 73 ohms between pins 1and 5, pins 3
and 5, pins 2and 6and between pins 4and 6of Connector
CN5. If Printer will not print while in self test mode, check
waveforms at pins 25 thru 28, and 33 thru 36 of Interface IC
(Q5). If waveforms are missing, check IC Q5 and CPU IC
(Q8) by substitution. If waveforms are present, check ICs
Q3 and Q4 and Driver ICs TR1A and TR2A.
CARRIAGE ASSEMBLY DOES NOT MOVE
Check the resistance of the Carriage Motor (M2), check for
60 ohms between pins 5and 1, pins 5and 3, pins 6and 2,
and pins 6and 4of Connector CN4. If resistances are not
correct replace Carriage Motor.
If the carriage assembly moves erratically check Home
Position Sensor (M4). Check Connector CN10 for good con-
nection. Check Interface IC (Q5) by substitution. Check IC
Q4.
MISSING DOTS IN PRINT PATTERN
Actuate self test mode. Check for 26V P-P signal at pins 8
thru 14 of Connector CN3. If signal is present on all pins,
check resistance of Print Head (M1). If 26V P-P signal is
missing at any pin check CPU IC (Q8) by substitution. If
signal is low about 5V P-P check Driver ICs (IRA3 and IRA4).
10

C13 C2 R3 D51 C3 PD50 D20 D18 D17 D15 D26 D22 D24 052 D54 031 033 C7 C10 C8 RM3 RM1 RM2 R32 R33 R20 RM5 C13 C14
O3*
r- >
o
012 R6 R7 R8 C17 R29 C6 D29 R30 R9 D43 C5 D45 D44 R15 R14 R13 R12 R11 R10 R19 R17 R18 C11 C21 C12 R21 C15
n
Other manuals for 1025
3
Table of contents
Other Atari Printer manuals