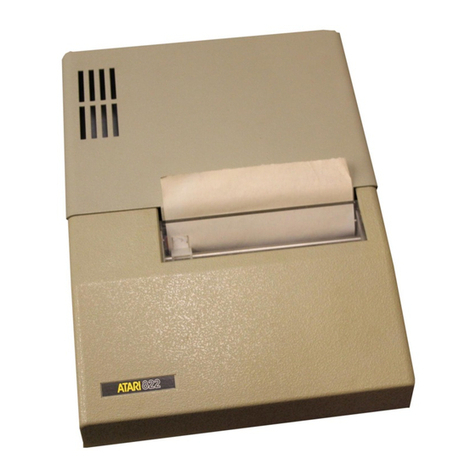
Atari 820 User manual

.•
""1
.
~
-
~
...
••
(1.
~
..
' . .
·.~
)I\.
ATARI
®
A Warner Communications Companya

INTRODUCTION
NOTE: Please read this manual carefully and
throughly before operating your ATARI® 820™
Printer. The Printer
is
a delicate machine and can
be damaged by improper
use.
The ATARI 820™
Printer
provides
printout
for
the
ATARI 400™ and
the
ATARI 800™ Personal Com-
puter Systems.
Many
combinations
of
hardware
and
software
make
use
of
the
Printer
.
Application
programs
provide
an
option
to
print
out
results
whenever
appropriate
. BASIC
and
ASSEMBLY
LANGUAGE
Cartridges
include
Printer
commands
,
as
does
the
ATARI
FILE
MANAGER
&
DISK
OPERATING SYSTEM (DOS),
which
is
available
for
the
ATARI 800.
UNPACKING
Your
ATARI 820
Printer
comes
with:
•
Printer
•
Bond
Paper
Roll
• Paper
Mandrel
•
Ribbon
•
Data
Cord
•
Instruction
Manual
•
Attached
Power
Cord
Save
your
original
packing
materials
and reuse
them
if
you
need
to
ship
your
Printer
or
store
it
for
long
periods
.
PAPER
------------------------~
MANDREL
----------------------~~
PAPER
RELEASE
LEVER
-
((((((((((((((((((((({{{(ff([{{(({(f(f{fl
PLA
TEN
;;::::=----~:1;;~
~~----
.-f
PRINTING
H
~
E~A
~
D
~~~~~~~!~~~=~~~~~~
~~i
RIBBON
DE:
1
LECTOR
RIBBON TENSION BRACKET
RIBBON
POST
SPOOL
CAM DRIVE
1

2
SETTING
UP
THE
PRINTER
((((((((fffflllllllllllllllll))))
DATA
CORD
l •
Follow
the
steps
below
to
set
up
your
Printer
and
connect
it
to
the
computer.
You
will
find
detailed
diagrams
and
instructions
on
the
following
pages.
DO
NOT
OPERATE THE PRINTER
WITHOUT
Rl
B-
BON
OR
PAPER
or
you
may
damage
the
printing
head solenoids.
1. Plug
the
power
cord
into
a 110-115
volt
AC
outlet
(with
the
power
switch
OFF).
2.
Plug
the
data
cord
into
the
serial 1/0
port
(labeled
PERIPHERAL
on
the
Console),
or
if
another
peripheral
is
in use,
into
the
jack
label-
ed
l/0
CONNECTOR
on
that
peripheral.
Plug
the
data
cord
into
either
jack
labeled
1/0 CON-
NECTOR
on
the
printer.
3.
Turn
the
power
switch
(PWR.)
ON.
4.
Press
the
paper
advance
(PAPER
ADV.)
button
once.
5.
Open
the
printer
cover
and
load
the
paper
around
the
platen
as
shown
in
the
photos
on
the
following
pages.
6.
Check
the
ribbon
for
proper
installation.
PRINTER
TIMEOUT
In
order
to
prevent
overheating,
the
Printer
is
equipped
with
an
automatic
timeout
cycle
which
halts
printing
for
approximately
three
seconds.
During
continuous
use
you
will
notice
that
the
printer
stops
periodically
and
then
continues.
Fre-
quent
timeouts
indicate
that
the
Printer
is
operating
CORRECTLY.
Any
attempt
to
override
the
timeout
period
is
likely
to
damage
your
Printer.

FRONT VIEW
D
a
ON
PWR
.
OFF
Paper Advance Button -Advances
paper automatically.
Power ON/OFF Switch
~.
POWNR.
~
Power Indicator Light
RIBBON
DEFLECTOR
RIBBON
TENSION
BRACKET
--------~~
RIBBON
POST
BLUE SPOOL
BACK
VIEW
Fuse
-Twist
in
direction
of
arrow
to
remove and replace fuse.
1/0 Connectors -Identical jacks ac-
com
modat
e data co
rds
from
Console
or
other peripheral components. Con-
nectio
ns
may be made
in
any order
with
either jack.
IMPORT
ANT
-Always replace a fuse only with one
that
has
the same electrical ratings.
(2
AMP,
Type
JAG)
TEAR BAR
RIBBON
GUIDES
PRINTING
HEAD
WHITE
SPOOL
INSTALLING
THE
RIBBON
Remove
the
two
ribbon
spoo
ls
from
the
package
.
The
white
spool
(containing
the
new
ribbon)
fits
on
the
right
ribbon
post;
the
blue
spool
(which
is
the
empty
one)
fits
on
the
left
ribbon
post. The
ribbon
must
follow
the
same
path
as
shown
in
the
illustra-
tion.
When
properly
installed,
the
ribbon
is
posi-
tioned
in
front
of
the
ribbon
tension
bracket
(the
side
closest
to
you)
, and
aro
und
the
two
ribbon
guides (the side
farthest
away
from
you)
.
Make
certain
the
ribbon
is
installed
correctly
befo
re
operating
the
Printer.
3

4
LOADING
THE
PAPER
Open
the
printer
cove
r
by
pulling
up
on
both
sides.
Check
the
printer
mechanism
-
make
sure
the
printing
head
is
on
the
left
side
as
shown
in
the
il-
lustration.
If
necessary, press
the
PAPER
ADV
.
but-
ton
to
position
the
printing
head
prope
rly
. This
must
be
done
before
attempting
to
load
the
paper
and
no
attempt
should be
made
to
position
the
printing
head
manually
.
DO
NOT
ATTEMPT
TO
LOAD
PAPER
OR
INITIATE
PRINTING
WHEN
THE
PRINTING
HEAD
IS
IM-
PROPERLY
POSITIONED
OR
YOU
MAY
DAMAGE
THE PRINTER.
The
manual
paper
advance
sho
uld
turn
cou
nt
erc
lo
ckwise
or
away
from
you
r
se
lf
with
moderate
pressure.
Turning
the
manual
paper
ad-
vance
clockwise
or
toward
yourself
could
damage
it
as
could
forcing
it
in
any
manner
.
For easiest
loading
,
cut
off
the
end
of
the
paper
to
create
a
smooth
edge. You
may
want
to
leave
the
paper
roll
out
of
the
Printer
and
off
to
the
side
when
loading,
or
you
may
want
to
place
the
roll
in
the
depression
behind
the
platen,
whichever
is
easiest
for
you
. Slide
the
mandrel
into
the
paper
roll.
If
loading
from
the
depression
behind
the
platen,
be sure
the
ends
of
the
mandrel
click
into
their
slots in
the
printer
case.
When
the
paper
is
properly
installed
the
Printer
will
close
easily
over
a
full
roll
(31f4-inch
diameter)
.
The
paper
roll
sits in
the
depression
behind
the
platen
. The
paper
passes
over
the
metal
bar
which
is
visible
below
and
behind
the
pl
aten
and
is
guided
by
two
white
nylon
sliders
on
the
bar.
It
feeds
around
the
platen
,
under
the
clear
plastic
paper
guide
,
the
ribbon
, and
the
tear
bar, and
then
out
the
top
of
the
Printer
.
Feed
the
end
of
the
paper
over
the
bar
and
under
the
back
edge
of
the
platen
.
To
advance
the
paper
around
the
platen
, press
the
PAPER
ADV.
button
and
hold
it
until
the
paper
comes
out
from
under
the
tear
bar
OR
turn
the
manual
paper
advance
counterclockwise
(away
from
yourself).
It
may
help
to
pull
the
PAPER
RELEASE
LEVER
forward
when
loading
the
pape
r.
Always
check
to
make
sure
the
paper
is
straight.
If
you
need
to
align
the
paper
around
the
platen
pull
the
PAPER
RELEASE
LEVER
forward
and
pull
up
the
paper
roll
a
few
inches.

PRINTER
COMMANDS
Each
piece
of
software,
whether
cartridge
, cassette,
or
diskette
based,
will
have its
own
commands
for
acti
-
vating
the
Printer.
Consult
the
software
manual
which
accompanies
the
software
you
wish
to
use
with
the
Printer
for
complete
Printer
commands.
BASIC-
When
you
are
familiar
with
ATARI BASIC
Computing
Language
you
will
know
how
to
use
the
com-
mands
PRINT and
LIST.
To PRINT
on
the
Printer
instead
of
the
screen,
replace
PRINT
with
LPRINT in
your
BASIC
source
programs
. To
LIST
on
the
Printer
, use LIST"P:"
or
L."P instead
of
LIST
.
(No
closing
quotation
marks
needed.)
Here
's an
example
:
Type
this BASIC Program
into
your
computer:
DO
THIS
TYPE
10 PRINT
"THE
PRINT
COMMAND
COMES
OUT
HE
t\
r
::
...
'di''hV'
20
LPRINT
"THE
LPRINT
COMMAND
COMES
OUT
When
you
RUN
this
program
each
PF:
I
NT
statement
will
appear
on
the
screen
like
this:
DO
THIS
TYPE
F.:
UN
PUSH
i;tfiiii;U*
SEE
THIS
Your
Print
er
will
print
only
the
L..PRINT
lines
like
this:
To see
your
program
again:
DO
THIS
TYPE
L I f:lT
PUSH
________
.._
.......__,_._.
-~~
~
~~~-""""'--w
~
THE
LPRINT
COMMAND
COMES
OUT
HERE.
SEE
THIS
5

6
To
get
a
printout
of
your
program
:
DO THIS
SEE
THIS
TYPE
LIST
•p
PUSH
10 PRINT
•THE
PRINT
COMMAND
COMES
OUT
HE
RE. •
l;ljiii;J:I
20
LPRINT
•THE
LPRINT
COMMAND
COMES
OUT
HERE."
The ATARI BASIC
REFERENCE
MANUAL
contains
a
complete
description
of
all
ATARI BASIC Language
com-
mands. (Also
see
News Bits
No
.
2)
ATARI
FILE
MANAGER
& DISK
OPERATING
SYSTEM (DOS) -The Disc
Operating
System
Manual
wiJI pro-
vide
you
with
complete
instructions
on
using
the
DOS
software
to
access
the
Printer and
other
peripheral
components
.
TECHNICAL
SPECIFICATIONS
AND
REORDER
NUMBERS
ATARI 820 Printer
• high resolution, 5x7
dot
matrix,
impact
printer
•
40
characters
per
line
•
horizontal
& vertical
alphanumeric
characters
•
power
switch and
indicator
light
• paper advance
button
• built-in
microprocessor
• crystal
controlled
for
data accuracy
Standard Roll Paper
•
width
, 3 7/8 inches x 3-1/4 inches
diameter
available at most stationary stores
Mandrel/Ribbon
•
Mandrel
, ATARI part no. C014853
• Ribbon, ATARI part no. C014854
Addressograph/Multigraph part no.
116-2395-366
Printing Speed
•
approximately
40-characters per second
•
automatic
3-second
timeout
for
cool
down
as
needed
Data
Cord
• ATARI part no. CA014122
Fuses
• 2
AMP
type
3AG fast
blow
ATARI part no.
46-2032001
Locations
for
ordering
inked
ribbons:
AM
OFFICE SUPPLY
7209
St.
Clair
Ave
.
Cleveland,
OH
44103
(Or
your
nearest
Addressograph/Multigraph
(AM)
dealer
.)
CALIFORNIA
RIBBON
&
CARBON
CO.
5816 Pine
Avenue
Maywood
, CA 90270
COLUMBIA
RIBBON
&
CARBON
MFG. CO., INC.
45
Executive
Drive
Plainview, NY 11803
KLEEN STRIKE MFG. CO., INC.
8173
Main
Street
Ellicott
City,
MD
21043
ENTRY
LEVEL
PRINTER
&
DISK
DRIVE
OPERATIONS
IN
BASIC
When
the
power
is
turned
OFF
on
a
computer,
all
programs
or
data
stored in
memory
are
lost
. The
810 Disk
Drive
is
used
to
store programs and
to
in-
sert (load) programs
back
into
the
computer
memory
bank
when
required
for
use.
Reference
I. To store and retrieve programs on diskette:
A. Power
up
disk
unit
B.
Put
diskette
in disk
unit
C.
Power
up
computer
D. To save
program
on
diskette-
1. Type in
program
2.
Type SAVE
"D:NAME"
3. BASIC
will
save
program
NAME
on
diskette
.
Sample Program
DO
THIS
TYPE
100
REM***
INTEREST
110 PRINT '
IF
YOU
TYPE
THE
AMOUNT
OF
P
RINCIPAL'
120 PRINT
'AND
THE
INTEREST
RATE
PER
Y
EAR,
I WILL'
130 .PRINT
'SHOW
YOU
HOW
YOUR
MONEY
GRO
WS,
YEAR
BY'
140 PRINT '
YEAR.
TO
STOP
MEr
PRESS
THE
BREAK
KEY,'
150
Pf\INT
160
PRINT
'PRINCIPAL';
165
INPUT
p
170 PRINT 'INTERE
ST
175
INPUT
R
180
LET
N
=1
190 PRINT
RATE';
200
LET
A•
P*I1tR
/
100
1
AN
210
PRINT
'YEAR=
';N
220
PRINT
'AMOUNT
='
;A
230
LET
N=Nt1
240
GOTO
190
RUN
SEE
THIS
PUSH
@,J;ii!M
to
stop
program
.
DO
THIS
TYPE
SAVE
•D:INTEREST"
Above
Program
is
recorded
on
Diskette
.
7

8
Reference
E.
To
retrieve
program
from
diskette-
1.
Type
LOAD
"
D:NAME
"
-------___,~
2.
Program can
now
be RUN, changed,
etc.
3.
Type
LIST
F.
To
RUN
program
from
diskette
1.
Type
RUN
"D:NAME"
If
you
have
a
program
that
you
wish
to
edit
(change), use
the
commands
listed
below.
Or,
if
you
wish
to
save
the
original
program
,
as
well
as
the
modified
version,
give
the
modified
program
a
new
name.
G.
To
save
listed
version
on
diskette-
1.
Type
LIST
"D:
NAME
",
N, M- Lines N
through
M
will
be
listed
to
diskette
H. To
retrieve
listed
version
on
diskette-
1.
Type
ENTER
"D:NAME"
This
will
merge
diskette
file
with
data
which
is
already
in
memory
.
2.
Type
LIST
Change
name
of
the
revised
program
if
yo
u wish
to
retain
both
the
original
and revi
se
d
progr
ams.
Sample Program
DO
THIS
TYPE
LOAD
•o:INTEREST"
SEE
THIS
DO
THIS
TYPE
100
REH***
INTEREST
110
PRINT
•
IF
YOU
TYPE THE AMOUNT OF p
RINCIPAL •
120
PRINT
•AND THE
INTEREST
RATE PER Y
EAR, I
WILL
•
130
PRINT
•sHOW
YOU
HOW
YOUR
MONEY
GRO
WS,
YEAR
BY•
140
PRINT
•rEAR.
TO
STOP
HE,
PRESS
THE
BREAK
KEY.
•
150
PRINT
160
PRINT
•PRINCIPAL•
I
165
INPUT P
170
PRINT
•INTEREST
RATE•;
175
INPUT R
180
LET
N=l
190
PRINT
200
LET
A=P*(
l+RilOO>AN
210
PRINT
•rEAR
= •
;N
220
PRINT
•AHOUNT
=•;A
230
LET
N•N+l
240
GOTO
190
RUN
RUN
UD!INTEREST"
DO
THIS
TYPE
SEE
THIS
LIST "D!INTEREST"
150,240
SEE
THIS
NOTE:
Number
s
100
to
140
were
deleted
from
program.

Reference
II.
To store and retrieve data on diskette
from a program:
A.
Power
up
disk
unit
B.
Put
diskette
in disk
unit
C.
Power
up
computer
D. To store
data
on
diskette
from
program-
1.
OPEN#1
,
8,0
,
"D
:
DATA
"
tells
computer
to
allow
writing
to
diskette
file
named
DATA
2.
PRINT#1
· X· "
"·
Y·
""·
Z
~
writes a
r~c~rd
~ha~
~~~·ks
like:
X,
Y,
Z
(X,
Y, & Z are numbers)
3. CLOSE
#1
When
program
is
done
this
tells
com-
puter
that
file
is
finished
.
Sample Program
Write
DO
THIS
TYPE
1
REM
THIS
PROGRAM
WRITES
A FILE
OF
CHECK
NUMBERS
AND
THEIR
AMOUNTS
5
DIM
CHECKNAME$1401
10
OPEN
t1,
s,
Q,
'D:CHECKS'
20
CHECKAMT=O:
CHECKNAME$=''
25
PRINT
'CHECK
NUMBER';
30
INPUT
CHECKNUM
35
IF
CHECKNUM=O
THEN
80
40
PRINT
'CHECK
AMOUNT';
50
INPUT
CHECKAMT
60
PRINT
'WHO
WAS
CHECK
TO';
70
INPUT
CHECKNAME$
80
PRINT
t1;CHECKNUM;•,•; cHECKAMT;•,•;cHECKNAME$
90
IF
CHECKNUM
>O
THEN
PRINT:
GOTO
20
100
CLOSE
t1
This
is
RUN
of
above
program
:
SEE
THIS
This
is
what
the
information
looks
like
on disk:
100,12.51,
JOHN
SMITH
101,24.34,GEORGE
BROWN
102,102.67,HEAVY CHEVY
0,0
9

10
Reference
E.
To
retrieve
data
from
diskette
from
program-
Sample Program
Read
SEE
THIS
1. OPEN
#1,
4,
0,
" D:
DATA
"
tells
computer
to
allow
reading
from
L
diskette
file
named
DATA
1
REM
THIS
PROGRAM
READS
A
FILE
OF
CHECK
NUMBERS
AND
THEIR
AMOUNTS
5
DIM
CHECKNAME$(40)
10
OPEN
t1o4o0o
"D:CHECKS'
15
PRINT 'CHECK t
AMOUNT
WHO
TO'
2. INPUT
#1
, X, Y, Z
Reads a record Iike
the
one created in
D
above
.
3. CLOSE
#1
Tells
computer
you
are
done
with
file.
PRINTER
Reference
I. To Print to Printer:
A.
Power
up
c
omput
er and Printer
B.
Type
LPRINT "HELLO" and HELLO
will
be
typed
on
Printer
C.
Wherever
you
can use PRINT
you
can use
LPRINT
See
the DISK OPERATING SYSTEM (DOS)
manual for complete details.
17
PRINT'----------
---------------
20
INPUT tllCHECKNUMoCHECKAMToCHECKNAME$
30
IF
CHECKNUM=O
THEN
100
40
PRINT CHECKNUMo'S'lCHECKAMToCHECKNAMES
50
GOTO
20
!00
CLOSE
tl
Sample Program
Read and print
SEE
THIS
I
REM
THIS
PROGRAM
READS
A
FILE
OF
CHECK
NUMBERS
AND
THEIR
AMOUNTS
5
DIM
CHECKNAME$<40)
10
OPEN
t1o4o0o
'D:CHECKS'
15
LPRINT 'CHECK t
AMOUNT
WHO
TO'
17
LPRINT
'-----------------------
20
INPUT tllCHECKNUMoCHECKAMToCHECKNAME$
30
IF
CHECKNUM=O
THEN
100
40
LPRINT CHECKo'$'lCHECKAMToCHECKNAME$
50
GOTO
20
100
CLOSE
t1
Print-Out
of
above
program
:
CHECK
t
100
101
102
SEE
THIS
AMOUNT
$12.51
$24.35
$102.67
WHO
TO
JOHN
SMITH
GEORGE
BROWN
HEAVY
CHEVY

~-----------------
Name
of
file
on
disk
Disk
1
is
assumed
p means
printer
Not
used in
disk
8 means
write
a
file
4 means read a
file
12
means
both
read &
write
IOCB
number
. Users can assign numbers
from
1
to
5.
Means
to
allow
access
to
a
device
or
file
.
11

Other manuals for 820
1
Table of contents
Other Atari Printer manuals