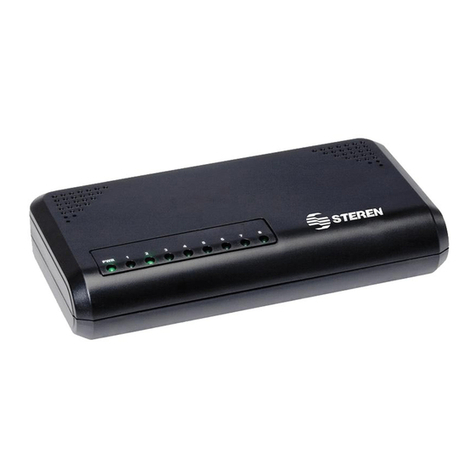
ATC ATC-408 Installation and operation manual

8-Port 10/100Mbps Fast Ethernet
Switch
ATC-408 Web management
Software User Manuals
http://www.szatc.com

Contents
1 Administrator........................................................................................................ 3
1.1 Authentication configuration...............................................................7
1.2 System IP Configuration..................................................................... 7
1.3 System status.......................................................................................9
1.4 Load default setting........................................................................... 11
1.5 Firmware update................................................................................ 13
1.6 Reset device.......................................................................................14
2 Port Management.............................................................................................. 15
2.1 Port configuration...............................................................................15
2.2 Bandwidth Control............................................................................. 16
2.3 Broadcast Storm Control.................................................................. 19
2.4 Max Packet length............................................................................. 21
3 VLAN Setting...................................................................................................... 24
3.1 Multi to 1 Setting................................................................................ 24
3.2 Tag Based VLAN............................................................................... 26
3.3 Port based VLAN............................................................................... 32
4 QoS Setting........................................................................................................ 33
4.1 Class of Service Configuration........................................................ 33
4.2 High Priority Queue Configuration.................................................. 34
4.3 Customization DiffServ..................................................................... 36
5 Port Security....................................................................................................... 40
6 Configuration Backup/Recovery......................................................................41
7 Logout..................................................................................................................45
8 Appendix Hyper Terminal Authentication....................................................... 46

3
1 Administrator
A. PC NIC setting
Start→Control Panel
Choose Internet Connection

4
Choose the Properties of Local Area Connection by clicking the right side of
the mouse.
Choose Internet Protocol (TCP/IP)

5
Use the following IP address:
IP address:192.168.2.X (X:1~254)
Subnet mask :255.255.255.0
Check switch IP address
Start→Run→cmd ping 192.168.2.1 –t <enter>

6
B. Login
Default IP : 192.168.2.1
Login ID :admin (Lowercase)
Password :system (Lowercase)
If you input error ID, the following screen will appear.
C. Welcome to 8 Port Smart Switch Web Controller

7
1.1 Authentication configuration
(Username & Password max:15 & can only use a-z","A-Z","0-9","_","+","-","=".)
1.2 System IP Configuration
Default IP:192.168.2.1
The following screen is the example of changing the IP address to

8
192.168.2.5.
IP
address, Subnet Mask, and Gateway at system IP Configuration diagram box
can be configured by user. IP178C/IP178CH also supports DHCP methods to
get IP address from DHCP server.
Login in new IP address 192.168.2.5

9
1.3 System status
This page is used to check the status of switch, including Switch MAC address
and software version.
The MAC address and version of .ATC-408 will be shown at system status
diagram box. Comment field can accept Aa~Zz, excluding special character.
A. Comment: It is a nickname of the management switch you can set.

10
B. Idle Time Security: It is an AUTO logout timer and the idle time range is
1~30 Minutes. If select Auto Logout and click update without filling in the idle
time blank, then the idle time will be default value.
Select Auto Logout (Default).
When idle time expires, following notice will appear.
Select Back to the last display.
Without any actions on this system, back to login screen will appear.
C. MAC address setting
The internet address, http://192.168.2.1/MACIDFix.htm, helps user to modify

11
MAC address setting.
For example:
MAC Address, 50:80:17:80:13:F0, is modified as following, 50:80:17:80:13:F1.
Click Update to get the new MAC address.
1.4 Load default setting
Clicking the “Load default setting” button will make the switch being set to the

12
original configuration.
Note: this change only concerns the switch behavior, excluding the change for
user name, password and IP configuration.
After Completing load process, the “System Setting Saved!!” will appear. Then
press “Reset Device” to take effect.

13
1.5 Firmware update
After pressing firmware update button, the switch will erase the older version
flash code first. Then enter file name at specific path, and the update will be
completed.
Enter password to execute firmware update process.
After pressing “Update” button, the old web code will be erased.

14
Enter correct path and press “UPDATE” button to complete firmware update
process.
Firmware update is finished.
1.6 Reset device
This page is used to reset device.

15
Press “Confirm” button to take effect for rebooting device.
2 Port Management
2.1 Port configuration
This page allows the user to configure operating mode of the physical port.

16
After completing the settings, press “Submit” button to take effect.
SMB status
After completing the settings, click update button to take effect. The setting will
be reflected at current status window.
2.2 Bandwidth Control
The range of bandwidth is from 128K to 8M, Full speed.
Example :
Set Port1→128K、Port2→256K 、Port3→512K 、Port4→1M、Port5→2M 、
Port6→4M 、Port7→8M 、Port8→Full

17
Results :
Results :SMB setting :100M Full,120m,60 length ,random data

18

19
2.3 Broadcast Storm Control
IP178C/IP178CH drops the incoming packet if the number of broadcast packet
in queue is over the threshold.

20
SMB setting:
Results:
A Broadcast Storm Control = Disable
B Broadcast Storm Control = Enable
Table of contents
Popular Network Router manuals by other brands
Mobily
Mobily NTC-40WV-QSG quick start guide
D-Link
D-Link DSL-2641B - Wireless G Router Quick installation guide
THOMSON
THOMSON GRASS VALLEY Profile XP PVS3000 installation guide

NETGEAR
NETGEAR RH340 - ISDN INET Gateway Router installation guide

KTI
KTI KS-616F installation guide

Minitar
Minitar MVA11A Quick installation guide
