10
Function of each part
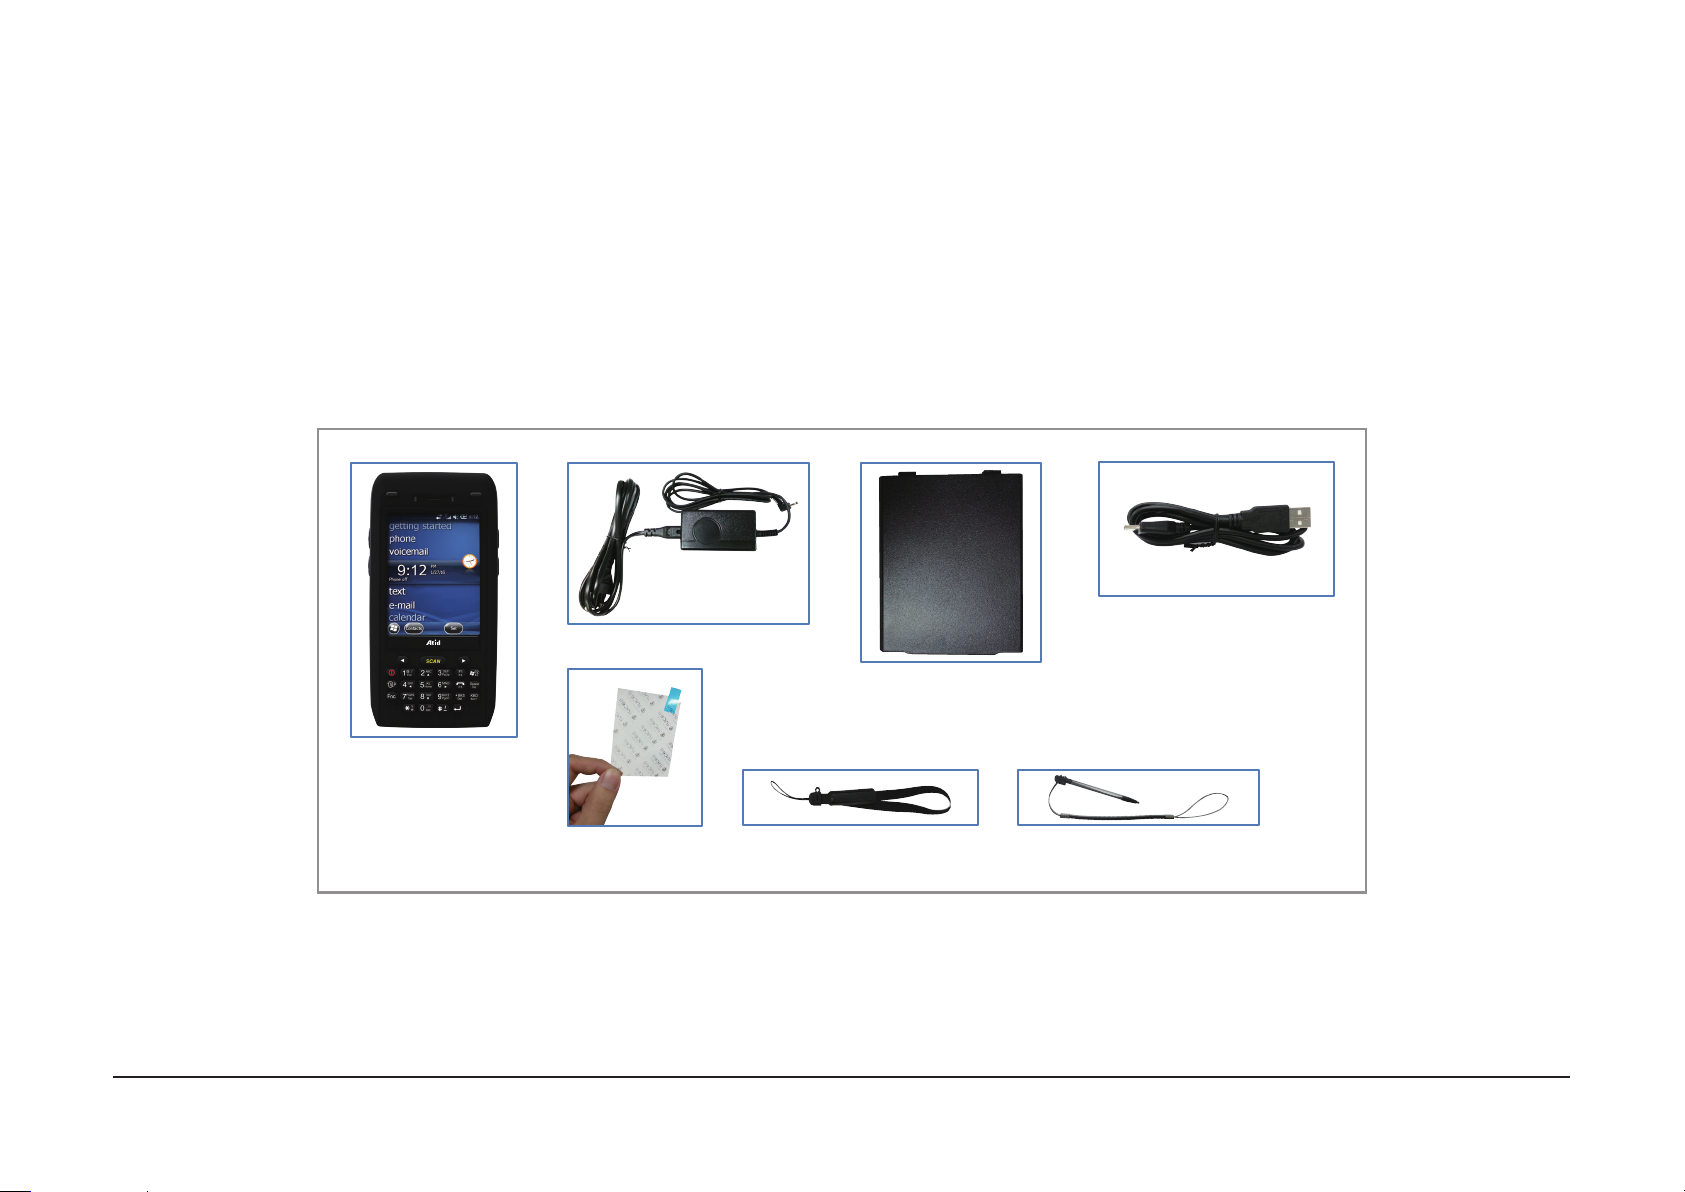
Chapter 2. Product composition
NAME FUNCTION
Enable you to connect and send data to PC via USB sync cable.Sync cable connector
Enable you to connect to earphone.
Earphone jack
Camera (option) It is possible to image capture and save.
Charger jack Enable you to connect to adaptor which provided from factory.
Enable you to connect to PC or charging the battery while using cradle.Cradle connector
Battery latch
Battery
Scan button (F7, F8)
It is possible to scan barcode or RFID tag
Scan key
Charger LED will be Red when the battery is charging, or will be green when it is charged completely.Charger LED
Enable you to input key value (number, alphabets, symbol), or executing assigned programs.Keypad
Display running programs, and could execute, use, and exit programs via to touch the screen.Touch screen
Internal HF
Hand strap hole
Enable you to perform a warm Reset, Press <Power>button simultaneously, Enable you to perform a hard ResetReset button
Enable you to conduct communicationMicrophone
Displays whether the wireless WLAN power supply
WLAN LED (option)
HF 13.56MHz Embedded module mounting location.
Enable you to attach a hand strap or a stylus for the convenience of using, while need to use the device for a long period time.
Build-in speaker, which could emit various sound eects.
Speaker
Enable you to install a UHF 900MHz tag reader module.
Enable to supply the power to the product.
Enable you to detaching and attaching the main battery.
It is possible to scan barcode or RFID tag
UHF Connecting port
You can use the camera with ash
Camera ash (option)
Laser beam emitted through this window. Please be careful the foreign substances and preventing from the damage.
Warning! Do not look at the laser beam directly.
1D/2D Scanner (option)