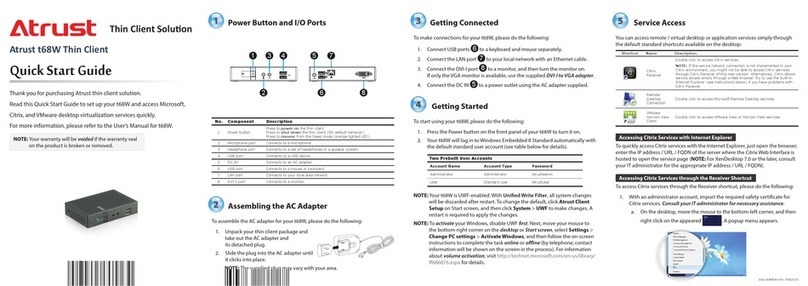
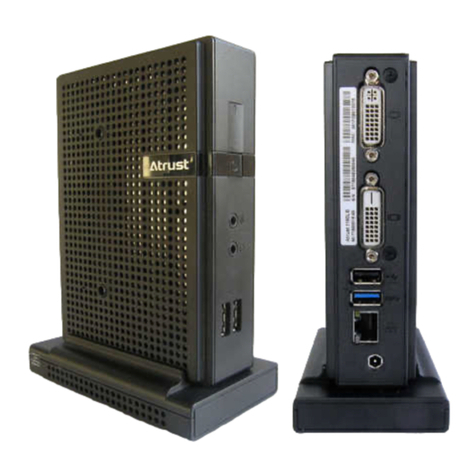
Atrust t180W User manual

Atrust t180W Thin Client
User’s Manual
Internal Draft 0.02
© 2016-17 Atrust Computer Corp.

UM-t180W-IoTEnt-EN-17063011

i
Copyright and Trademark Statements
Copyright © 2016-17 Atrust Computer Corp. All rights reserved.
This document contains proprietary information that is protected by copyright. No part of this document may be
photocopied, reproduced, or translated to another language without the prior written consent of Atrust Computer
Corp.
Disclaimer
Atrust Computer Corp. (“Atrust”) makes no representations or warranties with respect to the contents or use of
this document, and specically disclaims any express or implied warranties of merchantability or tness for any
particular purpose. Atrust is not liable for technical or editorial errors or omissions contained herein. The information
in this document is subject to change without notice.
Trademark Statements
Atrust is a trademark of Atrust Computer Corp.
Intel is a registered trademark of Intel Corporation or its subsidiaries in the United States and other countries.
Microsoft, Windows, Windows Server, RemoteFX, and MultiPoint are trademarks or registered trademarks of the
Microsoft group of companies.
Citrix, ICA, XenApp, XenDesktop, and VDI-in-a-Box are trademarks of Citrix Systems, Inc. and/or one or more of its
subsidiaries, and may be registered in the United States Patent and Trademark Oce and in other countries.
VMware, VMware View, and VMware Horizon View are trademarks or registered trademarks of the VMware, Inc.
PCoIP is a registered trademark of Teradici Corporation in the United States and/or other countries.
Other product names mentioned herein are used for identication purposes only and may be trademarks and/or
registered trademarks of their respective companies.

ii
About This User’s Manual
This manual provides detailed instructions on how to set up, use, manage, and maintain Atrust t180W thin clients.
Manual Structure and Subjects
Chapter Subject
1 Provides an overview of Atrust t180W thin clients.
2 Provides detailed instructions on how to set up Atrust t180W thin clients.
3 Provides the basics of how to use Atrust t180W thin clients.
4Provides instructions on how to congure client settings and customize Atrust t180W thin clients
with the Atrust Client Setup console.
Appendices Provides supplementary instructions on the maintenance of Atrust t180W thin clients.
Specications Provides detailed information on key components of Atrust t180W thin clients.
Notes, Tips, and Warnings
Throughout this manual, the notes, tips, and warnings in the following formats are used to provide important
information, useful advice, and prevent injuries to you, damage to your devices, or loss of data on your system.
NOTE
• A note provides important information for a specic situation.
TIP
• A tip gives a piece of useful advice to perform a task more eciently.
WARNING
• A warning provides crucial information that must be followed to prevent injuries to
you, damage to your devices, or loss of data on your system.

iii
Style Conventions
The following styles are used throughout this manual while referring to operational items on input devices,
hardware panels, or application interfaces.
Item Style Example
keys on the keyboard bold Ctrl + Alt + Pause, Ctrl + Alt, Alt + Tab
application windows or
entry lists
rst letter
capitalized ICA Connection list, RDP Connection list, View Connection list
buttons or tabs on a
window, toolbars, taskbar,
or menu
bold OK, Next, Save, Applications tab
options on a window,
screen, list, or menu bold Start the following program on connection, Remote Desktop
Services, Better Appearance (32-bit), Web Logon
selecting a series of options bold Applications > Citrix ICA, Applications > Remote Desktop,
Applications > VMware View, System > UWF

iv
Safety and Regulatory Information
Regulatory Statement
Federal Communications Commission Interference Statement
This equipment has been tested and found to comply with the limits for a Class B digital device, pursuant to Part
15 of the FCC Rules. These limits are designed to provide reasonable protection against harmful interference in a
residential installation. This equipment generates, uses and can radiate radio frequency energy and, if not installed
and used in accordance with the instructions, may cause harmful interference to radio communications. However,
there is no guarantee that interference will not occur in a particular installation. If this equipment does cause
harmful interference to radio or television reception, which can be determined by turning the equipment o and
on, the user is encouraged to try to correct the interference by one of the following measures:
• Reorient or relocate the receiving antenna.
• Increase the separation between the equipment and receiver.
• Connect the equipment into an outlet on a circuit dierent from that to which the receiver is connected.
• Consult the dealer or an experienced radio/TV technician for help.
FCC Caution: Any changes or modications not expressly approved by the party responsible for compliance could
void the user’s authority to operate this equipment. This device complies with Part 15 of the FCC Rules. Operation is
subject to the following two conditions: (1) This device may not cause harmful interference, and (2) this device must
accept any interference received, including interference that may cause undesired operation.
IMPORTANT NOTE:
FCC Radiation Exposure Statement
This equipment complies with FCC radiation exposure limits set forth for an uncontrolled environment. This
equipment should be installed and operated with minimum distance 20 cm between the radiator & your body.
This transmitter must not be co-located or operating in conjunction with any other antenna or transmitter.

v
Regulatory Information
WEEE (Waste Electrical and Electronic Equipment) Directive
In the European Union, this symbol indicates that this product should not be disposed of with
household waste. It should be deposited at an appropriate facility to enable recovery and recycling. For
proper disposal, please contact your local recycling or hazardous waste center.
Safety Information
WARNING
• Use only power supplies listed in the user instructions.
WARNING
• Risk of explosion if battery is replaced by an incorrect type. Dispose of used
batteries according to the instructions.
WARNING
• For safety, do not make mechanical or electrical modications to the equipment.
• Do not remove equipment covers and access any of the components inside the
equipment. Any access inside the equipment without an authorized or certied
technician may cause serious injuries and damage. For any problem, contact your
dealer for assistance.
• You should only make repairs as authorized by the product documentation.
Repairs, replacement, expansion, and upgrades not performed by a certied service
technician may cause injuries to you, damage your system, and void your warranty.

vi

vii
Table of Contents
Copyright and Trademark Statements i
Disclaimer i
Trademark Statements i
About This User’s Manual ii
Manual Structure and Subjects ii
Notes, Tips, and Warnings ii
Style Conventions iii
Safety and Regulatory Information iv
Regulatory Statement iv
Regulatory Information v
Safety Information v
1 Overview 1
1.1 Introduction 3
1.2 Features 3
1.3 Package Contents 4
1.4 Exterior Views 4
1.5 Panel Components 5
1.6 LED Indicators 7
1.7 Before Getting Started 8
1.8 Service Access with your t180W 9
2 Setting Up Your t180W 11
2.1 Positioning Your t180W 13
2.2 Assembling the AC Adapter 16
2.3 Getting Connected 17
3 Getting Started 19
3.1 Standard Shortcuts 21
3.2 Accessing Citrix Services 22
3.3 Accessing Microsoft Remote Desktop Services 28
3.4 Accessing VMware View and Horizon View Services 30
4 Conguring Client Settings 33
4.1 Atrust Client Setup 35
4.1.1 Interface Overview 35
4.1.2 Client Settings at a Glance 36
4.2 Conguring System Settings 37
4.2.1 System Tab Overview 37
4.2.2 Available Settings at a Glance 38
4.2.3 Securing the Access to Atrust Client Setup 39

viii
4.2.4 Conguring Shadow Settings for Remote Assistance 40
4.2.5 Updating Firmware from the Management Computer 42
4.2.6 Taking Snapshots for Mass Deployment or System Recovery 44
4.2.7 Deploying Systems with a Created Snapshot 45
4.2.8 Restoring Systems with a Created Snapshot 48
4.2.9 Enabling or Disabling the Appliance Mode 51
4.2.10 Conguring UWF (Unied Write Filter) 54
4.2.11 Enabling or Disabling Auto Registration 56
4.3 Conguring External Device Settings 57
4.3.1 Devices Tab Overview 57
4.3.2 Available Settings at a Glance 57
4.3.3 Conguring Settings for USB Storage Devices 58
4.3.4 Disabling or Enabling Attached Audio Devices 59
4.4 Conguring User Interface Settings 60
4.4.1 User Interface Tab Overview 60
4.4.2 Available Settings at a Glance 60
4.4.3 Conguring the Display of Standard Desktop Shortcuts for Quick Access 61
4.5 Conguring Service Access Settings 62
4.5.1 Applications Tab Overview 62
4.5.2 Available Settings at a Glance 63
4.5.3 Conguring Basic RDP Connection Settings 64
4.5.4 Accessing Remote Desktop Services 71
4.5.5 Conguring Advanced RDP Connection Settings 76
4.5.6 Conguring Basic ICA Connection Settings 89
4.5.7 Accessing Citrix Services 97
4.5.8 Conguring Advanced ICA Connection Settings 101
4.5.9 Conguring Basic VMware View Connection Settings 112
4.5.10 Accessing VMware View or Horizon View Services 114
4.5.11 Conguring Advanced View Connection Settings 116
4.5.12 Conguring Web Browser Settings 118
Appendices 121
A.1 Resetting Your t180W 123
A.2 Updating Firmware for Your t180W 124
Specications 127

Overview
1
This chapter provides an overview of your t180W thin clients.
1.1 Introduction
Desktop virtualization and simple endpoint devices 3
1.2 Features
Key features of Atrust t180W 3
1.3 Package Contents
Check your package contents 4
1.4 Exterior Views
Overview of thin client outside elements 4
1.5 Panel Components
Descriptions of front and rear panel components 5
1.6 LED Indicators
Descriptions of signals for LED indicators 7
1.7 Before Getting Started
About UWF (Unied Write Filter)
About the default user accounts
About the behavior of the system startup
8
8
8
1.8 Service Access with your t180W
Standard and customized desktop shortcuts 9


Overview
Introduction
3
1.1 Introduction
Desktop virtualization provides a new perspective to reconsider the design and implementation of an IT
infrastructure. In a desktop virtualization infrastructure, a station is no longer a cumbersome desktop, but simply an
endpoint device for users to access delivery services from the server(s).
With the introduction of the desktop virtualization technologies, you can considerably benet from:
• On-demand access to applications / desktops
• Centralized management of work environments
• Drastically reduced endpoint software / hardware issues
• Simplied system maintenance
• Improved system security
• More scalability with low-cost endpoint devices
1.2 Features
The key features of Atrust t180W thin clients are:
• Support for dual displays (DVI-I and DVI-D)
• Support for a wide range of desktop virtualization solutions from industry-leading companies:
Microsoft® Remote Desktop
Citrix® XenApp™, XenDesktop®, and VDI-in-a-Box™
VMware® View™ and VMware® Horizon View™
• Support for high-denition technologies:
Microsoft® RemoteFX®
Citrix® HDX™
VMware® View™ PCoIP®
• Simple click-access to various applications / desktops
• Built-in Atrust Client Setup as the local client management console

Overview
Package Contents
4
1.3 Package Contents
Please check your package contents. Ensure that all of the items are present in your package. If any items are
missing or damaged, please contact your dealer immediately.
Atrust t180W AC Adapter DVI-I to VGA Adapter
Quick Start Guide
NOTE
• Your package may not contain a hard copy of the Quick Start Guide. In this
case, a soft copy in PDF format will be provided.
1.4 Exterior Views
Right Rear View Left Front View
Rear Panel Front Panel

Overview
Panel Components
5
1.5 Panel Components
Front Panel Components
No. Sign Name Description
1Power LED Indicates the status of power.
2Power button
• Press to turn on the thin client.
• Press to shut down the thin client.
• Press to wake up the thin client when in Sleep mode.
3Microphone port Connects to a microphone.
4Headphone port Connects to a set of headphones or a speaker system.
5USB port
(USB 2.0) Connects to a USB device.
1
2
3
4
5

Overview
Panel Components
6
Rear Panel Components
No. Sign Component Name Description
6DVI-I port Connects to a monitor.
7DVI-D port Connects to a monitor.
8USB port
(USB 2.0) Connects to a USB device.
9USB port
(USB 3.0) Connects to a USB device.
10 LAN port Connects to a network.
11 DC IN Connects to an AC adapter.
6
7
8
9
10
11

Overview
LED Indicators
7
1.6 LED Indicators
Your t180W is equipped with a Power LED to indicate the state of power. The meanings of LED signals
are described as follows:
LED Signal Meaning
Power LED
O The client is o.
Blue The client is on.
Orange The client is in Sleep mode.
The LAN port of your t180W has two LED indicators showing the state of networking. The meanings of
LED signals are described as follows:
SPEED LED
(transmission rate)
LINK/ACT LED
(linking/transmission activity) Meaning
LED Signal
O O The client is not connected to a LAN.
O Amber blinking The client connects to a 10 Mbps LAN.
Orange Amber blinking The client connects to a 100 Mbps LAN.
Green Amber blinking The client connects to a 1000 Mbps LAN.
SPEED LED LINK/ACT LED

Overview
Before Getting Started
8
1.7 Before Getting Started
About UWF (Unied Write Filter)
Before getting started on client conguration through the Atrust Client Setup console or through the Windows
10 IoT Enterprise operating system, please note that in a session any changes to the system will not be kept by
default after the system restart. This is due to a special feature called UWF (Unied Write Filter) in your system.
By default, your t180W is UWF-enabled. Unied Write Filter (UWF) is a sector-based write lter intercepting all write
attempts to a protected volume and redirecting those write attempts to a virtual overlay. With UWF, all system
changes will only aect the session where the changes are made. After restart, all changes will be discarded.
You can change the default via the Atrust Client Setup console. It’s strongly recommended that you read the related
section in this user’s manual rst before making any changes to your system.
WARNING
• Please read the following section FIRST before making any changes to your system:
“4.2.10 Conguring UWF (Unied Write Filter)” on page 54.
NOTE
• As a thin client device, your t180W is mainly for access to remote or virtual desktops
on servers. With the limited and protected (UWF-enabled) hard disk space, it’s not
recommended to save data on your t180W. Instead, you can use storage spaces
over remote / virtual desktops, removable storage devices, or networks.
• In case that you need to copy a le to the protected volume, ensure that its size is
smaller than the free memory (overlay) space. Otherwise, your system may have
unexpected results or become unresponsive.
About Default User Accounts
There are two default user accounts for your Windows 10 IoT Enterprise: one is the standard, the other
administrative. The default credentials are shown as follows:
Type Account Name Password
Administrator Administrator Atrustadmin
Standard user User Atrustuser
NOTE
• The passwords are case sensitive.
About the Behavior of System Startup
Every time when the system is started up, it will automatically log in to Windows 10 IoT Enterprise using the default
standard user account as indicated in the preceding table about default user accounts.

Overview
Service Access with your t180W
9
1.8 Service Access with your t180W
With Atrust t180W, you can simply access desktop virtualization solutions from Microsoft, Citrix, and VMware, by
mouse-clicking. Two types of access shortcuts are available: standard and customized. The former is available on the
desktop of Windows 10 IoT Enterprise by default; the latter can be created and customized through the Atrust Client
Setup console.
Standard Desktop Shortcuts
You can nd the instructions on how to use standard desktop shortcuts to access on-demand applications or
desktops in chapter 3“Getting Started” on page 19 or in the Quick Start Guide for t180W.
Customized Desktop Shortcuts
You can nd the instructions on how to create and customize access shortcuts in chapter 4 “Conguring Client
Settings”on page 33.

Overview
10
Table of contents
Other Atrust Server manuals
Popular Server manuals by other brands
Polycom
Polycom KIRK 8000 Interface configuration guide

Brother
Brother NC-9100H Network user's guide
Gigabyte
Gigabyte G431-MM0 user manual

Fujitsu
Fujitsu FUTRO S940 operating manual
Advanced Industrial Computer
Advanced Industrial Computer RAC-15-F02 features and benefits
Jung
Jung SV-SERVER-01 Product documentation
