Au by Kiddi E IS01 PT Installation guide

Basic Manual
Contents
Introduction
Getting Ready
Learning the Basics
Character Input
Phone
Contacts
Mail
Internet
Multimedia
Applications
Settings
Wi-Fi
Global Function
Appendix/Index
Preface
Thank you for purchasing the EIS01PT. Before using your EIS01PT, be
sure to read the EIS01PT Basic Manual (this PDF manual) to ensure
correct usage. After you have finished reading this manual, store
this PDF manual and the printed manuals in safe places so you can
retrieve them whenever you need them.
◎The Basic Manual (this PDF manual) describes basic operations of the
EIS01PT major functions.
For detailed descriptions on various functions, refer to EIS01PT full
Instruction Manual (Japanese), which is available from the au homepage.
http://www.au.kddi.com/torisetsu/index.html
◎Downloading Manuals
You can download English version of the Basic Manual (this PDF manual),
Korean/Simplified Chinese/Traditional Chinese/Portuguese version of
the Basic Manual and the full Instruction Manual (Japanese) from the au
homepage.
http://www.au.kddi.com/torisetsu/index.html
◎Online Manual
Online manuals are also provided on the au homepage. They consist of
parts of the full Instruction Manual (Japanese) reorganized in a searchable
format.
http://www.au.kddi.com/manual/index.html
Safety Precautions
Be sure to read the Safety Precautions “安全上のご注意” in the
Instruction Manual (Japanese) to ensure proper usage of the
EIS01PT.
For troubleshooting, check the symptom of your EIS01PT in
au お客さまサポート (au Customer Support) on the au homepage.
http://www.kddi.com/customer/service/au/trouble/kosho/index.html
Before Using EIS01PT
• You cannot receive or make calls in a location where the signal
cannot be received, even within the service area. Calling may not
be available in a location where the signal is weak. If you move to
a location where the signal is weak during a call, the call may be
interrupted.
• The au phone is a digital cell phone and can maintain a high call
quality until the signal weakness reaches its limit.
Therefore, once the limit has been reached, the call may be
disconnected suddenly.
• Note that the au phone uses signals which may be intercepted
by a third party. (However, the CDMA/GSM system enables highly
confidential call communications.)
• The au phone is a wireless station which is compliant with the Radio
Act, and may be subject to inspections regulated by the Radio Act.
• When you insert the au IC-Card, the product number information of
your au phone is sent to the au server for the security and operation
status notification of the au phone.
• Always be considerate of others around you when using your au
phone in public places.
• For a child’s use, read the Basic Manual and give your child
instructions on proper use.
• The EIS01PT is a cell phone compatible with the international
roaming service. Each network service which is described in the
Basic Manual varies depending on the area or service. For details,
refer to the supplied Global Passport Owner’s Guide (Japanese).

Illustrations and Screenshots in This Manual
■Note on illustrations
The illustrations in this manual may look different from the actual cell
phone in shape, color and typeface. The key illustrations are also
simplified as shown below.
m h
v
p
b
■Note on screenshots
The screenshots in this manual are simplified and may look different
from the actual cell phone screens.
Notes on Cell Phone Use
Cell Phone Etiquette
The cell phone always emits weak radio waves when power is on.
Use the cell phone in an enjoyable and safe manner without forgetting
to be considerate of others around you.
■
Use of cell phones is not allowed in some places
•
Do not use the cell phone while you are driving. Doing so is both
dangerous and prohibited by law.
•
Using a cell phone in an aircraft is prohibited by law. Set “Airplane
mode” to on and turn the cell phone power off. However, the use of
cell phones is authorized by some airline companies. Contact your
airline company for more information.
■
Radio waves from cell phones may interfere with
medical electrical equipment
•
Some people close to you in crowded places such as packed trains
may be using a cardiac pacemaker. Turn the cell phone off in such
places.
•
Abide by the rules of hospitals and other medical institutions where it
is forbidden to use or carry cell phones.
■
Be considerate of where you use the cell phone and
how loudly you talk
•
Do not make calls in theaters, museums, libraries, and other similar
places. Turn power off or turn on manner mode not to disturb others
around you by ringtones.
•
Do not use the cell phone on a street where you might interrupt the
flow of pedestrians.
•
Move to areas where you will not inconvenience others on trains or in
hotel lobbies.
•
Refrain from talking in a loud voice.

•
Obtain the permission of other people before you take their photos
with the cell phone’s camera.
•
Do not record information with the cell phone’s camera in bookstores
and other locations where taking photos is not permitted.
Do Not Use the Cell Phone While Driving!
Turn off your cell phone while driving.
Do not use the cell phone while driving a car/motorcycle or riding a
bicycle. It may result in a traffic accident. Using a cell phone while
driving is prohibited by law. Using a cell phone while riding a bicycle
may also be punishable by law.
■
Prohibited!
•
Looking at a cell phone display
•
Talking on a cell phone while holding it
Water Resistance/ Dust Resistance
EIS01PT provides waterproofness of IPX5 equivalent*
1
and IPX7
equivalent*
2
and dustproofness of IP5X equivalent*
3
by firmly closing
the battery pack cover and external connection jack cover (by
company testing method).
*1 IPX5 (former JIS protection code 5) equivalent:
A phone keeps functioning after applying a jet flow of 12.5 L/min. from every direction from
a distance of approximately 3 m for at least 3 minutes using water nozzle of 6.3 mm inner
diameter.
*2 IPX7 (former JIS protection code 7) equivalent:
A phone keeps functioning after being slowly submerged to depth of 1 m in static tap water
at room temperature, left there for approximately 30 minutes and then taken out.
*3 IP5X (JIS protection code 5) equivalent:
A phone is protected to keep functioning safely after being placed in a chamber containing
dust particles with a diameter of 75 μm or less and left for 8 hours while the contents of the
chamber are subjected to agitation.
Checking the Contents of the Box
Check that all the contents are included.
Desktop holder microSD memory card
(2GB) (Sample)
EIS01PT Warranty (Japanese) Battery pack
• Instruction Manual (Japanese)
• Safety Precautions (Japanese)
• Setting Guide (Japanese)
• Global Passport Owner’s Guide (Japanese)
• au International Call Guide (Japanese)
The following items are not included.
• AC adapter
• Stereo earphones
• USB-microUSB conversion cable
• microUSB-stereo earphones conversion
adapter
• Purchase a specified charger (sold separately).
• The cell phone illustrations in this manual may look different from
the actual product.
Security Code and Password
You have to use each security code to operate the EIS01PT.
You can use the security code and other passwords described below.
Take care not to forget your security code and passwords, because
they are required for performing various operations and using
subscription services.
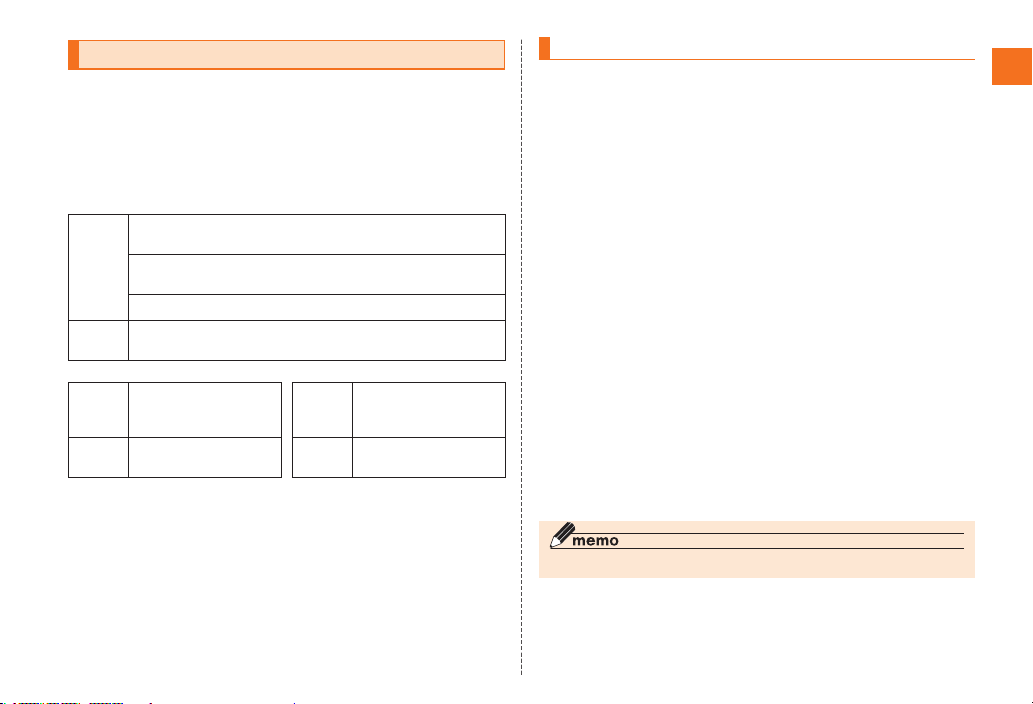
● Security Code
Usage
Example
①Using the Answering Service (Voice Mail) and Call Transfer
remotely from a fixed-line phone
②Making inquiries, applications, and changes while using
Customer Service Center voice guidance, and au homepage
③Configuring “Other settings” in E-mail settings
Initial
Setting
The four-digit number you wrote on your subscription form
● Pattern/PIN/Password
Usage
Example
Setting/Canceling Screen
lock, Remote control
lock, etc.
Initial
Setting
None
● PIN code
Usage
Example
Preventing unauthorized
use of the au IC-Card by
a third party
Initial
Setting
1234
PIN Code
If the PIN code is incorrectly entered three times consecutively, the
PIN code will be locked. Use the PUK code to unlock the PIN code.
■PIN code
You can set the EIS01PT to require PIN code entry every time the
power is turned on, to prevent unauthorized use of the au IC-Card by
a third party.
• At the time of purchase, the PIN code is not to be required to use
the phone. You can select “Lock UIM card” and set the PIN code to
be required. It is also required when setting “Lock UIM card”.
• The initial setting of the PIN code is “1234”. You can change the
PIN code to a four- to eight- digit number by selecting “Change UIM
PIN”.
■PUK code
Enter the PUK code when the PIN code is locked.
• PUK code is an eight-digit number given at the time of purchase,
and is printed on the back side of the plastic card where your au
IC-Card is attached.
• When you enter the PUK code, set a new PIN code by selecting
“Change UIM PIN”.
• If the PUK code is incorrectly entered ten times consecutively,
contact an au shop, PiPit or the Customer Service Center.
◎ The PIN code is not initialized even after executing “Factory data reset”.

Contents
Introduction ......................................... 1
Cell Phone Etiquette .................................................. 1
Do Not Use the Cell Phone While Driving! ................ 2
Water Resistance/ Dust Resistance .......................... 2
PIN Code .................................................................3
Contents .............................................. 4
Getting Ready ......................................6
Turning On the Power ..............................................9
Turning Off the Power ..............................................9
Sleep Mode .............................................................9
Setting Google Account ........................................10
Switching the Display Language to English ........... 10
Initial Setup of E-mail.............................................10
Setting au one-ID ..................................................11
Removing au IC-Card ...........................................12
Inserting au IC-Card..............................................12
Handling Precautions ............................................13
Inserting microSD Memory Card...........................14
Removing microSD Memory Card ........................14
Learning the Basics ..........................15
Selecting an Item ..................................................16
Displaying the Menu .............................................16
Using Status Bar ...................................................17
Using Notification/Status Panel .............................19
Switching Home Screen ........................................20
Using Widgets .......................................................20
Displaying Launcher Menu ...................................21
Character Input ................................. 24
Switching Character Entry Mode ..........................25
Switching Software Keyboards .............................25
Entering Hiragana/Kanji/Katakana
/Alphanumeric .......................................................25
Correcting Characters ...........................................26
Entering Emoji/Symbol/Emoticon ..........................26
Using Voice Input ..................................................26
Using Handwriting Input .......................................27
Switching Input Software .......................................27
Phone .................................................28
Making an International Call (001 International
Call Service) ..........................................................29
Contacts.............................................31

Mail .....................................................32
Setting Up the Earthquake Early Warning.............37
Internet ...............................................42
Using Address Bar ................................................42
Bookmarking a Web Page ....................................42
Using Bookmarks/History ......................................42
Multimedia .........................................43
Applications ...................................... 45
Settings ..............................................47
Wi-Fi ...................................................50
Global Function.................................51
For Overseas Use without Anxiety ........................51
Obtaining the PRL (Preferred Roaming List) .........52
Setting the Area .....................................................52
Setting the Data Roaming .....................................52
Setting the Time ....................................................53
Making a Call to Another Country (Including
Japan) from Your Travel Destination .....................53
Making a Call within the Same Country While
Overseas ...............................................................54
Appendix/Index .................................55

Names and Functions of Parts
③ ④
①⑮
⑲
⑤
⑯
㉒
⑰⑱
⑧⑦
⑥
⑩
⑳
㉑
⑨
⑫ ⑬ ⑭ ㉔
②
㉓
⑪

⑭ bBACK key
Returns to the previous screen.
⑮ vVolume key
⑯ Speaker
Emits ring tones, alarm tones, music, movie sounds, etc.
⑰ Camera lens
⑱ Mobile light
⑲ Infrared port
⑳ Charging terminals
Used when charging the EIS01PT with the desktop holder.
Battery pack/cover
microSD memory card slot
au IC-Card
Lock slider
① External connection jack cover
② External connection jac
Use it to connect the EIS01PT to the common AC adapter 03 (sold
separately), the microUSB cable 01 (sold separately), the 18pin-
microUSB conversion adapter 01 (sold separately), the microUSB
stereo earphones conversion adapter 01 (sold separately), etc.
③ Strap eyelet
④ pPower key
Turns on/off the power, and sets/disables sleep mode.
⑤ Built-in antenna
Do not cover the built-in antenna with your hand when you call,
transfer 3G data, use Wi-Fi, Bluetooth® or retrieve GPS information.
⑥ Charging indicator
Illuminates in red while charging.
⑦ Incoming indicator
Illuminates when receiving a call.
⑧ Earpiece
Emits the voice of the other party during a call.
⑨ Proximity sensor/optical sensor
The proximity sensor prevents operating the touch panel
incorrectly during a call. The light sensor detects the ambient
brightness and automatically adjusts the brightness of display.
⑩ Display
⑪ Microphone
Transmits your voice to the other party during a call. It is also used
for recording sounds.
Take care not to cover the microphone with your fingers when
making a call or recording sound.
⑫ mMENU key
Displays the option menu.
⑬ hHOME key
Use it to display the Home screen, etc.

Charging the Battery Pack
The battery pack is not fully charged at the time of purchase. Charge
the battery pack when you use the EIS01PT for the first time or when
the battery level becomes low.
◎The EIS01PT and the battery pack may become warm while charging.
This is not a malfunction.
◎Read carefully the Safety Precautions “安全上のご注意” in the Instruction
Manual (Japanese) before using the battery pack.
◎The charging time may become longer depending on the function used
while charging.
◎When using the EIS01PT with the specified charger (sold separately)
connected for charging, it may induce a repetition of small charging
periods/electrical discharges. Repeatedly charging the EIS01PT may
shorten the battery life.
◎If the EIS01PT charging indicator flashes in red, check that the battery is
correctly installed and that the cable is connected. If the indicator keeps
flashing, stop charging and contact an au shop or the Customer Service
Center.
◎The common AC adapter 01 (sold separately) is for use in Japan with
100 V AC power supply. Do not use it with single-phase 200 V power
supply or voltage transformers.
When charging with a specified AC adapter (sold separately), other than
the common AC adapter 01 (sold separately), outside Japan, use a plug
adapter according to your destination. Do not charge the EIS01PT using a
voltage transformer.
◎After charging, make sure to close the external connection jack cover
securely, and do not pull or twist it forcefully.
■Charging with the specified AC adapter (sold
separately) directly connected to the EIS01PT
The specified AC adapter (sold separately) is required. (The AC
adapter appearance in the figure may differ from the actual shape of
the adapter you are using).
The following is an explanation of how to charge your EIS01PT using
the common AC adapter 03 (sold separately).
◎When charging with the common AC adapter 01 (sold separately),
the common AC adapter 02 (sold separately) or an AC adapter with
specifications similar to the common AC adapter 02, use the 18pin-
microUSB conversion adapter 01(sold separately) to make the connection
to the EIS01PT.
◎When starting charging with the EIS01PT turned off, it automatically turns
on and the charging screen appears. Cell phone operation cannot be
performed when only the charging screen is displayed. When charging is
finished, the EIS01PT automatically turns off.
◎When charging the EIS01PT with the power turned off, if charging is
stopped while the battery is almost empty, a message prompting to
charge the battery may appear.

Charging time: Approx. 160 min
1Connect the microUSB
plug of the common
AC adapter 03 (sold
separately) to the
EIS01PT.
Open the external connection
jack cover, confirm the shape of
the connector and insert the plug
straight.
2Insert the power plug of the common AC adapter 03
(sold separately) into a power outlet.
The EIS01PT charging indicator illuminates in red and the battery level
icon changes to the charging icon on the display.
The charging indicator goes out when the charging is finished.
3After the charging if finished, pull the microUSB
plug of the common AC adapter 03 (sold separately)
straight out of the EIS01PT.
4Close the EIS01PT external connection jack cover.
5Pull the power plug of the common AC adapter 03
(sold separately) out of the outlet.
Turning On/Off the Power
Turning On the Power
1Hold down p for at least 1
second.
The logo is displayed. Wait a little for the
unlock screen to appear.
Drag to the circle in the center of the
screen to unlock.
If screen lock is set, the pattern/PIN/
password entry screen is displayed.
Drag a different icon to the circle in the
center of the screen to directly activate the
corresponding application.
◎When you turn on the EIS01PT for the first time, the initial setting screen is
displayed after you unlock the screen.
Turning Off the Power
1Hold down p for at least 0.5 second.
The phone options screen is displayed.
2[Power off] → [OK]
Sleep Mode
If no operation is made for a while, the screen is turned off temporarily
and the sleep mode is set.
You can also press p at any time to set the sleep mode.

■Canceling the sleep mode
1Press p while the sleep mode is set.
The unlock screen is displayed.
Initial Setup
When you turn on the EIS01PT for the first time, or after changing the
IC-Card or performing a factory data reset, the initial setting screen is
displayed after you unlock the screen.
Setting Google Account
Set up a Google account to use the online services provided by
Google.
1[言語変更] (Change language)
2Select a language.
3Tap the Android robot icon.
■
4[Create]
5Enter your first name, last name and a username →
[Next]
Follow the instructions displayed on the screen to complete the
account creation and setup.
■
4[Sign in]
5Enter your username and password → [Sign in]
Follow the instructions displayed on the screen to complete the
account setup.
◎If you did not set up a Google account by tapping [Skip] on the initial
setting screen, you can still set up an account in “Accounts & sync” or when
activating for the first time applications requiring to have a Google account.
Switching the Display Language to English
You can switch the display language for function names and other items
to English.
A part or all the contents may not be displayed in English depending on
the application.
1On the Home screen, [ ] → [設定] (Settings) → [言語
とキーボード] (Language & keyboard) → [言語を選択
(Select language)]
2[English]
◎The language can also be switched by tapping [言語変更] (Change
Language) on the initial setting screen.
Initial Setup of E-mail
When performing initial setup, an e-mail address is automatically set.
You can change this e-mail address.
1On the Home screen, [ ]
The E-mail screen is displayed.
2[OK]
When the e-mail setup is completed, your e-mail address is displayed.
Setting au one-ID
You can register a new au one-ID or one you have obtained
beforehand. Set the au one-ID in common in your EIS01PT and PCs,
and save the ID and password in your EIS01PT. By acquiring and
saving an au one-ID, you can use a variety of services provided by
au, such as “au kantan payment method”.
1On the Home screen, [ ] → [Settings] → [au one-ID
setting]
A screen about packet communication charges is displayed.
2[OK] → [auone-IDの設定・保存] (au one-ID setting and
saving)
Tap “au one-IDとは?” (“What is au one-ID?”) to display an
explanation in the browser.
3Enter the security code → [OK]
The security code is the four-digit number you wrote on your
subscription form. If the security code is incorrectly entered three
times consecutively during a single day, the setting operation will be
disabled until the next day.
■
4Enter the password → [利用規約に同意して登録]
(I accept the terms of service and register)
■
4お好きなau one-IDを登
録したい方はこちら (To
register an au one-ID of
your choice)
Follow the instructions displayed on
the screen to perform a new
registration.
The newly registered au one-ID is
set in common in the EIS01PT and
the PCs.
取得済みのau one-IDを
設定したい方はこちら (To
set an au one-ID you
already obtained)
Your au one-ID is set in common in
the EIS01PT and the PCs. Follow
the instructions displayed on the
screen to complete the procedure.
5[設定画面へ] (Go to setting screen) → Follow the
instructions displayed on the screen.
Set the necessary information to reissue a password.
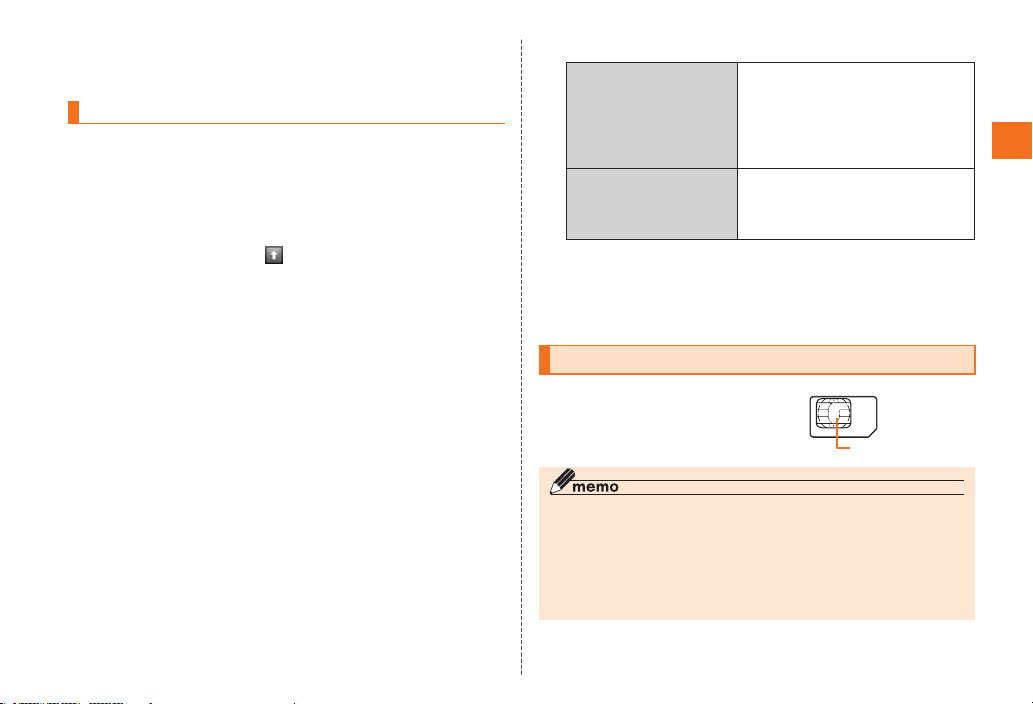
au IC-Card
An au IC-Card records your personal
information such as phone numbers.
IC (metal surface) part
au IC-Card
◎Follow the precautions below when handling the au IC-Card, otherwise it
may cause a malfunction or damage to the au IC-Card.
• Do not touch the IC (metal surface) part of the au IC-Card, or the IC-
Card terminal on the EIS01PT.
• Confirm the orientation before inserting the au IC-Card.
• Do not forcibly insert or remove the au IC-Card.
◎Be careful not to lose the au IC-Card after when removing it.

Removing au IC-Card
Turn off the power and remove the battery pack before removing or
inserting the au IC-Card.
1Turn off the EIS01PT and remove the battery pack.
2Pull the tab and move the tray straight out to remove
the au IC-Card.
Tab
Inserting au IC-Card
1Pull the tab and move the tray straight out.
2Place the au IC-Card on the tray with the IC (metal
surface) part side up and insert it securely.
Insert the au IC-Card in the tray according to the orientation of its
cutout.
Cutout
Using microSD Memory Card
You can set microSD memory cards (including microSDHC memory
cards) to the EIS01PT to save data. You can also keep contacts and
E-mail data in microSD memory cards.
◎Some applications may not be available if a microSD memory card is not
inserted.
◎The EIS01PT supports file size up to 2 GB.
◎A microSD memory card initialized on other devices may not function
properly on the EIS01PT. Initialize your microSD memory cards with the
EIS01PT.
Handling Precautions
• Do not remove the microSD memory card or the battery pack,
and do not turn off the EIS01PT or any other device while reading,
writing, playing back, saving or moving/copying data. It may
result to damage to the data stored in the EIS01PT or the microSD
memory card, or data loss.
• Do not drop or subject the EIS01PT to vibration or impact with a
microSD memory card inserted. It may result to damage to stored
data or data loss.
• Do not insert objects other than microSD memory cards, such
as liquid, metals or flammable items, into the microSD memory
card slot of the EIS01PT. It may result in a fire, electrical shock or
malfunction.
• We recommend using the included 2 GB microSD memory card
(sample) only with cell phones. Using it with other devices, or in
high-voltage or high-temperature and humidity environments may
cause damage or a malfunction to the microSD memory card or the
other devices.
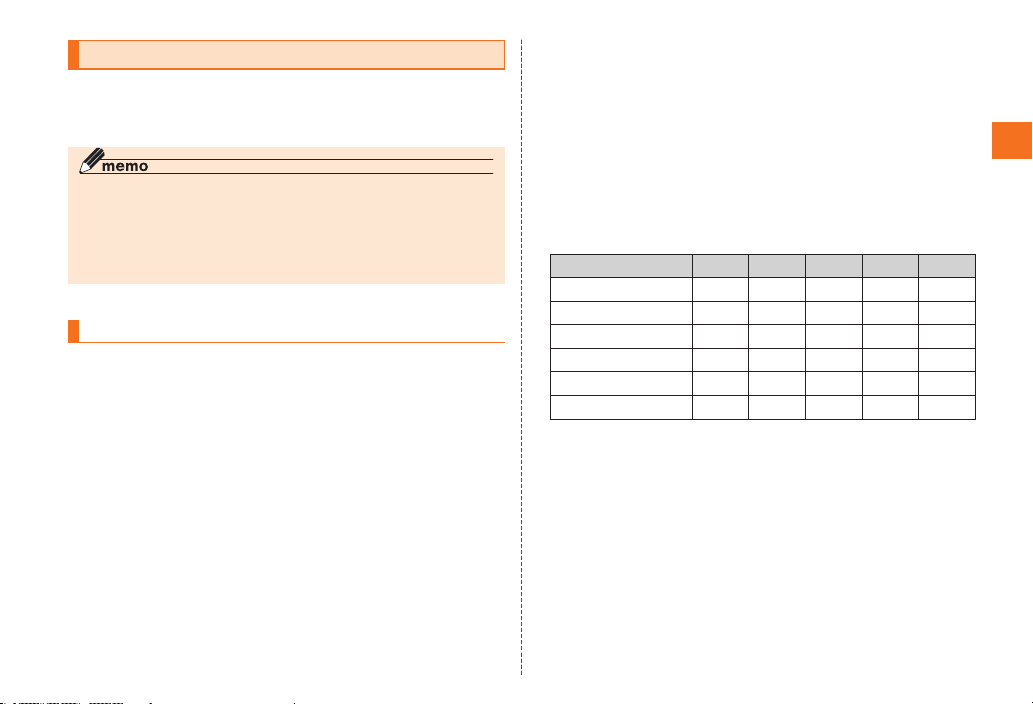
• The following microSD memory cards have been confirmed for
operation based on au criteria. For operation confirmation of other
microSD memory cards, contact each microSD memory card
manufacturer.
<microSD/microSDHC memory cards>
* 4 GB or more are for microSDHC memory cards.
Manufacturer 2 GB 4 GB 8 GB 16 GB 32 GB
○○○○ –
○○○ – –
○○○○ –
–––––
○ ○ –––
○––––
• ○: Confirmed operation –: Unconfirmed operation or not available
for sale (as of July 2011)
* Operation with EIS01PT is confirmed for microSD memory cards available for sale as of July
2011. For the latest information on operation confirmation, visit the au homepage or contact
the Customer Service Center.

Inserting microSD Memory Card
1Turn off the EIS01PT and remove the battery pack.
2Confirm the microSD memory card orientation and
insert it straight until it clicks.
Be sure to hear the click indicating that the memory card is locked.
Also, be careful not to remove your finger from the microSD memory
card until it locks as it may be ejected.
(Front side)
3Install the battery pack and close the battery pack
cover.
◎Do not touch the terminal part of the microSD memory card.
◎Insert the microSD memory card with the correct side up and in the
appropriate orientation.
Inserting a memory card forcefully into the slot could result in failure to
remove the microSD memory card or damage.
Removing microSD Memory Card
1Turn off the EIS01PT and remove the battery pack.
2Push the microSD memory card slowly until it clicks.
When you hear the click,
keep your finger onto the
microSD memory card and
let it come toward you.
The microSD memory card
will come out by itself. Be
careful as the card may
be ejected violently if you
remove your finger too fast
after pushing strongly.
3Pull slowly the microSD memory card.
Pull slowly and straight.
Depending on the microSD
memory cards, the lock
may not be release and
the microSD memory may
not come out. In this case,
remove it by gently pulling
in out with your finger.
4Install the battery pack and close the battery pack
cover.
◎Do not remove the microSD memory card forcefully. It may result to
damage or data loss.
◎The microSD memory card may be warm after a long time use. It is
normal.

Operating the Touch Panel
The display of the EIS01PT is a touch panel. You can operate the
EIS01PT by directly touching the items and keys displayed on the
screen with you finger.
■Tap/Double-tap
Gently touch a menu or an item
and immediately remove your
finger.
Tap quickly twice on the same
position to double-tap.
■Long-touch
Keep touching a menu or an
item.
■Slide
While gently touching the screen
with your finger, slide it to the
desired direction.
■Flick
Move (flick) quickly your finger
up, down, right or left on the
screen.
■Pinch out/Pinch in
While touching the screen with
2 of your fingers, move your
fingers apart (pinch out) or
closer (pinch in) to enlarge or
reduce the screen.
■Drag and drop
Touch gently the item you want
to move with you finger and
slide it to the desired location.
Remove your finger to drop the
item.
Touch Panel

Operation While Using Functions
Selecting an Item
Select a displayed item or icon by tapping the screen directly.
Displaying the Menu
■Option menu
The option menu is displayed by pressing m on a screen where
the menu is available.
Pressing m
Option menu
■Context menu
The context menu is displayed by long-touching a screen or item
where the menu is available.
Context menu
Long-touch a
registered contact

Viewing Home Screen
On the Home screen you can confirm the status and current settings
of the EIS01PT.
①Status bar
②Locator
③Widgets
④Shortcuts
⑤Folders
⑥Quick menu
⑦Menu icon
①
②
③
⑤
⑥
⑦
④
Using Status Bar
The status bar is displayed on the top of the EIS01PT display. The
notification indicators for a new mail or a missed call are displayed on
the left side of the status bar, while the status indicators showing the
signal strength, remaining battery and other EIS01PT statuses are on
the right side.
■Examples of notification indicators
Icon Description
Missed call
New e-mail message
New C-mail message
New Earthquake Early Warning
New PC-mail message
New Gmail message
(Green) Dialing/Receiving call/Calling
(Blue) Dialing/Receiving call/Calling with a Bluetooth®
headset connected
Putting a call on hold
Open network available
Schedule notification of the calendar
Ringing alarm
Playing music
Loading microSD memory card
microSD memory card unmounted
USB connecting
USB debug connecting
Home Screen and Launcher
Menu

Icon Description
Downloading/Installing data or application
Downloading/Finished downloading/Installing
Finished installing
• The downloading and installing icons are displayed
as animations.
Uploading data/Finished uploading data
• The uploading data icon is displayed as an
animation.
Application update available
EIS01PT software update available
EIS01PT memory full
Error/Warning notice
Indicators collected
■Examples of status indicators
Icon Description
Time
Timer set
Alarm set
( )
( )
( )
( )
( )
( )
( )
Battery level (while charging)
( ) Full/ ( ) Approx. 80% remaining/ ( )
Approx. 60% remaining/ ( ) Approx. 40%
remaining/ ( ) Approx. 20% remaining/ ( )
Approx. 10% remaining/ ( ) Battery level 0
• The icon while charging is displayed as an
animation. (The animation is not displayed when the
battery level is below 15%)
Icon Description
Signal strength (receiving electric field)*
Level 4/ Level 3/ Level 2/ Level 1/ Level 0/
Out of service area
3G data communication status*
Sending and receiving/ Sending/ Receiving/
Waiting
CDMA 1X data communication status*
Sending and receiving/ Sending/ Receiving/
Waiting
Wi-Fi signal strength*
Level 4/ Level 3/ Level 2/ Level 1/ Level 0
In roaming
Airplane mode set
Manner mode status
Standard manner mode (Vibrator on)/ Silent
manner mode (Vibrator off)
Microphone set to off during a call
Bluetooth® connection status
Connecting/ Waiting
Data synchronizing status
Synchronizing/ Synchronization failed
GPS in use
• The GPS positioning indicator is displayed as an
animation.
Character type
Hiragana-Kanji/ Full-width Katakana/ Half-
width Katakana/ Full-width Alphabet/ Half-width
Alphabet/ Full-width Numeric/ Half-width
Numeric/ Voice Input
* Displayed in green or blue when logged in with a Google account.
Table of contents
Other Au by Kiddi Cell Phone manuals

Au by Kiddi
Au by Kiddi IS11CA Specification sheet

Au by Kiddi
Au by Kiddi E09F Installation guide

Au by Kiddi
Au by Kiddi Medias Br IS11n by NEC Installation guide

Au by Kiddi
Au by Kiddi A5526K Specification sheet

Au by Kiddi
Au by Kiddi Assembly instructions Installation guide

Au by Kiddi
Au by Kiddi Toshiba A5529T Installation guide


