AUDAX 20-1 User manual

Audax Body Worn Video System
20-1 Chest Camera - User Guide
1. System Components
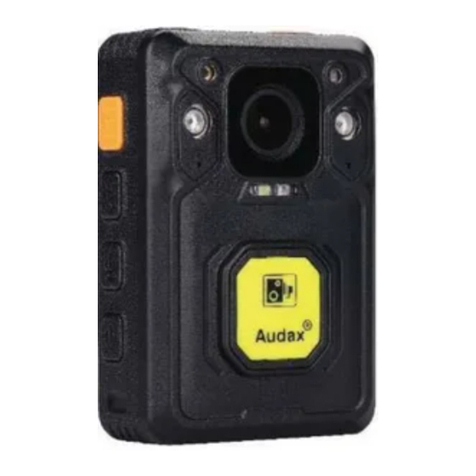
The system is supplied in a soft case complete with the following:
A. Chest Camera
B. Internal (non-removable) 32Gb Solid State memory
(64Gb and 128Gb optional)
C. USB 2.0 cable
D. Wall Socket USB Charger
E. 360 crocodile clip
F. Dock / KlickFast type connector
2. System Features
•Full HD video recording
•Solid State memory
•Still image capture
•Audio
•IR (Auto or Manual)
•GPS
•140° Wide Angle Lens
•Secure, password protected files
•IP67
V.20200604

3. NOTES / WARNINGS
Charging Battery –Prior to first use of the system, charge the battery for a minimum
of four hours. When the battery is fully charged, the Red “POWER” LED on the top
of the device will turn OFF. Please note that your camera may arrive already fully
charged, so don't be surprised if, the first time you try to charge it, the red “charging”
light does not come on.
Connection to PC –The Camera DOES NOT allow direct connection to a PC for
downloading of data. The ONLY way this can be achieved is by using the
CamManager software (Please note that this process is different if using the
Audax Docking Station).
Changing Settings –We recommend that all recorded video /image files are backed
up before changing any system settings. Failure to do so may cause recorded
footage/files to be deleted.
Internal Memory –Gaining or attempting to gain physical access to the Internal
Memory will invalidate the system Warranty.
Cables –Only ever use the supplied chargers and cables. Using other “similar”
cables may invalidate the system Warranty.
Password Protection –The Chest Camera device has two different Passwords set:
a. The “Settings” Menu has the initial password set as 000000 (Please see Section
6, para Q for details of how to set Passwords).
The software will not allow access to settings and downloading without using this
password. Audax recommend that this Password is re-set and safely recorded at
the earliest opportunity.
b. The “Replay” Menu has the initial password set as 000001 (Please see Section 6,
para R for details of how to set Passwords).
This allows that you can givethis password tothe user so thatthey can view recorded
footage (if you require). However, they will NOT be able to access other areas
(settings / downloading) with this password. Audax recommend that this Password
is re-set and safely recorded at the earliest opportunity.
IMPORTANT NOTE: If, after setting, your password is lost then the device will
have to be returned to be re-set. In that event, a fee will be chargeable and any
footage held on the unit might be erased as part of the re-setting process.
Screen Protectors –The Chest Camera device may be dispatched with a protective
film covering the camera lens (front) and viewing screen (back).
Please ensure that the film is peeled off before using.

4. Views
Top
a. Power (Left) –RED LED shows the device is charging
GREEN LED shows the device is ON
b. Work –RED LED (flashing) shows the device is Recording
Video. This LED will show AMBER (flashing) when
recording Audio Only.
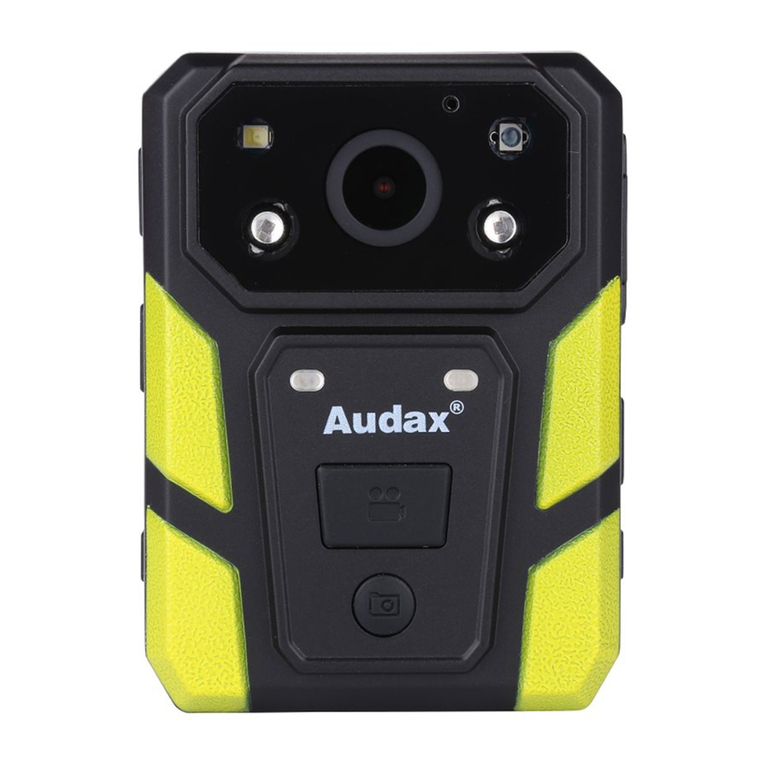
Front
a. Top left –White light filter
Top right –IR Sensor
Centre –Camera lens
Bottom Left/Right –IR Illuminators -
b. Record (Video) button
Left
c. USB connection
d. Audio only button
e. Manual IR button
Right
a. SOS button (Live Streaming ONLY)
b. Camera (still image) button
c. Power “on / off” button
Rear
a. 360° detachable clip
b. Display Screen
c. (1) “Menu” / “OK” button
d. (2) “Up” button
e. (3) “Down”button
f. (4) “Back” / “Replay” button
1 2 3 4

5. General System Operation (please refer to buttons listed above)
a. Power On/ Off
1. Press the POWER ON / OFF button for 1 second; the camera will turn on and enter the
standby mode (the device will vibrate).
IMPORTANT NOTE: Please also see section 6 para S regarding the “LCD auto off”
function and para T regarding the “Auto shutdown” function.
When the device is ON, pressing the POWER button for 1 second will turn the device OFF
b. Video Recording
1. Once turned on, the device will automatically enter the camera preview mode and a live
picture will be shown on the display screen. Press the RECORD button to commence
recording; the device may vibrate and the “work” LED on the top will change to RED
(flashing). A RED circle will also show on the display screen.
2. Press the RECORD button again to stop recording; the device may vibrate and the “work”
RED LED will turn off. At this point, recording will stop (unless Post-event recording has
been selected) and the video will be saved.
3. If recording is required in “low light” conditions, press the IR button (unless IR “Auto” has
been previously selected). The IR illuminators will be turned on and the device will enter
the night shooting mode.
IMPORTANT NOTE: Video recorded when IR has been selected will be in black and
white only.
c. Still Images
1. Once turned on, the device will automatically enter the camera preview mode. Press the
PHOTO button to take still images.
2. As already mentioned in b.3. above; if photos are to be taken in “low light” conditions, turn
on the IR illuminators (unless IR “Auto” has been previously selected).
IMPORTANT NOTE: Still images taken when IR has been selected will be in black and
white only.
3. When recording Video, the PHOTO button can be pressed to capture a picture while still
recording at that time.
d. Audio recording
1. Once turned on, the camera will automatically enter the camera preview mode. Press
the AUDIO button to record audio ONLY. The device will vibrate and the “work” LED on
the top will change to AMBER (flashing).
2. Press the AUDIO button again to end audio recording, and the audio file will be
automatically saved.

e. Video Playback
The device has been designed and manufactured with a one-touch playback button and
quick playback button.
When in the “standby” state, press the PLAYBACK button to enter the playback menu.
IMPORTANT NOTE: Playback of video, still images and audio only recordings are only
available once the correct 6 digit Password has been entered.
1. When in the “playback” state, press “OK” to select the Video playback option and press
the UP or DOWN button to select the video you want to play.
2. Press the OK button to play the video file. Pressing the OK button while the file is playing,
will pause playback. Press OK again to continue.
f. Still Image playback
1. When in the “playback” state, select the Photo playback option and press the UP or
DOWN button to select the image you want to view.
2. Press the OK button to view the picture. Pressing the UP/DOWN buttons will cycle
photos.
3. When choosing the slideshow mode to view pictures, they will be played in cycle under
the slideshow mode.
g. Audio Playback
1. When in the “playback” state, select the audio play back option and press the UP or
DOWN button to select the audio file you want to hear.
2. Press the OK button to play the audio.

h. Optional Components
A Single Charging Dock is available as an optional component (at extra cost).
This Single Dock can be connected to a PC using the USB Cable supplied with the Camera.
IMPORTANT NOTE: Please note that the Single Dock is only used for Charging the camera
and cannot be used for downloading data.

6. System Settings
Press the MENU button to go to the “SETUP” screen in order to change parameter settings.
Please note that the “Settings Menu” is password protected and can only be accessed when
the correct password is entered on the Camera. Therefore, only the person / people who
know the password can change the Settings.
a. Resolution
Select RESOLUTION (will be highlighted in RED) and select OK. This gives you the
option to change the resolution settings.
There are six options to select from (all at 30fps):
2560 x 1440 30fps 16:9 2304 x 1296 30fps 16:9
1920 x 1440 30fps 4:3 1920 x 1080 30fps 16:9
1280 x 720 30fps 16:9 848 x 480 30fps 16:9
Press “Up” or “Down” to select the required resolution and press “OK” to confirm. Press
“Back” to return to standby.
b. Video quality
Select VIDEO QUALITY (will be highlighted in RED) and select OK. This gives you the
option to change the video quality (bitrate) in the following settings:
There are three options to select from: Normal, Fine and S. Fine. This gives different
settings dependent on the Resolution set.
2560 x 1440 –30 18.0Mbps Normal 14.0Mbps Fine 9.0Mbps S. Fine
2304 x 1296 –30 15.0Mbps Normal 12.0Mbps Fine 8.0Mbps S. Fine
1920 x 1440 –30 15.0Mbps Normal 12.0Mbps Fine 8.0Mbps S. Fine
1920 x 1080 –60 12.0Mbps Normal 10.0Mbps Fine 8.0Mbps S. Fine
1280 x 720 –30 8.0Mbps Normal 6.0Mbps Fine 4.0Mbps S. Fine
848x 480 –30 5.0Mbps Normal 4.0Mbps Fine 3.0Mbps S. Fine
Press “Up” or “Down” to select the required setting and press “OK” to confirm. Press
“Back” to return to standby.

c. Pre Event Recording
Select PRE_RECORD (will be highlighted in RED) and select OK. This gives you the
option to select Pre-Event Recording.
There are two options to select from:
Off –No pre-event recording
On –the camera will pre-record for approximately 29 seconds (at 1280 x720) prior
to the pressing of the “Record” button (the actual pre-record time will depend on the
resolution set e.g. 1280 x 720 resolution will give 29 seconds, lower resolutions will
give more time but higher resolutions will give less time).
Press “Up” or “Down” to select the required option and press “OK” to confirm.
Press “Back” to return to standby.
d. Post Event Recording
Select POST_RECORD (will be highlighted in RED) and select OK. This gives you the
option to select Post Event Recording.
There are six options to select from:
Off –No post event recording
10, 20, 30 seconds, 1 minute and 5 minutes –The camera will continue to record
for the selected duration AFTER pressing the “stop recording” button.
Press “Up” or “Down” to select the required option and press “OK” to confirm.
Press “Back” to return to standby.
IMPORTANT NOTE: When POST_RECORDING has been set, the device will continue
to record, after the “stop recording” button has been pressed, until the time period
(e.g. 20 seconds) has been reached. The Red recording LED will remain on during
this period.

e. Video Duration
Select DURATION (will be highlighted in RED) and select OK. This gives you the option
to change the video file duration times.
There are five time intervals to select from:
Off (continuous recording) / 5 / 10 / 15 / 30 minutes
Press “Up” or “Down” to select the required resolution and press “OK” to confirm. Press
“Back” to return to standby.
f. Dewarp
Select DEWARP (will be highlighted in RED) and select OK. This gives you the option to
reduce the “fish eye” effect on video.
There are two options to select from: On or Off
Press “Up” or “Down” to select the required resolution and press “OK” to confirm. Press
“Back” to return to standby.
g. Video Encoding
Select VIDEO ENCODING (will be highlighted in RED) and select OK. This gives you the
option to change the compression rate.
There are two options to select from: H.264 and H.265
Press “Up” or “Down” to select the required resolution and press “OK” to confirm. Press
“Back” to return to standby.

h. EIS (Electronic Image Stabilisation)
Select EIS (will be highlighted in RED) and select OK. This gives you the option to
increase the stability of the video (when the wearer is running for example).
There are two settings to select from: On and Off
Press “Up” or “Down” to select the required resolution and press “OK” to confirm. Press
“Back” to return to standby.
i. Motion detection
Select MOTION DETECTION (will be highlighted in RED) and select OK. This gives you
the option for the Camera to detect and record when motion is seen by the camera lens.
There are four settings to select from: Off, Low, Medium and High
Press “Up” or “Down” to select the required resolution and press “OK” to confirm. Press
“Back” to return to standby.
NOTE: Once the setting for Motion detection has been changed (Low, Medium, High), the
“Record” button MUST be pressed to activate Motion detection.
The individual settings record video according to the change degree of the screen area
(Low, Medium or High). When the camera detects movement, it will start recording and
continue to record while movement is seen. If movement stops, recording will continue for
a further 18 seconds and then stop until the next movement is seen
i. Photo Size
Select PHOTO SIZE (will be highlighted in RED) and select OK. This gives you the option
to change the photo resolution sizes.
There are seven settings to select from:
2 / 3 / 5 / 8 / 12 / 16 / 30 Megapixels
Press “Up” or “Down” to select the required resolution and press “OK” to confirm. Press
“Back” to return to standby.

k. Photo quality
Select PHOTO QUALITY (will be highlighted in RED) and select OK. This gives you the
option to change the still image quality (bitrate).
There are three options to select from: Normal, Fine and S. Fine. This gives different
settings dependent on the “Photo Size” resolution set.
The compression ratio between S.Fine and Fine is 66%
The compression ratio between Fine and Normal is 66%
The compression ratio between S.Fine and normal is 43%
Press “Up” or “Down” to select the required resolution and press “OK” to confirm. Press
“Back” to return to standby.
l. Photo burst
Select PHOTO BURST (will be highlighted in RED) and select OK. This gives you the
option to change the continuous photo shooting in a sequence.
There are six options to select from:
Off –no continuous photo shooting (a single photo will be captured)
5 –Five photos taken with one press of the Capture button
10 –Ten photos taken with one press of the Capture button
15 –Fifteen photos taken with one press of the Capture button
20 –Twenty photos taken with one press of the Capture button
25 –Twenty Five photos taken with one press of the Capture button
Press “Up” or “Down” to select the required option and press “OK” to confirm. Press
“Back” to return to standby.

m. Self Timer
Select SELF TIMER (will be highlighted in RED) and select OK. This gives you the option
to set a time delay when taking still images.
There are six options to select from:
Off –no delay. A still image will be taken on press of the PHOTO button
3 –A three second delay will take place after pressing the PHOTO button
5 –A five second delay will take place after pressing the PHOTO button
10 –A ten second delay will take place after pressing the PHOTO button
30 –A thirty second delay will take place after pressing the PHOTO button
60 –A sixty second delay will take place after pressing the PHOTO button
Press “Up” or “Down” to select the required option and press “OK” to confirm. Press
“Back” to return to standby.
n. Auto shooting
Select AUTO SHOOTING (will be highlighted in RED) and select OK. This gives you the
option for continuous photographs to be taken every x seconds (dependent on settings
below).
There are six options to select from:
Off –no automatic photo taking
3 –A three second delay will take place after pressing the PHOTO button
5 –A five second delay will take place after pressing the PHOTO button
10 –A ten second delay will take place after pressing the PHOTO button
30 –A thirty second delay will take place after pressing the PHOTO button
60 –A sixty second delay will take place after pressing the PHOTO button
NOTE: If an Auto Shooting time has been selected and commenced, it can be stopped by
pressing the Camera button.
Press “Up” or “Down” to select the required option and press “OK” to confirm.
Press “Back” to return to standby.

o. LCD brightness
Select LCD BRIGHTNESS (will be highlighted in RED) and select OK. This gives you the
option to select the brightness of the screen.
There are three options to select from: High / Medium / Low
Press “Up” or “Down” to select the required option and press “OK” to confirm.
Press “Back” to return to standby.
p. Speaker Volume
Select SPEAKER VOLUME (will be highlighted in RED) and select OK. This gives you
the option to change the volume of the audio on the device.
IMPORTANT NOTE: This setting has NO effect on the sensitivity of the audio
recording Microphone e.g. even if this is set to OFF, audio will still be recorded.
There are four options to select from: Off / Low / Medium / High
Press “Up” or “Down” to select the required option and press “OK” to confirm.
Press “Back” to return to standby.
q. Password
Select PASSWORD (will be highlighted in RED) and select OK. This gives you the option
to change the password for the “Settings Menu”.
The DEFAULT Password is set as 000000.
Press “Up” or “Down”to select the required setting (0 to 9) and press “OK” to confirm each
setting.
Press “Back” to return to standby.

r. PB password
Select PB_PASSWORD (will be highlighted in RED) and select OK. This gives you the
option to change the “Replay” password.
The DEFAULT Password is set as 000001
Press “Up” or “Down”to select the required setting (0 to 9) and press “OK” to confirm each
setting.
Press “Back” to return to standby.
s. Light Sensitive
Select LIGHT SENSITIVE (will be highlighted in RED) and select OK. This option gives a
clearer picture in dark conditions when IR is used.
There are three options to select from: High, Medium or Low
IMPORTANT NOTE: This option only has any value when the Infrared Switch (R
(below)) is set to “Auto”
Press “Up” or “Down” to select the required option and press “OK” to confirm.
Press “Back” to return to standby.
t. IR distance
Select IR DISTANCE (will be highlighted in RED) and select OK. This gives you the
option to select the distance for use of the IR Illuminators.
There are three options to select from:
Near (+/- 5m)
Medium (+/- 10m)
Far (+/- 15m)
Press “Up” or “Down” to select the required option and press “OK” to confirm.
Press “Back” to return to standby.

u. Infrared Switch
Select INFRARED SWITCH (will be highlighted in RED) and select OK. This gives you
the option to select the use of the IR Illuminators.
There are two options to select from: Manual / Auto
Press “Up” or “Down” to select the required option and press “OK” to confirm.
Press “Back” to return to standby.
NOTE: If Manual IR is set, the user will be required to press the IR button on the camera
to activate the IR illuminators.
v. LCD Auto Off
Select LCD AUTO OFF (will be highlighted in RED) and select OK. This gives you the
option to power off the LCD Screen (screensaver) after a certain period of time (unless any
other operation is selected).
NOTE: Having the LCD Screen on continuously will use more battery power.
There are five options to select from:
Off –the LCD Screen will NOT automatically be turned off
30 secs –the LCD Screen will turn off after 30 seconds
1 min –the LCD Screen will turn off after 1 minute
3 mins –the LCD Screen will turn off after 3 minutes
5 mins –the LCD Screen will turn off after 5 minutes
Press “Up” or “Down” to select the required option and press “OK” to confirm.
Press “Back” to return to standby.

w. Auto shutdown
Select AUTO SHUTDOWN (will be highlighted in RED) and select OK. This gives you the
option to completely power off the camera off after a certain period (unless any other
operation / button is selected).
NOTE: this is different to the “LCD Auto off” settings given in para Vabove.
There are four options to select from:
Off –the camera will NOT automatically be turned off
This is the RECOMMENDED SETTING for all users
3 –the camera will be turned off after 3 minutes
5 –the camera will be turned off after 5 minutes
10 –the camera will be turned off after 10 minutes
Press “Up” or “Down” to select the required option and press “OK” to confirm.
Press “Back” to return to standby.
x. Slideshow
Select SLIDESHOW (will be highlighted in RED) and select OK. This gives you the option
to select a Slideshow of all the still images stored on the Camera. Each image will stay
on-screen for approximately 5 seconds before moving to the next image.
There are two options to select from: On or Off
Press “Up” or “Down” to select the required option and press “OK” to confirm.
Press “Back” to return to standby.
y. Motor
Select MOTOR (will be highlighted in RED) and select OK. This allows the camera to
vibrate when certain actions are carried out such as record start, record stop.
There are two options to select from: On or Off
Press “Up” or “Down” to select the required option and press “OK” to confirm.
Press “Back” to return to standby.

z. Key tone
Select KEY TONE (will be highlighted in RED) and select OK. This gives you the option
to enable or disable the audible key tone sound on the device.
There are two options to select from: On or Off
Press “Up” or “Down” to select the required option and press “OK” to confirm.
Press “Back” to return to standby.
aa. Indicator light
Select INDICATOR LIGHT (will be highlighted in RED) and select OK. This gives you the
option to enable or disable the LED Indicators on the top of the Camera.
There are two options to select from: On or Off
Press “Up” or “Down” to select the required option and press “OK” to confirm.
Press “Back” to return to standby.
ab. Loop record
Select LOOP RECORD (will be highlighted in RED) and select OK. This gives you the
option to either overwrite old video files stored on the camera or to have the camera stop
recording when the Memory is full.
There are two options to select from:
Off –disables the overwriting function
On –enables the overwriting function
Press “Up” or “Down” to select the required option and press “OK” to confirm.
Press “Back” to return to standby.

ac. Cardv
Select CARDV (Car DV) (will be highlighted in RED) and select OK. This gives you the
option to use the Camera in a vehicle. If selected “ON”, when the Camera is connected to
a 12v supply in vehicle, the Camera will turn on and start recording when the vehicle
ignition is turned on. The Camera will stop recording and turn off when the vehicle ignition
is turned off.
IMPORTANT NOTE: This setting is very much dependent on the vehicle and whether the
USB/12v connections remain powered even if the vehicle ignition is turned off.
This setting is based on the fact that power to the USB/12v connections is disabled when
the vehicle ignition is turned off
There are two options to select from: On or Off
Press “Up” or “Down” to select the required option and press “OK” to confirm.
Press “Back” to return to standby.
ad. WiFi
Select WIFI (will be highlighted in RED) and select OK. This gives you the option to
connect to a Wi-Fi Network for Live Streaming.
There are two options to select from: On or Off
Press “Up” or “Down” to select the required option and press “OK” to confirm.
Press “Back” to return to standby.

ae. WiFi SSID
Select WIFI SSID (will be highlighted in RED) and select OK. This allows you to input the
SSID (Service Set Identifier (Network Name)), using the keypad shown.
Press the following buttons to move around the keypad:
Audio Record Up
Manual IR Down
“Up” arrow Left
“Down” arrow Right
After entering the correct SSID, select the “Enter” key (bottom right of keypad) to finish.
af. WiFi Password
Select WIFI PASSWORD (will be highlighted in RED) and select OK. This allows you to
input the Password for the SSID selected, using the keypad shown. This is the same
procedure as for para ae above
Press the buttons to move around the keypad as shown in ae above
After entering the correct WiFi Password, select the “Enter” key (bottom right of keypad) to
finish.
ag. Server IP
Select SERVER IP (will be highlighted in RED) and select OK. This allows you to input
the IP address of the Server being used for live Streaming, (such as the Audax Server),
using the keypad shown. This is the same procedure as for paras ae and af above
Press the buttons to move around the keypad as shown in ae above
After entering the correct Server IP, select the “Enter” key (bottom right of keypad) to
finish.

ah. Server port
Select SERVER PORT (will be highlighted in RED) and select OK. This allows you to
input the correct Port Number of the Server being used for live Streaming, (such as the
Audax Server), using the keypad shown. This is the same procedure as for paras ae - ag
above
Press the buttons to move around the keypad as shown in ae above
After entering the correct Server Port, select the “Enter” key (bottom right of keypad) to
finish.
ai. Network ID
The NETWORK ID allows that the Camera will be recognised by the Server when Live
Streaming.
This setting is fixed and CANNOT be changed.
aj. Second resolution (Network quality)
Select SECOND RESOLUTION (will be highlighted in RED) and select OK. This allows
you to select the Resolution (Network Quality) for Live Streaming.
NOTE: the higher the Second Resolution is set, the higher the data rate will be.
There are three options to select from:
1080P / 720P / 540P
Press “Up” or “Down” to select the required option and press “OK” to confirm.
Press “Back” to return to standby.
This manual suits for next models
1
Table of contents
Other AUDAX Digital Camera manuals
