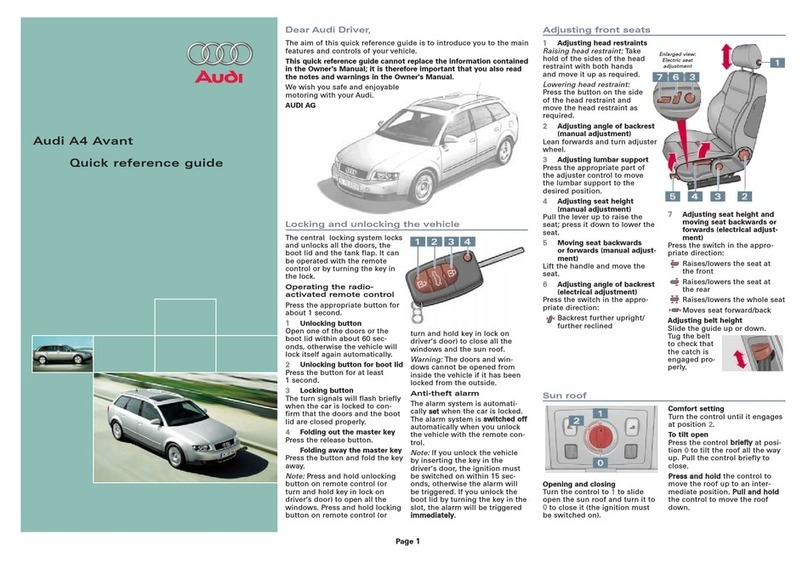
Audi Q7 2014 User manual

Owner's Manual
2014 Audi Q7
Vor sp r ung du rch Te c~~f~ (HD


Foreword
Than k you for choosing an Audi -we value your trust in us.
Yournew Audiwill allow you to experience the best in groundbreaking technolo -
gy and prem ium quality equ ipment a vehicle has to offer. We recommend that
you read your Owner's Manual tho roughly so that you quickly become acquaint-
ed wit h your Audi and make use of a ll of its features.
In addition to explaining how the different features work, we provide many use-
ful tips and informa tion concerning your safety, how to care for your vehicle and
how to ma inta in your vehicle's value. We also give you useful tips and informa-
tion on how to drive your vehicle more efficiently and in an environmenta lly
friendly manne r.
In the Owner's Manual packet, you will also find a quick reference guide, an
Owner's Manual for your Infotainment system and the vehicle maintenance
schedule.
We hopeyou enj oy driving your Audi andwe wishyou safe and pleasantmotor-
ing .
AUDIAG
lllll~lll111~111111111111111111111
14156 14 L023

2 Table of contents
Vehicle literature . . . . . . . . . . . . . .
About this Owner's Manual . ..
Controls and equipment . . . .. .
Ins t ruments and controls . . . .
General illus tr at ion .... . . . . . . . . .. .
Instruments and warning /
indicator lights ...... . . . . . . . . . .
Inst ruments . . . . . . .... . . . . . . . . .. .
War ning/ indi cator lights . . . . . . . . . . .
Driver information d isplay . . . .
I ntroduct ion . . . . . . .... . . . . . . . . .. .
Trip computer . . . . . .... . . . . . . . . .. .
Efficiency program ........ . . . . . .. .
On-Board Diagnostic system (OBD) . . .
Electronic speed limiter . . . . . . . . . . . .
Speed war ning system .. . ... . . . . . . .
Auto Check Control .... . ... . . . . . . .
Opening and closing . . . . . . . . . .
Keys . . . . . . ................ . . . . .
Power locking system . . . . . . . . . . . . .
Rear lid . . . . . . . .......... . . . . . . . .
Child safety lock .......... . . . . . . . .
Convenience key . . . .... . . . . . . . . .. .
Anti-theft alarm system . . . . . . . . . . .
Power win dows . . . .... . . . . . . . . .. .
Panoramic slid ing sunroof .. . . . . . .. .
Clear vision . . . . . .... . . . . . . . . .. .
Lights . . . . . . . . .......... . . . . . .. .
Inter ior lights ............. . .. . .. .
V1s1on . . ..... . .......... . ... . .. .
W iper and washer system . . . . . . . . . .
Mirrors . . . . ................ . . . . .
Digita l compass . . . .... . . . . . . . . . . .
Seats and storage ...... . . . . . . .
General recomme ndat ions . . . . . . . . .
Power fron t seat adjust ment . . . . . . . .
Seat mem ory ............ . . .. . .. .
Rear seats . . . . . . . . .... ... . . . . . .. .
Head rest raints . . . .... . . . . . . . . .. .
Armrest . . . . . . . . . .... . . . . . . . . .. .
5
6
8
8
8
10
10
14
21
21
24
26
27
28
28
30
38
38
41
45
48
49
so
5 1
54
57
57
61
62
63
68
70
72
72
73
74
75
77
78
Long center console . . . . . . . . . . . . . . . 79
Luggage compartment . . .... . . . . . .
Roof rack . . ... . . . . . . . . .... . . . . . .
( upholder . . . . . . . . . . . . . . . . .. . . . . .
Rear asht ray ..... . ............ . . .
Outlet . ... . ... . . . ............ . . .
Storage .. . ... . . . . . ............. .
80
84
86
87
88
88
Warm and cold . . . . . . . . . . . . . . . . 92
Climate control . . . . . . . . . . . . . . . . . . 92
Rear Air Conditioning . . . . . . . . . . . . . . 98
Basic sett ings . . . . . . . . . . . . . . . . . . . . 100
Heated Seat s . . . . . . . . . . . . . . . . . . . . 101
On the road . . . . . . . . . . . . . . . . . . . 103
Steering . . . . . . . . . . . . . . . . .. . . . . . . 103
Ig nit ion lock and ig nit ion switch . . . . . 105
Starti ng and st opping t he engine . . . . 106
Star ti ng and stopping the engine with
Convenience key . . . . . . . . . . . . . . . . . . 107
Parking brake . . . . . . . . . . . . . . . . . . . . 109
Starting on hill s . . . . . . . . . . . . . . . . . . 110
Cruise contro l . . . . . . . . . . . . . . . . . . . . 111
Adaptive cruise control . . . . . . . 113
Speed and distance control system . . 113
Driver informat ion . . . . . . . . . . . . . . . . 120
System limitations . . . . . . . . . . . . . . . . 125
Audi braking gua rd . . . . . . . . . . . . . . . 127
Audi side assist . . . . . . . . . . . . . . . 129
Lane Change Assist ant. . . . . . . . . . . . . 129
Not es . . . . . . . . . . . . . . . . . . . . . . . . . . 135
Automatic transmission . . . . . .
t ipt ronic ... . . . . . . . ........ . . . .. .
Parking systems
General information
Rear park assist .. . . . ... .... . . . . . .
Audi par kin g syste m plus with
rearview camera . . . .............. .
Audi par king syst em plus with fr ont-
and rearview camera . . . . .... . . . . . .
137
137
143
143
144
144
148
Adjusting the display and warn ing
tones..... . ... . . . . . .......... . .. 153
Error messages . . . . . . . . . . . . . . . . . . 153
Trailer hitc h . . . . . . . . . . . . . . . . . . . . . 153

Adaptive Air Suspension . . . . . .
Air suspension and damping
155
155
Homelink . . . . . . . . . . . . . . . . . . . . . 161
Universal remote control . . . . . . . . . . . 161
Safety first . . . . . . . . . . . . . . . . . . . . 164
Driving Safely . . . . . . . . . . . . . . . . . 164
General notes ................... .
Proper occupant seating positions . . .
Pedal area . . . . . ............ . . . . . .
Stowing luggage ......... . ... . . . .
Reporting Safety Defects .... . . . ... .
Safety belts ........... . ... . . . .
General notes ......... . ..... . ... .
Why safety belts? ..... . ..... . ... .
Safety belts ... . . .. . ..... . . . . . . . .
Safety belt pretensioners .. . . . . . . . .
Airbag system .......... . . . ... .
Important things to know .. . . . . . . . .
Front airbags ............ . ... . . . .
Monitoring the Advanced Airbag
System .. . . . . .............. . . . . .
Side airbags ................ . . . . .
Side curtain airbags .......... . . . . .
Child Safety .............. . . . . .
Important things to know ..... . . . . .
Child safety seats ......... . ... . . . .
Installing a child safety seat . . . . . . . .
LATCHLower anchorages and tethers
for children . ... . . .. . ..... . . . . . . . .
Additional Information
Vehicle operation ..... . . . . . . . .
Intelligent technology . . . . . . . .
164
165
169
170
171
174
174
175
178
181
183
183
187
194
198
201
204
204
210
214
217
223
224
224
Notice about data recorded by vehicle
control modules . . . . . . . . . . . . . . . . . . 224
Electronic Stabilization Control (ESC). 224
Brake system . . . . . . . . . . . . . . . . . . . . 226
Servotronic - advanced power steering
system . . . . . . . . . . . . . . . . . . . . . . . . . 228
Driving with your quattro . . . . . . . . . . 228
Energy management . . . . . . . . . . . . . . 229
Table of contents 3
Driving and environment . . . . . 232
The first 1,000 miles (1,500 km) and
afterwards . . . . . . . . . . . . . . . . . . . . . . 232
Catalytic converter . . . . . . . . . . . . . . . . 233
Diesel particulate filter . . . . . . . . . . . . 233
Avoid damaging the vehicle . . . . . . . . . 234
Shutting down vehicle . . . . . . . . . . . . . 234
Operate your vehicle economically and
min im ize pollution . . . ............ .
Driving off road . ............. .
Driving in difficult road conditions and
offroad . . . . . . . . . . ... . .......... .
Trailer towing . . . . . . . . . .. . . ... .
Driving with a trailer ........... . . .
Trailer towing tips . . . ............ .
Vehicle care . . . . . . . . .......... .
Vehicle care and cleaning .... .
General information ............. .
Carwashes . ..... . . ............. .
Cleaning and care information ..... .
Fuel supply and filling your
fuel tank . . . . ... . . ............. .
Fuel supply . . . . . . . . ............. .
Diesel fuel .. . . . ..... . .......... .
Fuel tank .. . . . . . . . . . ............ .
Selective catalytic reduction ....... .
Checking and filling .......... .
Engine hood . . . . . . ... . ... ... .. . . .
Engine oil . . . . . . . . . . . . .... .. .... .
Engine cooling system ............ .
Brake fluid . . . . . . . .............. .
Battery ... . . . . . . . . . . . .......... .
Windshield/headlight washer
234
237
237
240
240
242
244
244
244
244
245
249
249
250
251
254
257
257
259
264
267
268
container . . . . . . . . . . . . . . . . . . . . . . . 272
Tires and wheels . . . . . . . . . . . . . . 273
Tires . . . . . . . . . . . . . . . . . . . . . . . . . . . 273
Tire pressure monitoring system 291
Do-it-yourself service . . . . . . . . . 294
What do I do now? . . . . . . . . . . . . 294
Jack, tools and inflatable spare tire . . 294
Changing a wheel . . . . . . . . . . . . . . . . . 297
•
•

4 Table of content s
Fuses and bulbs . . . . . . . . . . . . . . . 302
Electrical fuses . . . . . . . . . . . . . . . . . . . 302
Bulbs . . . . . . . . . . . . .... . . . . . . . . . . . 305
Emergency situations . . . . . . . . . 30 7
General . . . . . . . . . . . . . . . . . . . . . . . . . 307
Starting by pushing or tow ing . . . . . . . 307
Starting with jumper cables . . . . . . . . 307
Use of jumper cables . . . . . . . . . . . . . . 308
Emergency towing with commercial
tow truck . . . . . . . . . . . . . . . . . . . . . . . 309
Lift ing vehicle . . . . . . . . . . . . . . . . . . . . 311
Technical data . . . . . . . . . . . . . . . . . 313
Technical Data . . . . . . . . . . . . . . . . . 313
Vehicle ident ificati on . . . . . . . . . . . . . . 3 13
Weights . . . . . . . . . . . . . . . . . . . . . . . . 3 13
Dimensions . . . . . . . .... . . . . . . . . .. . 314
Capacities . . . . . . . . . . . . . . . . . . . . . . . 315
Gasoline engines . . . . . . . . . . . . . . . . . 315
Diesel engine . . . . . . . . . . . . . . . . . . . . 315
Consumer Information . . . . . . . 316
Warranty coverages . . . . . . . . . . . . . . . 316
Operating your vehicle outside the
U.S.A. or Canada . . . . . . . . . . . . . . . . . 316
Audi Service Repair Manuals and
Literature . . . . . . . . . . . . . . . . . . . . . . . 3 16
Maintenance.. . . . . ... .. . . . . . . . . . . 316
Addit ional accessories, modifications
and parts replacement . . . . . . . . . . . . 318
Declaration of Compliance,
Telecommunications and Electronic
Systems . . . . . . . . . . . . . . . . . . . . . . . . 319
Inde x . . . . . . . . . . . . . . . . . . . . . . . . . . 32 1

I n addition to t his Owner's Manual, your Audi
comes w ith t he
- MMI Operating I nst ructi ons
- Warranty & Maintenance booklet .
If you are missing one of these publicat ions,
or if you believ e that the information is not
comp lete, contact you r aut horized Audi dealer
for assistance.
MMI Operating Instructions
contain detailed description of the Audi Multi
Media Interface (MMI) including t he naviga-
tion system, the sound system and the hand-
held phone.
The Warranty & Maintenance booklet
explains how you can keep your Audi in top
driving condition by having it serviced regular-
ly and conta ins detai led info rmat ion about
the wa rranties covering your Aud i. Always
have the booklet with you when you take your
vehicl e to an author ized Audi dealer for serv-
ice. Your Audi Service Advisor will record each
schedul ed service and can answe r any qu es-
tions you may have regarding how t o maint ain
your vehicl e.
In Canada,
the vehicle lite rat ure is also available in
French. To obta in a copy, cont act your dealer
or wri t e to:
Au Canada, on peut se procure r un exemp laire
en fr an<;aisde ce document aupres du conces-
sionnair e ou de:
Volkswagen Canada, Inc.
Client Assistance
Assist ance a la Clientele
777 Bayly St reet , West ,
Aj ax, Ontario LlS 7G7
If you sell your Audi
all lite ratu re should be left in the vehicle t o
make t he Warranty terms as we ll as all oper-
ating, safety and maintenan ce inform ati on
availa ble t o t he next owne r.
Vehicle literature 5
If you change your address or if you
bought this Audi used
be sure to send in a "Notice of Address
Change"/ " Notice of Used Car Purchase" post
card. This card can be fo und in the Warranty &
Maintenance booklet or obtained from your
autho rized Audi dealer.
It is in your own interest that we are able to
contact you should the need arise .
•
•

6 About this Owner 's Manual
This owner's manua l contains important infor-
mation, tips, suggestions, and warnings for
the use of your vehicle.
Make sure that this owner's manua l is always
located in the vehicle. This is especially impor-
tant if you allow other people to drive the ve-
hicle, or if you sell it.
This owner's manua l describes the equipment
range specified for this mode l at the editoria l
deadline date. Some of the equipment descri-
bed here will only be available at a later date,
or only in specific markets.
Some sections in this owner's manua l do not
apply to all vehicles. In that case, the range of
applicability is given at the beginn ing of the
section, e.g. "Applies to vehicles: w ith adap-
tive light". In addition, optional or vehicle-
specif ic equipment is indicated by an asterisk
"* "
Illustrations may be different from those in
your vehicle, and are intended to be viewed as
a basic guide .
You will find a table of contents at the begin-
ning of this book, which disp lays all topics de-
scribed in this manual in order of appearance.
You will find an alphabetical index at the end
of this book .
All directions, such as " left", "right", "front",
''back", are relative to the direct ion of travel.
* Optional or vehicle-specific equipment
.,.. This section continues on the next page.
~ .&. Cross-reference to a "WARNING!" with-
in a section. For ind ication w ith a page num-
ber, the corresponding "WARNING!" can be
found outside of the section .
A WARNING
Text with this symbol contains important
information on safety and how to reduce
the risk of personal injury or death.
(D Note
Text with this symbo l draws your attention
to potentia l sources of damage to your ve-
hicle.
@) For the sake of the environment
Text with this symbo l contains information
about the environment and how you can
help protect it.
{!) Tips
Text with this symbo l contains special tips
and other information about gett ing the
most out of your vehicle and its features.

7
•
•

8 Instruments and controls
Instruments and controls
General illustration
Fig. l Cockpit: left section
-----
-----
----- ---
- - -- - -
~
-
-------
~
-,~ ---
~
-·- c-•-
Fig. 2 Cockpit : right section
-----
~
I ~·
--;;.....- - .. "*'
~

(!) Memory buttons (driver's seat)
@ Door handle
@ Power locking swit ch .... . . . . .
© Side assist button .......... .
® Adjuster control for outside m ir-
rors . ... . . . ............... .
@ Air outlets ................ .
(J) Light switch ........... . ... .
@ Turn signal and high beam . . . .
® Multifunction steering wheel
with:
- Horn
- Driver's airbag ........... . .
- Audio/video, telephone, navi-
gation and voice recognition
buttons
- Shift buttons ......... . . . . .
- Button for steering wheel
heating . ............ . ... .
@ I nstrument cluster ...... . . . . .
@ Switches for:
- Windshield wiper/washer . . . .
- Trip computer ........ . . . . .
@ I gnition lock ........... . ... .
@ Buttons for :
- Parking system
- Resetting the trip odometer . .
- !CHECKl button ... ' ... ... . .
- Instrument lighting ... ... . .
'3 Adjustable steer ing wheel, de-
pending on equipment:
- mechanical .......... . ... .
- electrical ............ . ... .
@ Control lever for:
74
44
129
68
97
57
60
187
140
102
10
63
24
105
144
12
12
13
103
103
- Cruise control . . . . . . . . . . . . . 111
- Adaptive cruise control . . . . . 113
@ Data Link Connector for On
Board Diagnostics (OBD II) . . . . 27
@ Pedal for operating parking
brake . . . . . . . . . . . . . . . . . . . . . . 109
@ Engine hood release . . . . . . . . . . 257
@ Handle for releasing parking
brake. ... . . . ... .... . . . . . . . . 109
@ Switch for unlock ing the trunk
lid . . . . . . . . . . . . . . . . . . . . . . . . 45
Instruments and controls 9
@ Power window switches ...... .
@ MMI Display (see separate man-
ual)
@ Buttons/Indicator light for:
- PASSENGERAIR BAGOFF
- Emergency flashers ........ .
- Electronic Stabilization Con-
trol (ESC) .... . . . . ........ .
@ Buttons for:
- Switching MMI disp lay on/off
- Valet key function .. . ...... .
- Unlocking glove compartment
@ Glove compartment ......... .
@ Front passenger's airbag ..... .
@ Audi mult imed ia (see separate
manua l)
@ Climate controls . . . . . . . ..... .
@) Shift lever for automatic trans -
mission .... . . . . . .......... .
@ 12-volt out lets . . . . . . . . ..... .
@ MMI control console (see sepa-
rate manual)
@ Storage compa rt ment
@ ISTART I-/ ISTOPI button
(D Tips
51
60
224
41
89
89
187
93
137
88
107
Some of the equipment or features shown
in the general illustration may be standard
equipment on your vehicle or may be op-
tional equipment depend ing on your mod-
el. Always ask your authorized Audi dealer
if you have a question about your vehicle .

10 Instruments and warning /i ndicator lights
Instruments and warning/indicator Lights
Instruments
Instrument cluster and controls
The instrument cluster isyour central source of information.
Fig. 3 Overview of t he inst rument cluster
CDCoolant temperature gauge . . . 10
@ Tachome t er with t ime an d date
display . . . . . . . . . . . . . . . . . . . . 11 , 11
® Warning/indicator lights . . . . . . 14
© Driver info rmation system . . . . . 2 1
® Speedometer with odometer . . 12
® Fuel gauge . . . . . . . . . . . . . . . . . 12
(i) Inst rumen t clus t er illumination 13
@ Reset button for t rip odometer . 12
® Parking system . . . . . . . . . . . . . 144
@ ICHECK I button . . . . . . . . . . . . . . 12
@ Tips
The illuminat ion fo r t he inst rume nt cluster
lights up whe never you switch on the ig ni-
tion with t he vehicle headlights off . As
the daylight fades, the instrument cluster
illumi nat ion likewise dims automatically
and will go out completely when t he out-
side light is very low. This feat ure is meant
to remind you to switch on t he headlights
when outside lig ht cond itions become
poor.
Engine coolant temperature gauge
The eng ine coolant gauge q page 10, fig. 3 CD
only works when the ignition is on. To prevent
damage to you r engine, please note the fol-
lowing impor t ant po ints:
Engine cold
As long as the needle remains at or close to
the bottom of the gauge, the engi ne still has
not reached its operat ing temperature . Avoid
high eng ine speeds, heavy eng ine loads and
heavy th rottle a pplicat io ns.
Normal temperature
When the engine has reached its operat ing
temperature, the need le will move into the
midd le of the gauge and rema in the re. If t he
engine is worki ng ha rd at high outside t em-
peratures, the needle may rise up . This is no
need to worry as long as the . warning light
in the instr ument cluster does not illuminate.
Warning light in the instrument cluster
When the . warn ing light in the inst rument
cluster st arts to flash, th is can mean one of
two things : eithe r the coo lant temperature is .,..

In strument s an d warning / indicator lights 11
too high, or the coolant level is too low
¢ page 32 .
If the needle is well in the upper area of the
ga uge , the coolant temperature is too high.
Stop the vehicle, switch the engine off and
allow the engine to cool. If the warning light
comes on again after driving a short distance,
contact an authorized dealer.
A WARNING
- Always observe the warning in
¢ page 257, before opening the hood
and checking the engine coolant level.
- Never open the engine hood if you see or
hear steam, or if you see engine coolant
dr ipping from the engine compartment.
You could bu rn yourself. Let the engine
cool off first until you can no longer see
or hear steam or coolant es caping.
0 Note
- Mount ing additional lights or accessories
in front of the a ir inlets reduces the cool-
ing effect of the rad iator. At h igh outside
temperatures or high eng ine load , t he
engine could overheat.
- The front spo iler has been designed to
properly distribute the cooling air when
the veh icle is moving. If the spoiler is
damaged, this cou ld reduce the cooling
effect and the engine could then over-
heat. Ask your authorized Audi dealer for
ass istance.
Tachometer (engine rev counter)
The tachometer indicates the engine RPM
(revolutions per minutes).
The tachometer @ ¢ page 10, fig. 3 is the left
of the two large clock-type displays.
The engine turns at a speed 1,000 times the
single digit in the display, e.g . if the needle is
pointing at the "2" the engine is turning at
2,000 RPM.
If engine RPMdrops be low 1,500, you should
downshift to the next lower gear. The red area
at the end of the scale indicates maximum
permissible engine RPM after the break-in pe-
riod. Before reaching this area , move these-
lector lever to position D (Drive) or ease your
foot off the accelerator pedal.
(D Note
The tachometer needle should not move
into the red range. If it does, then only for
a very short per iod of t ime. You could
damage your engine by driving at high
RPM.
@) For the sake of the environment
Upshifting early saves fuel and reduces en-
gine noise .
Digital clock with date display
Fig. 4 Inst rument cluster : time and date
The date, time of day, and time and date for -
mat can be set in the MMI. You can learn more
about this in the MMI manual.
(D Tips
- When open the driver door, the time,
date and odometer are disp layed for an
add itional 30 seconds.
- You can also call up the display with the
!CHECK Ibutton q page 12 while the ig-
nition is switched off.

12 Instruments and warning/indicator lights
Speedometer with odometer
The speedometer shows you the vehicle
speed, and the odometer shows you how
many miles (kilometers) you have driven.
Fig. 5 Instrument cluster Odometer and reset button
The odometer and trip odometer are located
inside the speedometer.
- USAmode ls - Miles
- Canada models - Kilometers
You can switch the display from miles to kilo-
meters and vice versa via the MMI. You can
find out more in the MMI manual.
Lower odometer
The low er odometer shows the total number
of mi les (kilometers) driven.
Upper odometer (trip odometer)
The upper odometer shows the t ota l number
of mi les (kilometers) driven since you last re-
set the odometer to zero. You can use this od-
ometer when you want to keep track of how
many miles (kilometers) you have driven for a
single tr ip or errand. The last digit indicates
1/10 of a mile (100 meters).
You can reset the trip odometer to zero by
pressing the Reset button ~o.
Malfunction message
If there is a malfunction somewhere in the in-
strument cluster, dEFwill appear in the trip
odometer and will stay on. Contact your au-
thorized Audi dealer to have the problem cor-
rected.
(D Tips
- When you open t he driver door, the time,
date and odometer are disp layed for an
additiona l 30 seconds.
- You can also call up the display with the
ICHECK Ibutton c>page 12 while the ig-
nition is switched off.
Fuel gauge
The fue l gauge only works when the ignition is
on.
When the needle reaches the reserve mark,
the c>page 35 00]symbol appears in the in-
strument cluster display as well as the mes-
sage Please refuel. This message is meant to
remind you to refuel.
The total tank capacity of your vehicle is listed
in .:>page 315 .
@ Note
Never run the tank completely dry. An ir-
regular supply of fuel can cause engine
misfiring and fuel could enter the exhaust
system. The catalytic converter could then
overheat and be damaged.
~ button
Fig. 6 CHECKbutto n in the instrument cluster
The !CHECK Ibutton performs the follow ing
funct ions:
Switching on the clock and odometer
With the ig nition turned off, the odometer
reading and the dig ita l clock with date display ..,_

In strument s a nd warning / indicator lights 13
can be switched on for about 30 seconds by
pressing the ICH ECKi button ¢ fig. 6 .
Starting the Auto-Check sequence
The Auto-Check system ¢ page 30 const ant-
ly monitors certai n ind ividual fu nct ions and
components of the vehicle when the ignit ion
is t urned on and when the vehicle is moving.
With t he ignition turned on, you can start the
"Au to-Check sequence" by pressing the
ICH ECKi button. You can perform an Auto-
Check sequence when the vehicle is stationary
and the ign ition is turned on or when the vehi-
cle is moving not faster than 3 mph (5 km/h).
The number of keys progr ammed t o t he vehi-
cle is also displayed. The disp lay 3\ 3 indicates
that th ree keys have been programmed . This
allows you to make sure you have received all
of the keys when you purchase a used vehicle.
For example, if you on ly receive two keys, you
should take those keys to your aut horized
Aud i dealer to have the missing key deactivat-
ed so it cannot be used. You should also re-
port the m issing key to your insurance compa-
ny.
Calling up the driver informati on
A yellow or red symbol appears in the instru-
ment cluster display, usually w ith a driver
message. The driver message display disap-
pears after about 5 seconds. The driver mes-
sage can be displayed again by briefly press-
ing the ! CHECK I button.
Setting the speed warning
By pressing the IC HECK I button briefly, you
can set thres hold 1 of the speed warning
while you are driving o page 29 . By main-
tain ing pressure on the ICHECK I button, you
delete t he warning threshold .
Instrument cluster illumination
The basic brightness of the illumination for
the instruments, the center console and the
display can be adjusted.
Fig. 7 I nstrument cluster ill um ination
.,.Presst he"+" but t on to increase t he bright -
ness during the hours of darkness.
...Presst he "-" button to decrease the bright-
ness dur ing the hours of darkness.
A lig ht sensor in the instrument cluster con-
tro ls t he illumination for the instrument clus-
te r, the center console and the displays . In a
bright environment, using the buttons to
change the brightness has no effect .
{l) Tips
The ill umination for the inst rument cluster
lights up w henever you switch on the igni-
tion with the vehicle headlights off. As the
daylight fades, the inst rument cluste r ill u-
mination likewise di ms automa t ically and
will go out comp let ely when the outsi de
light is very low. This feature is meant t o
remi nd you t o swi t ch on t he headl ight s
whe n outs ide light conditions become
poor .

14 Instruments and warning/indicator lights
Warning/indicator lights
Overview
The warning/indicator lights indicate different functions or a possible malfunction.
Fig. 8 Instrument duster with warning/indicator lights
Yourvehicle is equipped with several impor·
tant warning and indicator lights to help you
monitor the continued reliable operation of
your vehicle¢ _&.
•
II
•
Electronic power control
(alternative to II)
¢page 15
Glow plug system
(alternative to [3B)
¢page 15
Electronic Stabilization Control
(ESC)
¢page 16
Electronic Stabilization Control
(ESC)
¢page 16
USA models: Safety systems
¢ page 16
Canada models: Safety systems
¢page 16
Leftturn signa l
¢page 16
Trailer turn signa l assembly*
¢page 17
• Malfunction Indicator Lamp
(MIL)
¢ page 17
• Adaptive AirSuspension*
c:>page 17
• Adaptive Air Suspension*
¢pag e 17
II Right turn signal
¢page 16
Safety belt
c:>page 18
Ill High beam
c:>page18
[I] Tire pressure monitoring system
c:>page18
~i[~~1~
USA models: Cruise control acti·
vated
c:>page18
• Canada models: Cruise contro l
activated
c:>page18
rm
USA models: Anti-lock brake
system (ABS)defective
¢ page 18

In strument s and warnin g/ indic a tor ligh ts 15
Canada models: Anti-lock brake
system (ABS) defective
¢ page 18
USA mode ls : Parking brake
¢ page 19
Canada models : Parking brake
¢page 19
USA models: Brake malfunction
¢page 19
Canada models : Brake malfunc-
tion
¢page 19
Vehicles w ith the adaptive cruise contro l*
have the following additiona l check lamps:
II II c:=:)
c:=:) III I c:=:)
Open road
¢ page 121
Driving in traff ic
¢ page 121
Request for driver to as-
sumecontrol
¢ page 121
_& WARNING
- Failure to heed warning lights and other
important vehicle info rmation may result
in serious personal injury or vehicle dam-
age.
- Whenever stall ed or stopped for repair,
move the vehicle a safe distance off the
road, stop the engine, and turn on the
emergency flasher¢ page 60.
- The engine compartment of any motor
vehicle is a potentially hazardous area.
Before you check anything in the engine
compartment, stop the engine and let it
cool down . Always exercise extreme cau-
t ion when working under the hood
~ page 257.
Many functions are monitored by the Auto-
Checksystem ¢ page 30. Malfunct ions
or faults will be identified either w ith a red
symbol (priority 1 - Danger!) or with a yel-
low symbo l (priority 2 - Warning).
EPCElectronic power control
Applies to vehicles : with gasoline engine
Thiswarning/indicator light monitors the
electronic power control.
The ~ warning/indicator light (Electronic
Power Contro l) illuminates when you t urn on
the ignition as a function check.
(D Tips
If this warn ing/ indicat or light illum inates
while you are driving, t hen there is a mal-
funct ion in t he engine electronics. Have
the malfunct ion corrected as soon as pos-
sible by your authorized Audi dealer or
qualified workshop .
W Glow plug system
Appli es to vehicles: wit h diesel engine
The control light illuminates when the glow
plug system is active.
If the lmlindicator light illuminates, the glow
pl ug system is active . You should start the en-
gine immediately after the indicator light
switches off. The indicator light only illum i-
nates for approximately 1 second if the en-
gine is warm or if the outs ide temperature is
above 46 QF(8 QC).
(D Tips
- If the glow plug indicator light illum i-
nates while dr iving, there is an engine
cont rol malfunction . The engine should
be checked immed iate ly.
- If the ind icator light does not ill uminate
at all when switch ing the ignit ion on,
there may be a malfunction in the glow
plug system. The engine should be
checked.

16 In st rum e nt s and w a rn ing /i ndic at o r light s
;;. / ~ Electronic Stabilization Control
(ESC)
This warning/indicator light monitors the
Electronic Stabilization Control.
If the DJindicator light blinks while driving,
the ESCor ASR(Anti-Slip Regulation) is active-
ly regulating.
If th€ DJindicator light turns on, the system
has switched the ESCoff. In this case, you can
switch the ignition off and then on to switch
the ESCon again. The indicator light turns off
when the system is functioning fully.
If the i indicator light turns on, ESCwas re-
str icted using the I~OFF !button ~ page 224 .
Stabiliz ation control (ESC/ABS): Fault! See
own er's manual
If th€ J_j)indicator light and the ABSindicator
light ~ (USAmodels) 111](Canada models)
turn on and the message appears, the ABSor
electronic differential lock is malfunction ing.
This also causes the ESCto malfunct ion. The
brakes st ill function with the ir normal power,
but ABSis not act ive.
Driveto your authorized Audi dealer or quali-
fied workshop immediately to have the mal·
function corrected.
A WARNING
If the 1111(USAmodels) tllll (Canada
mode ls) brake system indicator light turns
on together with the ABSand ESCindica-
tor lights, the ABS/ESCregulating function
may have failed . Functions that stabilize
the vehicle are no longer availab le. This
could cause the vehicle to swerve and in-
crease the risk of sliding. Drive carefully to
the nearest authorized Audi dealer or oth-
er qua lified workshop and have the mal·
function corrected.
(D Tips
For additional information on ESCand
ABS,refer to c:>page 224.
tli1!!r Safety systems
The I (USAmodels) !Ill(Canada models) in-
dicator light mon itors the safety systems (e.g.
airbags, pretensioners) and illuminates for a
few seconds each time you switch the ignition
on.
If the I (USAmodels)/ . (Canada models)
indicator light does not go out, or if it illumi-
nates while you are driving, or if it starts to
blink, then there is a malfunction somewhere
in the system. If the light does not illuminate
when you switch the ignit ion on, th is also
means there is a malfunct ion.
A WARNING
"'--
If you have a malfunction in the safety sys-
tems, contact your authorized Audi dealer
immediately. Otherwise the safety sys-
tems may not work properly in an acci-
dent.
¢¢ Turn signals
The indicator light blinks when you use either
turn signal.
Whenever you use the left II or the right .
turn signal, the indicator light blinks. When
you use the emergency flashe rs, both indica-
tor lights flash .
If one of the turn signal light bulbs burn out,
the turn signal will blink twice as fast as nor·
mal.
This does not apply, however, in towing mode.
The indicator light does not flash if a turn sig·
nal is out on the tra iler or the towing vehicle.
Additional informat ion on the turn signals
~page 60.

In strument s and warnin g/ indic a tor ligh ts 17
¢1.~Trailer turn signal assembly
App lies to vehicles: with towing hitc h
The indicator light also blinks if the turn sig-
nal is operated when towing a trailer .
The indicator light . blinks when the turn
signal is used, if a trailer has been properly
connected to the vehicle.
If one of the turn signal bulbs on the trai ler is
burned out or defective, the indicator light
will not blink when you use the turn signals.
{!) Tips
Forvehicles with a factory installed towing
hitch or a trailer hitch that was installed
later according to factory specifications,
the trailer tu rn signal assembly is actuat-
ed.
o Malfunction Indicator Lamp (MIL)
The Malfunction Indicator Lamp (MIL)is part
of the On-Board Diagnostic (OBDII) system.
The symbol (.j light s up when the ignition is
turned on and will turn off after the engine
has started and has sett led at a constant idle
speed. This indicates that the MILis working
properly.
The warning light illuminates when there is a
malfunction in the engine electronic system .
Contact your authorized Audidealer and have
the malfunction corrected .
An improperly clos ed fuel fill ercap may also
cause the MILlight to illumi nate (onl y
vehicles with gasoline eng ine) c:>page 252.
For more informat ion c:>page 2 7.
Ci:>Adaptive Air Suspension
Applies to vehicles: with Adaptive Air Suspension
Thisf!I warning/indicato r light has the fol-
lowing functions:
- It illuminates for a few seconds after the ig-
nition is t urned on as function check and
then goes out .
- If the warning/indicator light illuminates or
blinks contin uously, there is a system fault
in the Adaptive AirSuspension. Asystem
fau lt can result in limited ride comfort and
low ground clea rance . Drivesafely to the
nearest authorized Audidealer or qualified
workshop, and have the fault corrected .
- If the warning/indicator light flashes, you
should not drive the vehicle. The flashing
warning/indicator light points to an extreme
High level. Avery pronounced lifting of the
vehicle (extreme High level) can result, for
examp le, when a heavyload is removed
from the vehicle. As soon as the level has re-
turned to norma l, the warning/indicator
light stops flashing, and you can drive away.
- If the warning/indicator light flashes in con-
junction with the II warning/indicator
light, you should not drive off immediately
in order to prevent damage to the under-
body. The two warning/ indicator lights
flashing together points to an extreme Low
level. Avery
pronounced lowering of the ve-
hicle (extreme Lowlevel) can result, for ex-
ample , from a heavy load. As soon as the
level has retu rned to normal, t he warning/
indicator lights stop flashing, and you can
drive away.
(D Note
If the warning/ indicator light flashes in
conjunction with the B warning/ind ica-
tor light, you should not drive the vehicle
because low-lying vehicle parts can bot -
tom out as you drive over uneven ground
and be damaged as a result.
~
Adaptive Air Suspension
Appli es to vehicles: with Adaptive Air Suspension
ThisB warning/i ndicator light has the fol-
lowing functions:
- It illuminates for a few seconds after the ig-
nition is turned on as function check and
then goes out .
- It comes on for approximately 15 seconds
as a warning of reduced ground clearance , if .,,.

18 Instruments and warning/indicator lights
the dynamic mode is activated and if the ig-
nition is switched on ¢ page 155, Chassis
controls .
- If the warning/indicator light flashes in con-
junction with the IIJwarning/indicator
light, you shou ld not drive the vehicle imme-
diately in order to prevent damage to the
underbody . The two warning/indicator
lights flash ing together points to an ex-
treme Low level. A very pronounced lower-
ing of the vehicle (ext reme Low level) can re-
sult, fo r example, from a heavy load. As
soon as the level has ret urned to normal I
the warning/indicator lights stop flashing,
and you can drive away.
{[) Note
If the warn ing/ indicator light flashes in
conjunction with the IIJwarning/indica -
tor light, you should not drive the vehicle
because low-lying vehicle parts can bot-
tom out as you drive over uneven ground
and be damaged as a result .
~
Safety belts
This warning/indicator light reminds you to
put on your safety belt.
The . warning/indicator light illuminates
when the ignition is switched on to remind
the driver and (on USA models only) any front
passenger to put on the safety belt. Add ition-
ally, an acoustic warning (gong) w ill also
sound.
For more Information ¢ page 174, Safety
belt warning light.
~D High beam
The II warning/indicator light ill uminates
when the high beams are on or whe n you use
the headlight flasher . For more informat ion
about using the high beams, see¢ page 60.
ill Tire pressure monitoring system -
telltale indicator lamp
The warning/indicator light appears in the
event of a significant loss of tire pressure or if
there is a malfunction.
The ind icator light [D]ill uminates to check
the function when you switch on the ign it ion.
If the [D]symbol remains on or blinks after
you switch on the ign it ion, there is a loss of
t ire pressure or a system ma lfunction . If there
is a system malfunction, seeyour authorized
Audi dealer as soon as possible.
Detailed informat ion on the tire pressure
monitoring system can be found in
¢ page 291.
.CRUISE/''(")Cruise control
The lij;(l)~i~(USA mode ls) ,11 (Canada mod-
els) warning/indicator light illuminates when
t he cruise control is activated .
ABS/(8 ) Anti-lock brake system (ABS)
This warning/indicator light monitors the ABS
and the electronic differential lock (EDL).
The ~ (USA models) 1(1](Canada models)
warning/indicator light will come on fo r a few
seconds when the ignition is switched on. The
lig ht will go out after an automatic check se-
quence is comp leted .
There is a malfunction in the ABS when:
- The warning/indicator light does not illumi-
nate when you switch on the ignition.
- The warning/indicator li ght does not go out
after a few seconds.
- The warning/indicator light illum inates
while driving.
The brake system will still respond even
without the assistance of the ABS system.
See your authorized Audi dealer as soon as
possible to restore full braking performance.
For more information regarding the ABS
¢ page 224. II>-
Table of contents
Other Audi Automobile manuals

Audi
Audi TT 2007 Operating instructions

Audi
Audi TT 2007 Operating instructions

Audi
Audi R8 Spyder 2015 User manual

Audi
Audi A4 User manual

Audi
Audi TTS Coupe 2015 User manual

Audi
Audi TT COUPE User manual

Audi
Audi A5 Coupe 2013 User manual

Audi
Audi A2 User manual

Audi
Audi TT 2011 User manual

Audi
Audi Q7 2015 User manual

Audi
Audi A6 User manual

Audi
Audi A4 2005 Manual

Audi
Audi TT 2010 User manual

Audi
Audi A6 2018 User manual

Audi
Audi Coupe Quattro 1986 User manual

Audi
Audi Q7 2007 Operating instructions

Audi
Audi A6 ALLROAD QUATTRO User manual

Audi
Audi Q8 e-tron Sportback 2024 Instruction Manual

Audi
Audi Q7 2007 Operating instructions

Audi
Audi Q7 V12 TDI QUATTRO - User manual