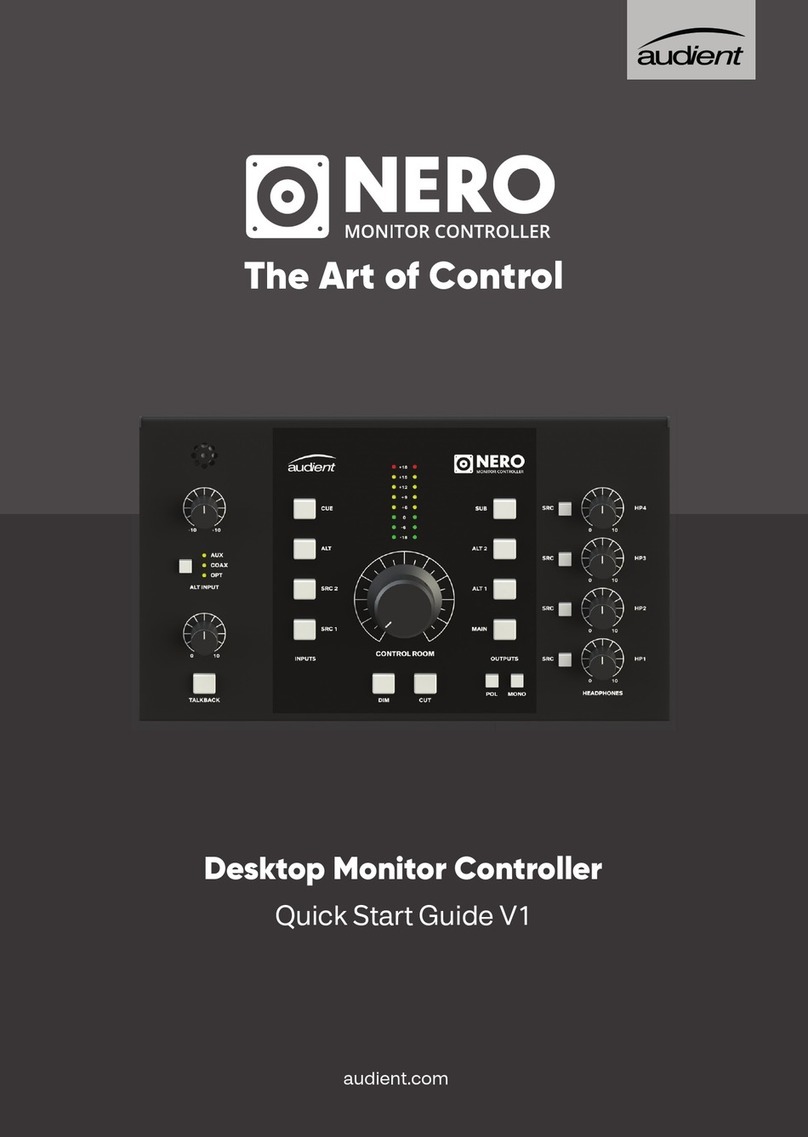
Audient Nero User manual

audient.com
User Manual V1.0

2 3
ContentsWelcome and Thank You
Welcome and Thank you 2
Nero Overview 4
Box Contents 6
Safety Information 7
Declaration of Conformities 9
Setup Diagrams 11
Hardware Features: 14
Power Switch 15
Inputs 16
Outputs 17
Routing 18
Input Selection 18
Speaker Output Selection 19
Volume Control 20
Monitoring Functions 20
Talkback 21
Saving your Routing 22
Factory Reset 22
Smart Touchpoints 23
Speaker Level Matching 23
Smart Mono Mode 24
Assignable Sub 24
User Defined Dim 25
Talkback Routing 25
Signal Flow Diagrams 26
Technical Specifications 28
Warranty & Contact 29
Service 31
Glossary 32
Nero has been designed to deliver pristine
sound quality whilst giving you powerful
control over your monitoring.
Featuring a comprehensive range of I/O,
console style monitor control, Precision
Matched Attenuation Technology,
an assignable sub output and Smart
Touchpoints.
With the incredible flexibility and
customisation provided, Nero will sit
comfortably at the core of your studio.
Nero는 아래 기능을 포함하고 있습니다.
• 4 x 스테레오 아날로그 소스
–2 x 라인 레벨 입력
–1 x 독립 Cue 믹스 입력
–1 x Aux 입력 (RCA or Mini Jack)
• 광단자 & Coaxial S/PDIF 입력
• 3 x 스테레오 스피커 출력
• 1 x 지정가능한 Sub 출력
• 4 x 라우팅이 가능한 헤드폰 출력
• 사용자 지정이 가능한 Smart Touchpoints
• 토크백 입력
• 내장 마이크
• 외장 토크백 마이크 입력
• Dim, Cut, Mono, Polarity Monitor 컨트롤
Thank you for
choosing this
Audient product

4 5
Nero OverviewNero Overview
입력 소스
선택
스피커
Cut / Dim
컨트롤
L 채널의
모노 / 극성
반전
헤드폰 선택
버튼 & 볼륨
컨트롤
Aux 입력 Trim,
그 외 입력 선택
토크백
마이크 게인 &
On/Off 스위치
스피커
볼륨 & 미터
스피커
출력 선택
S/PDIF
입력
전원 스위치 &
DC 입력
헤드폰
아웃풋 2-4
스피커
출력 선택
아날로그 입력 소스 토크백 마이크
선택 스위치
서브 출력 외부 토크백 마이크 입력

6 7
Safety InformationBox Contents and Setup
Important Safety Instructions
audient.com/support
Inside your Nero packaging you will find the
following items:
•Nero
•12V Switch Mode Power Supply with
Regional Adaptors
•Quick Start Guide
Please visit audient.com/nero to download
the latest supporting documentation and
brochures for our product range.
The 12V DC power supply comes with
interchangeable UK, EU, US and Australian
Socket Adaptors and will work across a
broad range of Mains Voltages, making Nero
globally portable.
We hope that you enjoy using Nero!
! WARNING !
TO REDUCE RISK OF FIRE OR ELECTRIC SHOCK, DO NOT EXPOSE THIS
APPARATUS TO RAIN OR MOISTURE.
NO USER SERVICEABLE PARTS INSIDE.
PLEASE REFER SERVICING TO QUALIFIED SERVICE PERSONNEL.
Please read all of these instructions and
save them for later reference before con-
necting the DC power adapter to the
mains and powering up Nero.
To prevent electrical shock and fire hazard
follow all instructions on the 12VDC power
supply. Nero itself does not operate with
any high voltage mains supply inside the
unit but appropriate safety measures
should still be adhered to regarding the
AC/DC supply.
Please ensure you only use the included
Nero power supply. We cannot recom-
mend the usage of third party power sup-
plies. In the event of a power supply failure
do not open the 12VDC supply. If required,
please contact Audient support so that a
suitable replacement can be sourced.
Nero utilises an external switch-mode power
supply that is very quiet and rated at 2A. This
switch-mode design will accept any A.C line
voltage from 100v to 240v @ 50/60Hz.
Therefore the unit will work anywhere in the
world but please ensure your A.C mains line
voltage is within this specification.
Consult a qualified technician if you suspect
difficulties. Do not attempt to tamper with
the power supply or mains voltages - HAZ-
ARDOUS TO HEALTH. Ensure that the appro-
priate international pin adapter is fitted to the
power supply before insertion into the mains
socket.

8 9
Declaration of ConformitiesSafety Information
FCC Part 15BImportant Safety Instructions
1. Read these instructions
2. Keep these instructions
3. Heed all warnings
4. Follow all instructions
5. Do not use this equipment near water
6. Clean only with dry cloth
7. Do not install near any heat sources such
as radiators, heat registers, stoves, or
other equipment (including amplifiers)
that produce heat
8. Do not defeat the safety purpose of the
polarized or grounding-type plug. A
polarized plug has two blades with one
wider than the other. A grounding type
plug has two blades and a third grounding
prong. The wide blade or the third prong
are provided for your safety. If the provided
plug does not fit into your outlet, consult an
electrician for replacement of the obsolete
outlet
9. Protect power cords from being walked on
or pinched particularly at plugs,
convenience receptacles, and the point
where they exit from the equipment Only
use attachments/accessories specified by
the manufacturer
10. Unplug this equipment during lightning
storms or when unused for long periods
of time
11. Refer all servicing to qualified service
personnel. Servicing is required when
the equipment has been damaged in any
way, such as power supply cord or plug
is damaged, liquid has been spilled or
objects have fallen into the equipment,
the equipment has been exposed to rain
or moisture, does not operate normally,
or has been dropped
12. For products that are a mains powered
device: The equipment shall not be
exposed to dripping or splashing and no
objects filled with liquids (such as vases)
shall be placed on the equipment.
This apparatus has been tested and
found to comply with the limits of a
class-A digital device, pursuant to Part
15B of the FCC Rules. These limits are
designed to provide reasonable
protection against harmful interference
in a residential installation.
This equipment generates, uses and
can radiate radio frequency energy and,
if not installed and used in accordance
with the instructions, may cause
harmful interference to radio
communications. If this equipment does
cause harmful interference to radio or
television reception, which can be
determined by turning the equipment
off and on, the user is encouraged to try
to correct the interference by one or
more of the following measures:
1. Re-orient or relocate the receiving
antenna
2. Increase the separation between the
equipment and receiver
3. Connect the equipment into an outlet
on a different circuit from that to which
the receiver is connected.
4. Consult the dealer or an experienced
radio/TV technician for help

10
Declaration of Conformities
Setup Diagrams
We, Audient Ltd, Aspect House, Herriard, Hampshire, RG25 2PN, UK,
01256 381944, declare under our sole responsibility that the product Nero
complies with Part 15 of FCC Rules.
Operation is subject to the following two conditions:
1. This device may not cause harmful interference,
2. This device must accept any interference received,
including interference that may cause undesired operation
We, Audient Ltd, declare that the product, Nero, to which this declaration
relates, is in material conformity with the appropriate CE standards and direc-
tives for an audio product designed for consumer use.
Audient Ltd has conformed where applicable, to the European Union’s Directive
2002/95/EC on Restrictions of Hazardous Substances (RoHS) as well as the
following sections of California law which refer to RoHS, namely sections
25214.10, 25214.10.2, and 58012, Health and Safety Code; Section 42475.2,
Public Resources
Please note that Audient Nero is exempt from the EC 1275/2008 power
management requirement for the following reason:
Nero is designed with the analogue line inputs being the primary functional input
of the device. When an input device is connected, Nero must be active to wait
for a signal. During a recording or mixing session it can be a long time until audio
is actually played. If Nero were to go into a standby mode or similar, this would
cause a disruption to a recording session as the user would expect the unit to be
operational even if the input is not being actively used.

12 13
인터페이스 / CD 플레이어에서
아날로그 신호
인터페이스에서
디지털 신호
오디오 인터페이스
CD 플레이어
오디오 인터페이스
메인 스피커
믹서
포노 프리앰프
보조 스피커 1
보조 스피커 2
외부 토크백
마이크
모노 스피커
보조 스피커
메인 스피커
스마트폰
CD 플레이어

15
하드웨어 주요기능
Hardware Features
전원 스위치
후면 패널의 파워 스위치로 유닛의 전원을 켜고 끌 수가 있습니다.
Nero의 전원 끄거나 켜기 전,
반드시 스피커나 파워앰프의 전원이 꺼져 있어야 합니다.
(그 외 연결된 장비들도 마찬가지 입니다.)

16 17
하드웨어 주요기능 하드웨어 주요기능
입력
SRC 1 & 2
보조 입력
아날로그 입력
Nero는 다양한 입력 옵션을 제공합니다.
이 입력은 모니터링을 위해 Nero로 오디오를 전송하는
기능 입니다.
출력
Nero는 다양한 출력 옵션을 제공하여, 모든 장치의
출력을 하나로 통일합니다.
Cue 입력
Cue 입력은 SRC 1/2와 동일하게 라인 레벨 밸런스드
TRS 입력을 받습니다. 일반적으로는 아티스트를 위한
모니터링 믹스를 제공할 때 사용됩니다.
Aux 입력은 RCA와 mini-jack 입력을 통해 CD
플레이어나 스마트폰을 연결하여 사용할 수 있습니다.
RCA와 mini-jack 입력이 동시에 연결되어 있는 경우,
RCA 입력이 우선적으로 사용됩니다.
Trim 노브를 사용해서 입력 값의 볼륨을 조절할 수
있습니다.
특히 다른 입력과 볼륨 값을 동일하게 셋팅할 때
유용하게 사용할 수 있습니다
S/PDIF 입력을 선택하면, Optical 과 Coax 중 오디오
입력이 감지되는 포트를 자동으로 선택합니다.
만일 선택한 입력 Source에서 오디오가 감지되지
않으면 LED가 점멸합니다. 이 경우 반드시 입력
장치를 확인하시기 바랍니다.
입력 포트에서 오디오가 감지되면 LED가 점멸
상태에서 점등 상태로 바뀝니다.
디지털 입력
두개의 S/PDIF 입력은 Optical 과 Coax 이며, 최대
192kHz 의 샘플레이트를 지원합니다. 이 입력단자를
통해 오디오 인터페이스와 같은 장치를 연결할 수
있습니다.
SCR 1&2 는 아날로그 TRS 밸런스드 라인 입력이며,
모든 아날로그 라인 출력 디바이스와 연결할 수
있습니다. 일반적으로 SRC 1은 오디오 인터페이스에서
출력되는 스테레오 오디오를 입력 받아 사용되는 메인
모니터링 소스 입니다.
메인 출력 (Main Output)
메인 출력(Main Output)은 여러분들이 사용하는
메인 모니터 스피커와 연결되는데 사용됩니다. 출력
포트는 아날로그 TRS 밸런스드 라인 출력 입니다.
보조 출력 (Alt Outputs)
Nero는 두개의 보조 출력(Alt Outputs)이 있어,
스피커 2조를 더 연결할 수가 있습니다. 이 방식을 통해
다양한 모니터 스피커로 모니터링이 가능합니다. 출력
포트는 TRS 밸런스드 라인 출력 입니다.
서브 출력 (Sub Output)
서브 출력(Sub Output)은 서브 우퍼를 연결할 때 사용
됩니다.
Nero에는 총 3개의 보조 입력이 있습니다. 그 중 2개는
디지털 입력, 1개는 아날로그 Aux 입력 입니다.
Nero 전면부에 위치한 Alt Input 버튼을 눌러 다양한
보조 입력을 선택할 수 있습니다.

18 19
하드웨어 주요기능 하드웨어 주요기능
헤드폰 출력 헤드폰 출력
라우팅 (Routing)
입력 선택
컨트롤 룸 (Control Room)
주의 : 기본 설정 - 토크백은 HP2~HP4 으로
라우팅 되어 있습니다.
스피커 출력 선택
(Speaker Output Selection)
Nero의 전면에는 모니터 그레이드의 헤드폰 출력이
있습니다. 이 출력은 믹스를 모니터링 하거나, 레코딩
세션을 할 때 사용할 수 있습니다.
그 외에 아티스트가 사용할 수 있는 3개의 헤드폰
아웃풋이 후면에 있으며, 각 출력 별로 다른 입력과
믹스를 내보낼 수 있습니다.
토크백 라우팅 (Talkback Routing)
헤드폰 소스 모드를 사용 중에 토크백 버튼을 사용하여
토크백 시그널을 헤드폰을 라우팅 하는 것이
가능합니다.
Nero의 전면의 컨트롤 룸 섹션에 위치한 버튼을 눌러,
어떤 스피커로 모니터링 할 것인지 선택할 수
있습니다.
모니터 컨트롤러의 많은 기능 중, 가장 중요한 것은
시그널 라우팅이라고 할 수 있습니다. Nero는 스피커
및 헤드폰의 효과적인 라우팅 옵션을 제공합니다.
컨트롤 룸 출력으로 입력을 지정을 하게 되면, 전면의
Input 버튼이 오렌지색으로 점등하며 활성화된
입력을 표시 합니다.
입력 소스 (Input Source)
헤드폰 볼륨 노브 옆에 위치한 SRC 버튼을 사용하여
입력을 특정 헤드폰 출력으로 라우팅 할 수 있습니다.
SRC 버튼을 누르면 헤드폰 소스 모드(Headphone
Source Mode)로 진입하게 되며, 이 때 SRC와 입력
선택(Input Select) LED가 녹색으로 점등합니다.
이 상태에서 해당되는 입력 버튼을 선택할 수 있습니다.
헤드폰1(HP1)은 컨트롤 룸 소스를 그대로 따라갈 수
있는 특별한 모드가 있습니다.
헤드폰 1은 모든 소스에서 라우팅할 수 있지만 다른
모든 소스 대신 컨트롤룸에서 공급할 수도 있습니다.
1. 현재 활성화된 입력 버튼을 누르게 되면 이 특별
모드가 작동합니다.
2. 컨트롤 룸을 모든 입력 LED는 꺼지게 됩니다.
3. 이 모드에서는 토크백이 작동하지 않습니다.
주의 : HP1은 컨트롤 룸 소스, HP2~HP4는 Cue
입력을 모니터링 하는 것이 기본 설정입니다.

20 21
하드웨어 주요기능 하드웨어 주요기능
모니터링 기능
Dim
토크백
게인 노브(Gain Knob)
볼륨 컨트롤
스피커 출력 볼륨은 전면에 위치한 볼륨 노브로 조절
할 수 있습니다. 이 볼륨 노브는 Stepped Volume
감쇠기를 사용하기 때문에, 좌측 최소 볼륨 부터 우측
최대 볼륨까지 균일하게 조정이 됩니다.
Nero는 오디언트의 콘솔에서의 경험을 토대로, 마치
콘솔을 사용하여 모니터링 하는 듯한 경험을
제공합니다.
Dim 기능은 현재 설정된 출력 볼륨 값을 감쇠한데
사용됩니다. 기본 설정은 -15dB 감쇠지만, 사용자의
필요에 따라 설정하여 사용할 수 있습니다.
Cut
모든 스피커의 출력을 끕니다. 이 기능은 순간적으로
옆의 사람과 대화를 하거나, 헤드폰으로만 모니터링을
하고 싶을 때 유용하게 사용할 수 있습니다.
위상 반전(Polarity)
이 버튼은 좌측 채널의 위상을 반전하는데 사용됩니다.
모노 기능과 같이 사용할 수도 있으면, 스테레오
리버브 및 딜레이를 모니터링 하는데 유용하게 사용할
수 있습니다.
이 버튼은 설정을 통해 눌러져 있는 동안만 위상 반전
기능이 작동하게끔 설정할 수 있습니다.
토크백 기능은 마이크 시그널을 보컬 부스 등에 있는
헤드폰 믹스로 출력합니다. 레코딩 부스와 같은 별도
공간에 있는 아티스트와 커뮤니케이션을 위해
유용하게 사용 됩니다.
Nero는 토크백 마이크가 내장이 되어 있으며, 외장
토크백 마이크 또한 연결해서 사용할 수 있습니다.
후면의 패널에서 내장 마이크, 혹은 외장 토크백
마이크를 사용할 것인지 선택할 수 있습니다.
- 내장 마이크
- 외장 마이크는 표준 XLR 케이블로 연결됩니다.
- 콘덴서 마이크는 Nero의 팬텀 파워을 켜서 전원을
공급할 수 있습니다.
토크백 프리앰프는 다양한 마이크와 사용되도록 넓은
레이지의 게인을 제공합니다. 게인 노브를 사용하여,
토크백 마이크의 적절한 레벨을 설정할 수 있습니다.
토크백 버튼
이 버튼은 토크백을 활성화 하여, 지정된 헤드폰으로
토크백 음성을 출력합니다.
추가적으로 Dim 기능을 활성화 하여, 토크백
마이크로 부터 피드백이 발생하지 않도로 방지합니다.
모노(Mono)
모노 기능은 좌측 채널과 우측 채널을 모노로 모니터링
할 때 사용됩니다. 이 기능은 통해 모노 스피커에서의
믹스 상태를 파악하는데 유용하게 사용 됩니다. 모노
스피커의 예로는 블루투스 스피커 등이 있습니다.
이 버튼은 설정을 통해 눌러져 있는 동안만 Mono
기능이 작동하게끔 설정할 수 있습니다.

22 23
하드웨어 주요기능 하드웨어 주요기능
공장 초기화 스마트 터치포인트 (Smart Touchpoints)
스피커 레벨 매칭 (Speaker Level Matching)
사용자 지정 라우팅 저장하기
Nero의 전원이 꺼진 후 다시 시작할 때, 이전의
라우팅을 다시 사용하고 싶으면 반드시 저장을 하셔야
합니다.
라우팅을 저장하기 위해서는, 현재 활성화된 스피커
출력 버튼(Speaker Output) 을 누른채, 다른 스피커
출력 버튼을 동시에 누르시면 됩니다.
저장이 정상적으로 진행되었다면, Dim 버튼은
녹색으로, Cut 버튼은 붉은색으로 점멸합니다.
스마트 터치포인트는 모니터링을 위한 라우팅을
빠르게 설정할 수 있는 기능을 제공합니다.
Nero의 출력과 모니터 컨트롤을 여러분들의 필요에
따라 손쉽게 설정할 수 있습니다. 스마트 터치포인트를
지속적으로 누르면 셋업 모드로 진입하게 됩니다. 이후
라우팅 옵션을 선택 후 다시 누르면 저장 후 셋업
모드를 종료하게 됩니다.
스피커 볼륨 조정을 위해서는 핑크 노이즈
제너레이터(Pinknoise Generator)와 SPL 미터를
사용하시는 것을 권장드립니다. 아래 절차를 따라
조정하십시오.
1. 메인 스피커로 핑크 노이즈를 출력
2. 해당 SPL 레벨을 기록
3. 조정하고자 하는 보조 스피커 줄력을 선택하고,
출력 선택 버튼(Output)를 LED가 점멸할 때 까지
계속 누르고 계십시오.
4. 볼륨 컨트롤을 조정하여 이전 메인 스피커의 SPL
레벨과 동일하도록 설정하십시오.
5. 점멸하고 있는 보조 스피커 버튼을 다시 눌러
설정을 저장할 수 있습니다.
Nero는 조정을 위해 ±15dB 값을 제공하며, 만약
최대로 조정했음에도 두개의 스피커의 볼륨이
일치하지 않는 경우에는, 스피커의 파워앰프 및 자체
게인 컨트롤을 먼저 확인해보시기 바랍니다.
1조 이상의 스피커를 사용하게 되면, 각 스피커 마다
다른 볼륨 값이 있음을 경험할 수 있습니다. 이 현상은
스피커의 파워 앰프에서 오는 차이이며, 간단한
조정으로 스피커의 볼륨을 매칭할 수 있습니다.
Nero의 보조 스피커 출력에 speaker trim 기능을
적용하여 여러 개의 스피커의 볼륨을 조정할 수
있습니다.
Nero 를 공장 초기화 하기 위해서는 아래의 과정을
거쳐야 합니다.
1. 전원 끄기
2. Dim 버튼과 Cut 버튼을 동시에 누른 상태로
3. 전원을 버튼을 누릅니다.
4. 3초 후 Dim 버튼과 Cut 버튼은 놓으시면 됩니다.
이 과정을 통해 Nero의 공장 초기화를 할 수 있습니다.

24 25
사용자 지정 가능 Dim 토크백 라우팅스마트 모노 모드(Smart Mono Mode) 지정 가능한 서브(Sub) 출력
Nero는 스피커의 출력을 모노로 바꾸는 기능이
있습니다. 별도의 소프트웨어 없이 모노 출력을 손쉽게
사용할 수 있습니다.
아래 절차에 따라 스마트 모노 모드를 셋업하시기
바랍니다.
1. 모노로 출력하고자 하는 스피커 출력 선택(Out
put) 버튼을 계속 누르고 있으면 LED가 점멸하며
셋업 모드로 진입합니다.
2. 모노(Mono) 버튼을 누르시고
3. 점멸하는 스피커 출력 선택 버튼을 다시 눌러
설정을 저장하시기 바랍니다.
서브(Sub) 출력을 특정 스피커 출력을 지정하여, 그
스피커를 선택할 때 마다 자동으로 활성화 되기 할 수
있습니다.
아래 절차에 따라 서브 출력을 셋업하시기 바랍니다.
1. 모노로 설정하고자 하는 스피커 출력 버튼을 누르고
있으면, 점멸되며 셋업 모드로 진입합니다.
2. Sub 버튼을 누르고
3. 점멸하고 있는 스피커 출력 선택 버튼을 눌러
설정을 저장할 수 있습니다.
Nero의 기본적인 감쇠율은 -15dB 이지만, 사용자의
필요에 따라 조정할 수 있습니다.
아래 절차를 따라 감쇠율을 조정하시기 바랍니다.
1. Dim 버튼의 LED가 점멸할 때 까지 계속 누르고
있으면 셋업 모드로 진입하게 됩니다.
2. 볼륨 노브를 통해 원하시는 볼륨 값을 설정할 수
있습니다.
3. Dim 버튼을 다시 눌러 설정을 저장할 수 있습니다.
Nero는 유연한 토크백 라우팅 기능을 제공합니다 -
각 헤드폰 별로 독립적인 출력을 지정할 수 있습니다.
아래 절차를 따라 토크백 마이크를 라우팅 하시기
바랍니다.
1. 헤드폰 출력 소스(SRC) 버튼을 누르고
2. 토크백 버튼을 누르시면, 붉은 빛이 점등하여 해당
출력으로 토크백이 라우팅됐음을 표시 합니다.
3. 헤드폰 소스 선택 모드를 사용하는 도중에는
토크백을 사용할 수 없습니다.
서브 출력은 해당 출력을 선택할 때 마다 자동으로
활성화 됩니다.
이 외에 다른 스피커 출력에서는 Sub 버튼을
누름으로서 서브 출력을 활성화 할 수 있습니다.
이 셋업이 완료되면, 해당 스피커를 선택할 때 마다
모노로 출력이 됩니다 - 이 때 Mono 버튼의 LED는
켜지지 않습니다.
그 외 다른 스피커는 이 셋업이 적용되지 않고, Mono
버튼을 눌러서 모노 모드를 활성화 할 수 있습니다.
예시 예시
예시

26 27
Signal Flow 다이어그램
+48v
SRC 1 Sub
Monitoring
HP1
SRC 2
Main
HP 2
Cue
Alt 1
HP 3
Alt 2
Mini
Jack/
RCA
RCA
Internal
Mic Gain
Talkback
Input
Optical
Input
S/PDIF
Input
Signal Flow 다이어그램
Talkback
Routing
Switch
SRC
Select
Switch
SRC
Select
Switch
SRC
Select
Switch
SRC
Select
Switch
Mono/
Stereo
Select
SRC
Select
Switch
SRC
Select
Switch
SRC
Select
Switch HP 4
Neutrik
입력 프로세싱
모니터 출력
토크백 출력
헤드폰 출력
Preamp
HP
Amp
HP
Amp
HP
Amp
Mono
Mono
Volume
Control
HP
Amp
DAC
+
Left Polarity

28 29
상세 스펙 Warranty
Warranty
The Audient warranty period for any product purchased is 12 months from the date of the original
purchase.
•The warranty is not transferable to a second user.
•Audient products are built using the latest manufacturing technology, tested to the highest
possible standards and by using premium components this should result in providing you with
reliable performance for many years.
•The warranty is return to base, meaning the unit must be returned, carriage paid, to the Dealer you
purchased the unit from or the exclusive territory Distributor responsible for the country in which
you purchased the product
•Some of the products returned under warranty are found not to exhibit any fault at all when they
are retested at our Service Centre’s so it’s always useful to contact our Support team first to try to
•
warranty period please contact either Audient support or the dealer that you purchased the
If you suspect that your unit is suffering from a component or manufacturing defect during the
Audient product from
•In the event of a component or manufacturing defect becoming evident during the warranty
period, Audient will ensure that the product is repaired free of charge or replaced
•Whilst this warranty is provided by Audient, the warranty obligations are fulfilled by the exclusive
territory Distributor responsible for the country in which you purchased the product.
•The Dealer will advise you of the appropriate procedure for resolving the warranty issue.
•In every case it will be necessary to provide a copy of the original invoice or Dealer purchase
receipt to the Distributor.
•In the event that you are unable to provide proof of purchase directly then you should contact
the Dealer from whom you purchased the product and attempt to obtain proof of purchase from
them. The Dealer | Distributor will then advise the procedure to follow.
•
(defined as a Dealer which has purchased the product directly from Audient in the UK, or one of
This limited warranty is offered solely to products purchased from an Authorised Audient Dealer
our Authorised Distributors outside the UK).
BALANCED LINE INPUTS:
Nominal Input Level: +4dBu
Max input level: +18dBu
CMRR: > 50dB
UNBALANCED AUX INPUTS:
Nominal Input Level: -10dBV
Maximum Input level
(minimum trim): +27dBu
Trim Range: ±12dB
DIGITAL INPUTS:
Inputs: TOSLINK and Coaxial
Format: S/PDIF
Sample rates: 44.1kHz - 192kHz
Bit depth: Up to 24bit
TALKBACK INPUT:
Maximum input level: 2dBu
Gain: 4-44dB
Phantom power: +48V
SPEAKER OUTPUT:
Maximum output level: +12dBu
HEADPHONE OUTPUT:
Minimum load: 12.8Ohms
PERFORMANCE
SPEAKER OUTPUTS:
THD+N: 0.0015% 0dBu 1k input
SNR: 100dBu
Crosstalk (speakers): >100dB
Frequency response: 20Hz - 22kHz±0.5dB
Attenuation at min volume
(speaker outputs): >110dB
DAC
THD+N: <0.0017%
Dyn Range: 113dB
Freq Resp: 20Hz - 22kHz ±0.5dB
HEADPHONE OUTPUTS
THD+N @ 0dBu (output level): 0.009% 30Ohm
0.009% 60Ohm
0.008% 600Ohm
Peak power output: 90mW 30Ohm
56mW 60Ohm
7.35mW600Ohm
Crosstalk: >62dB
Attenuation at min volume: >96dB
POWER SUPPLY:
12VDC Centre Positive DC Adapter - 2Amps
WEIGHTS & DIMS:
Dimensions (MM): 255W x 155D x 75H
Weight: 2KG

30 31
Warranty Service
Tel: 0044 1256 381944
audient.com
Service Information
Please note that if you purchased the product from outside of your country of residence you must
return the unit to the original point of purchase for repair.
The Audient warranty term is additional to any statutory rights in the country of purchase or as
offered by the dealer at the time of purchase.
What is meant by a Manufacturing Defect ?
We define this as a defect in the performance or specification of the product as described and pub-
lished by Audient.
A Manufacturing Defect does not include damage caused by post-purchase shipping, storage or
careless handling, nor damage caused by misuse.
Nero contains no user-serviceable components, please refer to qualified service personnel for
diagnosis and repair. Your warranty will be void if you tamper with the device at component level.
If you have any questions with regard to the repair, please contact Audient Ltd.
If your unit is in warranty, please contact your dealer directly for a repair or replacement (at the
discretion of the dealer).
For out of warranty repairs, please contact Audient Ltd, after which a Return Materials Authoriza-
tion (RMA) number will be assigned. This number will serve as a reference for you and helps facili-
tate and expedite the return process. When the unit is returned please include this RMA number
along with a description of the fault inside the packaging box.
To request an RMA, access technical support & FAQs, ask for troubleshooting assistance or make
an enquiry, please visit: audient.com/support

32
Below is a list of common words you may encounter in this manual or whilst using Nero.
AAmperes
DAW Digital Audio Workstation
CUE Artist Headphone Mix
DAC Digital to Analogue Converter
dB Decibel
dBu Decibel referenced to 0.775Vrms = 0 dBu
dBFS Decibel Full Scale
DC Direct Current
DoC Declaration of Conformity
FAQ Frequently Asked Questions
FCC Federal Communications Commission
I/O Input / Output
LED Light Emitting Diode
RoHS Restriction of Hazardous Substances
S/PDIF Sony Philips Digital Interface Format
THD+N Total Harmonic Distortion + Noise
TRS Tip Ring Sleeve (1/4” Jack Balanced)
TS Tip Sleeve (1/4” Jack Unbalanced)
VVolts
XLR Extra Live Return, Extremely Low Resistance,
Canon X Series, Latching, Resilient Rubber Compound... or make up your
own!
Glossary
Other manuals for Nero
1
Table of contents
Languages:
Other Audient Controllers manuals
Popular Controllers manuals by other brands

ALDEN
ALDEN SPS 180 AGM quick start guide

Roller
Roller Control instruction manual

A10
A10 Harmony Controller 2000 quick start guide

Clarke
Clarke Air CAT865 Operating & maintenance instructions

dixell
dixell iCHILL IC205D EVO Quick reference guide

PIETRO FIORENTINI
PIETRO FIORENTINI CIRVAL Operation & maintenance manual