Audio Service SUN G3 User manual

USER MANUAL
RIC HEARING SYSTEMS
MOOD G3
SUN G3
RIXX G3


3
DEAR CUSTOMER,
Congratulations on your new hearing systems. You have decided to
purchase advanced and high-quality products.
By purchasing these hearing systems, you have taken an important
step to enable yourself to hear well again. We are sure that these
hearing systems will soon become indispensable to you and will
make your life safer and more enjoyable. This user manual will help
you to familiarize yourself with your new hearing systems.
If you require further information, please contact your hearing
system specialist, who will be happy to help.
CAUTION
It is important to read this instruction manual and the safety
manual carefully and in full. Follow the safety instructions to
prevent damage or injury.

4 - CONTENTS
CONTENTS
YOUR HEARING SYSTEMS
– Type of hearing systems 5
– Diagram of the hearing systems 6 – 7
– Ear molds 8
– Batteries 8
– Conguration of your hearing systems 9 – 10
SAFETY INFORMATION
– Symbols 11
BATTERIES 12 14
DAILY USE
– Inserting and removing the hearing system 14 – 16
– Switching the hearing system on and o 17 – 18
– Program selection 19
– Volume control 20
ADDITIONAL FUNCTIONS
– Phone calls 21 – 23
– Tinnitus function 23
– Varying AudioSpot 23 – 25
– Wireless functionality 25
– Accessories 25
MAINTENANCE AND CARE
– Hearing systems 26 – 27
– Ear molds 27 – 28
MISCELLANEOUS INFORMATION
– Troubleshooting 29
– CE mark 30
– Service Information 31

- 5
YOUR HEARING SYSTEMS
YOUR HEARING SYSTEMS
TYPE OF HEARING SYSTEMS
Your hearing systems are RIC hearing systems (receiver-in-canal).
The speaker sits in the auditory canal and is connected to the
hearing system by a cable. The hearing systems are not intended
for babies, small children or people with mental disabilities.

6 - YOUR HEARING SYSTEMS
RIXX G3
Battery type 10
non-rechargeable
8
2
1
7
4
10
3
1
5
MOOD G3
Battery type 312
rechargeable
8
2
4
7
9
3
1
5
6
6a
SUN G3
Battery type 13
rechargeable
8
2
4
7
9
3
DIAGRAM OF THE HEARING SYSTEMS

- 7
YOUR HEARING SYSTEMS
1Hearing system (technolog)
2 Receiver
3Microphone protection
4Battery compartment
5Charging contact (depends on the model)
6CLIC MOULD
(
individual ear mold as an alternative to the dome
)
6aRemoval line
7Receiver connection
8Dome (standard ear mold)
9Rocker switch
Can be programmed by your hearing system specialist
as:
–Program button
–On/o switch
–Volume control
–Tone control
–Tinnitus noiser louder/softer (depends on the
model)
10 Push button
Can be programmed by your hearing system specialist
as:
–Program button
–Program button with on/o function

8 - YOUR HEARING SYSTEMS
EAR MOLDS
Your hearing systems have one of the following ear molds:
CLIC MOULD
BATTERIES
DOME
10
13
Item Size
Click Dome Open 4 mm
Click Dome Open 8 mm
Click Dome Open 10 mm
Click Dome Semi-open 12 mm
Click Dome Closed 6 mm
Click Dome Closed 8 mm
Click Dome Closed 10 mm
Click Dome Double 8 mm
Click Dome Double 10 mm
312

- 9
YOUR HEARING SYSTEMS
Rocker switch function Control L R
Program selection Quick press o o
Program change with
on/o function
Quick press
Press for approx.
2 sec.
o o
Volume control Quick press o o
Volume control and
program change
Quick press
Press for approx.
2 sec.
o o
Volume control and
program change with
on/o function
Quick press
Press for approx.
2 sec.
Press for approx.
5 sec.
o o
Tone Quick press o o
Varying AudioSpot Quick press o o
Tinnitus noiser
louder/softer Quick press o o
Push button function Control L R
Program selection Quick press o o
Program change with
on/o function
Quick press
Press for approx.
2 sec.
o o
CONFIGURATION OF YOUR HEARING SYSTEMS

10 - YOUR HEARING SYSTEMS
Functions Yes
Binaural synchronization o
Power-on delay o
AutoPhone o
Telephone coil program o
Varying AudioSpot o
Tinnitus noiser louder/softer o
Signals for Yes
Program selection o
Battery warning sound o
Volume limit o
Volume control o
Varying AudioSpot o
CONFIGURATION OF YOUR HEARING SYSTEMS

- 11
SAFETY INFORMATION
SAFETY INFORMATION
SYMBOLS
Symbols used in this document
Indicates a situation that could result in serious, moderate or
minor injury.
Indicates potential property damage.
Instructions and tips on how to use your hearing systems
better and more eectively.
Indicates that an action is required.
Indicates an option not available for every hearing system.
Ask your hearing system specialist to mark the information
that is relevant for you.

12 - BATTERIES
BATTERIES
IUse only rechargeable or disposable batteries of the correct
size.
ICharge rechargeable batteries before using them for the
rst time (further information is available in the user
manual “Smart Power”).
IRemove the protective lm from batteries only when you
are ready to use them. Zinc-air batteries then need a few
minutes to reach full power.
IThe positive side is always marked. The negative side is
shown by the recessed ring.
IAlways keep spare batteries to hand.
IIf you do not intend to use the hearing systems for a few
days, remove the batteries.
The rechargeable battery run time may lessen after many
charging cycles. Replace the rechargeable battery with a new
one when this happens.
HANDLING THE BATTERIES
CHARGING CYCLES OF RECHARGEABLE BATTERIES

- 13
BATTERIES
BATTERY POWER RUNNING LOW
Your hearing system specialist can program your hearing system so
that an audible signal warns you when the battery is running low.
Change or recharge the battery when you hear this audible signal
or if the amplication starts to fade.
IOpen the battery compartment fully
using your nger nail (see gure).
IInsert the correct battery. The plus
symbol on the battery should face
upwards (see gure).
IClose the battery compartment. If the
battery compartment cannot be easily
closed, check that the battery is correctly
inserted. Please do not use force when
closing the battery compartment,
as this may damage it. If the battery
compartment is completely closed, the
hearing system is ready for use.
INSERTING THE BATTERY
14 - BATTERIES DAILY USE
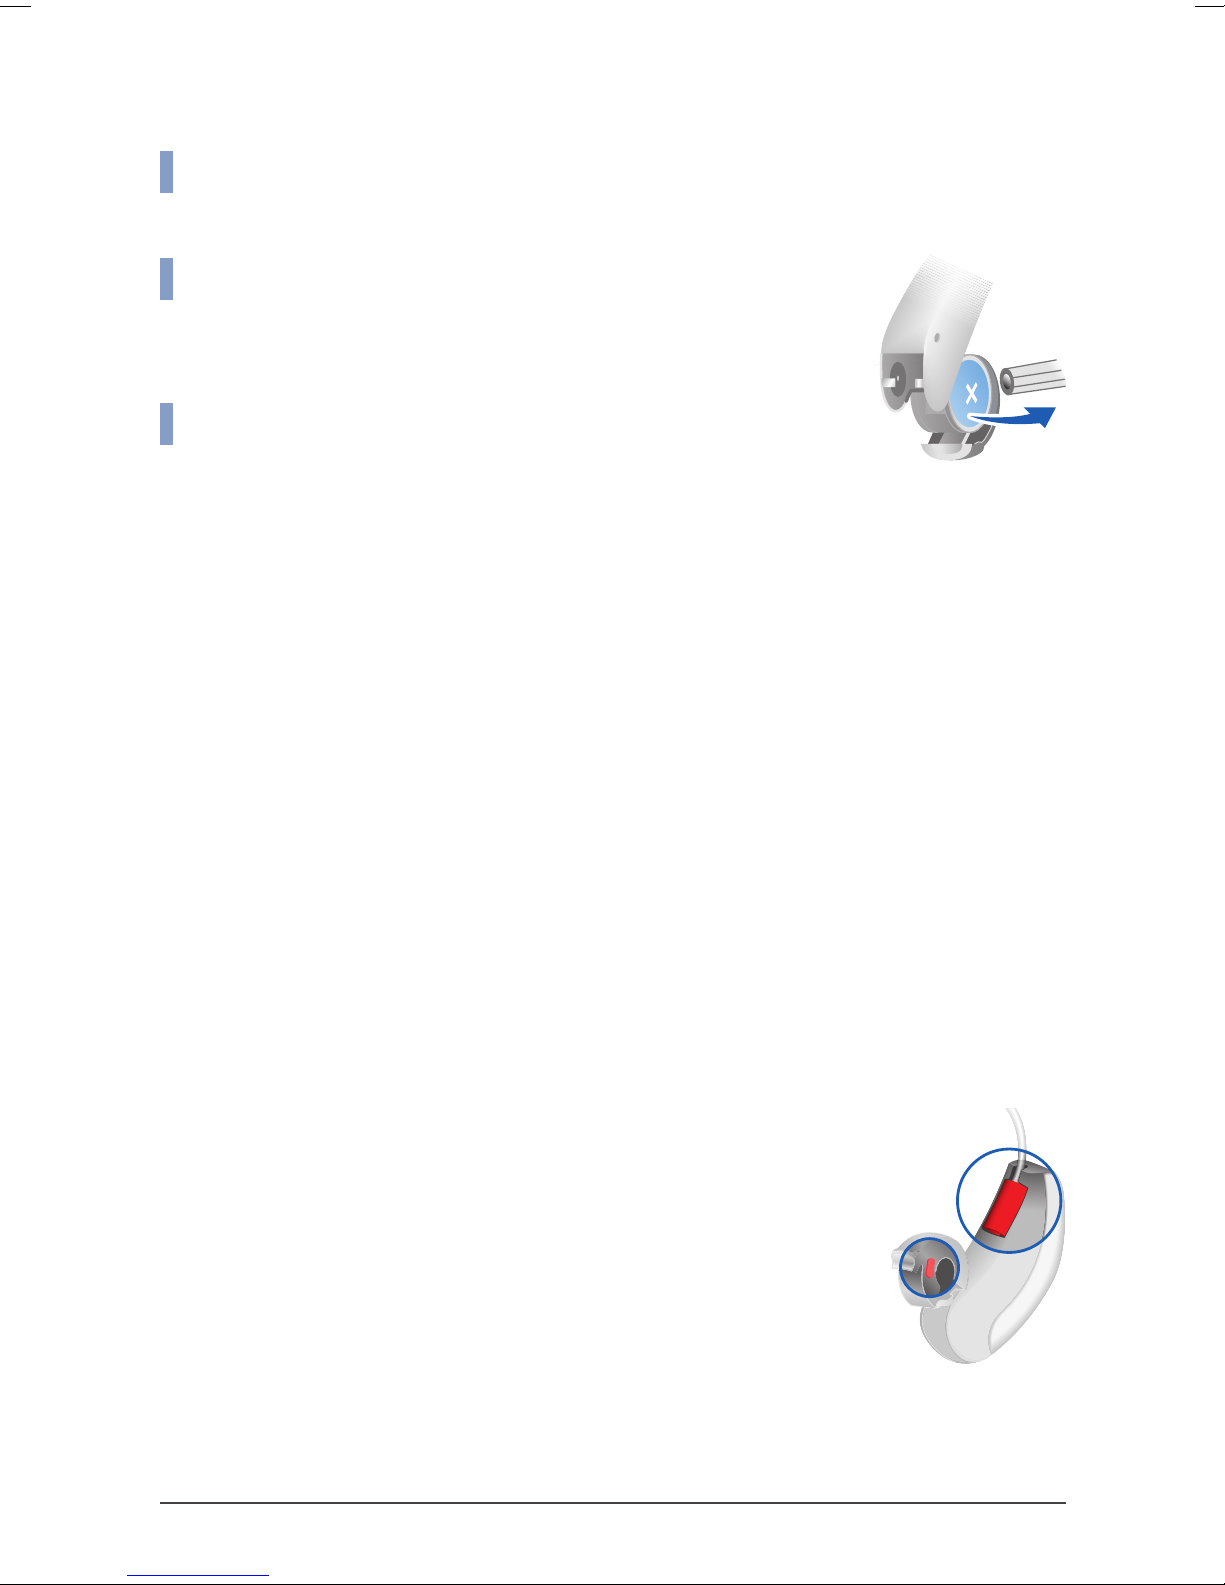
REMOVING THE BATTERY
IOpen the battery compartment. The battery will fall out as soon
as the compartment has been fully opened.
IIf the battery does not fall out, tap lightly on the
casing or use the magnetic pen. The magnetic
pen is available as an accessory.
ITake care not to damage the battery
compartment while removing the battery.
DAILY USE
INSERTING AND REMOVING THE
HEARING SYSTEM
Your hearing systems have been specially tted for your left and
right ear. Colored markings indicate which ear a hearing system is
intended for:
red marking = right ear
blue marking = left ear

- 15
DAILY USE
CAUTION
Risk of injury!
IAlways wear the external receiver with an ear mold.
IEnsure that the external receiver is properly connected to
the ear mold.
IInsert the ear mold carefully and not too deeply into the ear.
INSERTING THE HEARING SYSTEM
IKeep the receiver cable close to the ear mold.
ISlide the ear mold gently into the auditory
canal (1). It may be helpful to tug the ear gently
upwards or backwards.
ITwist the ear mold slightly until a good t is
attained. Open and close your mouth to ensure
no air is trapped in the auditory canal.
IPick up the hearing system and slide it over your ear (2).
The optional concha support will help improve the
position of the ear mold in the ear.
To position the concha support:
IBend the concha support and insert it carefully down
into the ear.

16 - DAILY USE
REMOVING THE HEARING SYSTEM
IPick up the hearing system and slide it out
from behind your ear (1).
IIf your hearing system has a CLIC MOULD,
pull the removal line towards the back of
your head in order to remove the ear mold (2).
IFor all other ear molds (domes):
Grasp the receiver in the ear canal with two ngers and pull
it out gently.
NOTE
IDo not tug at the receiver connector. This could
damage the hearing systems.
CAUTION
Risk of injury!
IVery occasionally the ear mold may remain in your ear
when you remove the hearing system, or may be dicult
to remove. In such cases, have the ear mold removed by a
medical professional.
Clean and dry your hearing systems after wearing.
For more information see “Maintenance and care”.

- 17
DAILY USE
SWITCHING THE HEARING SYSTEM ON
AND OFF
Ask your hearing system specialist to mark the options relevant for you.
WITH THE BATTERY
COMPARTMENT
ON Close the battery compartment.
OFF Open the battery compartment
to the rst resistance.
After charging the battery:
ISwitching on: Remove the hearing systems from the charger.
WITH PUSH BUTTON RIXX G3
ON Press and hold the button for approximately
2 seconds. After switching on, the last used
settings (volume and hearing program) will
be active.
OFF Press and hold the button for approximately 2 seconds.
WITH ROCKER SWITCH MOOD G3 AND SUN G3
ON Press the rocker switch up or down for approx. 2 or 5
seconds. After switching on, the last used
settings (volume and hearing program) will
be active.
OFF Press the rocker switch up or down for approx.
2 or 5 seconds.
The length of time required depends on the
programming of the switch; see overview on p. 9.

18 - DAILY USE
WITH REMOTE CONTROL DEPENDS ON THE MODEL
See the remote control user manual.
A signal may be sounded if desired when switching on or o.
You will only hear it if you are wearing the hearing systems.
USING THE SMARTPHONE APP
Ask your hearing system specialist which iOS and Android-compat-
ible apps are available for your hearing system.
Over and above this, selected hearing system models make it
possible for further functions controlled by a push button or
a rocker switch to be added. Please ask your hearing systems
specialist to tell you more about this. See also the overview
on p. 9.
POWERON DELAY
Your hearing system has a power-on delay which your hearing
system specialist is able to activate. It ensures that there is an
automatic delay of up to 18 seconds before your hearing system
switches on, which allows you to avoid feedback whistling as you
insert the system into your ear.

- 19
DAILY USE
PROGRAM SELECTION
WITH PUSH BUTTON RIXX G3
Press the push button briey. The hearing system
changes to the next program.
WITH ROCKER SWITCH MOOD G3 AND SUN G3
Press up briey or for approx. 2seconds to switch to the
next program.
Press down briey or for approx. 2seconds to switch to
the previous program.
The length of time required depends on the program-
ming of the switch; see overview on p. 9.
WITH REMOTE CONTROL DEPENDS ON THE MODEL
See the remote control user manual.
USING THE SMARTPHONE APP
Ask your hearing system specialist which iOS and Android-compat-
ible apps are available for your hearing system.
Over and above this, selected hearing system models make it
possible for further functions controlled by a push button or
a rocker switch to be added. Please ask your hearing systems
specialist to tell you more about this. See also the overview
on p. 9.
A signal can be set to sound when the hearing program is changed
if desired.
If AutoPhone is activated, the hearing system automatically
switches to the telephone coil program as soon as the tele-
phone is close to the ear. For more information see “Phone
calls”.

20 - DAILY USE
VOLUME CONTROL
The volume of your hearing systems is controlled automatically. It is
normally not necessary for you to change the volume manually. If
you prefer to operate it manually, your hearing system specialist
can switch your hearing systems over to manual operation.
AUTOMATIC
The volume is automatically adjusted when the hearing systems
are in use.
WITH ROCKER SWITCH MOOD G3 AND SUN G3
Press the top of the rocker switch briey to increase the
volume.
Press the bottom of the rocker switch briey to reduce
the volume.
WITH REMOTE CONTROL
DEPENDS ON THE MODEL
See the remote control user manual.
USING THE SMARTPHONE APP
Ask your hearing system specialist which iOS and Android-compat-
ible apps are available for your hearing system.
Over and above this, selected hearing system models make it
possible for further functions controlled by a push button or
a rocker switch to be added. Please ask your hearing systems
specialist to tell you more about this. See also the overview
on p. 9.
This manual suits for next models
2
Table of contents
Other Audio Service Hearing Aid manuals

Audio Service
Audio Service Mobile Connect Set User manual

Audio Service
Audio Service STILINE BT User manual

Audio Service
Audio Service P Li-Ion G6 User manual

Audio Service
Audio Service RIC RIXX G2 User manual

Audio Service
Audio Service Mood Li-Ion G6 User manual

Audio Service
Audio Service Smart Connect User manual

Audio Service
Audio Service NOVA 2 + ASTRAL User manual

Audio Service
Audio Service Mood G5 User manual

Audio Service
Audio Service HF 3 User manual

Audio Service
Audio Service ITC Li 7 User manual


