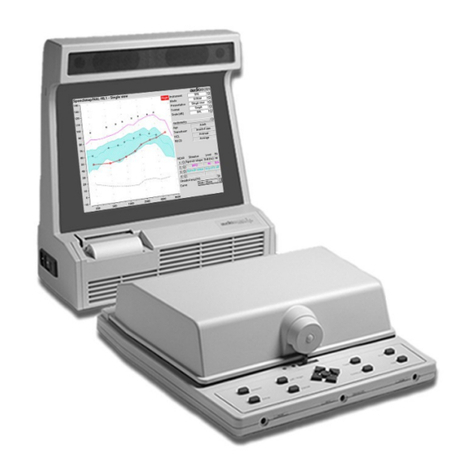
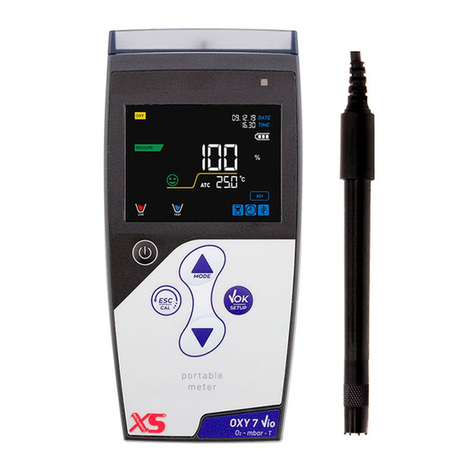
audioscan RM500SL User manual

RM500SL®User's Guide Version 3.4
March 2010

Table of Contents
1 About RM500SL...............................................................................................................................6
Section overview.............................................................................................................................6
New in this software release...........................................................................................................6
Electronic user’s uide....................................................................................................................6
Warranty, Trademarks, Acknowled ments.....................................................................................7
Notices for the European Community.............................................................................................7
EC Declaration of Conformity........................................................................................................9
2 Gettin Started...............................................................................................................................11
Section overview............................................................................................................................11
Unpackin and connectin ............................................................................................................11
CDROM..........................................................................................................................................11
Microphone connection.................................................................................................................11
Microphone care............................................................................................................................12
Battery pill use and care................................................................................................................13
Mouse, keyboard, barcode scanner...............................................................................................13
External peripherals......................................................................................................................14
3 General Operation..........................................................................................................................16
Section overview...........................................................................................................................16
Input device operation...................................................................................................................16
Barcode data input........................................................................................................................16
Keypad keys...................................................................................................................................17
Menus, lists and buttons................................................................................................................18
Screen messa es and Help............................................................................................................19
Software updatin .........................................................................................................................19
4 General Setup.................................................................................................................................21
Section overview............................................................................................................................21
Date and time setup.......................................................................................................................21
Display settin s..............................................................................................................................21
Savin test setup............................................................................................................................21
5 Networkin .....................................................................................................................................23
Section overview............................................................................................................................23
Networkin requirements.............................................................................................................23
Networkin setup..........................................................................................................................23
Sin le computer connection..........................................................................................................24
6 Printin and Storin Results..........................................................................................................25
Section overview............................................................................................................................25
Internal printer paper loadin .......................................................................................................25
Barcodes, tabular data, headers and comments on printouts.......................................................26
Local printer setup.........................................................................................................................27
Printin to USB memory................................................................................................................28
Network printer setup...................................................................................................................28
Printin to a network file...............................................................................................................29
Storin and restorin data – setup................................................................................................30
Storin and restorin data............................................................................................................30
7 Test Box Measures - Setup.............................................................................................................32
Section overview............................................................................................................................32
Test box screen..............................................................................................................................32
Graph or table format....................................................................................................................32
Output or ain scale.......................................................................................................................32
Hide or Show test box curves........................................................................................................32
1996 or 2003 ANSI standard........................................................................................................33
ANSI test frequencies....................................................................................................................33
Test box calibration facts...............................................................................................................34
Calibratin test box reference microphone...................................................................................34
Calibration check for coupler microphone....................................................................................35
Couplin the hearin instrument..................................................................................................36
Positionin the hearin instrument...............................................................................................36
8 ANSI S3.22 Hearin Aid Tests.......................................................................................................38

RM500SL®User's Guide Version 3.4
June 2011
Section overview...........................................................................................................................38
ANSI S3.22-1996 facts..................................................................................................................38
ANSI S3.22-2003 facts...................................................................................................................38
ANSI 1996 Linear and AGC tests..................................................................................................39
ANSI 2003 Linear and AGC tests..................................................................................................39
ANSI test results............................................................................................................................40
ANSI input-output curves..............................................................................................................40
ANSI telecoil terminolo y..............................................................................................................41
ANSI telephone simulator (TMFS) test.........................................................................................41
Telecoil test results........................................................................................................................42
9 Other Test Box Measures...............................................................................................................44
Section overview............................................................................................................................44
Harmonic distortion.......................................................................................................................44
Noise reduction.............................................................................................................................44
Multicurve procedure....................................................................................................................45
Multicurve results..........................................................................................................................45
Spectral analysis in Multicurve.....................................................................................................46
Battery drain test...........................................................................................................................46
Manual control procedure.............................................................................................................47
Sound level meter usin manual control.......................................................................................47
10 Sensory loss simulator.................................................................................................................50
Sensory loss simulator description................................................................................................50
Sensory loss simulator operation..................................................................................................50
11 On-Ear Measures - Setup.............................................................................................................52
Section overview............................................................................................................................52
On-ear calibration facts.................................................................................................................52
Calibration of on-ear probe microphone.......................................................................................52
Calibration check for probe module..............................................................................................53
Max TM SPL setup.........................................................................................................................54
ABR nHL to eHL setup...................................................................................................................55
Positionin the client.....................................................................................................................55
Positionin the probe tube............................................................................................................56
12 On-Ear Measures Screen Setup...................................................................................................58
Section overview............................................................................................................................58
On-ear ri ht or left display............................................................................................................58
Graph, table or 2cc tar et format..................................................................................................58
SPL or HL scale.............................................................................................................................58
Hide or show on-ear curves...........................................................................................................59
13 On-Ear Instrument Measures......................................................................................................60
Section overview...........................................................................................................................60
On-ear feedback test......................................................................................................................60
On-ear noise reduction test...........................................................................................................60
On-ear manual control...................................................................................................................61
Sound level meter usin on-ear microphones...............................................................................62
14 Occlusion Effect Test...................................................................................................................63
Section overview...........................................................................................................................63
Occlusion effect measurement......................................................................................................63
15 RECD (real-ear to coupler difference).........................................................................................65
Section overview............................................................................................................................65
RECD facts.....................................................................................................................................65
RECD coupler response.................................................................................................................65
RECD on-ear response..................................................................................................................66
RECD results.................................................................................................................................68
16 Insertion Gain..............................................................................................................................69
3

RM500SL®User's Guide Version 3.4
June 2011
Section overview...........................................................................................................................69
Insertion ain in SPL.....................................................................................................................69
Insertion ain in HL.......................................................................................................................70
Audiometric data entry..................................................................................................................70
REUR measurement procedure.....................................................................................................71
REAR measurement procedure.....................................................................................................72
SII calculation in Insertion ain....................................................................................................73
17 Speechmap...................................................................................................................................75
Section overview............................................................................................................................75
Speechmap facts............................................................................................................................75
DSL 5.0 in Speechmap...................................................................................................................75
DSL 5.0 chan es............................................................................................................................76
NAL-NL1 in Speechmap................................................................................................................76
Camfit in Speechmap.....................................................................................................................76
Usin Speechmap..........................................................................................................................77
Screen tour - unaided screen........................................................................................................78
Screen tour - aided screen............................................................................................................79
On-ear or Test box mode...............................................................................................................79
SII calculation in Speechmap........................................................................................................80
18 Speechmap Fittin Procedures....................................................................................................81
Section overview...........................................................................................................................81
Assessment data entry...................................................................................................................81
Assessment data choices...............................................................................................................82
Fittin to tar ets for soft speech...................................................................................................83
Fittin to tar ets for loud sounds..................................................................................................83
Fittin to tar ets for mid-level speech..........................................................................................84
Open fittin s in Speechmap..........................................................................................................84
Verifyin Frequency Compression/ Frequency-Lowerin Hearin Instruments in Speechmap. .85
FM fittin and verification.............................................................................................................87
19 Speechmap Technical Details......................................................................................................89
Section overview...........................................................................................................................89
Speechmap stimuli........................................................................................................................89
Stimulus levels...............................................................................................................................90
Microphone location effects..........................................................................................................91
Speech si nal analysis...................................................................................................................92
20 Troubleshootin ...........................................................................................................................93
Section overview...........................................................................................................................93
Self test failures.............................................................................................................................93
Test box hi h distortion or noise...................................................................................................93
Test box curves inconsistent.........................................................................................................94
Test box curves differ from specifications.....................................................................................94
Test box speaker overdriven.........................................................................................................94
No test box reference mic. detected.............................................................................................95
Invalid test box calibration............................................................................................................95
No on-ear ref. mic. detected..........................................................................................................95
Invalid on-ear calibration..............................................................................................................95
Sound-field speaker overdriven.....................................................................................................96
Barcode scanner malfunction........................................................................................................96
21 Technical Specifications.............................................................................................................100
General........................................................................................................................................100
Test box.......................................................................................................................................100
On-Ear..........................................................................................................................................100
Sensory Loss Simulator...............................................................................................................101
22 Glossary......................................................................................................................................103
4

RM500SL®User's Guide Version 3.4
June 2011
23 References..................................................................................................................................108
24 Appendix 1..................................................................................................................................111
Manufacturer Disclosure Statement for Medical Device Security..............................................111
25 Appendix 2..................................................................................................................................114
AudioNote 2.1 VERIFIT and RM500SL Test Si nals and Analysis.............................................114
5

RM500SL®User's Guide Version 3.4
June 2011
1 About RM500SL
Se tion overview
This section provides a listin of features new in this software release, instructions for
a essing the ele troni User’s Guide, contact, warranty and trademark information and
noti es for the European Community.
Help is available on the followin topics by pressin <Help> (For lon Help pa es, use
<Left/Ri ht> (or mouse) to switch between the Help index and the Help pa e and
arrows (or mouse) to scroll throu h the pa e.)
In addition you will find a lossary, references and more information in the electronic
user’s uide on the Audioscan software CD.
New in this software release
Software 3.4 introduces the followin si nificant additions and chan es:
1. Frequency lowering HI fitting – determine the amount of frequency shift provided by
frequency-lowerin hearin instruments and the sensation level of the lowered
components of the speech si nal..
2. ISTS – the International Speech Test Si nal has been added in Speechmap.
3. German language screen text and setup selection.
4. Reset test setup when erasin session data.
5. Setup menu is arran ed in alphabetical order.
6. Full size Graph only and ANSI printouts when not usin the raph+table option.
7. nit serial number printed next to software version.
8. HP printer driver updated.
9. MPO test si nal modified to make the results more directly comparable to UCL
measurements or estimates, independent of the hearin aid characteristics.
10. RM500SL software can be updated from website without the use of a CD.
Please consult the relevant section of this User’s Guide or Help for more details.
Ele troni user’s guide
A printable user’s uide is on the Audioscan CD-ROM supplied with a new instrument.
A .pdf file viewer, such as Acrobat Reader (5.0 or hi her) or Foxit Reader is required to
view the User’s Guide. Foxit Reader is supplied on the CD-ROM.
1. Insert the CD-ROM into the CD drive on your computer.
6

RM500SL®User's Guide Version 3.4
June 2011
2. Select My Computer, then the CD drive and the User’s Guide folder.
3. To install Foxit Reader, copy FoxitReader.exe to an appropriate location on your PC. To
run FoxitReader.exe double click it.
4. To view the User’s Guide, double-click the RM500SL Users Guide.pdf file.
The User’s Guide may also be downloaded from www.audioscan.com.
Warranty, Trademarks, A knowledgments
The Audioscan RM500SL is an electro-acoustic test system used to verify the performance
of a hearin aid in an ear simulator (2cc coupler) or in the ear of a wearer. It is
manufactured by Etymonic Desi n Inc., 41 Byron Ave., Dorchester, Ontario, Canada, N0L
1G0. www.audioscan.com
Phone: 800-265-2093 (USA only); 519-268-3313 Fax: 519-268-3256
Email: info@audioscan.com or service@audioscan.com
Warranty: The RM500SL is warranted a ainst defects for two years from date of purchase.
Within this period, it will be repaired without char e for parts, labor or return shippin
when returned prepaid to your authorized Audioscan service a ent. This warranty does not
apply to battery substitutes (pills), which carry a 90 day warranty, or to equipment that, in
our sole jud ment, has been subject to misuse, or unauthorized alteration or repair.
Trademarks: Audioscan, RM500SL, and Speechmap are re istered trademarks of
Etymonic Desi n Inc. DSL is a re istered trademark of the University of Western Ontario.
HP LASERJET is a re istered trademark of Hewlett-Packard Company. IBM is a re istered
trademark of International Business Machines Corporation. K-AMP is a re istered
trademark of Etymotic Research Inc. KEMAR is a re istered trademark of Knowles
Electronics Inc., QUEST is a trademark of Quest Technolo ies Inc. PostScript is a
re istered trademark of Adobe Systems, Inc.
Acknowledgments: DSL 5.0 is used under license from the University of Western Ontario
(UWO) which is solely responsible for its content. We acknowled e the support received
from past and present staff at the National Centre for Audiolo y at UWO in implementin
the DSL method. CAMFIT is used under license from Prof. Brian C.J. Moore, University of
Cambrid e, UK. We are indebted to the University of Memphis Hearin Aid Research
Laboratory for permission to use some of their recorded speech material.
Noti es for the European Community
Waste Electrical and Electronic Equipment (WEEE)
Within the European Community, Waste Electrical and Electronic Equipment (WEEE)
re ulations, make it ille al to dispose of electrical and electronic equipment as unsorted
municipal waste. The followin symbol is affixed to the product to indicate recyclin status.
7

RM500SL®User's Guide Version 3.4
June 2011
Declaration of Electromagnetic Compatibility (EMC)
Medical electrical equipment needs special precautions re ardin EMC and needs to be
installed and put into service accordin to the followin information:
•The RM500SL should not be used adjacent to or stacked on other equipment. If this is
necessary, its operation should be verified as normal in this confi uration.
•Portable and mobile RF communications equipment can affect medical electrical
equipment and may affect the performance of the RM500SL.
•The RM500SL has not been tested for immunity to electroma netic disturbances.
Performance de radation due to such disturbances (includin electrostatic dischar e)
is considered normal and acceptable.
The compliances listed in the followin table are met with the Audioscan SL-100 RECD
transducer connected. The use of other accessories may result in increased emissions.
Guidance and manufacturer’s declaration - electromagnetic emissions
The RM500SL is intended for use in the electroma netic environment specified below.
The user of the RM500SL should assure that it is used in such an environment.
Emissions test Compliance Electromagnetic environment -
guidance
RF emissions
CISPR 11 Group 1
The RM500SL uses RF ener y only for
internal function. Therefore RF emissions
are very low and not likely to cause any
interference in nearby electronic
equipment.
RF emissions
CISPR 11 Class A
Harmonic emissions
IEC 61000-3-2 Class A
Volta e fluctuations/
flicker emissions
IEC 61000-3-3
Complies
The RM500SL is suitable for use in all
establishments other than domestic and
those directly connected to the public low-
volta e power supply network that
supplies buildin s used for domestic
purposes.
8

RM500SL®User's Guide Version 3.4
June 2011
EC De laration of Conformity
9

RM500SL®User's Guide Version 3.4
June 2011
10

RM500SL®User's Guide Version 3.4
June 2011
2 Getting Started
Se tion overview
This section provides help on unpackin the RM500SL and connectin various components
and accessories. Note that battery pills (SL-110), the RECD transducer (SL-100), the
barcode scanner (VA-120) and a microphone extension cable (VA-130) are accessories for
the RM500SL and must be ordered separately.
Unpa king and onne ting
1. Carefully unpack the RM500SL and check the contents of the shippin box a ainst the
enclosed packin list. Note that some parts may be packed inside the test chamber.
2. Unwrap the power cord from its stowa e hooks - notin carefully how it has been
packed. To avoid serious dama e to the display screen, always repack the cord this way.
3. Connect the power cord to the socket next to the power switch on the ri ht side of the
unit. Plu the other end into a rounded 100 – 240 volt power outlet.
CDROM
Operatin software, RM500SL Pro ram memory updater pro ram, some test si nals, the
online Help files and a printable user’s uide are all on the Audioscan Software CD-ROM
supplied with the instrument. See replacement and Software updatin for more
information.
Mi rophone onne tion
1. Plu the reference microphone and the coupler microphone into the connectors in the
test chamber as shown.
11

RM500SL®User's Guide Version 3.4
June 2011
2. Plu the probe microphone assembly into the probe connector located at the left of the
test chamber as shown.
NOTE: A microphone extension cable (VA-130) is available from Audioscan. Standard audio
extension cables should not be used. They will substantially increase noise levels.
Mi rophone are
Coupler microphone:
1. DO NOT twist the cable when attachin a coupler to the coupler microphone. Turn only
the coupler or unplu the coupler microphone before turnin it.
2. DO NOT leave the coupler microphone plu ed in when transportin .
3. DO make sure that the 2cc coupler is ti htly screwed to the coupler microphone when
performin hearin instrument tests. Coupler leaka e can cause feedback and erratic
response curves.
4. DO make sure the #13 tubin on the BTE (HA-2) coupler is free from any cracks/tears.
5. DO make sure that any replacement #13 tubin used on the BTE coupler is .38 inches in
12

RM500SL®User's Guide Version 3.4
June 2011
len th.
Probe microphone:
Debris can alter the probe module reference microphone calibration and frequency
response and can permanently clo the probe module port.
1. DO NOT reuse probe tubes. Debris and liquid from cleanin attempts can lod e in the
enlar ed base of the probe tube and subsequently clo the probe microphone port.
2. DO NOT attempt to open or repair the probe microphone. Attemptin to repair the
probe module may lead to dama e or alteration of the factory calibration.
3. DO keep the probe module and probe tubes in a clean area.
4. DO stow the probe module when not in use or when transportin the RM500SL.
Battery pill use and are
Battery pills are optional. The thin onne ting strip of each battery pill is fragile. When
insertin pills into hearin instrument battery compartments, take care that this strip is not
pinched or bent severely as the battery door is closed.
1. Select a battery pill that is appropriately sized for the hearin instrument that you are
testin .
2. Insert the pill into the hearin instrument, carefully closin the battery door over the
thin connectin strip.
3. Plu the pill’s cable into the battery pill jack inside the RM500SL Test box. (to the left of
the coupler microphone connection).
4. Turn the hearin instrument on.
Mouse, keyboard, bar ode s anner
13

RM500SL®User's Guide Version 3.4
June 2011
The RM500SL may be operated from the built-in keypad, a USB mouse (not included) or a
standard USB computer (QWERTY) keyboard (not included), which may also be used to
enter headers and comments on printouts: See Input device operation.
An optional barcode scanner may be connected to the USB port to enter threshold, UCL
and RECD data directly from a RM500SL or Verifit printout. Barcoded threshold data
printed by some Grason-Stadler audiometric equipment may also be scanned. Scanners
other than that supplied by Audioscan may not work and are not supported by Audioscan.
Multiple USB devices may be used to ether by connectin them to the RM500SL USB port
via a USB hub.
In the European Community, if this devi e is onne ted to one or more other
devi es to make a system, the CE mark on this devi e is only valid if the other devi es in
the system arry a CE mark in respe t of the Medi al Devi e Dire tive and if the supplier
has stated that the requirements of the Medi al Devi e Dire tive will be met for this
parti ular ombination.
External peripherals
An external printer may be connected to the the USB port. It may be color or black & white
but it must be PCL3, PCL5 or PostS ript ompatible. The external printer must first be
selected in Setup. See Printin and Storin Results
14

RM500SL®User's Guide Version 3.4
June 2011
Auxiliary audio output ja ks are not a tive with this version of software.
In the European Community, if this devi e is onne ted to one or more other
devi es to make a system, the CE mark on this devi e is only valid if the other devi es in
the system arry a CE mark in respe t of the Medi al Devi e Dire tive and if the supplier
has stated that the requirements of the Medi al Devi e Dire tive will be met for this
parti ular ombination.
15

RM500SL®User's Guide Version 3.4
June 2011
3 General Operation
Se tion overview
The RM500SL is operated by usin the built-in keypad, a USB QWERTY keyboard (not
included) or a USB computer mouse (not included). Any of these pointin devices can be
used to select items from menus, operate on-screen buttons and to enter audiometric data.
In addition, audiometric data printed in barcode form by the RM500SL, the Verifit VF1 or
some Grason-Stadler products, may be scanned into the RM500SL.
Input devi e operation
The RM500SL may be operated by means of the built-in keypad, an external mouse or an
external QWERTY keyboard. These devices are used to summon on-screen menus and select
items from them, to operate on-screen buttons and to input data. The scroll wheel on this
type of mouse will scroll throu h lon lists in list boxes and in Help. Clickin the ri ht
mouse button enerates an ima e of the keypad which may be operated by the mouse.
Clickin the left mouse button when the mouse pointer is on a raph will display a screen
cursor with a di ital readout of X and Y co-ordinates. Clickin a ain will dismiss the cursor.
Function Keypad QWERTY ouse
Summon Help menu <Help> F1 Ri ht click
Summon Setup menu <Setup> F2 Ri ht click
Summon Test menu <Tests> F3 Ri ht click
Summon Session menu <Session> F4 Ri ht click
Switch between Ears or
A/B Data or Help index and Help
pa e
<Left/Ri ht> F5 Left click or Ri ht
click for keypad
ima e
Print <Print> Print Scrn Ri ht click
Move across screen columns
Arrows Arrows
Move mouse
Move within a screen column
Arrows Arrows
Move mouse
Select a hi hli hted item or
operate a screen button
Round key
(<PICK> key)
Numeric
Enter Key
Left click
Enter numeric data Select point on
chart
Numeric
keypad
Left click on a point
on chart
Enter text Not possible Any key Not possible
Proceed from current state <Continue> Enter ↵Click Continue
Revert to previous state <Cancel> Esc Click Cancel
Also see Mouse, keyboard, barcode scanner and Barcode data input
Bar ode data input
16

RM500SL®User's Guide Version 3.4
June 2011
In Speechmap and Insertion ain tests, audiometric data in barcode form on a RM500SL or
Verifit printout may be entered by scannin the appropriate barcode. In Speechmap,
threshold, UCL, RECD, transducer, a e and ABR nHL to eHL conversion factors are
encoded. In Insertion ain, threshold and transducer type are encoded. The type of data
and the ear (left, ri ht) is shown below the barcode. Only data for the displayed ear are
imported. Barcodes may be scanned in any order and it does not matter if the barcode is
“upside down”.
1. Select Speechmap or Insertion ain from the Tests menu.
2. Hold the printout so that the barcode to be scanned is flat. With the scanner 6” - 8” from
the barcode, press the tri er on the scanner and center the illuminated red line alon
the len th of the barcode.
3. When the scan is successful, the scanner will “beep”, the red line will extin uish and a
Barcode Entry poster will appear on the screen. A reen checkmark on the poster shows
which data have been accepted. A messa e will advise if the barcode does not contain
data for the screen you are viewin .
4. When all desired data have been accepted, select [Done] to apply the data.
See Barcodes, headers and comments on printouts. Barcodes on some Grason-Stadler
printouts may also be scanned into the RM500SL.
Keypad keys
Keypad
Button
Function
<Help> Summon context-sensitive Help Screen.
<Setup> Summon Setup Menu containin a list
of RM500SL features that can be
modified. Any modifications made will
be maintained after power off.
17

RM500SL®User's Guide Version 3.4
June 2011
<Tests> Summon Test Selection Menu
containin a list of the available test
procedures.
<Session
>
Summon Session Data Menu to erase
or export data
<Left/Ri
ht>
Used to alternate between ears or A/B
Data.
<Print> Print on internal or external printer or
print to file.
Arrows
Move across screen columns.
Arrows
Move within a screen column.
Round
Key
(<PICK>
key)
Select a hi hli hted item or operate a
screen button.
<Continu
e>
Proceed from current state.
<Cancel> Revert to previous state.
Menus, lists and buttons
enu Setup Box List Box
Screen Buttons are identified by a circle within a raised block and are located at the ri ht
hand end of a line of screen text. A screen button hi hli hted usin the keypad or a
QWERTY keyboard is surrounded by a heavy line. A screen button hi hli hted by the mouse
pointer chan es color from li ht to dark ray. A hi hli hted screen button is operated by
pressin the <PICK> (round) key on the keypad, the Enter key on a keyboard or by clickin
the left mouse button. This process also selects the hi hli hted item in a list box.
There are three different types of screen buttons:
When selected, a Menu Button displays a menu, a setup box or a test screen.
18

RM500SL®User's Guide Version 3.4
June 2011
When selected, a List Button displays a drop-down list box.
The current list item is shown in the window.
When selected, a To le Button alternates between states.
The current state is shown in the window.
S reen messages and Help
The Title bar (top line of the display screen) informs you of the selected Test (e. .,
Multicurve) and the current Presentation (Sin le view or Dual view).
The Message bar (bottom line of the display screen) su ests the next step in a test or
informs you of the state of the instrument or conditions that could affect your data. For
example, it will inform you if the microphones need to be calibrated.
Context-sensitive help is available by pressin <Help>. The Arrows or a mouse may
be used to scroll throu h the Help index (left panel). The Left/Ri ht key or a mouse may be
used to switch between the Help index and the Help pa e (ri ht panel). The Arrows or
a mouse may be used to scroll throu h lon help pa es.
Software updating
Operatin software is contained on a USB flash drive located in the test chamber under the
printer paper roll cradle as shown. Software updates must be transferred to this USB flash
drive in order to be used. This requires that the USB flash drive be removed from the
RM500SL and plu ed into the USB port on a PC.
To remove the USB flash drive, ensure that the RM500SL power is off and:
1. Open the test chamber and remove the foam from the test chamber floor.
2. Pull the USB flash drive strai ht toward the front of the unit until it is free.
Software updates are shipped on a CD-ROM or downloaded from the Audioscan website. In
each case, an updated User's Guide is included. The software is transferred to the USB
flash drive in the RM500SL usin a PC with a USB port.
To update the RM500SL software from a CD-ROM:
1. Insert the software update CD-ROM into the CD-ROM drive on your PC.
2. Double-click on My Computer, then double-click on the CD-ROM drive.
3. Double-click on rm500sl_update.exe and follow the built-in instructions to complete the
update. You will be prompted to insert the USB flash drive at the appropriate time.
To download and update the RM500SL software without a CD-ROM, o to
www.audioscan.com, and follow the link entitled “download the latest software”. Further
instructions will be iven as part of the download process.
To install the USB flash drive, ensure that the RM500SL power is off and:
19

RM500SL®User's Guide Version 3.4
June 2011
1. Open the test chamber and remove the foam from the test chamber floor.
2. Gently insert the USB flash drive into the USB port, with its foam pad down.
3. Replace the foam in the floor of the test chamber.
NOTE that the USB flash drive has been especially confi ured for the RM500SL. Replacin
this flash drive with another can cause erratic operation. Such replacement should be done
only when authorized and ONLY by an Audioscan service representative.
20
Other manuals for RM500SL
2
Table of contents
Other audioscan Measuring Instrument manuals
