AudioSonic CDV-77271 User manual

2 CH DVD PLAYER
PLEASE READ BEFORE OPERATING THIS EQUIPMENT.
MODEL:CDV-77271

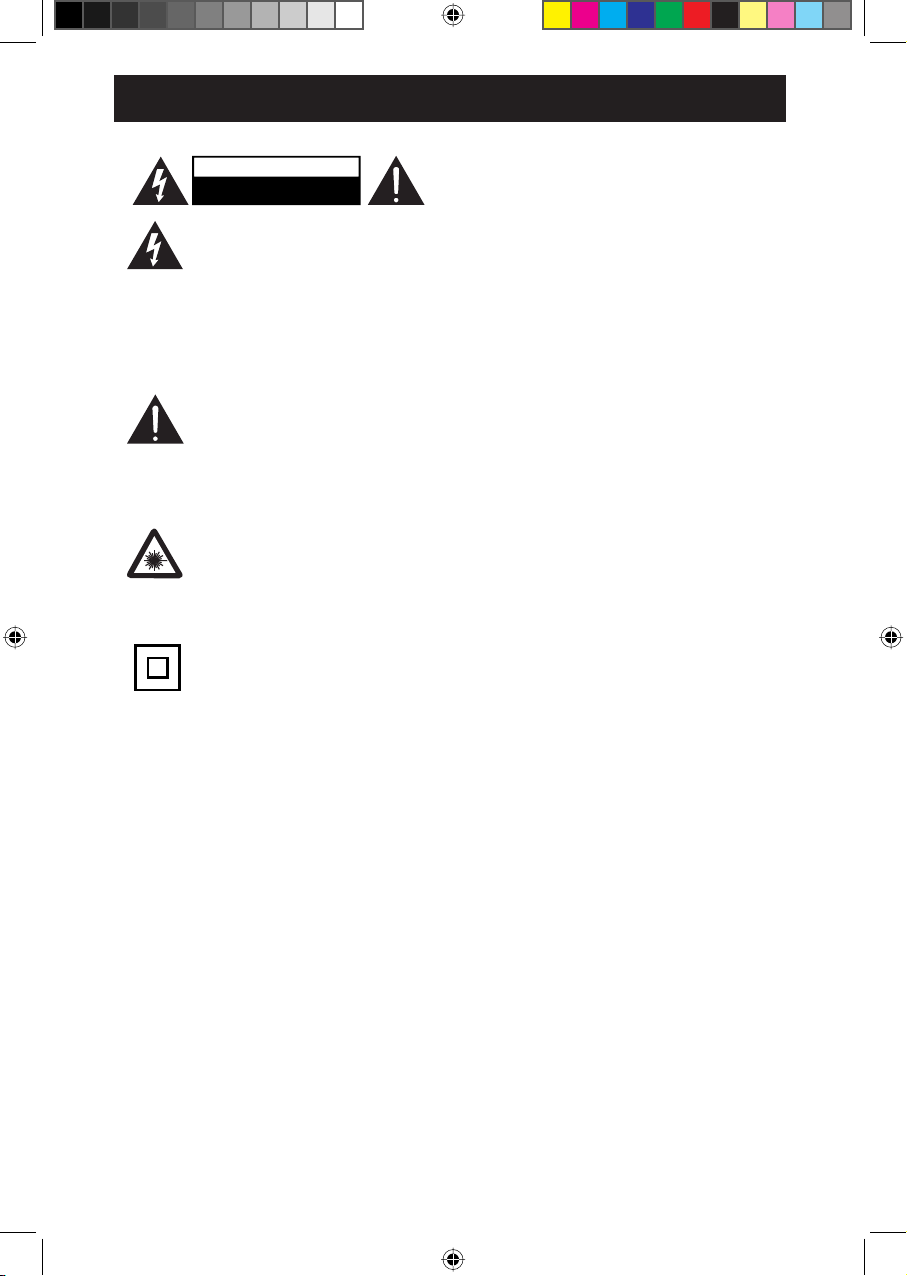
The lightning flash with
arrowhead symbol, within an
equilateral triangle, is intended
to alert the user to the presence of
uninsulated “dangerous voltage” within
the product’s enclosure that may be of
VXI¿FLHQWPDJQLWXGHWRFRQVWLWXWHDULVNRI
HOHFWULFVKRFNWRSHUVRQV
The exclamation point within an
equilateral triangle is intended
to alert the user to the presence
of important operating and maintenance
(servicing) instructions in the literature
accompanying the appliance.
DANGER:
Invisible and hazardous laser
UDGLDWLRQZKHQRSHQDQGLQWHUORFN
failed or defeated. Avoid direct exposure to
beam.
This symbol indicates that this
product incorporates double
insulation between hazardous
mains voltage and user accessible parts.
CAUTION: TO PREVENT ELECTRIC
SHOCK, MATCH WIDE BLADE OF PLUG
TO WIDE SLOT, FULLY INSERT.
WARNING:7RUHGXFHWKHULVNRIILUH
RUHOHFWULFVKRFNGRQRWH[SRVHWKLV
apparatus to rain or moisture.
CAUTION: Use of controls or adjustments
or performance of procedures other than
those specified may result in hazardous
radiation exposure.
:$51,1* Use of this unit near
ÀXRUHVFHQWOLJKWLQJPD\FDXVHLQWHUIHUHQFH
regarding use of the remote. If the unit
is displaying erratic behavior move away
IURPDQ\ÀXRUHVFHQWOLJKWLQJDVLWPD\EH
the cause.
&$87,21 Danger of explosion if battery
is incorrectly replaced. Replace only with
the same or equivalent type.
:$51,1* There is a danger of
explosion if you attempt to charge standard
$ONDOLQHEDWWHULHVLQWKHXQLW2QO\XVH
rechargeable NiMH batteries.
:$51,1*/LWKLXPEDWWHULHVOLNH DOO
rechargeable batteries are recyclable
local government for disposal or recycling
practices in your area. They should never
be incinerated since they might explode.
:$51,1*6KRFNKD]DUG'R1RW2SHQ
Main plug is used as disconnect device
and it should remain readily operable
during intended use. In order to disconnect
the apparatus from the main completely,
the main plug should be disconnected from
WKHPDLQVRFNHWRXWOHWFRPSOHWHO\
Do not mix old and new batteries.
'RQRWPL[DONDOLQHVWDQGDUGFDUERQ
batteries.
CAUTION
RISK OF ELECTRIC SHOCK
DO NOT OPEN
]LQFDQGQRWUHFKDUJHDEOHQLFDGQLPKHWF
and should be recycled and not disposed of
in normal household waste. Contact your
CAUTION: Allow DVD player to sit at room
temperature for 2 hours before plugging in.
of any soft, porous, or sensitive surfaces
to avoid damaging the surface. Use a
protective barrier between the unit and
surface to protect the surface.
:$51,1* Do not place the unit on top
WARNINGS AND PRECAUTIONS
2

1. Read these Instructions.
2. Keep these Instructions.
3. Heed all warnings.
4. Follow all instructions.
5. Do not use this apparatus near water.
6. Clean only with a dry cloth.
7.'RQRWEORFNDQ\YHQWLODWLRQRSHQLQJV
Install in accordance with the
manufacturer’s instructions.
8. Do not install near any heat sources
such as radiators, heat registers, stoves, or
RWKHUDSSDUDWXVLQFOXGLQJDPSOL¿HUVWKDW
produce heat.
9. Do not defeat the safety purpose of
WKHSRODUL]HGRUJURXQGLQJW\SHSOXJ$
polarized plug has two blades with one
wider than the other. A grounding type
plug has two blades and a third grounding
prong. The wide blade or the third prong
are provided for your safety. When the
SURYLGHGSOXJGRHVQRW¿WLQWR\RXURXWOHW
consult an electrician for replacement of
the obsolete outlet.
10. Protect the power cord from being
ZDONHGRQRUSLQFKHGSDUWLFXODUO\DWSOXJV
convenience receptacles, and the point
where they exit from the apparatus.
11. Only use attachments/accessories
VSHFL¿HGE\WKHPDQXIDFWXUHU
12. Use only with a cart,
VWDQGWULSRGEUDFNHW
or table specified by the
manufacturer, or sold with
the apparatus. When a cart
is used, use caution when moving the cart/
apparatus combination to avoid injury from
WLSRYHU
14.5HIHUDOOVHUYLFLQJWRTXDOL¿HGVHUYLFH
personnel. Servicing is required when
the apparatus has been damaged in any
ZD\VXFKDVSRZHUVXSSO\FRUGRUSOXJ
is damaged, liquid has been spilled or
objects have fallen into the apparatus, the
apparatus has been exposed to rain or
moisture, does not operate normally, or has
been dropped.
Additional Warnings
The apparatus shall not be exposed to
dripping or splashing and that no objects
¿OOHGZLWKOLTXLGVVXFKDVYDVHVVKDOOEH
placed on apparatus.
Battery shall not be exposed to excessive
KHDWVXFKDVVXQVKLQH¿UHRUWKHOLNH
&DXWLRQPDUNLQJLVORFDWHGDWWKHUHDURU
bottom of the apparatus.
7KHPDUNLQJLQIRUPDWLRQLVORFDWHGDWWKH
rear or bottom of apparatus.
IMPORTANT SAFETY INSTRUCTIONS
time.
13.Unplug this apparatus during lightning
storms or when unused for long periods of
3

Congratulations on the purchase of your new DVD player.
We recommend that you spend some time reading this instruction manual in order that you
fully understand all the operational features it offers.
Read all the safety instructions carefully before use and keep this instruction manual for
future reference.
Remove all packaging from the unit. Retain the packaging. If you dispose of it please do so
according to local regulations.
The following items are included:
These limits are designed to provide reasonable protection against harmful interference in
a residential installation. This equipment generates, uses, and can radiate radio frequency
energy and, if not installed and used in accordance with the instructions, may cause harmful
interference to radio communications. However, there is no guarantee that interference
will not occur in a particular installation. If this equipment does cause harmful interference
to radio or television reception, which can be determined by turning the equipment off and
on, the user is encouraged to try to correct the interference by one or more of the following
measures:
5HRULHQWRUUHORFDWHWKHUHFHLYLQJDQWHQQD
,QFUHDVHWKHVHSDUDWLRQEHWZHHQWKHHTXLSPHQWDQGUHFHLYHr.
&RQQHFWWKHHTXLSPHQWLQWRDQRXWOHWRQDFLUFXLWGLfferent from that to which the receiver is
connected.
&RQVXOWWKHGHDOHURUDQH[SHULHQFHGUDGLR79WHFKQLFLDQIRUKHOS
DVD Player Instruction Manual
A9&DEOH
IM
Package Contents
WIDE
5HPRWH&RQWURO
4

Front View
Rear View
Connect a composite VIDEO cable to
the DVD player’s VIDEO socket to the
video input socket on the TV.
12
Connect audio cables to a stereo
system equipped with anAUDIO
input terminal.
3 4 5 6 7
z 1
89
1. Disc tray
2. OPEN/CLOSE button
3. PLAY/PAUSE button
4. STOP button
5. Remote sensor
6. POWER button
7. Power indicator
Ŷ
8. 2 Channel audio output 9. Video output
PRODUCT OVERVIEW
5

1. OPEN/CLOSE Button
Press to open and close the disc tray.
2. 0-9 Buttons
10+ Button
,IHQWHUGLJLWVWKDWDUHPRUHWKDQHJ
3. MENU Button
ŸźŻŹ%XWWRQV
3UHVVWRQDYLJDWHDQGPDNHVHOHFWLRQVRQ
RQVFUHHQPHQXV
ENTER Button
3UHVVWRFRQ¿UPWKHVHOHFWLRQRUFXUUHQWRSHUDWLRQ
5. PREV / NEXT Buttons
3UHVVWRVNLSWRWKHSUHYLRXVQH[WWLWOHFKDSWHU
WUDFN
6. F.BWD / F.FWD Button
Press to perform fast rewind / fast forward
SOD\EDFN
3/$<3$86(ŹOO%XWWRQ
3UHVVWRVWDUWRUSDXVHWKHSOD\EDFN
8. OSD Button
3UHVVWRGLVSOD\WKHFXUUHQWSOD\EDFNLQIRUPDWLRQ
9. SUBTITLE Button
Press repeatedly to switch between different
subtitle languages that are available in the disc.
10. N/P Button
Press to change the output signal to NTSC /
PAL / AUTO.
11. ANGLE Button
Press to switch between multiple camera angles
programmed on a DVD (if available).
13. REPEAT Button
Press to select different repeat modes.
14. A-B Repeat Button
3UHVVWRUHSHDWDVHFWLRQEHWZHHQSRLQW$
and B within a title/ chapter/
15. PROGRAM Button
Press to play the contents of the disc in a
SUHVHOHFWHGRUGHU
16. CLEAR Button
Press to erase input information.
1
2
3
4
5
6
7
8
9
10
11
12
13
14
15
16
ǿŻŻ
ŻŻ
ŻŻ
ǿŻŻ
track.
WIDE
,IHQWHUGLJLWVWKDWDUHOHVVWKDQLQFOXGHG
" ",
press "10+" button twice and press "5" button to
enter.
3UHVVEXWWRQVFRPELQHG
Press to display the DVD main menu.
PBC
12. ZOOM Button
Press repeatedly to zoom in the image.
REMOTE CONTROL
6

17. POWER Button
Turn the power on or restore the DVD
player to standby mode.
18. VOL +/– Buttons
To increase and decrease volume.
19. MUTE Button
To mute or restore the sound output.
20. SETUP Button
To access or exit the SETUP menu.
21. TITLE Button
Press to go to title menu.
22. AUDIO Button
To change the audio mode.
23. ( Ŷ6723%XWWRQ
7RVWRSWKHSOD\EDFN
24. PBC Button
To open the VCD main menu.
25. WIDE Button
Press to change aspect ratio.
26. STEP Button
27. SLOW Button
3UHVVUHSHDWHGO\WRHQWHUVORZSOD\EDFN
28. GOTO Button
7RVNLSGLUHFWO\WRDVSHFLILFWLPHWLWOH
FKDSWHUWUDFNLQWKHGLVF
29. RANDOM Button
Press to turn on or turn off random k.
23
22
21
20
19
18
17
24
25
26
27
28
29
WIDE
at
different speeds.
SOD\EDFN
PBC
REMOTE CONTROL
7
Press to play forward frame by frame.

compartment of the remote control.
Handling the Batteries
Ɣ,PSURSHURULQFRUUHFWXVHRIEDWWHULHVPD\FDXVH
FRUURVLRQRUEDWWHU\OHDNDJHZKLFKFRXOGFDXVHILUH
personal injury or damage to property.
Ɣ2QO\XVHWKHEDWWHU\W\SHLQGLFDWHGLQWKLVPDQXDO
Ɣ:KHQWKHEDWWHULHVDUHH[KDXVWHGWKHUHPRWHZLOOQRWIXQFWLRQ5HSODFHERWKEDWWHULHVDW
the same time with new ones.
Ɣ'RQRWLQVWDOOXVHGEDWWHULHVRUPL[GLIIHUHQWW\SHVRIEDWWHULHV
Ɣ'RQRWGLVSRVHRIXVHGEDWWHULHVDVGRPHVWLFZDVWH'LVSRVHRIWKHPLQDFFRUGDQFHZLWK
local regulations.
Handling the Remote Control
Ɣ'RQRWGURSRUFDXVHLPSDFWWRWKHUHPRWHFRQWURO
Ɣ'RQRWVSLOOZDWHURUDQ\OLTXLGRQWKHUHPRWHFRQWURO
Ɣ'RQRWSODFHWKHUHPRWHFRQWURORQDZHWREMHFW
Ɣ'RQRWSODFHWKHUHPRWHFRQWUROXQGHUGLUHFWVXQOLJKWRUQHDUVRXUFHVRIH[FHVVLYHKHDW
Ɣ5HPRYHWKHEDWWHU\IURPWKHUHPRWHFRQWUROZKHQQRWLQXVHIRUDORQJSHULRGRIWLPHDVLW
FRXOGFDXVHFRUURVLRQRUEDWWHU\OHDNDJHDQGPD\UHVXOWLQSK\VLFDOLQMXU\DQGRU
Remote Control Operation Range
Point the remote control to the DVD player no more than 5 meters/ 16 feet from the remote control
sensor and within 60° of the front of the DVD player. The operating distance may vary
depending on the brightness of the room.
30° 30°
WIDE
SURSHUW\
GDPDJHLQFOXGLQJ¿UH
AAA
AAA
3UHVVDQGOLIW WKHEDFNFRYHU XSWR RSHQWKH EDWWHU\
2.
Close the battery compartment cover.4.
Unscrew the screw on the battery door.
REMOTE CONTROL
8
3. Insert two "AAA" batteries (not included), following the
(+) and (-) markings in the battery compartment.

When connecting any external AV device or TV, do not connect the power cable to the wall
outlet until all other connections are completed.
Method 1: Connecting to a TV with an AV Cable
AV Cable (included)
Method 2: Connecting to a Stereo System and TV with an AV Cable
z 1
z 1
MAKING CONNECTIONS
9
NOTE: Video = Yellow
Audio Left = White
Audio Right = Red
NOTE: Video = Yellow
Audio Left = White
Audio Right = Red
White Red Yellow
White
Red
Yellow
Television
White
Red
Yellow
AV Cable(included)
Television
White Red Yellow
Stereo System

1) Plug the AC plug into a wall outlet that has AC 110-240V~60/50 Hz.
2) Press the POWER button to turn on the DVD player.
1) Press the OPEN/CLOSE button to open the disc tray. Place a disc into the disc tray with the label facing up.
* For a double sided disc, load the side which you wish to play facing down.
2) Press the OPEN/CLOSE button to close the disc tray. The playback will start once the disc loads.
* Some discs may not playback automatically. You can press the PLAY/PAUSE button to start playback.
1) Press the STOP button once to go to pre-stop mode. Some discs the DVD player will recall the stopped location.
2) Press the PLAY/PAUSE button to resume playback from the location where playback was stopped.
2) Each press of the NEXT or PREVIOUS button during playback will skip back or forward through the chapters.
*PREVIOUS and NEXT functions are not available in chapter repeat and A-B repeat mode.
2) Press the PLAY/PAUSE button to resume normal playback.
NOTE:
1) FAST REVERSE and FAST FORWARD functions are not available in A-B repeat mode.
3) Press the STOP button twice to stop completely. This will cause the disc to go back to the beginning. Press the
PLAY/PAUSE button to begin playback from the start of the disc.
1) During disc playback, press the PREVIOUS button to go back to the start of the previous chapter, or the NEXT
button to skip to the start of the next chapter.
1) During playback, you can press the FAST REVERSE or FAST FORWARD to either fast forward or reverse
through the disc. Each time either of these buttons are pressed, the fast forward/fast reverse speed will change.
There are 5 levels of speed available: x2, x4, x8, x16, x32.
2) DVD Discs that do not match the region code cannot be played on this player. You can find the DVD region on
the back of the DVD case or on the actual DVD. Australia and New Zealand are classified as Region 4.
POWER ON THE PLAYER
LOADING A DISC
STOP PLAYBACK
PREVIOUS AND NEXT
FAST FORWARD AND FAST REVERSE
1) During disc playback, press the SLOW button to enter slow forward mode. There are 4 speeds available: 1/2, 1/4,
1/8, 1/16.
2) Press the PLAY/PAUSE button to resume normal playback.
While playing the disc, press the TITLE button to go to the title menu. (May not be available on all discs).
1) Press the VOLUME +/- buttons on the remote control to adjust the volume.
2) Press the MUTE button on the remote control to switch the sound off. The MUTE icon will show up on the TV
screen. Press the mute button again to turn mute off. Alternatively, you can also press the VOLUME +/- buttons to
cancel mute and restore sound.
SLOW
TITLE
VOLUME ADJUSTMENT
1) During playback, press the STEP button to play the DVD frame by frame.
2) Press the PLAY/PAUSE button to resume normal playback.
"Title Remain".
During playback, press the OSD button on the remote control to set "Chapter Elapsed", "Chapter Remain", "Title
Elapsed",
STEP
OSD (On Screen Display)
→
2x
→
3x
→
4x
During the playback of DVD's, press the ZOOM button to enlarge the image by the following order:
ZOOM
To resume normal viewing, press the ZOOM button again until the picture returns to its normal state.
OPERATIONS--DVD PLAYBACK
10

Repeat a section between point A and B within a Title/Chapter/Track.
1) Press the A-B button to choose a starting point (A).
3) Press the A-B button a third time to cancel and exit.
2) Press the A-B button again to set an ending point (B) and complete the setting. The selected section A-B will
be repeated.
Press the ANGLE button repeatedly to switch between different camera angles that are available on the disc.
This function may not be available on all discs.
A-B REPEAT
ANGLE
REPEAT
Press once to repeat chapter.
Press twice to repeat title.
Press the third time to repeat all.
During playback, press the RANDOM button repeatedly to turn the random mode On or Off.
Press the AUDIO button repeatedly to select different channels.
Press the STOP button to pause the playback. Then press the WIDE button repeatedly to select the aspect ratio.
Press the SUBTITLE button repeatedly to switch between different subtitle languages that are available on the disc.
This function may not be available on all discs.
RANDOM
AUDIO
WIDE
SUBTITLE
1
2
3
4
5
6
7
8
9
10
Tt:02 ch:01
Tt: ch:
Tt: ch:
Tt: ch:
Tt: ch:
Tt: ch:
Tt: ch:
Tt: ch:
Tt: ch:
Tt: ch:
Exit Start Next
1) During DVD playback, press the PROG (program) button. The Program menu will appear as the below:
PROGRAM
4) Press the PROG button again to exit.
2) Using the navigation and numeric buttons, you can select and set the desired Tt (Title), Ch (Chapters), Tracks
(for CD) or the movie (music) you want. During setting, press the CLEAR button to clear the incorrect input.
3) Using the navigation buttons, highlight and select the START button at the bottom of the screen. Press the
ENTER button on the remote to start the program playback.
1) During playback, press the GOTO button to search for a title/chapter on the disc.
2) Press the GOTO button again to display the search menu.
3) Press the LEFT or RIGHT navigation buttons repeatedly to select the title/chapter.
4) Press the 0-9, 10+ numeric buttons to select title/chapter.
GOTO
OPERATIONS--DVD PLAYBACK
11
In STOP mode, press the N/P button to switch between PAL, NTSC and AUTO (multi).
N/P
Press the MENU button and the chapter menu of the current DVD will appear on the screen. Use the navigation
buttons to select the desired option. Then press the ENTER button to confirm the selection. This function may not
be available on all discs.
MENU
Press repeatedly to cancel repeat mode.

1) Plug the AC plug into a wall outlet that has AC 110-240V~60/50 Hz.
2) Press the POWER button to turn on the DVD player.
1) Press the OPEN/CLOSE button to open the disc tray. Place a disc into the disc tray with the label facing up.
* For a double sided disc, load the side which you wish to play facing down.
2) Press the OPEN/CLOSE button to close the disc tray. The playback will start once the disc loads.
* Some discs may not playback automatically. You can press the PLAY/PAUSE button to start playback.
1) Press the STOP button once to go to pre-stop mode. Some discs the DVD player will recall the stopped location.
2) Press the PLAY/PAUSE button to resume playback from the location where playback was stopped.
2) Each press of the NEXT or PREVIOUS button during playback will skip back or forward through the chapters.
*PREVIOUS and NEXT functions are not available in chapter repeat and A-B repeat mode.
2) Press the PLAY/PAUSE button to resume normal playback.
NOTE:
FAST REVERSE and FAST FORWARD functions are not available in A-B repeat mode.
3) Press the STOP button twice to stop completely. This will cause the disc to go back to the beginning. Press the
PLAY/PAUSE button to begin playback from the start of the disc.
1) During disc playback, press the PREVIOUS button to go back to the start of the previous chapter, or the NEXT
button to skip to the start of the next chapter.
1) During playback, you can press the FAST REVERSE or FAST FORWARD to either fast forward or reverse
through the disc. Each time either of these buttons are pressed, the fast forward/fast reverse speed will change.
There are 5 levels of speed available: x2, x4, x8, x16, x32.
POWER ON THE PLAYER
LOADING A DISC
STOP PLAYBACK
PREVIOUS AND NEXT
FAST FORWARD AND FAST REVERSE
1) Press the VOLUME +/- buttons on the remote control to adjust the volume.
2) Press the MUTE button on the remote control to switch the sound off. The MUTE icon will show up on the TV
screen. Press the mute button again to turn mute off. Alternatively, you can also press the VOLUME +/- buttons to
cancel mute and restore sound.
VOLUME ADJUSTMENT
OSD
During playback, press OSD button to show playing and disc information.
Repeat a section between point A and B within a Title/Chapter/Track.
1) Press the A-B button to choose a starting point (A).
3) Press the A-B button a third time to cancel and exit.
2) Press the A-B button again to set an ending point (B) and complete the setting. The selected section A-B will
be repeated.
A-B REPEAT
Track All
Press the REPEAT button on the remote to select different repeat modes:
REPEAT
OPERATIONS--CD PLAYBACK
12
(On Screen Display)

1
2
3
4
5
02
04
6
7
8
9
10
EXIT
B_
B_
B_
B_
B_
B_
B_
B_
NEXT
START
1) During CD playback, press the PROG (program) button. The Program menu will appear as the below:
4) Press the PROG button again to exit.
2) Using the navigation and numeric buttons, you can select and set the desired Tracks (for CD) or the movie
(music) you want. During setting, press the CLEAR button to clear the incorrect input.
3) Using the navigation buttons, highlight and select the START button at the bottom of the screen. Press the
ENTER button on the remote to start the program playback.
PROGRAM
During playback, press the RANDOM button repeatedly to turn the random mode On or Off.
RANDOM
AUDIO
Press AUDIO button to switch the audio output.
OPERATIONS--CD PLAYBACK
13

- Rotate 270°
- Rotate 90°
- Rotate 180°
- Rotate 360°
1) During playback, press the ZOOM button to enlarge or minimize the image by the following order:
100%, 125%, 150%, 200%, 75%, 50%
2) To resume normal viewing, press the ZOOM button again until the picture returns to its normal state.
Press the OSD button to show the file information. Press again to show the picture number.
1) There are 3 modes that you can select when rotating a picture: "Invert", "Left" and "Right". These operations
are only allowed when a picture is
is displayed. The arrow navigation keys are used to select the different rotation modes:
displayed normally and will be cancelled automatically when a new picture
1) Press the REPEAT button repeatedly to play a single photo. You can choose to repeat "Single", "Repeat One",
"Repeat Folder".
When a JPEG (Image) disc is inserted into the DVD player,the slideshow will automatically start. Press the STOP
button to enter the naivgation menu.
- In the menu, use the UP or DOWN navigation buttons to select a file, then press the PLAY/PAUSE button to start
the slide show. Press the PREV or NEXT buttons during the slide show to return to the previous picture or skip to
the next picture. Press the PLAY/PAUSE button during the slide show to pause the current picture. Then press
the PLAY/PAUSE button to resume the slide show.
Press the PROG button repeatedly to change the picture in different slide types.
PROGRAM
IMAGE ROTATION
REPEAT
ZOOM
(On Screen Display)
OSD
OPERATIONS-- DISC PLAYBACK
JPG
14

General Audio Dolby Video
General Setup Page
Go To General Setup Page
Preference
TV Display Wide
Angle Mark On
OSD Lang ENG
Screen Saver On
Last Memory Off
Off
Captions
NOTE: Preference page can only be opened when no disc is playing.
Press the SETUP button and the settings menu will appear on the screen as below. Using the navigation buttons,
select and highlight the function you wish to set or reset. Press ENTER to enter and confirm the selection. After
setting, press the SETUP button to save the settings and exit.
SETTING MENUS:
1) If TV display is selected, use the navigation and ENTER buttons to set the aspect ratio to Normal/PS
(4:3); Normal/LB (4:3 Letter Box) or Wide (16:9) to match the connected TV.
2) If Angle Mark is selected, use the navigation and ENTER buttons to set it On or Off. If it is set to On, when
multi-angles are available in the DVD that is playing, the multi-angle logo will appear on the screen.
3) If OSD (On Screen Display) is selected, use the navigation and ENTER buttons to set the OSD language to
English,French or Spanish as desired.
4) If Captions are selected, use the navigation and ENTER buttons to set it On or Off. If it is set to On, the screen
will show captions. If it is set to Off, the captions on the screen will disappear.
5) If Screen Saver is selected, use the navigation and ENTER buttons to set it to On or Off. If it is set to On, the
screen saver will come on when the unit stops or the image has been paused for 5 minutes.
GENERAL SETUP PAGE
6) If Last Memory is selected, use the navigation and ENTER buttons to set it to On or Off. If it is set to On, DVD
will continue to play the video after stopped or paused.
If Downmix is selected, use the navigation and ENTER buttons to set it to LT/RT, Stereo or 5.1CH as the audio
output connection:
- If set to LT/RT, the rear left or rear right channels in Dolby 5.1 surround sound, the DVD will play on both the left
and right speakers.
- If set to Stereo, the rear left channel will play on the left speaker, while the rear right channel will play on the
right speaker.
AUDIO SETUP PAGE
NOTE: Function depends on the recording of disc.
1) If Duel Mono is selected, use the navigation and ENTER buttons to set it to Stereo, L-Mono (play the left channel
on all speakers), R-Mono (play the right channel on all speakers) or Mix-Mono (mix the right and left channels then
play on all speakers) as desired. These functions will depend on the recording of the disc.
2) If Dynamic is selected, use the navigation and ENTER buttons to set the Dynamic Level as desired or you can
turn it off.
DOLBY SETUP PAGE
SYSTEM SETUP
15

SYSTEM SETUP
OUTPUT MODE:
If the DVD player is connected to the TV through a Video Jack, please set to CVBS.
NOTE: Preference page can only be opened when no disc is playing.
1) If TV type is selected, use the navigation and ENTER buttons to set to PAL, AUTO or NTSC.
(NOTE: The TV system in the US, Canada and Mexico is NTSC).
3) If Parental is selected, use the navigation and ENTER buttons to set the rating level as desired.
- Press the RIGHT navigation button to enter the menu. The rating level list will highlight.
- Press the UP or DOWN navigation button to select the desired level (see below).
- Press the ENTER button and a password window will pop up.
- Enter the 6 digit password (default password is 136900) by using the numeric buttons on the remote.
- Press ENTER to save the settings and exit.
* Rating Levels:
- 1 = (Kid Saf): Kid Safe
- 2 = (G): All Ages
- 3 = (PG): Parental Guidance
- 4 = (PG 13): Parental Guidance under 13 years old
- 5 = (PGR): Parental Guidance suggested under 17 years old
- 6 = (R): Parental Guidance strongly recommended under 17 years old
- 7 = (NC 17): 17 years or above
- 8 = (ADULT): Adult only
4) If Password is selected, press ENTER to enter into the subsetting menu that will appear on the screen.
- If Password is selected, press ENTER twice to enter. The new password setting menu will appear.
- Enter the 6 digit old password. The column for the new password will become highlighted.
- Enter a new 6 digit password. The column for confirm password will become highlighted.
2) If Audio, Subtitle or Disc Menu is selected, use the navigation and ENTER buttons to set the priority of the
available language (This function will depend ont he recording of the DVD).
- If Password Mode is selected, use the navigation and ENTER buttons to set it to On (activate the rating
level setting) or Off (password is needed).
- Enter the new password again. The OK button on the screen will become highlighted. Press the ENTER
button to save the setting and exit.
5) If Default is selected, use the navigation and ENTER buttons to reset all of the settings and restore to the
factory settings. Press the SETUP button to exit without making any changes.
VIDEO SETUP PAGE
PREFERENCE SETUP PAGE
16

Treat the discs carefully. Always hold the disc by its edges and the hole in the center. Never allow your fingers
to come in contact with the shiny, unprinted side of the disc as this could lead to issues with the playback of the disc.
- Do not attach adhesive tape, stickers etc. to any part of the disc.
- If a disc skips or gets stuck on a section while playing, there is a possibility the disc is dirty or damaged (scratched).
- Clean the disc periodically with a soft, lint-free, dry cloth. Never use detergents or abrasive cleaners to clean
the disc. If necessary, use a CD cleaning kit.
- When cleaning a disc, wipe in straight lines from the center of the disc to the outer edge of the disc. Never wipe
in circular motions.
- Discs should be stored in their cases after each use to avoid damage.
- Do not stick or write anything on either side of the disc. Sharp writing instruments or ink may damage the surface.
- To prevent fire or shock hazard, disconnect your unit from the AC power outlet when cleaning.
- The surface finishing of your unit may be cleaned with a dust cloth and cared for as other furniture.
- Use caution when cleaning and wiping the plastic parts.
- Mild soap and a damp cloth may be used to wipe down the front panel.
- Do not expose the discs to direct sunlight, high temperatures or dust etc. Prolonged exposure or extreme
temperatures can warp the disc.
CARING FOR DISCS:
CLEANING THE PLAYER
CARE AND MAINTAINANCE
17

PROBLEM SOLUTION
No operation can be
performed with the
remote control.
&KHFNWKHEDWWHULHVLQWKHUHPRWHFRQWURO7KH\PD\QHHG
replacing.
2SHUDWHWKHUHPRWHFRQWURODWDGLVWDQFHRIQRPRUHWKDQ5
5HPRYHEDWWHULHVDQGKROGGRZQRQHRUPRUHEXWWRQVIRU
several minutes to drain the microprocessor inside the remote
control to reset it. Reinstall batteries and try to operate the remote
control again.
Disc does not play. (QVXUHWKDWWKHGLVFLVLQVWDOOHGZLWKWKHODEHOVLGHIDFLQJXS
&KHFNWKHUHJLRQQXPEHURIWKH'9'
Disc Menu does not
appear.
&KHFNLIWKHGLVFKDVD0HQX
No power Remote Control to turn on the unit.
0DNHVXUHWKHZDOORXWOHWKDVSRZHU
The picture is distorted
RUWXUQVEODFNDQG
white during color
SOD\EDFN
7KHGLVFGRHVQRWPDWFKZLWKWKH79FRORUV\VWHPVWDQGDUG
(PAL/NTSC).
7KHGLVFLVGLUW\&OHDQWKHGLVF
6RPHWLPHVDVPDOODPRXQWRISLFWXUHGLVWRUWLRQPD\DSSHDU
This is not a malfunction of the unit.
The screen aspect
ratio cannot be
changed.
7KH6FUHHQ$VSHFW5DWLRLV¿[HGRQ\RXU'9'V
'HSHQGLQJRQWKH79LWPD\QRWEHSRVVLEOHWRFKDQJHWKH
Screen Aspect Ratio.
7KLVLVQRWDSUREOHPZLWKWKH'9'SOD\HU
No audio.
0DNHVXUH\RXKDYHVHFXUHO\FRQQHFWHGWKH'9'SOD\HUDQG
other devices.
0DNHVXUHWKH79DQGWKHDPSOL¿HUDUHLQJRRGFRQGLWLRQDQGDUH
setup properly.
Not able to select
some items in the
setup/ system menu.
3UHVVWKH6723EXWWRQWZLFHEHIRUHVHOHFWLQJWKHVHWXSV\VWHP
menu.
'HSHQGLQJRQWKHIXQFWLRQVSURJUDPPHGRQWKHGLVFVVRPH
menu items cannot be selected.
The DVD player does
QRWVWDUWSOD\EDFN
,QVHUWDUHDGDEOHGLVFZLWKWKHSOD\EDFNVLGHIDFLQJGRZQ
&KHFNWKHGLVFW\SHFRORUV\VWHP3$/176&DQGUHJLRQFRGH
&KHFNIRUDQ\VFUDWFKHVRUVPXGJHVRQWKHGLVF
3UHVV6(783EXWWRQWRWXUQRIIWKHVHWXSPHQX
(QWHUWKHSDVVZRUGLQRUGHUWRFKDQJHWKHSDUHQWDOUDWLQJOHYHO
RUWRXQORFNWKHGLVFIRUSOD\EDFN
0RLVWXUHPD\KDYHFRQGHQVHGLQVLGHWKHV\VWHP5HPRYHWKH
disc and leave the system turned on for about an hour.
'LVFRQQHFWWKHSRZHUFDEOHIURPWKHZDOORXWOHWPDLQVVRFNHWIRU
a few minutes. Reconnect the power cable and try to operate the
DVD player.
Picture freezes
momentarily during
SOD\EDFN
&KHFNWKHGLVFIRU¿QJHUSULQWRUVFUDWFKHVDQGFOHDQZLWKDVRIW
cloth wiping from center to edge.
m /
16 feet.
TROUBLESHOOTING GUIDE
18
Press the On/Off button on the DVD player or on the

Power Source.................................................
Power Consumption........................................
Power source of the Remote Control..............
Signal System.................................................
Operating Temperature....................................
Operating Humidity Range..............................
Compatible Discs:
DVD-VIDEO Disc
FPVLQJOHVLGHGVLQJOHOD\HU
FPVLQJOHVLGHGGXDOOD\HU
FPVLQJOHVLGHGVLQJOHOD\HU
FPVLQJOHVLGHGGXDOOD\HU
FPVLQJOHVLGHGVLQJOHOD\HU
COMPACT DISC
12cm disc
8cm disc
Audio Signal Output Characteristics:
Frequency Response:
DVD (Linear Audio).........................................
CD Audio ........................................................
S/N Ratio ........................................................
10W
DC 3V, 2×AAA size batteries
NTSC / PAL / AUTO
+5° to+35°C
5% to 90% (no condensation)
+].+]
+].+]
70dB
6SHFL¿FDWLRQVDUHVXEMHFWWRFKDQJHZLWKRXWQRWLFH
AC 110 -240V~50/60Hz
-
Compatible Discs............................................. VCD/Kodak Picture/JPEG
DVD/ DVD±R/ DVD±RW/CD/CD-R/
CD-RW/
SPECIFICATIONS
19

12 MonthWarranty
Thankyou for yourpurchasefrom Kmart.
KmartAustralia Ltdwarrantsyournewproducttobe freefromdefectsin
materialsand workmanshipfor the periodstatedabove, fromthe date of
purchase, provided thatthe productisused inaccordance withaccompanying
recommendationsorinstructionswhereprovided.Thiswarrantyisinaddition
toyourrightsunderthe Australian ConsumerLaw.
Kmartwill provide youwithyourchoiceofarefund,repairorexchange(where
possible)for thisproductifitbecomesdefectivewithinthe warrantyperiod.
Kmartwill bearthe reasonableexpenseof claimingthe warranty.This
warrantywillnolongerapply wherethe defectisaresultof alteration,
accident,misuse, abuseorneglect.
Pleaseretainyourreceiptasproof ofpurchaseand contactourCustomer
ServiceCentreon1800 124 125 (Australia)or0800 945 995 (NewZealand) or
alternatively,via email at customer.satisfaction@kmart.com.au for any
difficultieswithyourproduct.Warrantyclaimsand claimsfor expense
incurred inreturningthisproductcanbeaddressed toourCustomerService
Centreat690 SpringvaleRd,MulgraveVic 3170.
Ourgoodscomewithguaranteesthatcannotbe excludedunderthe Australian
ConsumerLaw.Youareentitled toareplacement orrefundfor amajorfailure
and compensationforanyotherreasonably foreseeableloss ordamage.You
arealso entitled tohavethe goodsrepaired orreplaced ifthe goodsfailtobe
of acceptablequalityand thefailuredoesnotamounttoamajorfailure.
For NewZealand customers,thiswarrantyisinadditiontostatutoryrights
observed underNewZealand legislation.
Table of contents
Other AudioSonic DVD Player manuals