AudioSonic HF-1253 User manual

HF-1253
Stereo powerpack
CD / MP3 / USB
EN Instruction Manual
Nl Gebruiksaanwijzing
Fr Mode d’emploi
dE Bedienungsanleitung
Es Manual de instrucciones
pt Manual de Instruções
pl Instrukcje użytkowania
it Istruzioni per l’uso
sV Användare

2

3
Dear customer,
Congratulations and thank you for purchasing this high quality product.
Please read the instruction manual carefully so that you will be able to make the best
possible use of the appliance. This manual includes all the necessary instructions and
advice for using, cleaning and maintaining the appliance. If you follow these instructions
you will be guaranteed off an excellent result, it saves you time and will avoid problems.
We hope you will have a great deal of pleasure from using this appliance.
WARNING
• Please refer the information on exterior bottom enclosure for electrical and safety
information before installing or operating the apparatus.
• To reduce the risk of fire or electric shock, do not expose this apparatus to rain or
• The battery (battery or batteries or battery pack) shall not be exposed to excessive
heat such as sunshine, fire or the like.
• The mains plug is used as disconnect device, the disconnect device shall remain
readily operable.
• Invisible laser radiation when open and interlocks defeated. Avoid exposure to
beam of laser.
• Correct Disposal of this product. This marking indicates that this product should
not be disposed with other household wastes throughout the EU. To prevent
possible harm to the environment or human health from uncontrolled waste
disposal, recycle it responsibly to promote the sustainable reuse of material
resources. To return your used device, please use the return and collection systems
or contact the retailer where the product was purchased. They can take this
product for environmental safe recycling.
• No naked flame sources, such as lighted candles, should be placed on the apparatus.
• Attention should be drawn to environmental aspects of battery disposal.
• Use of the apparatus in moderate climates.
• The rating and marking information are located at the bottom of the unit.
• Excessive sound pressure from earphone and headphones can cause hearing loss.
• The mains plug of unit should be obstructed or should be easily accessed during
intended use.
• To be completely disconnect the power input, the mains plug of apparatus shall
be disconnected from the mains.
• Danger of explosion if battery is incorrectly replaced. Replace only with the same
or equivalent type.
• To prevent fire or shock hazard do not expose this appliance to rain or moisture.
• Risk of electric shock. Do not open.
• Warning: shock hazard-do not open
• To prevent personal injury, do not reverse any batteries and do not mix battery types.
• Attention should be drawn to the environmental aspects of battery disposal.
• The rating plate is located at the back cabinet of the apparatus.
• Do not throw batteries in fire.
Within an equilateral triangle, is intended to alert the user to the pres-
ence of uninsulated dangerous voltage within the products enclosure
that may be of sufficient magnitude to constitude a risk of electric shock
to persons.
Within an equilateral triangle, is used to indicate that a specific
component shall be replaced only by the component specified in that
documentation for safety reason.
The following label has been affixed to the unit, listing the proper procedure for
working with the laser beam:
This label is attached to the place as illustrated to inform that
the apparatus contains a laser component.
This label is placed inside the unit. As shown in the illustration.
To warn against further measures on the unit. The equipment contains
a laser radiating laser rays according to the limit of laser product
of class 1.
EN Instruction Manual

4
SAFETY INSTRUCTIONS
• READ INSTRUCTIONS - All the safety and operating instructions should be read
before the appliance is operated.
• RETAIN INSTRUCTIONS - The safety and operating instruction should be retained
for future reference.
• HEED WARNINGS - All warnings on the appliance and in the operating instructions
should be adhered to.
• FOLLOW INSTRUCTIONS - All operating instructions should be followed.
• WATER AND MOISTURE - The appliance should not be used near water,
for example, near a bathtub, washbowl, kitchen sink, laundrytub, swimming pool
or in a wet basement.
• VENTILATION - The appliance should be situated so that its location or position
does not interfere with its proper ventilation. Do not place on bed, sofa, rug or
similar surface that may block the ventilation openings, in a built-in installation,
such as a bookcase or cabinet that may impede the flow of air through the
ventilation openings.
• HEAT - The appliance should be situated away from heat sources such as radiators,
stoves, or other appliances (including amplifiers) that produce heat.
• POWER SOURCE - The appliance should be connected to power supply only of
the type described in the operating instructions or as marked on the appliance.
• POWER CORD PROTECTION - Power supply cords should be routed so that they are
not likely to be walked on or pinched by items placed upon or against them.
• POWER LINES - An outdoor antenna should be located away from power lines.
• OBJECT and LIQUID ENTRY - Care should be taken so that objects do not fall and
liquids are not spilled into the enclosure through openings.
• ESD WARNING - The display does not function properly or no reaction to operation
of any the control may due to the electrostatic discharge.
Switch off and unplug the set. Reconnect after a few seconds.
• DAMAGE REQUIRING SERVICE - The appliance should be serviced by qualified
service personnel when:
a. The power-supply cord or plug has been damaged.
b. Objects have fallen into, or liquid has been spilled into the appliance enclosure.
c. The appliance has been exposed to rain.
d. The appliance has been dropped, or the enclosure damaged.
e. The appliance does not appear to operate normally.
• SERVICING - The user should not attempt to service the appliance beyond that
described in the user operating instructions. All other servicing should be referred
to qualified service personnel.
Notes:
• Dirty or scratched CD may cause a skipping problem. Clean or replace the CD.
• If an error display or malfunction occurs, disconncet the AC cord and remove all
the batteries. Then turn the power back on.
BEFORE OPERATION
Notes: Concerning compact discs.
Since dirty, damaged or warped discs may damage the appliance, care should be
taken of the followings items:
• Usable compact discs. Use only compact disc with the mark shown below.
• CD compact disc only with digital audio signals.
Instruction Manual

3 7
4 8
1 5
2 6
2
3
4
5
7
9
12
13
14
16
17
15
11
8
6
1
20
22 23
1918
21
10
5
EN Instruction Manual
LOCATION OF CONTROL
1. LCD DISPLAY
2. POWER INDICATOR
3. FM ST. INDICATOR
4. REMOTE SENSOR
5. STOP
6. MODE
7. SKIP +
8. BAND SELECTOR
9. SKIP
10. TUNING CONTROL
11. USB SLOT
12. AUX IN
13. ALBUM
14. FUNCTION SELECTOR
15. POWER ON / OFF
16. VOLUME CONTROL
17. PLAY / PAUSE
18. TIME SET
19. HOUR
20. MINUTE
21. AC POWER CORD
22. FM ANTENNA
23. SPEAKER JACKS L/R
POWER SOURCE
You can power your appliance by plugging the AC power cord at the back of
the appliance into a wall AC power outlet. Check that the rated voltage of
your appliance matches your local voltage.
REMOTE CONTROL
1. STOP
2. MODE
3. SKIP +
4. + 10
5. PLAY / PAUSE
6. PROGRAM
7. SKIP -
8. ALBUM

6
Instruction Manual
BATTERY INSTALLATION
Insert a “Cell” size batteries into the battery compartment. Be sure that the batteries
are inserted damage to the remote control. Always remove the batteries when
the remote control will not be used for a long period of time, as this will cause
leakage to the batteries and subsequently damage to your set.
Slide out cover and install single "Cell" battery with polarities as shown.
Notes:
• Power button on main unit must be ‘On’ in order for Remote Control to operate.
• If the distance required between the remote control and the appliance decreases,
the batteries are exhausted. In this case replace the batteries with new one.
SENSOR WINDOW OF THE RECEIVER
• Even if the remote control is operated within the effective range, its operation may be
impossible if there are any obstacies between the appliance and the remote control.
• If the remote control is operated near other appliances which generate infrared rays,
or if other remote control devices using infrared rays are used near the appliance,
it may operate incorrectly.
RADIO OPERATION
General operation
• Set the “FUNCTION” selector to “RADIO” mode.
• Select desired band by using the “BAND” selector.
• Adjust radio frequency to your desired station by using the “TUNING” control.
• Adjust the “VOLUME” control to the desired level.
FM / FM-stereo reception
• Set the “BAND” selector to FM mode for MONO reception.
• Set the “BAND” selector to FM ST. mode for FM STEREO reception.
The Stereo indicator light up to show FM ST. mode.
For better reception
• FM - This appliance has a FM antenna located at the rear cabinet.
This wire is completely unraveled and extended for better reception.
• AM - This appliance is equipped with a built - in directional ferrite AM antenna.
Rotate the appliance to get better reception.
CD / MP3 OPERATION
General operation
PLAY / PAUSE ( ) Press to start playing CD / MP3 disc.
Press again to stop playing CD / MP3
operation temporarily.
Press again to resume playback.
SKIP + & ( ) Press to go to the next track or back to the previous track.
SKIP - ( ) Press and hold while playing until you find the point of
the sound.
STOP ( ) Press to stop all CD / MP3 operation.

7
EN Instruction Manual
Playback
• Set the “FUNCTION” selector to “CD / MP3” mode.
• Open the CD door and place a CD / MP3 disc with the label up in
the CD compartment.
• Close the CD door.
• Focus search is performed if disc is inside.
For CD disc - Total number of tracks is read and appears on the display.
For MP3 disc - “MP3” appears on the display.
• Playback will start automatically from the first track.
• Adjust the “VOLUME” control to the desired level.
• Press the “PLAY / PAUSE” button again when you want to stop
playback temporarily.
• Press the “STOP” button when finished.
CD / MP3 OPERATION
Program
• Be sure to press the “STOP” button before use.
• Press the “MODE” button, the display will show “P01” and flash.
• Select desired track by using the “SKIP +” or “SKIP -” button.
(You may select a desired album by pressing the “ALBUM” button)
• Press the “MODE” button again to confirm desired track into the program memory.
• Repeat step 2 and 3 to enter additional tracks into the program memory.
• When all the desired tracks have programmed, press the “PLAY / PAUSE” button to
play the disc in the order you have programmed.
• Press the “STOP” button twice to terminate programmed playback.
Up to 20 tracks fo CD disc, 99 tracks of MP3 disc can be programmed for disc play
in any order.
Mode
Press the “MODE” button before or during playing CD / MP3 disc,
each press switches the mode function as follows:
1 - REPEAT 1
2 - REPEAT ALBUM ( *MP3 ONLY )
3 - REPEAT ALL
4 - RANDOM
5 - NORMAL PLAYBACK
USB OPERATION
General operation
PLAY / PAUSE ( ) Press to start playing tracks from the USB.
Press again to stop playing USB operation temporarily.
Press again to resume playback.
SKIP + & ( ) Press to go to the next track or back to the previous track.
SKIP - ( ) Press and hold while playing until you find the point of
the sound.
STOP ( ) Press to stop all USB operation.

8
Instruction Manual
Playback
• Plug or slot in USB device to the port. (Make sure no disc on disc tray)
• Set the “FUNCTION” selector to “CD / MP3” mode.
• Press and hold the “PLAY / PAUSE” button for a few seconds to entry USB mode.
• Playback will start automatically from the first track.
• Press the “STOP” button when finished.
• Press the “PLAY / PAUSE” button again, playback will start from the first track.
Program, mode
The operation of PROGRAM, MODE are as the same as that of CD / MP3.
Please refer to CD / MP3 OPERATION.
OTHER FEATURES
Clock setting
• Press the “TIME SET” button. (Do not release “TIME SET” button during time setting)
• Press the “HOUR” button to set hour.
• Press the “MINUTE” button to set minute.
• Release all button to confirm setting. Confirmed setting will on the display.
Aux in
• Use a 3.5mm Male-to-Male Stereo cable to connect any external audio device
with a 3.5mm Headphone or Ling-Out jack to the AUX IN jack on the front panel
of the stereo.
• Start playback on the external audio device. Adjust the volume on the audio
device (do not set the volume too high to avoid distortion). You may also adjust
the volume on the appliance.
• To control playback function, use the controls provided by the external
audio device.

9
Nl Gebruiksaanwijzing
Geachte klant,
Gefeliciteerd met de aankoop van dit kwaliteitsproduct.
Lees de gebruiksaanwijzing zorgvuldig door zodat u optimaal gebruik kunt maken van
dit apparaat. In deze handleiding vindt u alle benodigde aanwijzingen en adviezen
voor het gebruik. Als u deze aanwijzingen volgt, hebt u altijd een uitstekend resultaat,
bespaart u tijd en kunt u problemen voorkomen.
Wij hopen dat u dit apparaat met plezier zult gebruiken.
WAARSCHUWING
• Raadpleeg voor u het apparaat in gebruik neemt de informatie onderaan
het apparaat voor de elektrische veiligheid eninformatie.
• Stel het apparaat niet bloot aan regen of vocht om het risico van brand of een
elektrische schok te verminderen.
• De batterijen mogen niet worden blootgesteld aan overmatige hitte zoals zonlicht,
vuur of dergelijke.
• Zorg ervoor dat de stekker van het apparaat gemakkelijk bereikbaar blijft.
• Onzichtbare laserstraling wanneer het apparaat geopend is:
Vermijd blootstelling aan de straal van de laser.
• Dit product mag aan het einde van zijn levensduur niet bij het normale huisafval
worden gedeponeerd, maar dient bij een speciaal inzamelpunt voor het
hergebruik van elektrische en elektronische apparaten te worden aangeboden.
Het symbool op artikel, gebruiksaanwijzing en verpakking attendeert u hierop.
De gebruikte grondstoffen zijn geschikt voor hergebruik. Met het hergebruik
van gebruikte apparaten of grondstoffen levert u een belangrijke bijdrage voor
de bescherming van ons milieu. Informeer bij uw lokale overheid naar
het bedoelde inzamelpunt.
• Plaats geen brandende voorwerpen zoals kaarsen op het apparaat.
• Aandacht moet worden gevestigd op de milieuaspecten vande inzameling
van batterijen.
• Gebruik het apparaat niet in een extreem hoog of laag klimaat.
• Het ratinglabel bevindt zich aan deonderzijde van het apparaat.
• Overmatige geluidsdruk van oortelefoon of hoofdtelefoon kan
gehoorbeschadiging veroorzaken.
• Verwijder de stekker uit het stopcontact om het apparaat volledig uit te schakelen.
• Kans op explosiegevaaralsde batterijonjuist wordt vervangen.
Vervang de batterij uitsluitenddoor hetzelfde ofgelijkwaardigtype
• Risico op een elektrische schok, niet openen.
• Om persoonlijk letsel te voorkomen, de batterijen in de goede richting leggen
zoals is aangegeven en geen verschillende types batterijen gebruiken.
• Er moet aandacht worden besteed aan de milieuaspecten bij verwijdering van
de batterijen.
• Het typeplaatje bevindt zich aan de achterkant op de behuizing van het apparaat.
• Gooi de batterijen niet in het vuur.
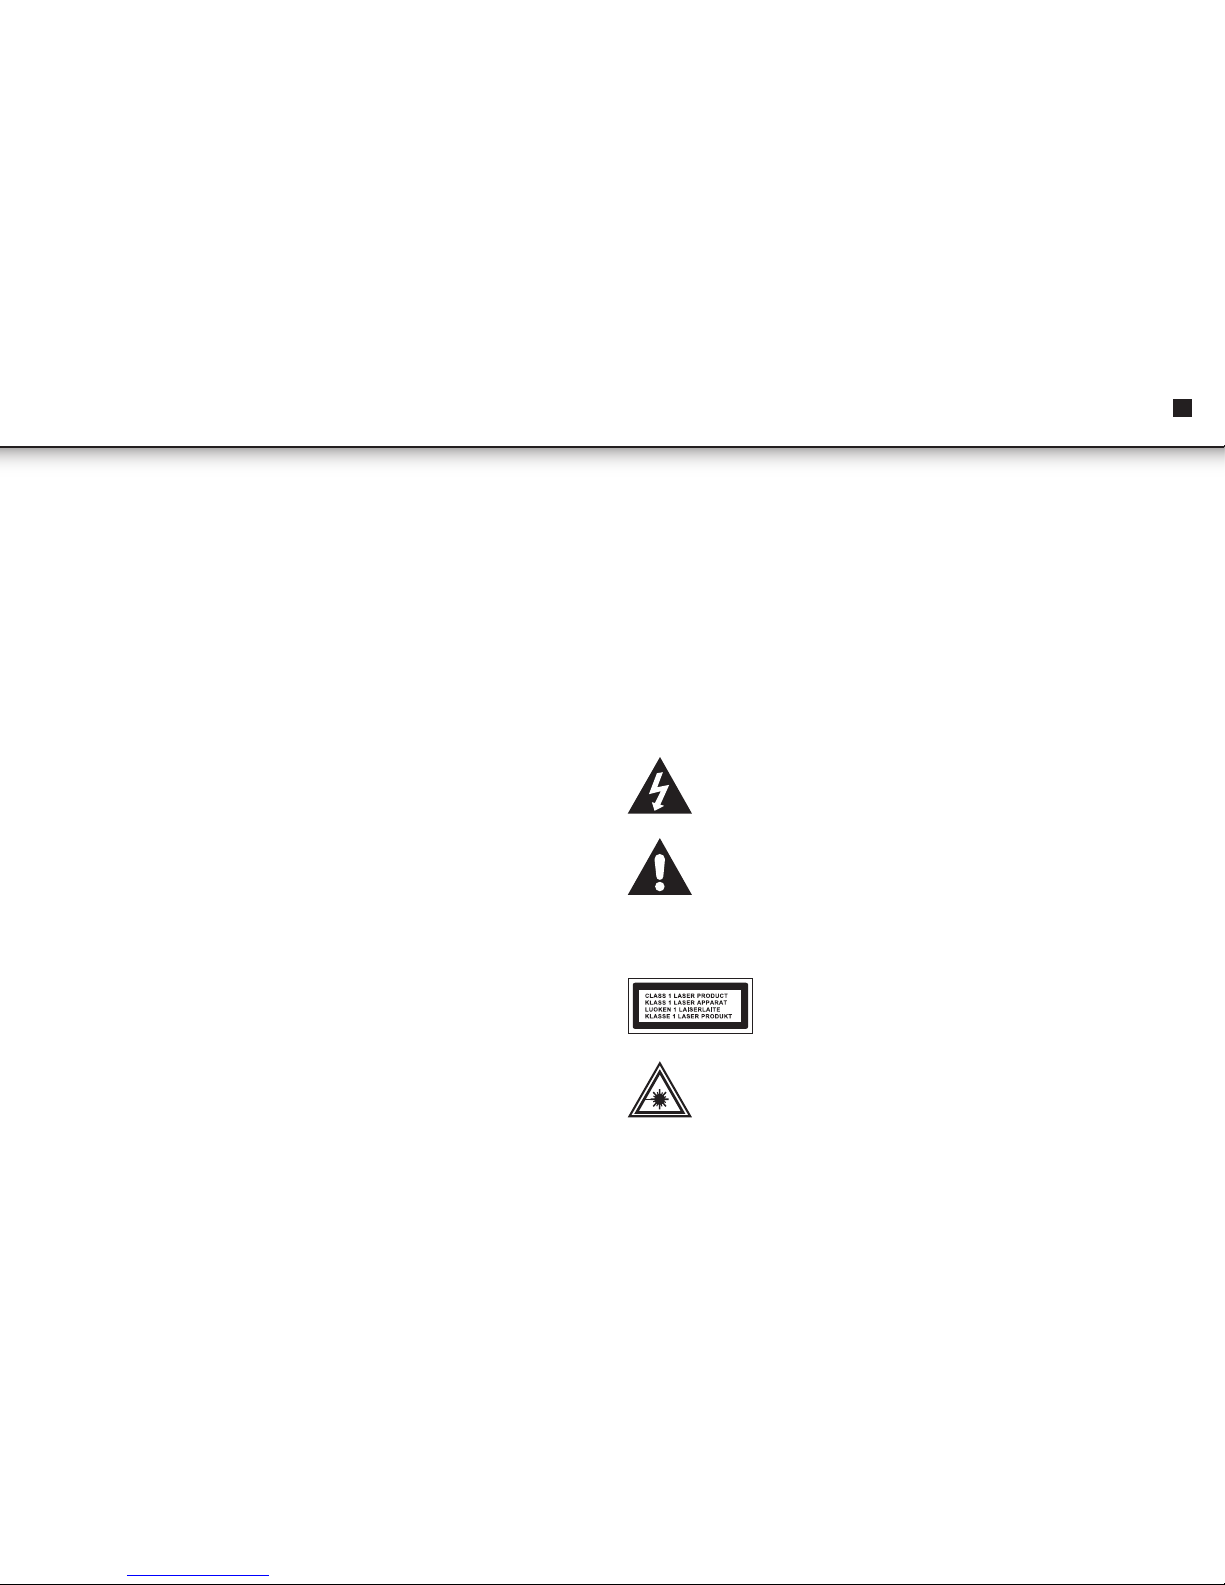
Het symbool van een bliksem met pijlpunt in een gevarendriehoek is
bedoeld om de gebruiker te waarschuwen voor het aanwezig zijn van
een ongeïsoleerde hoge spanning binnen de behuizing, deze spanning
is hoog genoeg om gevaarlijk te zijn voor de gezondheid.
Het symbool van de bliksem met pijlpunt, binnen een gelijkzijdige driehoek
is bedoeld om de gebruiker attent te maken op de aanwezigheid van
"gevaarlijke spanning" binnen in het apparaat, die voldoende groot kan
zijn om het risico van een elektrische schok te vormen voor mensen.
Het volgende label is aangebracht op het toestel, volg de juiste procedure voor
het werken met de laserstraal:
Dit label is aangebracht op de plaats waar het apparaat
een laser component bevat.
Waarschuwing voor straling label, dit label is geplaatst aan de
binnenkant van de behuizing zoals aangegeven op de afbeelding,
dit om te waarschuwen om bij verdere service handelingen
voorzichtigheid in acht te nemen. Dit apparaat bevat een laser
die binnen de limieten van een CLASS1 laser vallen.

10
Gebruiksaanwijzing
VEILIGHEIDSINSTRUCTIES
• LEES DE INSTRUCTIES - Alle veiligheids- en bedieningsinstructies moeten worden
gelezen voordat het apparaat wordt bediend.
• BEWAAR DE INSTRUCTIES - De veiligheids- en bedieningsinstructies moeten
worden bewaard om eventueel later te kunnen raadplegen.
• VOLG DE WAARSCHUWINGEN - Alle waarschuwingen op het apparaat en in
de gebruiksaanwijzing moeten in acht worden genomen.
• VOLG DE INSTRUCTIES - Alle bedieningsinstructies moeten worden opgevolgd.
• WATER EN VOCHT - Het apparaat mag niet worden gebruikt in de buurt van water,
bijvoorbeeld bij een badkuip, wasbak, aanrecht het zwembad of een vochtige kelder.
• VENTILATIE - Het apparaat moet zo worden geplaatst, dat een goede ventilatie
mogelijk blijft.Niet op een bed, sofa, tapijt of vergelijkbaar oppervlak dat de
ventilatieopeningen kan blokkeren, zoals een kast waardoor de luchttoevoer in
de ventilatieopeningen wordt belemmerd.
• WARMTE - Zorg dat het apparaat niet in de buurt van warmtebronnen zoals
radiatoren, kachels of andere apparaten wordt geplaatst. (Inclusief versterkers
die warmte produceren)
• POWER SOURCE - Het apparaat moet worden aangesloten op de stroomvoorziening
van het type beschreven in de bedieningsinstructies en zoals aangegeven op
het apparaat.
• POWER CORD BESCHERMING - Netsnoeren moeten zo worden gelegd dat er niet
over wordt gelopen of worden bekneld door voorwerpen.
• HOOGSPANNINGSKABELS - Een buitenantenne moet uit de buurt van
hoogspanningslijnen worden gericht.
• OBJECTEN EN VLOEISTOFFEN - Zorg er voor, dat er geen voorwerpen op kunnen
vallen of vloeistoffen worden gemorst op het apparaat.
• ESD WAARSCHUWING - Als het display niet goed werkt en/of alle functionaliteit
weggevallen is kan het zijn dat het systeem ontregeld is door statische elektriciteit.
Schakel het systeem uit en haal de stekker uit de wandcontactdoos en plaats deze
na enkele seconden terug.
• ONDERHOUDSVEREISTEN - Het apparaat moet worden onderhouden door
gekwalificeerd personen wanneer:
a.Het netsnoer of de stekker beschadigd is.
b.er vloeistoffen in de behuizing zijn gemorst.
c.Het apparaat is blootgesteld aan regen.
d.Het apparaat is gevallen, of het omhulsel is beschadigd.
e.Het apparaat niet normaal lijkt te functioneren.
• ONDERHOUD - Meer dan het onderhoud wat wordt aangegeven in
de gebruiksaanwijzing kan niet worden uitgevoerd door de consument.
Al het andere onderhoud moet worden overgelaten aan gekwalificeerd personeel.
Opmerkingen:
• Beschadigingen of vuil op een cd kan problemen veroorzaken, als dit voorkomt
reinig of vervang dan de cd.
• Als er een foutmelding of storing optreedt, verwijder de stekker uit het
stopcontact en verwijder alle batterijen.Plaats vervolgens de batterijen terug in
het apparaat, steek de stekker in het stopcontact en activeer het apparaat weer.
VOOR GEBRUIK
Opmerkingen: Over compact discs
Beschadigde of vuile CD’s kunnen beschadigingen aan het apparaat veroorzaken.
Let op dat u de onderstaande regels in acht neemt.
• Gebruik alleen compact discs met het merk hieronder.
• Gebruik alleen compact discs met digitale audio signalen.

3 7
4 8
1 5
2 6
2
3
4
5
7
9
12
13
14
16
17
15
11
8
6
1
20
22 23
1918
21
10
11
Nl
ONDERDELENBESCHRIJVING
1. LCD DISPLAY
2. POWER INDICATIE LAMPJE
3. FMST.INDICATOR
4. AFSTANDBEDIENING SENSOR
5. STOP
6. MODE
7. SKIP+
8. BAND SCHAKELAAR
9. SKIP
10. FREQUENTIE AFSTEMKNOP
11. USBPOORT
12. AUX IN
13. ALBUM
14. FUNCTIESCHAKELAAR
15. POWERON/OFF
16. VOLUME CONTROL
17. PLAY/PAUSE
18. TIJD INSTELLEN
19. UUR
20. MINUTEN
21. NETSNOER
22. FMANTENNE
23. LUIDSPREKERAANSLUITINGENL/R
ELECTRICITEITS AANSLUITING
Wisselstroom. Activeer het apparaat door de stekker in het stopcontact te steken.
Controleer of de spanning van het apparaat met uw plaatselijke voltage overeenkomt.
AFSTANDSBEDIENING
1. STOP
2. MODE
3. SKIP +
4. + 10
5. PLAY / PAUSE
6. PROGRAM
7. SKIP -
8. ALBUM
Gebruiksaanwijzing

12
Gebruiksaanwijzing
BATTERIJ INSTALLATIE
Plaats"cel"formaatbatterijeninhet batterijvak.Zorg ervoor datde batterijencorrect
zijn geplaatstom schadeaande afstandsbedieningte vermijden.
Verwijder altijddebatterijenwanneer de afstandsbediening voor een lange periode
niet gebruikt zal worden, want dit zalleiden tot lekkagevande batterijenen
vervolgensschadeaanuw toestel.
Schuif het afdekplaatje open en installeer de batterij met de polen in de richting die wordt aangegeven op het apparaat.
Opmerkingen:
• Het apparaat moet worden geactiveerd met de power knop op het apparaat
alvorens u de afstandsbediening kunt gebruiken.
• Als het effectief bereik van uw afstandsbediening verminderd dient u
de batterijen te vervangen.
SENSORVENSTER VAN DE ONTVANGER
• Zelfsalsde afstandsbedieningwordt gebruiktbinnen het effectieve bereik,
kande werking ervanonmogelijk zijn als erobstakels zijntussen het apparaat
ende afstandsbediening.
• Als de afstandsbedieningwordtgebruikt in de buurtvan andere apparaten
dieinfrarood stralen genereren,ofandere afstandsbedienings gestuurde
apparatenis het mogelijk dat dezeniet goed functioneert.
RADIO BEDIENING
Algemenewerking
• Stel de functieschakelaar in op de radio modus.
• Selecteerde gewenstebandmet behulp vande "BAND"-schakelaar.
• Stelradiofrequentie op de gewenstezenderdoormiddel van de frequentie
afstelknop.
• Regel met de volume regelaar het gewenste volume niveau.
FM/FM-stereo
• Zetde "BAND"-schakelaarnaarde FM-modusvoor mono-ontvangst.
• Zetde "BAND"-schakelaarnaarFMST.modusvoorFM-stereo-ontvangst.
Destereo-indicatorlichtop.
Voor een betereontvangst
• FM-Dit apparaatheeft eenFM-antenneaan de achterzijde.
Zorg er voor dat dezedraadvollediguitgerold isvoor een betereontvangst.
• AM- Ditapparaat isuitgerustmeteeningebouwdeAM-antenne.
Draaihet apparaat voor een betere ontvangst.
CD / MP3 WERKING
Algemene werking
• Druk PLAY / PAUSE ( ) om te beginnen met het afspelen van nummers
via de USB poort.
• Druk nogmaals PLAY / PAUSE om het afspelen tijdelijk te onderbreken.
• Druk nogmaals PLAY / PAUSE om de weergave te hervatten.
• Druk op SKIP + ( )& - ( ) om naar het volgende nummer of terug naar
het vorige nummer te gaan.
• Druk SKIP + & - en houd vast om vooruit of terug te spoelen.
• Druk op STOP ( )om alle USB-werking te stoppen.

13
Nl Gebruiksaanwijzing
Afspelen
• Stelde"FUNCTIE"-schakelaar naar"CD/MP3"-modus.
• Open deCDlade enplaatseenCD /MP3CDmethet labelnaar boven in deCD lade.
• Sluit deCDlade.
• Het apparaat zal gaan draaienals deCD / MP3 CD er in zit.
VoorCD-Totaalaantaltrackswordt gelezenenweergegevenop hetdisplay.
VoorMP3-disc-"MP3"verschijnt op hetdisplay.
• Het afspelen start automatischvanaf de eerstetrack.
• Druk opde "PLAY/PAUSE"toets wanneer utijdelijk wiltstoppen met afspelen.
• Druk opde "STOP"knopals u klaar bent.
PROGRAMMEREN
• Tot 20 nummers voor een cd, en 99 nummers voor een MP3 CD kan worden
geprogrammeerd in een willekeurige volgorde.
• Druk op de stop knop voor dat u gaat programmeren.
• Druk op de knop "MODE", op het display zal “P01” gaan knipperen.
• Selecteer het gewenste nummer met behulp van de "SKIP + " of "SKIP -"knop.
(U kunt het gewenste album kiezen door op de "ALBUM"knop te drukken)
• Druk op de "MODE" toets om het gewenste nummer te bevestigen in het
programma geheugen.
• Herhaal stap 2 en 3 om extra nummers in het programmageheugen te plaatsen.
• Als u alle gewenste nummers heeft geprogrammeerd, drukt u op de "PLAY /PAUSE"
knop om de geprogrammeerde nummers af te spelen.
• Druk twee keer op de "STOP" knop om het afspelen te beëindigen.
Mode
Druk op de "MODE" knop voor of tijdens het afspelen van CD / MP3 disc,
elke druk verandert de functie als volgt:
1 - REPEAT 1 (herhaal 1 nummer)
2 - REPEAT ALBUM (* Alleen voor MP3)
3 - REPEAT ALL (herhaal complete CD)
4 - RANDOM (willekeurig)
5 - NORMAL PLAYBACK (normale weergave)
USB WERKING
Algemene werking
• Druk PLAY / PAUSE om te beginnen met het afspelen van nummers via de USB poort.
• Druk nogmaals PLAY / PAUSE om het afspelen tijdelijk te onderbreken.
• Druk nogmaals PLAY / PAUSE om de weergave te hervatten.
• Druk op SKIP + & - om naar het volgende nummer of terug naar het vorige
nummer te gaan.
• Druk SKIP + & - en houd vast om vooruit of terug te spoelen.
• Druk op STOP om alle USB-werking te stoppen.

14
Gebruiksaanwijzing
Afspelen
• Plaats het USB apparaat in de USB poort.(Zorg dat er geenCD in de lade zit)
• Stelde functie schakelaar naar"CD/MP3"-modus.
• Druk op de"PLAY/PAUSE"en houd deze vooreenpaarseconden vast om het
USB-modus te betreden.
• Het afspelen start automatischvanaf het eerstenummer.
• Druk opde "STOP"knopals u klaar bent.
• Druk nogmaals opde"PLAY/ PAUSE"toets,en het afspelen zal weerstarten
vanafde eerstetrack.
Programmeer,mode
Het programmeren werkt hetzelfde zoals eerde beschreven bij CD/MP3.
Wij verwijzen u naarCD /MP3 OPERATIE voor deze actie.
OVERIGE EIGENSCHAPPEN
Klokinstelfunctie
• Druk op de "tijdsinstelling" knop. (laat deze knop niet los tijdens tijdinstelling)
• Druk op de "UUR" knop om uren in te stellen.
• Druk op de "MINUTEN" knop om de minuten in te stellen.
• Laat alle knoppen los om de instelling te bevestigen.
Aux in
• Sluit een 3.5mm AUX-kabel (male to male) aan op het externe audio-apparaat
en plug deze in op de AUX IN-aansluiting op het voorpaneel van het apparaat.
• Start het afspelen op het externe audio-apparaat. Stel het volume van
het audio-apparaat in (niet te hoog om vervorming te voorkomen).
U kunt ook het volume van het apparaat aanpassen.
• De verdere bediening gebeurt met behulp van de knoppen van
het externe audio-apparaat.

15
Fr Mode d’emploi
Cher client,
Nous vous félicitons et vous remercions pour l’achat de ce produit de qualité supérieure.
Veuillez lire attentivement ce manuel d’instructions afin de faire le meilleur usage possible
de cet appareil. Ce manuel comprend toutes les instructions et les conseils nécessaires
pour l’utilisation, le nettoyage et l’entretien de cet appareil. Si vous suivez ces instructions,
vous obtiendrez d’excellents résultats, vous gagnerez du temps et éviterez tout problème.
Nous espérons que l’utilisation de cet appareil vous satisfera pleinement.
AVERTISSEMENT
• Veuillez-vous référer aux informations sur le boîtier externe inférieur pour
connaitre les consignes électriques et les consignes de sécurité avant d'installer
ou d'utiliser l'appareil.
• Pour réduire les risques d'incendie ou de chocs électriques, ne pas mettre
l'appareil sous la pluie ou dans un environnement humide. L'appareil ne doit pas
être exposé à des gouttes ou des projections de liquide et aucun objet contenant
des liquides tels que des vases ne doit être posé sur l’appareil.
• Les piles ne doivent pas être exposées à une source de chaleur excessive,
telle que les rayons solaires, le feu et autres.
• Lorsque la fiche de raccordement au secteur est utilisée en tant que dispositif
de sectionnement, celui-ci doit pouvoir rester facilement opérationnel.
• Quand l'appareil et les verrouillages sont ouverts, une radiation laser visible est
présente. Évitez l'exposition au faisceau laser.
• Élimination correcte de ce produit. Ce pictogramme indique que ce produit ne
doit pas être traité en tant que déchet ménager dans l'Union européenne.
En vous assurant que ce produit est mis au rebut correctement afin de promouvoir
le recyclage des matériaux, vous contribuerez à éviter les conséquences
potentiellement néfastes pour l’environnement et la santé humaine qui pourraient
résulter d’un traitement inapproprié de ce produit en tant que déchet.
Pour rapporter votre appareil usagé, veuillez utiliser les services de reprise et
de collecte ou bien, contactez le détaillant où le produit a été acheté. Ils peuvent
procéder à un recyclage de ce produit respectueux de l'environnement.
• Aucune source de flamme nue, telle que des bougies allumées, ne doit être posée
sur l’appareil.
• Une attention particulière doit être portée quant à l’impact environnemental lors
de la mise au rebut des piles.
• L'appareil est prévu pour une utilisation dans des climats tempérés.
• Les informations concernant le classement et la signalétique sont situées au bas
de l'appareil.
• Une pression acoustique excessive du casque ou des écouteurs pourrait
endommager votre audition.
• La fiche d'alimentation de l'appareil ne doit pas être obstruée et elle doit être
facilement accessible pendant l'utilisation.
• Pour débrancher complètement l'alimentation électrique, la fiche de l'appareil doit
être débranchée du réseau.
• Des piles mal remplacées posent un risque d'explosion.
• Ne les remplacez que par des piles identiques ou de type équivalent.
• Afin d'eviter les risques d'incendie ou d'electrocution, n'exposez pas cet appareil
a la pluie ou a l'humidite.
• Risque d'electrocution- ne pas ouvrir.
• Afin d’éviter toutes blessures corporelles, ne pas inverser et ne pas mélanger les
types de piles.
• Soyez attentif aux aspects environnementaux lorsque vous devez éliminer des piles.
• La plaque signalétique est située dans le compartiment au dos de l'appareil.
• Ne pas jeter les piles au feu.
Dans un triangle équilatéral, vous indique la présence de haute tension
non isolée à l'intérieur des produits qui peut être d'une ampleur suffisante
pour constituer un risque de choc électrique envers les personnes.
Dans un triangle équilatéral, indique qu’un composant spécifique ne
pourra être remplacé que par le composant spécifié dans
la documentation, et ce pour des raisons de sécurité.
L’étiquette suivante a été apposée sur l’appareil. Elle décrit la procédure adéquate
pour travailler avec le faisceau laser :

16
Mode d’emploi
Cette étiquette est apposée sur l’appareil comme indiqué afin
d’informer de la présence d’un composant laser.
L'étiquette est placée à l'intérieur de l'appareil. Comme illustré ici.
Avertissement concernant les mesures supplémentaires sur l'appareil.
L’appareil contient un laser émettant des rayons lasers dans le respect
de la limite du produit laser de classe 1.
CONSIGNES DE SECURITE
• LIRE LES CONSIGNES - Toutes les consignes de sécurité et d’utilisation doivent être
lues avant de faire fonctionner l’appareil.
• CONSERVER LES CONSIGNES - Les consignes de sécurité et d'utilisation doivent
être conservées en vue d’une consultation ultérieure.
• TENIR COMPTE DES AVERTISSEMENTS - Tous les avertissements qui se trouvent sur
le produit et dans le mode d'emploi doivent être respectés.
• SUIVRE LES INSTRUCTIONS - Toutes les instructions d’utilisation doivent être suivies.
• EAU ET HUMIDITÉ - L’appareil ne doit pas être utilisé près d’une source d’eau,
par exemple, près d’une baignoire, d’un lavabo, d’un évier de cuisine,
d’une cuve de lessivage, d’une piscine ou dans une cave humide.
• VENTILATION - L’appareil doit être disposé de sorte que son emplacement ou sa position
n’interfère pas avec son système de ventilation. L'appareil ne doit pas être placé sur un
lit, un canapé, un tapis, ou une surface similaire qui peut bloquer les ouvertures de
ventilations; ou bien placé dans une installation intégrée, telle qu'une bibliothèque ou
une étagère, qui pourrait gêner la circulation d'air à travers les ouvertures de ventilation.
• CHALEUR - N'installez pas l'appareil à proximité de sources de chaleur, telles qu'un
radiateur, une grille de diffusion de chaleur, un poêle ou tout autre appareil
(y compris des amplificateurs) générant de la chaleur.
• SOURCE D’ALIMENTATION - L'appareil ne doit être relié qu’au type de source
d’alimentation décrit dans les instructions d’utilisation ou mentionné sur l’appareil.
• PROTECTION DU CORDON D’ALIMENTATION - Les cordons d’alimentation doivent
être agencés de manière à ne pas être piétinés ou coincés par des objets placés
sur ou contre ceux-ci.
• LIGNES D’ALIMENTATION - Si vous utilisez une antenne extérieure, veillez à la
maintenir à une distance suffisante des lignes électriques.
• INTRUSION D'OBJET ET DE LIQUIDE - Prenez soin à ce qu'aucun objet ou liquide ne
s'introduise dans le boîtier via les ouvertures.
• AVERTISSEMENT CONCERNANT LES DÉCHARGES ÉLECTROSTATIQUES - Un
problème au niveau du fonctionnement de l'affichage ou encore l'inactivité des
commandes peut être dû à une décharge électrostatique. Mettez l’appareil hors
tension et débranchez-le. Rebranchez-le après quelques secondes.
• DÉGÂTS NÉCESSITANT UNE RÉVISION - L’appareil devra être révisé par un
technicien qualifié lorsque :
a. Le cordon d'alimentation ou la fiche est endommagé(e).
b. Des objets ou des liquides ont été projetés dans le boîtier de l’appareil.
c. L'appareil a été exposé à la pluie.
d. L’appareil a subi une chute ou que le boîtier est endommagé.
e. L’appareil ne semble pas fonctionner normalement.
• ENTRETIEN - L’utilisateur ne doit en aucun cas essayer de réparer l’appareil.
Il s'en tiendra à ce qui est décrit dans les instructions d’utilisation.
Pour toute réparation, veuillez vous adresser à un technicien qualifié.
Remarques :
• Un CD sale ou rayé peut entraîner des problèmes de saut de plage.
Nettoyez le CD ou remplacez-le.
• En cas de dysfonctionnement ou de message d’erreur, débranchez le cordon
d’alimentation de l’appareil et enlevez toutes les piles. Puis, rebranchez-le.
AVANT L'UTILISATION
Remarques: Concernant les disques compact.
Puisqu’un CD sale ou rayé peut endommager l’appareil, soyez attentif aux
éléments suivants :
• Disques compact utilisables. N’utilisez que les CD portant la marque mentionnée
ci-dessous.
• N’utilisez que des signaux audio numériques.

3 7
4 8
1 5
2 6
2
3
4
5
7
9
12
13
14
16
17
15
11
8
6
1
20
22 23
1918
21
10
17
Fr
EMPLACEMENT DES COMMANDES
1. ÉCRAN LCD
2. VOYANT D’ALIMENTATION
3. VOYANT STEREO FM
4. CAPTEUR DE TELECOMMANDE
5. STOP
6. MODE
7. SAUT +
8. SELECTEUR DE BANDE
9. SAUT
10. COMMANDE SYNTONISEUR
11. PORT USB
12. ENTREE AUX
13. ALBUM
14. SELECTEUR DE FONCTION
15. MARCHE / ARRET
16. REGLAGE DU VOLUME
17. LECTURE / PAUSE
18. REGLAGE DE L’HEURE
19. HEURE
20. MINUTE
21. CORDON D’ALIMENTATION CA
22. ANTENNE FM
23. PRISES HAUTPARLEUR G / D
SOURCE D'ALIMENTATION
Vous pouvez alimenter votre appareil en branchant le cordon d’alimentation CA,
situé à l’arrière de l’appareil, dans une prise murale CA. Vérifiez que la tension nominale
de votre appareil correspond à la tension du réseau local.
AFSTANDSBEDIENING
1. STOP
2. MODE
3. SAUT +
4. + 10
5. LECTURE / PAUSE
6. PROGRAMME
7. SAUT -
8. ALBUM
Mode d’emploi

18
Mode d’emploi
INSTALLATION DES PILES
Insérez une pile de type C dans le compartiment prévu à effet. Assurez-vous que
les piles sont placées correctement pour éviter d'endommager la télécommande.
Retirez toujours les piles lorsque l’appareil n’est pas utilisé pendant une longue
période car celles-ci risque de fuir, et d’endommager votre appareil.
Faites glisser le couvercle et installez les piles de type à « cellule » unique en respectant les polarités comme indiqué.
Remarques :
• Si la distance requise entre la télécommande et l'appareil diminue,
les piles sont épuisées. Dans ce cas, remplacez les piles par des neuves.
• Le bouton d'alimentation sur l'unité principale doit être en marche pour que
la télécommande fonctionne.
FENETRE DU CAPTEUR DU RECEPTEUR
• Même si la télécommande est utilisée dans la zone de portée utile, son
fonctionnement peut s'avérer impossible s'il y a des obstacles entre l'appareil et
la télécommande.
• Si la télécommande est utilisée à proximité d'autres appareils générant des rayons
infrarouges, ou si d'autres dispositifs de commande à distance utilisant des rayons
infrarouges sont utilisés à proximité de l'appareil, elle peut mal fonctionner.
FONCTIONNEMENT DE LA RADIO
Fonctionnement général
• Placez le sélecteur de "FONCTION" en mode "RADIO".
• Sélectionnez la bande de votre choix en utilisant le sélecteur de "BANDE".
• Sélectionnez une fréquence radio en fonction de la station désirée à l’aide
de la touche "TUNING" (Syntoniseur).
• Réglez le volume à l'aide de la molette "VOLUME".
Réception fm / fm-stereo
• Placez le sélecteur de "BANDE" en mode FM pour une réception MONO.
• Placez le sélecteur de "BANDE" en mode FM ST pour une réception FM STEREO.
Le voyant Stéréo s’allume lorsque le mode FM ST est activé.
Pour une meilleure réception
• FM - Cet appareil a une antenne FM située à l'arrière du boitier.
Ce fil est complètement démêlé et allongé pour une meilleure réception.
• AM - Cet appareil est équipé d'une antenne AM directionnelle en ferrite intégrée.
Réorientez l’antenne afin d’obtenir une meilleure réception.
FONCTIONNEMENT CD/MP3
LECTURE / PAUSE ( ) Appuyez sur cette touche pour lire le disque CD / MP3.
Appuyez à nouveau pour arrêter temporairement
la lecture du disque CD / MP3.
Appuyez à nouveau pour reprendre la lecture.
SAUT + & ( ) Appuyez sur cette touche pour passer à la plage
suivante ou précédente.
SAUT - ( ) Appuyez sur la touche et maintenez-la enfoncée jusqu’à
atteindre le moment choisi de la plage.
STOP ( ) Appuyez sur cette touche pour arrêter la lecture
du disque CD / MP3.

19
Fr Mode d’emploi
LECTURE
• Placez le sélecteur de "FONCTION" en mode "CD/MP3".
• Ouvrez le clapet du lecteur et placez un disque CD / MP3 avec l’étiquette vers
le haut dans le compartiment CD.
• Fermez le clapet du lecteur CD.
• Une recherche de focalisation est effectuée si le disque est à l’intérieur du lecteur.
Pour les disques CD - Le nombre total de plages apparaît sur l'écran.
Pour les disques MP3 - "MP3" s'affiche à l'écran.
• La lecture débutera automatiquement à la première plage.
• Réglez le volume à l'aide de la molette "VOLUME".
• Appuyez sur la touche "LECTURE / PAUSE" lorsque vous souhaitez arrêter
temporairement la lecture.
• Appuyez sur la touche "STOP" lorsque la lecture est terminée.
FONCTIONNEMENT CD/MP3
Programme
• Jusqu'à 20 plages de disque CD et 99 plages de disque MP3, peuvent être
programmées pour la lecture du disque dans n'importe quel ordre.
Assurez-vous d'appuyer sur la touche "STOP" avant utilisation.
• Appuyez sur la touche "MODE", l’écran affiche "P01" et clignote.
• Sélectionnez la plage souhaitée en utilisant les touches "SKIP + " ou "SKIP - ".
(Vous pouvez sélectionner l'album de votre choix en cliquant sur la touche "ALBUM".)
• Appuyez à nouveau sur la touche “MODE” pour mémoriser votre choix de plage.
• Répétez les étapes 2 et 3 afin de mémoriser d’autres plages.
• Lorsque toutes les plages souhaitées sont programmées, appuyez sur
la touche "LECTURE / PAUSE" pour lire le disque dans l’ordre choisi lors de
la programmation.
• Appuyez deux fois sur la touche "STOP" pour mettre un terme à
la lecture programmée.
Mode
Appuyez sur la touche "MODE" avant ou pendant la lecture du disque CD / MP3;
vous changez de mode à chaque fois que vous appuyez sur ce bouton comme suit :
1 - REPETER 1
2 - REPETER ALBUM ( *MP3 SEULEMENT )
3 - REPETER TOUT
4 - ALEATOIRE
5 - LECTURE NORMALE
FONCTIONNEMENT DU PERIPHERIQUE USB
Fonctionnement général
LECTURE / PAUSE ( ) Appuyez sur cette touche pour lancer une lecture à
partir du périphérique USB.
Appuyez à nouveau pour arrêter temporairement la
lecture du périphérique USB.
Appuyez à nouveau pour reprendre la lecture.
SAUT + & ( ) Appuyez sur cette touche pour passer à la plage
suivante ou précédente.
SAUT - ( ) Appuyez sur la touche et maintenez-la enfoncée jusqu’à
atteindre le moment choisi de la plage.
STOP ( ) Appuyez sur cette touche pour arrêter l'utilisation du
périphérique USB.

20
Mode d’emploi
Lecture
• Branchez le périphérique USB au port. (Assurez-vous qu’il n’y a aucun disque dans
le tiroir à disque)
• Placez le sélecteur de "FONCTION" en mode "CD/MP3".
• Appuyez sur la touche "LECTURE / PAUSE" et maintenez-la enfoncée quelques
secondes pour passer en mode USB.
• La lecture débutera automatiquement à la première plage.
• Appuyez sur la touche "STOP" lorsque la lecture est terminée.
• Appuyez à nouveau sur la touche "LECTURE / PAUSE", la lecture débutera à
la première plage.
Programme, mode
Les fonctions PROGRAM, MODE sont identiques à celles des CD / MP3.
Veuillez vous référer au fonctionnement du CD / MP3.
AUTRES CARACTERISTIQUES
Réglage de l'heure
• Appuyez sur la touche "REGLAGE DE L'HEURE". (Ne relâchez pas la touche
"REGLAGE DE L'HEURE" pendant le réglage de l’heure)
• Appuyez sur la touche "HEURE" pour régler les heures.
• Appuyez sur la touche "MINUTE" pour régler les minutes.
• Relâchez la pression exercée sur toutes les touches pour confirmer le réglage.
L’heure réglée apparaît sur l’écran.
Entrée AUX
• Utilisez un cordon 3.5mm stéréo mâle/mâle pour connecter un appareil audio
externe avec une prise jack 3,5 mm line-out ou pour casque à la prise ENTRÉE AUX
sur le panneau avant de la stéréo.
• Commencez la lecture sur l'appareil audio externe. Réglez le volume sur le périphérique
audio (le volume ne doit pas être trop élevé pour éviter les distorsions).
Vous pouvez également régler le volume sur l'appareil.
• Pour contrôler la fonction de lecture, utilisez les commandes prévues par
le dispositif audio externe.
Table of contents
Languages:
Other AudioSonic Stereo System manuals

AudioSonic
AudioSonic HF-1254 User manual

AudioSonic
AudioSonic TXCD-1530 User manual

AudioSonic
AudioSonic CD-1588 User manual

AudioSonic
AudioSonic TXCD-1536 User manual

AudioSonic
AudioSonic TXCD-1536 User manual

AudioSonic
AudioSonic MHF-220BT User manual

AudioSonic
AudioSonic HF-1265 User manual

AudioSonic
AudioSonic CL-1563 User manual

AudioSonic
AudioSonic HF-1250 User manual