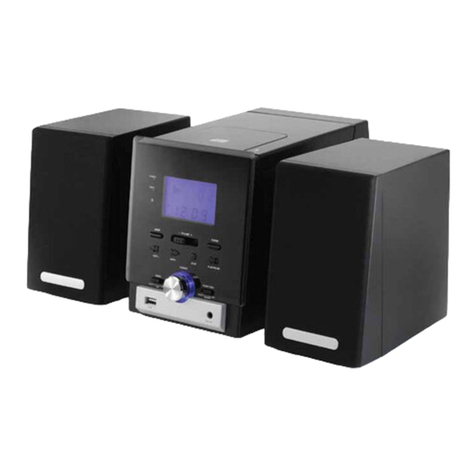
AudioSonic MHF-220BT User manual

Mini Hi-Fi System
MHF-220BT

2
CAUTION:
TO REDUCE THE RISK OF FIRE OR ELECTRIC
SHOCK; DO NOT EXPOSE THIS APPARATUS
TO RAIN OR MOISTURE.
CAUTION:
TO REDUCE THE RISK OF ELECTRIC SHOCK,
DO NOT REMOVE COVER (OR BACK). NO
USER-SERVICEABLE PARTS INSIDE. REFER
SERVICING TO QUALIFIED SERVICE
PERSONNEL.
The lightning flash with arrowhead symbol, within an
equilateral triangle, is intended to alert the user to the
presence of uninsulated “dangerous voltage” within
the product’s enclosure that may be of sufficient
magnitude to constitute a risk of electric shock to
persons.
The exclamation point within an equilateral triangle is
intended to alert the user to the presence of important
operating and maintenance (servicing) instructions in
the literature accompanying the appliance.
Important Safety Instructions
1.
Read these instructions.
2.
Keep these instructions.
3.
Heed all warnings.
4.
Follow all instructions.
5.
Do not use this apparatus near water.
6.
Clean only with dry cloth.
7.
Do not block any ventilation openings. Install in
accordance with the manufacturer’s instructions.
8.
Do not install near any heat sources such as
radiators, heat registers, stoves, or other
apparatus (including amplifiers) that produce heat.
9.
Do not defeat the safety purpose of the polarized
or grounding-type plug. A polarized plug has two
blades with one wider than the other. A grounding
type plug has two blades and a third grounding
prong. The wide blade or the third prong is
provided for your safety. If the provided plug does
not fit into your outlet, consult an electrician for
replacement of the obsolete outlet.
10.
Protect the power cord from being walked on or
pinched particularly at plugs, convenience
receptacles, and the point where they exit from
the apparatus.
11.
Only use attachments/accessories specified by the
manufacturer.
15.
Damage Requiring Service
Unplug the apparatus from the wall outlet and
refer servicing to qualified service personnel under
the following conditions:
A.
When the power-supply cord or plug is
damaged,
B.
If liquid has been spilled, or objects have fallen
into the apparatus,
C.
If the apparatus has been exposed to rain or
water,
D.
If the apparatus does not operate normally by
following the operating instructions. Adjust
only those controls that are covered by the
operating instructions as an improper
adjustment of other controls may result in
damage and will often require extensive work by
a qualified technician to restore the apparatus to
its normal operation,
E.
If the apparatus has been dropped or damaged
in any way, and
F.
When the apparatus exhibits a distinct change
in performance this indicates a need for
service.
16.
Object and Liquid Entry
Never push objects of any kind into the apparatus
through openings as they may touch dangerous
12. Use only with the cart,
stand, tripod, bracket, or
table specified by the
manufacturer, or sold with
the apparatus. When a cart
is used, use caution when
moving the cart/apparatus
combination to avoid injury
from tip-over.
voltage points or short-out partsthat could result in
a fire or electric shock.
The apparatus shall not be exposed to dripping or
splashing and no objects filled with liquids, such
as vases shall be placed on the apparatus.
Don’t put candles or other burning objects on top
of this unit.
17. Batteries
Always consider the environmental issues and fol-
13.
Unplug this apparatus during lightning storms or
when unused for long periods of time.
14.
Refer all servicing to qualified service personnel.
Servicing is required when the apparatus has been
damaged in any way, such as power-supply cord or
plug is damaged, liquid has been spilled or objects
have fallen into the apparatus, the apparatus has
been exposed to rain or moisture, does not operate
normally, or has been dropped.
low local regulations when disposing of batteries.
18. If you install the apparatus in a built-in installa-
tion, such as a bookcase or rack, ensure that there
is adequate ventilation.
Leave 20 cm (8") of free space at the top and sides
and 10 cm (4") at the rear. The rear edge of the
shelf or board above the apparatus shall be set 10
cm (4") away from the rear panel or wall, creating
a flue-like gap for warm air to escape.
PORTABLE CART WARNING
S3125A
CAUTION
RISK OF ELECTRIC SHOCK
DO NOT OPEN
3
Precautions
1.
Recording Copyright—Unless it’s for personal
use only, recording copyrighted material is illegal
without the permission of the copyright holder.
2.
AC Fuse—The AC fuse inside theunit isnot user-
serviceable. If you cannot turn on the unit, contact
yourdealer.
3.
Care—Occasionallyyou shoulddusttheunitall
over with a soft cloth. For stubborn stains, use a soft
cloth dampened with a weak solution of mild
detergent and water. Dry the unit immediately
afterwards with a clean cloth. Don’t useabrasive
cloths, thinners, alcohol, or other chemical solvents,
because they maydamagethe finish or remove the
panel lettering.
4.
Power
WARNING
BEFORE PLUGGING IN THE UNIT FOR THE
FIRST TIME, READ THE FOLLOWING
SECTIONCAREFULLY.
Make sure that the voltage in your area meets the
voltage requirements printed on the unit’s rear
panel (e.g., AC 110-240 V, 50/60 Hz).
The power cord plug is used to disconnect this unit
from the AC power source. Make sure that the plug
is readily operable (easily accessible) at all times.
Pressing the [POWER] button to select OFF mode
does not fully disconnect from the mains. If you do
not intend to use the unit for an extended period,
remove the power cord from the AC outlet.
5.
PreventingHearing Loss
Caution
Excessive sound pressure from earphones and
headphones can cause hearing loss.
6.
Batteries and Heat Exposure
Warning
Batteries (battery pack or batteries installed) shall
not be exposed to excessive heat as sunshine, fire or
the like.
7.
Never Touch this Unit withWet Hands—
Never
handle this unit or its power cord while your hands
are wet or damp. If water or any other liquid gets
inside this unit, have it checked by your dealer.
8.
HandlingNotes
·
If you need to transport this unit, use the original
packaging to pack it how it was when you
originally bought it.
·
Do not leave rubber or plastic items on this unit
for a long time, because they may leave marks on
the case.
·
This unit’s topand rear panels may get warm after
prolonged use. This is normal.
·
If you do not use this unit for a long time, it may
not work properly the next time you turn it on, so
be sure to use it occasionally.
·
When you’ve finished using this unit, remove all
discs and turn off the power.
9.
Installing this Unit
·
Install this unit in a well-ventilated location.
·
Ensurethatthere’sadequateventilationallaround
this unit, especially if it’s installed in an audio
rack. If the ventilation is inadequate, the unit may
overheat, leading to malfunction.
·
Do not expose this unit to direct sunlight or heat
sources, because its internal temperature may
rise, shortening the life of the optical pickup.
·
Avoid damp and dusty places, and places subject
to vibrations from loudspeakers. Never put the
unit on top of, or directly above a loudspeaker.
·
Install this unit horizontally. Never use it on its
side or on a sloping surface, because it may cause
a malfunction.
·
If you install this unit near a TV, radio, or VCR,
the picture and sound quality may be affected. If
this occurs, move this unit away from the TV,
radio, or VCR.
10.
MoistureCondensation
Moisture condensation may damage this unit.
Read the following carefully:
Moisture may condense on the lens of the optical
pickup, one of the most important parts inside this unit.
·
Moisture condensation can occur in the following
situations:
–
The unit is moved from a cold place to a warm
place.
–
A heater is turned on, or cold air from an air
conditioner is hitting the unit.
–
In the summer, when this unit is moved from
an air conditioned room to a hot and humid
place.
–
The unit is used in a humid place.
·
Donot use this unit when there’s the possibilityof
moisture condensation occurring. Doing so may
damage your discs and certain parts inside this
unit.
If condensation does occur, unplug the power cord
and leave the unit for two to three hours in the room
temperature.

Precautions—Continued
This unit contains a semiconductor laser system and is
classified as a So, to
use this model properly, read this Instruction Manual
carefully. In case of any trouble, please contact the
store where you purchased the unit.
To prevent being exposed to the laser beam, do not try
to open the enclosure.
CAUTI N
CLASS M VISIBLE AND INVISIBLE LASER
RADIATION WHEN OPEN. DO NOT VIEW
DIRECTLY WITH OPTICAL INSTRUMENTS.
THIS PRODUCT UTILI ES A LASER. USE OF
CONTROLS OR AD USTMENTS OR
PERFORMANCE OF PROCEDURES OTHER
THAN THOSE SPECIFIED HEREIN MAY RESULT
INHA ARDOUS RADIATION E POSURE.
The label on the right is
applied on the rear panel.
.
This unit is a CLASS
LASER PRODUCT
and employs a laser
inside the cabinet.
2.
To prevent the laser from being exposed, do not
remove the cover. Refer servicing to qualified
personnel.
Before Using Your New Speakers
Speaker Precautions
Thespeakers can handle the specified input power
when used for normal music reproduction. If they’re
fed any of the following signals, even if the input
power is within the specified rating, excessive current
may flow in the speaker coils, causing burning or wire
breakage:
.
Interstation noise from an untuned FM radio.
2.
Audio from a cassette that’s being fast-forwarded.
.
High-pitched sounds generated by an oscillator,
electronic musical instrument, and so on.
4.
Amplifieroscillation.
5.
Special test tones from audio test CDs and so on.
6.
Thumps and clicks caused by connecting or
disconnecting audio cables (always turn off your
amplifierbeforeconnecting or disconnecting
cables).
.
Microphonefeedback.
The speakers contain powerful magnets. Do not put
metal items, such as screwdrivers, close to the
speakers, as they maybe attracted toward the magnet,
causinginjury, or damage to the tweeter diaphragm.
Using Close to a CRT-type TV or
Computer
(In the following explanation, TV refers to a CRT-
type TV.)
·
Place the speakers on sturdy, flat surfaces. Putting
them on uneven or unstable surfaces where they may
fall and cause damage and affect the sound quality.
·
Do not keep water or other liquids close to the
speakers. If a liquid is spilled over them, the woofer
and tweeter inside may be damaged.
·
Do not handle the speakers with wet or damp hands.
TVs and computer monitors are magnetically sensitive
devices and as such are likely to suffer from
discoloration or picture distortion when conventional
speakers are placed nearby. To prevent this, the
speakers feature internal magnetic shielding. In some
situations, however, discoloration may still be an issue.
In this case, turn off your TV or monitor, wait 5 to 0
minutes, and then turn it back on again. This normally
activatesthedegaussingfunction,whichneutralizesthe
magnetic field, thereby removing any discoloration
effects. If discolorationproblems persist, try moving
the speakers away from your TV or monitor. Note that
discoloration can also be caused by a magnet or
demagnetizing tool that’s too closeto your TV or
monitor.
Note
·
If the speakers are placed close to a TV or monitor,
due to the electromagnetic waves radiated by the TV
or monitor, you may hear noise from the speakers
even after your amplifier has been turned off. To
prevent this, position the speakers away from your
TV or monitor.
CLASS LASER PRODUCT .

5
Pac a e Contents
Make sure you have the following items:
Main unit
Speakers (left and right)
Remote control
Instructionmanual
Usin t e Remote Contro
When using the remote control, point it toward the
Main unit’s remote control sensor, as shown below.
Install two AAAsize batteries.
Make sure to match the
and - ends of the batteries
with the diagram inside the
compartment.
InstallationLocation
This unit and it’s remote control might become
discolored by ultraviolet or other light components if
you use them in direct sunlight, or under fluorescent
lighting or germicidal lamp. Note
Put the cover back in place and
slide it in the direction of the
arrow, till you hear a Click
sound.
Rep acin t e attery
Use only a battery of the same type (AAA).
Slide the cover at the back
of the remote control in the
direction of the arrow and
remove the cover.
·
If the remote control doesn’t work reliably, try
replacing the batteries.
·
If you intend not to use the remote control for a
long period of time, remove batteries from
compartment to prevent damage from leakage or
corrosion.
·
Expired batteries should be removed as soon as
possible to prevent damage from leakage or
corrosion.
Caution
·
Replacing the battery incorrectly may cause an
explosion. Use only a battery of the same type or an
equivalent.
A51
Remote control sensor
CD
US SD
F
SLEEPSTOP
SOUND
AU IN
REPEAT
PRO
OL
OL
CH CH

Features
CD
·
Play audio CDs, MP CDs (CD-R and CD-RW)
·
REPEATplayback mode
·
PROGRAMMABLEplayback
USB Flash Drive
·
MP playback from USB flash drives
SD Card
·
MP playback from SD card.
Bluetooth
·
Bluetoothfunctionsthatenablewirelessplaybackvia
smartphones or other audio devices
Radio
·
FM tuner
·
0 FM presets
Speakers
·
Stylish cabinet
·
2 Way Bass-reflex
Miscellaneous
·
Sound effect mode presets
·
Line input for external audio source
·
Headphones jack
·
Sleep timer

Contents
ettin Starte
I SI 2
P 3
P C 5
R C 5
R B 5
G
T P
P
R P 1
R C 11
A C P3 SB
P3 N
13
asicOperations
B O 1
T O 1
S I 1
A 1
1
1
S SEP 1
P ayin CDs
P C 15
P C 15
R P 15
Listenin to t e Ra io
L R 1
P SA
A P 1
S PS 1
P ayin an E terna De ice
P E 1
P B E
C LINEIN 1
P ayin a US F as Dri e
P SB 1
P ayin a SD Car
P SC 1
isce aneous
T 1
S 22
12 W 23
ire ess P ay ac ia uetoot
W P B 1
P 1
P B B
1

ettin Starte
Top Pane
pen Close
·
Press to open the disc compartment cover.
·
Press to close the disc compartment cover.

Front Pane
CD Displa
·
Displays information of playback, mode,
channel etc.
2olu e Dial
·
Decreases or increases the volume.
o er Button
·
Turns on/off the system.
4Mode Button
·
Selects the input mode.
hones
·
Headphone jack.
·
Skips to the previous title, chapter, track,
or channel.
USB
·
USB port.
0
·
Stops play.
5 udio n
·
Audio input jack.
6
·
Skips to the next title, chapter, track,
or channel.
SD Card
·
SD card slot.
2
·
Play, pause or resume play.
45
02 6
2

1
ettin Starte
—
Continued
Rear Pane
FM antenna
·
Connects wire FM antenna.
2S RS ter inals
·
Connects to the right and left speakers.
C po er in
AC power input: 110-240V~ 50/60Hz 0.2A (Max.).
FM antenna
·
FM radio reception is affected by distance, physicalobstacles and other broadcast signals.
·
To improve radio reception, unwind and stretch the FM antenna fully, and adjust its position.
2
110V-240V~ 50/60Hz

11
ettin Starte —Continued
RemoteContro
·
Turns on/off the system.
·
Searches backward at different speeds.
2
·
Selects Bluetooth input mode.
·
Starts, pauses or resumes play.
CD
·
Selects CD player mode.
4U
·
Selects LINE IN mode.
5SUD
·
Selects different sound effect presets.
·
Skips to the previous title, chapter, or track.
0
·
Searches forward at different speeds.
·
Decreasesvolume.
6 C
·
Skips to the previous FM channel. 2
·
Skips to the corresponding title, chapter,
track, or FM channel.
CD US SD F
SLEEP STOP
SOUND
AU IN
REPEAT
PRO
OLOL
CH CH
2
5
4
6
0
2
4
5
6
20
2
22

12
ettin Starte
—
Continued
R
·
Accesses or exits the program playback
menu for CD.
4
·
Turns Off/On sound.
5USB SD
·
Selects USB or SD input mode.
6FM
·
Selects FM radio mode.
S
·
Stops play.
S
·
Selects different periods of time after which
the system will turn off automatically.
C
·
Skips to the next FM channel.
20
·
Skips to the next title, chapter, or track.
2
·
Increasesvolume.
22 R
·
Selects repeat mode.

13
Disc Au io CD an P an US F as Dri e P
Notes
recautions or la ack
Compact discs (CDs) with the following logo on the
label surface can be used.
Donotusediscsdesignedforpurposesotherthanaudio,
such as CD-ROMs for PC use. Abnormal noise could
damage the unit and/or speakers.
Never use discsthat have a special shape (such as hearts
or octagons). These types of discs could damage the
unit.
CD la ack ith Cop control Function
Some audio CDs with copy-control function do not
complywith official CDstandards. These are special
discs and cannot be played with the unit.
la ack o M Discs
MP files recorded on a CD-R/CD-RW can be played
with the unit.
·
Use discs which have been recorded following the
ISO 660 Level 2 file system. (The supported
directory depth is eight levels, the same as ISO 660
Level )
·
Discs must be closed (finalized).
·
OnlyMP fileswiththeextension .MP or“.mp
are supported.
·
Files recorded using MPEG audio layer at
samplingfrequenciesof 2/44. /4 kHzandabit rate
of 2- 20 kbps are supported.
la ack ro USB Drives or SD cards
·
The unitdoes not support playback from audio
player units and smartphones that are not USB mass
storage devices or SD cards.
·
MP files recorded on a USB flash drive or a SD card
can be played with the unit.
·
Supported file systems are FAT 6 and FAT 2.
·
Only MP files with the extension .MP or .mp
are supported.
·
Files recorded using MPEG audio layer at
samplingfrequenciesof 2/44. /4 kHzandabitrate
of 2- 20 kbps are supported.
·
USB hubs are not supported.
Note
·
A
·
The unit supports USB flash drives and SD cards of
a maximum capacity of up to 2GB.
disc recorded with a recorder or personal computer
may not play in some cases. (Cause: Disc’s
characteristics,damagedordirtydisc,dirtonplayer’s
lens, dew condensation, etc.)
·
A disc recorded on a personal computer might not
play depending on the application settings or
environment. Record the disc in a format supported
by the unit.
·
A disc with insufficient storage capacity may not
playbackproperly.
·
Files are played back in the same order as they are
saved in the USB flash drive. However, playback may
changeifthefilesorfoldersintheUSBflash driveor
SD card are deleted or renamed on a computer, etc.
andlin Discs
Hold discs by the edge, or by the center hole and edge.
Avoid touching the playback surface (surface with
nothing printed on it).
Do not attach paper or stickers, or write on the playback
or label surface of the disc. Take care not to scratch or
damage the disc.
The CD receiver supports CD-R and CD-RW discs.
Note that some discs may not playback because of the disc
characteristics, scratches, contamination or the recording
state. A disc recorded with an audio CD recorder will not
playback unless it is finalized.
*
*
L
P

1
asicOperations
This manual descri estheprocedure or usingthe
remote control unless otherwise speci ied.
Turnin on t e unit
Press t e utton
You can also use the POWER button on the
unit.
The unitis turned on, and the displaylights up. Press
the button again to turn it off (standby mode).
Se ectin t e Input o e
You can select CD, USB/SD, Bluetooth, FM, or LINE
IN which can be an external component.
To select the input source, use the remote control’s
CD, , USB/SD, FM, AU IN buttons.
On the unit press the MODE button
re
peatedly.
utin t e unit
Press t e utton
Press the button to unmute.
Tip
·
You can also unmute the unit by adjusting the
volume.
·
Alternatively, set the unit to standby, then turn it on
again to cancel muting.
Usin Hea p ones
You can connect a pair of stereo headphones ( .5 mm,
/ -inch phone plug) to the receiver’s PHONES jack for
privatelistening.
Note
·
Alwaysturndown thevolumebeforeconnectingyour
headphones.
·
While the headphones plug is inserted in the
PHONES jack, the speakers are turned off.
Austinteoume
To a ust t e o ume use t e OLU E –
uttons
You can also usethe unit’s VOLUME control dial.
Se ectin Soun Effect Preset
To se ect your esire soun effect preset
press SOUND utton repeate y

5
P ayin CDs
Thismanualdescri es theprocedure orusingthe
remote control unless otherwise speci ied.
P ayin CDs
Selectin racks
Press the Previous button repeatedly to skip to
previous tracks.
Presst e mar toopen t e isc
compartment oor
Press the Next
subsequenttracks. button repeatedly to skip to
P ace CD in t e compartment it t e
a e si e facin up
C an et e inputmo etoCD t enpress
t e utton
To change the input mode to CD, press the
remote controls CD button, or press the
MODE button on the main unit repeatedly.
P
layback willstarts automatically.
To pause p ay ac
Press the button. Toresumeplayback,pressthe
button again.
To Fast For ar or Fast Re erse
During playback, press the Fast Forward button
repeatedlyto fast forward at different speed, or theFast
Reverse button repeatedlyto fast reverse at different
speed
To stop p ay ac
Press the button.
To remo e t e CD
Press the buttonto open thedisctray.
Press the 0- buttons to skip to the corresponding track
directly.
Repeat P ay ac
Press t e REPEAT utton repeate yto isp ay
REPEAT ONE REPEAT ALL or REPEAT
OFF
With REPEAT ALL playback, all songs will be
played back repeatedly.
With REPEAT ONE playback, only one song
will be played back repeatedly.
To cancel repeat playback, press the REPEAT button
repeatedly until REPEAT OFF displayed.

16
Wireless Playback via Bluetooth
The mini Hi-fi enables you to wirelessly play music
from your Bluetooth-enabled smartphone, tablet,
mobile music player, or personal computer via
Bluetooth.
To play back music via Bluetooth, you must first
pair the unit with your Bluetooth-enabled device.
Once pairing is established, the pairing information
is stored in both devices and you will not need to
repeat the pairing process.
However, if you delete the device registration from
either device and the pairing information is deleted,
you must pair the devices again.
Playing Back Music on Your
Bluetooth-enabled Device
1
T
enabled device.
enabled device.
urn on
“Bluetooth”
on your Bluetooth-
2
Turn on the unit, then pres
repeatedly to select Bluetooth mode.
sbutton
dir tinuehtnonottubEDOMsserpro,yltce
dehsilbatsesinoitcennochtooteulafIB .4petsotpiks,yllacitamotua
Pairing
Place the Bluetooth device within 1 metre
from the system.
3
Perform the Bluetooth connection steps
on the Bluetooth-enabled device to
connect to the MHF-220BT.
Turn on “Bluetooth” on your Bluetooth-enabled
device.
2
1
Turnon the unit, then press button
directly, or press MODE button on the unit
repeatedly to select Bluetooth input mode.
The unit engages pairing mode, with voice
prompt “Bluetooth Mode. Waiting for
Pairing.”
4
Play back audio on your Bluetooth-
If the volume level on the Bluetooth-enabled
device is low, the playback volume relative to
other input sources willbe low.
Raise the volume level on the Bluetooth-enabled
device to an appropriate level (if necessary, to the
maximum).
Note:
When youpresstheMODEbuttonontheunit
3
Registertheunit onyour Bluetooth-enabled
device
When yourBluetooth-enabled devicedisplays a
list ofdetected devices, select “MHF-220BT.”
If the device requests a password, enter “0000.”
Please note that the registering (pairing) process
might vary depending on the Bluetooth-enabled
device. For more information, refer to the user's
manual for the device.
4
Whenpairingiscomplete,theunit makes
voice prompt
“Paired.”
Whenpairingiscomplete,aBluetoothconnection
is established. If a connection isnot established,
trytoconnect fromthe Bluetooth-enabled device.
tochangetheinputsourcetoBluetooth,theunitwill
automaticallyconnect totheBluetooth-enabled device
thatwasconnectedlasttime.Ifaconnectionis not
establishedautomatically,trytoconnectfromthe
Bluetooth-enableddevice.
Bluetooth connection will becut off ifyou change the
inputtoanysourceotherthanBluetoothorsettheunitto
standbymode.
If your Bluetooth-enabled device features a bass
boost or equalizer function, disable these functions.
Otherwise, the playback sound may be distorted.
Note:
If the pairing fails, turn “Bluetooth” off on the
Bluetooth-enabled device, turn it on again, and then
try the procedure from step 1.
If you want to pair other Bluetooth-enabled devices,
perform steps 1-4 for each device.

1
Listenin to t e Ra io P ayin an E terna De ice
Thismanualdescri es theprocedure orusingthe
remote control unless otherwise speci ied.
Presettin F Stations
Automatica y Auto Preset
Auto Preset Caution
Any existing presets will be deleted when the Auto
Preset function is run.
Press t e F utton to c an e or ODE
utton on t e unitinput source to F .
Adjust the position of the FM antenna for the best
FM reception.
Press t e utton
The Auto Preset function is activated.
Up to 0 stations can be preset and presets are
stored in frequency order.
If you want to cancel the Auto Preset process,
P ayin ac from an E terna
De ice Connecte to t e LINE IN
ac
Press t e AU IN utton to c an e t e
input mo e to LINE
P ay ac from e terna e ice
Note:
This adjustment affects only the speaker volume the
headphone volume cannot be adjusted.
If the volume level of your external audio device is
external audio device.
substantially low, this adjustment may not be
sufficient.Insuchacase, raisethevolumelevelon the
Ifthe input level is raised excessively, the sound may
distort. If this occurs, adjust the input level
appropriately.
press the STOP button.
Note:
Depending on your location, a preset may be stored
with no station, and you’ll hear only noise when you
select it.
Se ectin Preset Stations
Youmust storesomepresets beforeyoucanselectthem.
Press t e F utton or ODE utton on
t e unit to c an e t e input mo e
to F
The preset you selected the last time you listened
to the radio will be selected.
Use t e CH CH uttons to se ect a
preset

18
PlayingaUSBFlashDrive
Playing a SD Card
This manual describes the procedure for using the
remote control, unless otherwise specified.
1
Press the USB/SD button to change the
input source to “USB”.
2
Insert a USB flash drive in the USB port.
1
Press the USB/SD button to change the
input source to “SD”.
2
Insert a SD card in the card slot.
3
To start playback, press the button.
3
To start playback, press the button.
4
To stop playback, press the
STOP
button.
4 To stop playback, press the
Note:
STOP
button.
Note:
Thememory cards will only fit in one direction.
Do not force them as this willdamage the card
Do not connect your B flash drive via a B hub.
Whenconnectingordisconnectinga Bflashdrive,
use your hand to support the unit so that it does not
move.
For details on the usable formats for a B flash
drive, refer to page 1 “Playback from B Drives
or D ards”.
Donotconnect theunit s Bporttoa B port on
your computer.
reader.
Whenconnectingordisconnectinga Dcard,
use your hand to support the unit so that it does
not move.
For details on the usable formats for a D card,
refer to page 1 “Playback from B Drives or
D ards”.
USB flash drive
SD card

1
Troubleshooting
If you have any trouble using the unit,look for a solution in this section.
Po er
Can t turn on the unit.
Makesure that the power cord is properlyplugged into the wall outlet.
nplug thepower cord from the wall outlet, wait minutesor more, then plug it in again.
Theunitturns off une pectedly.
If thesleep timer hasbeen set, the unit will turn off automatically after a specified period.
The unitwill automatically enter standby mode when uto tandby has been set and launches.
eoteControl
The re ote control doesn t ork properly.
Replace the battery with a new one.
Theremote control istoo far awayfrom theunit, orthere s an obstacle betweenthem.
Theunit s remote control sensor is being sub ected tobright light (inverter-typefluorescent light or
sunlight).
The unit is located behind the tinted glassdoors of an audio rack or cabinet.
udio
There s no sound.
Make sure the unit s volume is not set too low.
Make surethe correct input source is selected.
Make sure the unit is not muted.
heck allconnections and correct as necessary.
While headphones are connected, the speakers output no sound.
Ifthere s no sound from an external device connected to I E I , check whether the external device s audio
output level (volume) might be too low.
The sound uality is not good.
Make sure all audio connecting plugs are pushed in all the way.
Thesoundqualitycanbeaffectedbystrongmagneticfields,suchasthatfromaT .Trymovinganysuchdevices
away from the unit.
If you haveanydevices that emit high-intensity radio waves near the unit, such as acellular phone that s being
used to make a call, the unit may output noise.
Theunitsprecisiondrivemechanismmayemitafainthissingsoundwhilereadingdiscsduringplayback or when
searching for tracks. ou maybe able tohear this noisein extremely quiet environments.
udio output is inter ittent hen the CD receiver is sub ected to vibration.
The unit is not a portable device. seit in a location that s not sub ect to shock or vibration.
Makesure that the included floor pads are attached to the speakers.
eadphones output is inter ittent or there s no sound.
Makesure thatthe headphones cable is not broken or damaged. lso, clean the headphones plug. ee your
headphones instructionmanualfor cleaninginformation.
udio perfor ance.
udio performance will be at its best about 10 to 0 minutes or moreafter the unit has been turned on and had
time to warm up.
singcabletiestobundleaudiocableswithspeakerorpowercablesmaydegradethesoundquality,sodon tdoit.

Troubleshooting—Continued
CD Playback
Thedisc ill not play.
Makesure thedisc hasbeen loaded correctly, with thelabel-side facingup.
heck to see if the surface of the disc is dirty.
If condensation is suspected, turn on the unitand leave it for 2 to hours before playing any discs.
ome D-R RW discs may not be playable.
It takes a long ti e forplayback tostart.
It may take the unit a while to read Ds that contain many tracks or files.
Playback u ps.
The unit is being sub ected to vibration or the disc is scratched or dirty.
The volume may be too loud. Turn down the volume.
Can t
play P Discs.
se only discs compliant with I O 0 evel1 evel 2 or oliet file system.
The disc has not been finalized (closed). Finalize (close) the disc.
heck whether the file format is supported (see page 1 ).
MP files without a “.MP ” or “.mp ” file extension are not recognized.
Bluetooth
Bluetooth pairing fails.
IfthereareanyotherBluetooth-enableddevicesneartheunit,turnoffthepowertothosedevicesandthenperform
the pairing processagain.
Deletethe registration information for the MHF-220BTon the Bluetooth-enabled device, then perform the
pairingprocess again.
Sound via Bluetooth connection is interrupted.
Theremaybea wireless device or microwave oven nearby. If so, locatetheunit awayfrom thosedevices.
TheBluetooth-enabled device maybe toofar from the unit, or there may be a wallbetween thedevices. If so,
use your Bluetooth-enabled devicecloser to the unit.
SoundviaBluetoothconnectionisdelayedanddoesnotsynctothevideo.
Due toBluetooth transfer characteristics, there may be a certain amount of signal latency. For this reason, you
might notice a slight delay in audio output from the unit, in relation tothe playback ofvideo on your
Bluetooth-enableddevice.
USBFlashDrivePlayback
Can t
accessthe usicfilesonaUSBflashdrive.
The unit supports B flash drives only. However, this does not necessarily guarantee the performance of all
B flash drives.
Make sure that the B flash drive has been formatted as F T1 or F T 2.
B hubs are not supported.Be sureto connect a B flash drive directly to the unit.
This unit cannot play files other than MP files.
The essage “ o USB” is displayed.
Try reconnecting your B flashdrive.
Can t
play P files.
MP files without a .MP or .mp file extension are not recognized.
heck whether theMP format is supported (seepage 1 ).
Table of contents
Other AudioSonic Stereo System manuals

AudioSonic
AudioSonic HF-1254 User manual

AudioSonic
AudioSonic CD-1588 User manual

AudioSonic
AudioSonic TXCD-1536 User manual

AudioSonic
AudioSonic HF-1253 User manual

AudioSonic
AudioSonic TXCD-1530 User manual

AudioSonic
AudioSonic CL-1563 User manual

AudioSonic
AudioSonic HF-1265 User manual

AudioSonic
AudioSonic HF-1250 User manual

AudioSonic
AudioSonic TXCD-1536 User manual