AudioSonic HF-1265 User manual

NL Gebruiksaanwijzing
GB Instruction Manual
du Bedienungsanleitung
fr Mode d’emploi
es Manual de instrucciones
pt Manual de Instruções
pL Instrukcje użytkowania
iIstruzioni per l’uso
eN Instruction Manual
NL Gebruiksaanwijzing
fr Mode d’emploi
de Bedienungsanleitung
es Manual de instrucciones
pt Manual de Instruções
pL Instrukcje użytkowania
it Istruzioni per l’uso
sV Bruksanvisning
cs Návod na použití
sk Návod na použitie
Stereo powerpack
MP3 / ID3 - USB / SD MMC Hf-1265
30

2

3
Gebruiksaanwijzing
Geachte klant,
Gefeliciteerd met de aankoop van dit kwaliteitsproduct.
Lees de gebruiksaanwijzing zorgvuldig door zodat u optimaal gebruik kunt maken van
dit apparaat. In deze handleiding vindt u alle benodigde aanwijzingen en adviezen
voor het gebruik. Als u deze aanwijzingen volgt, hebt u altijd een uitstekend resultaat,
bespaart u tijd en kunt u problemen voorkomen.
Wij hopen dat u dit apparaat met plezier zult gebruiken.
VeiligheidsVoorschriften
Lees de gebruiksaanwijzing aandachtig door voordat u het apparaat voor het eerst
gebruikt. Bewaar de gebruiksaanwijzing, het garantiecertificaat, de verkoopbon en
indien mogelijk de kartonnen doos met de binnenste verpakking om deze indien
nodig later te kunnen raadplegen.
WAArschUWing: Verwijder de klep (of achterkant) niet, om het risico op een
elektrische schok te reduceren. Er bevinden zich geen onderdelen binnenin, die
door de gebruiker onderhouden kunnen worden. Laat het onderhoud over aan
gekwalificeerd onderhoudspersoneel.
WAArschUWing: De batterij (batterij, batterijen of batterijdoos) dient niet te
worden blootgesteld aan extreme hitte, zoals direct zonlicht, vlammen en dergelijke.
WAArschUWing: waneer de stekker wordt gebruikt om het apparaat uit te
schakelen dient deze goed toegankelijk te zijn.
• Onzichtbare laserstraling, wanneer geopend en ontgrendeld. Vermijd blootstelling
aan laserstralen.
• Plaats geen open vuur, zoals brandende kaarsen, op het apparaat.
• Neem milieuvoorschriften in acht bij het weggooien van de batterijen.
• Gebruik het apparaat in gematigde klimaten.
• Informatie over het vermogen en het label bevinden zich aan de onderkant van
het apparaat.
• Buitensporige geluidsdruk van oortelefoons en hoofdtelefoons kunnen
gehoorverlies veroorzaken.
• De hoofdstekker van het apparaat dient gemakkelijk bereikbaar te zijn gedurende
het gebruik.
• Om volledig te ontkoppelen van de stroomtoevoer, dient men de hoofdstekker
van het apparaat te ontkoppelen van het hoofdnet.
• Voorzichtig! Explosiegevaar als de batterij niet correct vervangen is. Vervang enkel
met hetzelfde of een gelijksoortig type.
• Het apparaat niet aan regen of vocht blootstellen om brand- of schokgevaar te
voorkomen.
• Voorzichtig: Gevaar op elektrische schokken, niet openmaken.
• Waarschuwing: Schokgevaar-niet openmaken.
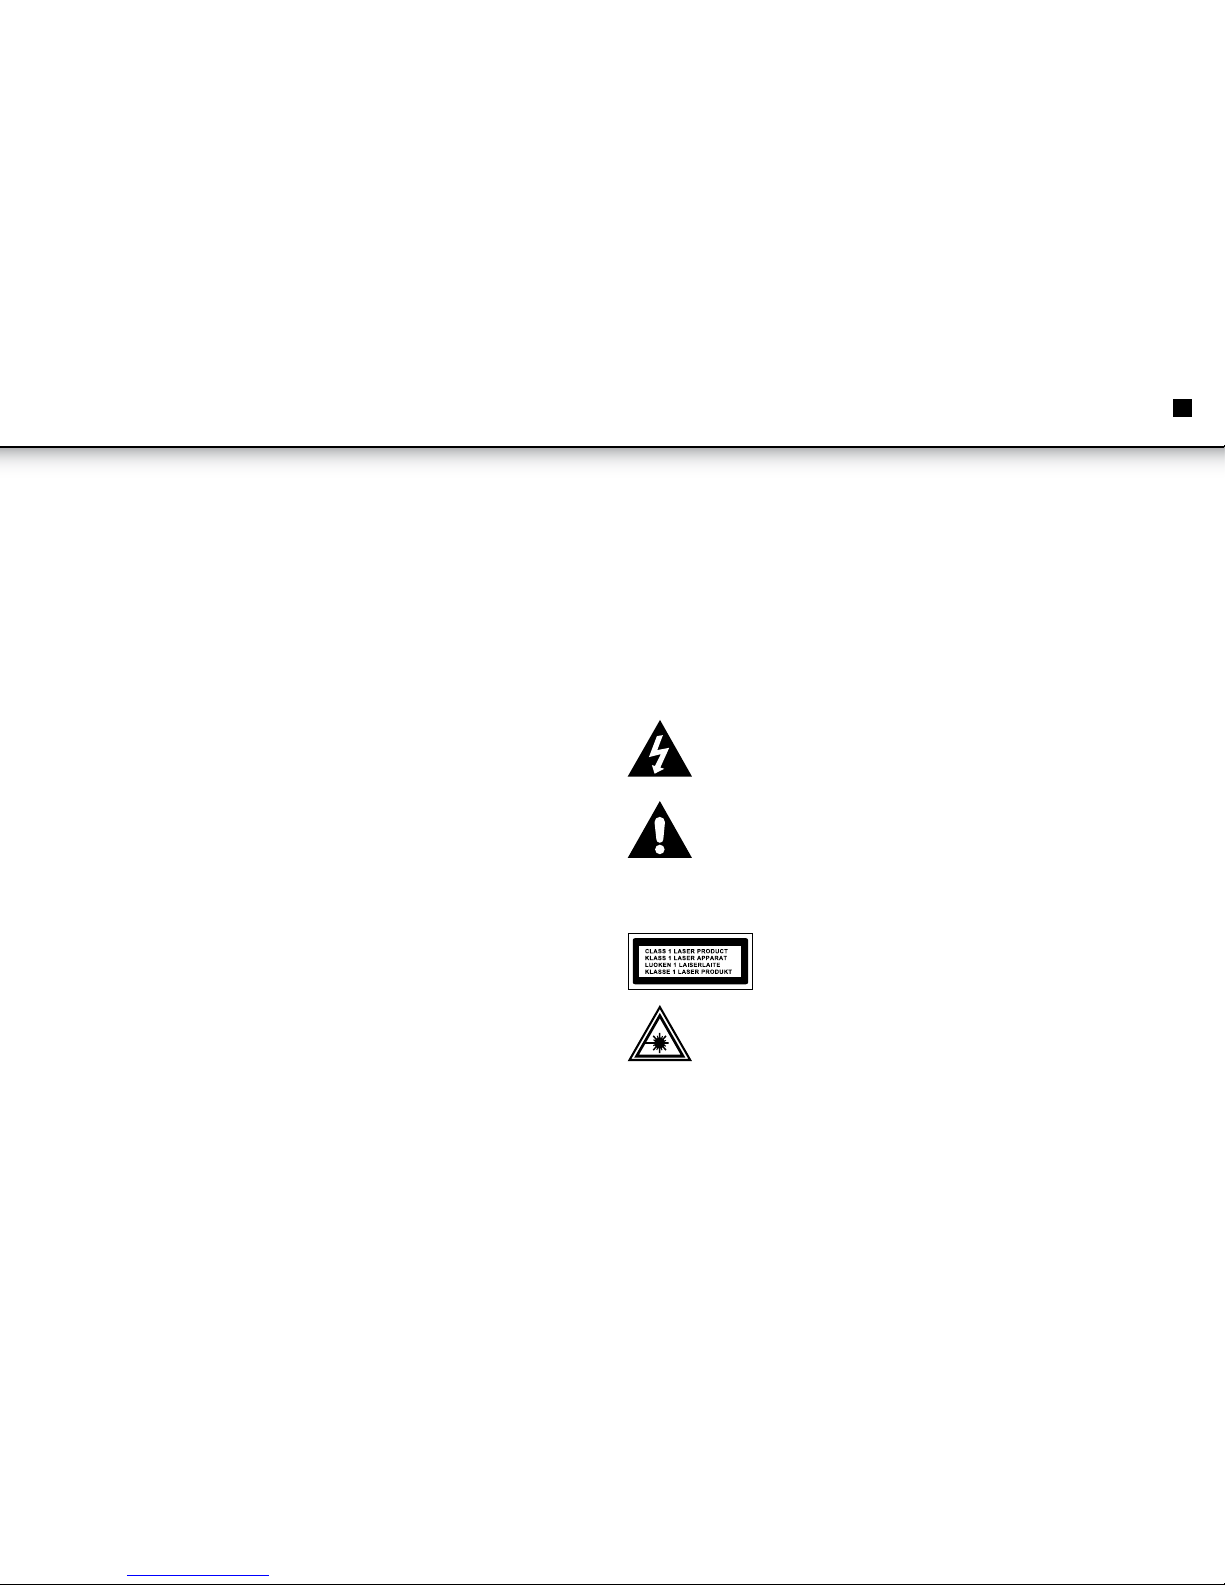
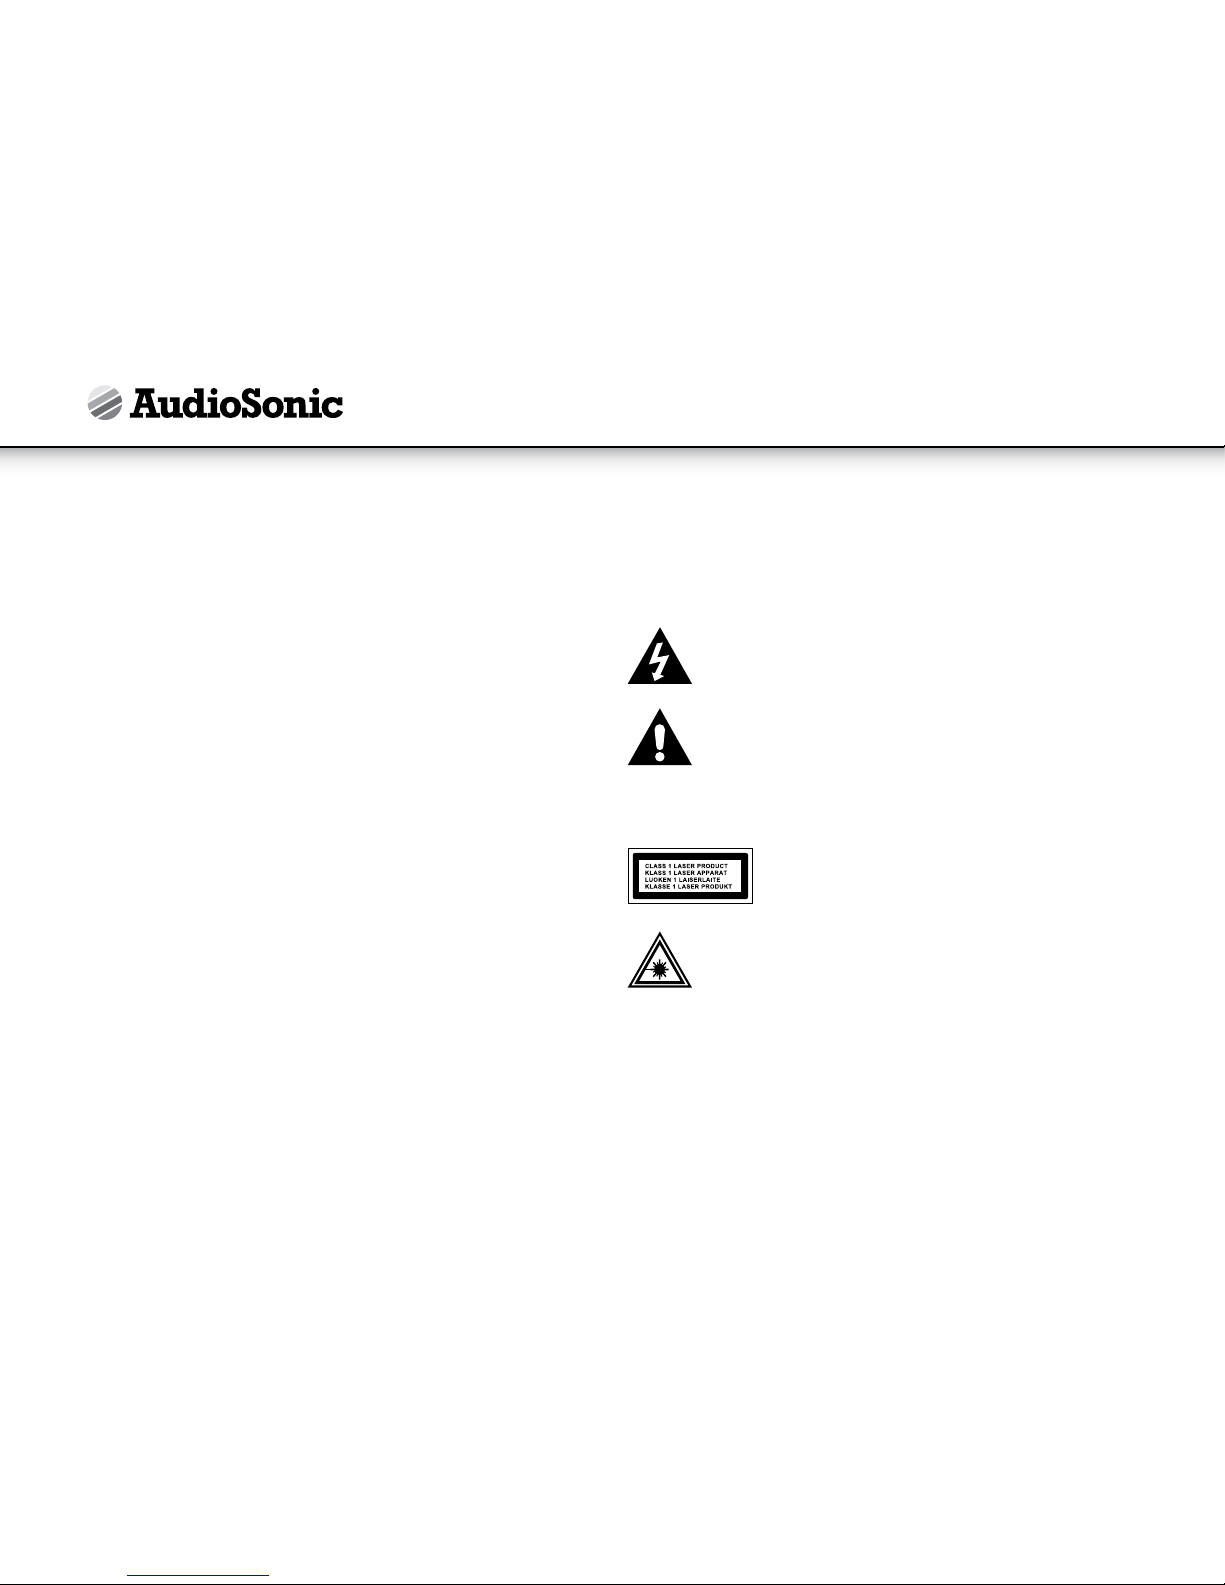
Lichtflits met pijlsymbool in een gelijkbenige driehoek wordt bedoeld
als waarschuwing voor de aanwezigheid van ongeïsoleerde gevaarlijke
voltage in de productbehuizing, die sterk genoeg is om een gevaar te
vormen voor mensen op een elektrische schok.
Het symbool van uitroepteken in een gelijkbenige driehoek wordt gebruikt
om aan te geven dat een specifiek onderdeel om veiligheidsredenen
alleen vervangen kan worden door het onderdeel dat in de documentatie
gespecificeerd is.
Het volgende etiket is bevestigd op het apparaat en somt de juiste procedure voor
het werken met laserstralen op:
Dit label is bevestigd op de op de illustratie aangegeven
plek, ten einde te informeren dat het apparaat een
lasercomponent bevat.
Waarschuwing voor straling label, dit label bevindt zich in het apparaat,
zoals te zien op de illustratie, als waarschuwing tegen verdere
maatregelen op het apparaat. De apparatuur bevat een laser die
laserstralen uitstraalt conform het limiet van Klasse 1 laserproducten.
NL

4
Gebruiksaanwijzing
- Dit label bevindt
zich in het apparaat, zoals te zien op de illustratie, als waarschuwing tegen verdere
maatregelen op het apparaat. De apparatuur bevat een laser die laserstralen
uitstraalt conform het limiet van Klasse 1 laserproducten.
- Men dient zich te houden aan alle
waarschuwingen op het apparaat en in de gebruiksaanwijzing.
- Het apparaat dient niet gebruikt te worden nabij water,
bijvoorbeeld bij een ligbad, wastafel, afwasbak, wastobbe, zwembad of in een
vochtige kelder.
VentilAtie - Het apparaat dient dusdanig geplaatst te worden dat zijn plaats
of positie een correcte ventilatie niet belemmerd. Plaats het apparaat niet op
een bed, sofa, tapijt of soortgelijke oppervlakken die de ventilatieopeningen
kunnen blokkeren, of in een inbouwinstallatie, zoals een boekenkast of kast die de
luchtafvoer via de ventilatieopeningen verhinderd.
hitte - Het apparaat dient uit de buurt geplaatst te worden van hittebronnen,
zoals radiatoren, kachels en andere apparaten (inclusief versterkers) die hitte
produceren.
- Het apparaat dient enkel aan het type energiebron gekoppeld
te worden, zoals beschreven in de gebruiksaanwijzing of zoals aangegeven op het
apparaat.
- Stroomkabels dienen dusdanig geplaatst te
worden dat er niet op gelopen kan worden of dat ze niet beklemd kunnen raken
door voorwerpen die erop of ertegen staan.
- Een buitenantenne dient niet in de buurt van
een hoogspanningsleiding geplaatst te worden.
- Pas op dat er geen
voorwerpen of vloeistoffen binnendringen in de behuizing via de openingen.
esd-WAArschUWing - Het niet naar behoren functioneren van het
weergavescherm of het ontbreken van een reactie bij het bedienen van de
controleknoppen kan veroorzaakt worden door elektrostatische ontlading. Schakel het
apparaat uit en koppel het los. Maak na een aantal seconden opnieuw verbinding .
- Het apparaat heeft een onderhoudsbeurt
door gekwalificeerd personeel nodig als:
a. De stroomkabel of -stekker beschadigd is.
b. Er voorwerpen of vloeistoffen zijn binnengedrongen in de apparaatbehuizing.
c. Het apparaat aan regen is blootgesteld.
d. Het apparaat gevallen is of als de behuizing beschadigd is.
e. Het apparaat niet naar behoren lijkt te functioneren.
onderdelenbeschrijVing
1. USB-AANSLUITING
2. SD-KAART
3. BLUETOOTH KOPPELING LED
4. TERUG/AFSTEMMEN, - KNOP
5. AFSPELEN/PAUZE/KOPPELEN KNOP
6. VOLGENDE/AFSTEMMEN, + KNOP
7. VOL+ KNOP
8. GEH.-/MAP KNOP
9. STOP KNOP
10. VOL. - KNOP
11. GEH. +/MAP + KNOP
12. FUNCTIE KNOP
13. EQ/ BASS KNOP
14. HERHALEN/PROGRAMMEREN KNOP
15. OPENEN/SLUITEN KNOP
16. AAN/STANDBY KNOP
17. AFSTANDSBEDIENINGSSENSOR

5
19
20
21
22
23
18
24
18. AUX IN-AANSLUITING
19. SUBWOOFER-UITGANG
20. LUIDSPREKER VERLICHTING AANSLUITING
21. LUIDSPREKER UITGANG AANSLUITING
22. DC-INGANG
23. KOPTELEFOON INGANG
24. FM-ANTENNEKABEL
Gebruiksaanwijzing
1 2
4
8
12 13 14 15
9
567
10
11
16
17
NL
3

6
Gebruiksaanwijzing
• Haal het apparaat en de accessoires uit de doos. Verwijder eventuele stickers,
beschermfolie of plastic van het apparaat.
• Plaats het apparaat altijd op een vlakke stabiele ondergrond en zorg voor
minimaal 10 cm. vrije ruimte rondom het apparaat. Dit apparaat is niet geschikt
voor inbouw of buitengebruik.
• U kunt het apparaat van stroom voorzien door de ontkoppelbare AC-stroomkabel
in de AC-ingang aan de achterzijde van het apparaat te steken en in het
stopcontact. Controleer of het benodigde voltage van het apparaat overeenkomt
met het lokale voltage. Verzeker u ervan dat de AC-stroomkabel volledig in het
apparaat is gestoken.
• Deze set is voorzien van een ingebouwd energiebesparingssysteem, die de set
automatisch in de standby-modus brengt wanneer het detecteert dat de set niet
in gebruik is.
• Verbind de geluids- en voedingskabel van de luidsprekers met de hiervoor
bedoelde aansluitingen aan de achterkant van het apparaat. Wees er zeker van dat
u de goudkleurige kabel in de rode aansluiting invoert.
• De klok wordt weergeven in de standby-modus en wanneer u op de "tijd/snooze"
knop drukt.
• De klok instellen
• Schakel het apparaat in de standby-modus. Houd de "tijd/snooze" knop ingedrukt
om naar de instellingenmodus te gaan. Gebruik vervolgens de "afstemmen +"
en "afstemmen -" knop op de afstandsbediening om de gewenste instelling in te
stellen en bevestig met de "tijd/snooze" knop. Volg de procedure.
• Druk herhaaldelijk op de "slaap" knop om de automatische uitschakeltijd te selecteren
• Houd de "nacht" knop 2 seconden lang ingedrukt om de achtergrondverlichting
in en uit te schakelen.
• Druk herhaaldelijk op de "EQ/bass" knop om het gewenste geluidseffect in
overeenkomst met de muziek die u aan het beluisteren bent, te selecteren.
• Houd de "EQ/bass" knop ingedrukt om de bass boost functie in of uit te schakelen.
• Druk herhaaldelijk op de "functie" knop om de radio functie te selecteren.
• Druk op de "afstemmen +" en "afstemmen -" knop om handmatig te scannen.
• Druk twee seconden lang op de "afstemmen +" en "afstemmen -" knop om
automatisch te scannen.
• Druk op de "prog." knop om het huidige station op te slaan. Gebruik de "mem.
+ en -" knoppen om de gewenste geheugenpositie te selecteren en bevestig de
selectie met de "prog." knop.
• Druk herhaaldelijk op de "functie" knop om de CD functie te selecteren.
• Druk op de "openen/sluiten" knop om de CD klep te openen. Plaats een CD of
MP3-CD op de middenas met het label naar boven gericht. Sluit de CD klep door
op de "openen/sluiten" knop te drukken, waarna de CD vanaf het eerste nummer
wordt afgespeeld.
• Voor MP3-CD's kunt u de "map+ en -" knoppen gebruiken om de benodigde map
te selecteren.
• Druk herhaaldelijk op de "functie" knop om de USB of SD functie te selecteren.
• Plaats de USB-stick of SD-kaart om te beginnen met afspelen.
• Opmerking: SD-kaart (voor afspelen MP3) ondersteunt SD (tot 16 GB).

7
Gebruiksaanwijzing
• Opmerking: USB (voor afspelen MP3) ondersteunt USB 1.1/2.0 (tot 16 GB).
• Opmerking: Druk te allen tijde op de "stop" knop en vervolgens op de "functie"
knop om naar een andere bron te schakelen, alvorens de USB of SD te verwijderen.
• Druk herhaaldelijk op de "functie" knop omde AUX functie te selecteren.
• Wees er zeker van dat het externe apparaat is ingeschakeld. U kunt nu beginnen
met het afspelen van muziek op het externe apparaat.
• Druk herhaaldelijk op de "functie" knop om de BT functie te selecteren.
• Zet het externe Bluetooth apparaat aan en zoek naar “VERTICAL HIFI”.
• Druk op de "afspelen/pauze/koppelen" knop op het apparaat. Vervolgens dient u
de HiFi instelling op uw externe apparaat te accepteren.
• De verbinding is tot stand gekomen. U kunt nu afspelen op uw externe apparaat.
• Opmerking: wanneer er om een code wordt gevraagd, dient u "0000" in te voeren.
• Houd de "afspelen/pauze" knop ingedrukt om de titel van het huidige nummer
weer te geven op het scherm.
gArAntieVoorWAArden
• Op dit product wordt een garantie van 24 maanden verleend. Uw garantie
is geldig wanneer het product is gebruikt in overeenstemming met de
gebruiksaanwijzing en voor het doel waarvoor het gemaakt is. Tevens dient de
originele aankoopbon (factuur, kassabon of kwitantie) overlegd te worden met
daarop de aankoopdatum, de naam van de retailer en het artikelnummer van het
product.
• Voor uitgebreide garantievoorwaarden verwijzen wij u naar onze servicewebsite:
www.service.tristar.eu
Dit product mag aan het einde van zijn levensduur niet bij het normale huisafval
worden gedeponeerd, maar dient bij een speciaal inzamelpunt voor het hergebruik van
elektrische en elektronische apparaten te worden aangeboden. Het symbool op artikel,
gebruiksaanwijzing en verpakking attendeert u hierop. De gebruikte grondstoffen zijn
geschikt voor hergebruik. Met het hergebruik van gebruikte apparaten of grondstoffen
levert u een belangrijke bijdrage aan de bescherming van ons milieu. Informeer bij uw
lokale overheid naar het bedoelde inzamelpunt.
NL

8
Dear customer,
Congratulations and thank you for purchasing this high quality product.
Please read the instruction manual carefully so that you will be able to make the best
possible use of the appliance. This manual includes all the necessary instructions and
advice for using, cleaning and maintaining the appliance. If you follow these instructions
you will be guaranteed off an excellent result, it saves you time and will avoid problems.
We hope you will have a great deal of pleasure from using this appliance.
Please read the instruction manual carefully before using the device. Please keep
these instructions, the guarantee certificate, the sales receipt and, if possible, the
carton with the inner packaging.
WArning: To reduce the risk of electric shock, do not remove cover (or back). No
user-serviceable parts inside. Refer servicing to qualified service personnel.
WArning: The battery (battery or batteries or battery pack) shall not be exposed to
excessive heat such as sunshine, fire or the like.
WArning: The mains plug is used as disconnect device, the disconnect device shall
remain readily operable.
• Invisible laser radiation when open and interlocks defeated. Avoid exposure to
beam of laser.
• No naked flame sources such as lighted candles should be placed on the
apparatus.
• Attention should be drawn to environmental aspects of battery disposal.
• Use of the apparatus in moderate climates.
• The rating and marking information are located at the bottom of the unit.
• Excessive sound pressure from earphones and headphones can cause hearing
loss.
• The mains plug of unit shouldn't be obstructed or should be easily accessed
during intended use.
• To be completely disconnect the power input, the mains plug of apparatus shall
be disconnected from the mains.
• Caution! Danger of explosion if the battery is incorrectly replaced. Replace only
with the same or equivalent type.
• To prevent fire or shock hazard do not expose this appliance to rain or moisture.
• Caution: risk of electric shock do not open.
• Warning: Shock hazard-do not open.
Lightning flash with arrowhead symbol within an equilateral triangle, is
intended to alert the user to the presence of uninsulated dangerous volt-
age within the products enclosure that may be of sufficient magnitude
to constitute a risk of electric shock to persons.
Exclamation point within an equilateral triangle, is used to indicate that
a specific component shall be replaced only by the component specified
in that documentation for safety reason.
The following label has been affixed to the unit, listing the proper procedure for
working with the laser beam:
This label is attached to the place as illustrated to inform that
the apparatus contains a laser component.
This label is placed inside the unit. As shown in the illustration. To warn
against further measures on the unit. The equipment contains a laser
radiating laser rays according to the limit of laser product of class 1.
Instruction Manual

9
eNInstruction Manual
- This label is placed inside the
unit. As shown in the illustration. To warn against further measures on the unit.
The equipment contains a laser radiating laser rays according to the limit of laser
product of class 1.
- All warnings on the appliance and in the operating
instructions should be adhered to.
- The appliance should not be used near water, for
example, near a bathtub, washbowl, kitchen sink, laundry tub, swimming pool or
in a wet basement.
- The appliance should be situated so that its location or position
does not interfere with its proper ventilation. Do not place on bed, sofa, rug or
similar surface that may block the ventilation openings, in a built-in installation,
such as a bookcase or cabinet that may impede the flow of air through the
ventilation openings.
• HEAT - The appliance should be situated away from heat sources such as
radiators, stoves, or other appliances (including amplifiers) that produce heat.
• POWERSOURCE - The appliance should be connected to a power supply only of
the type described in the operating instructions or as marked on the appliance.
- Power supply cords should be routed so that they
are not likely to be walked on or pinched by items placed upon or against them.
- An outdoor antenna should be located away from power lines.
- Care should be taken so that objects do not fall and
liquids are not spilled into the enclosure through openings.
- The display does not function properly or no reaction to
operation of any the control may due to the electrostatic discharge. Switch off and
unplug the set. Reconnect after a few seconds.
- The appliance should be serviced by qualified
service personnel when:
a. The power-supply cord or plug has been damaged.
b. Objects have fallen into, or liquid has been spilled into the appliance enclosure.
c. The appliance has been exposed to rain.
d. The appliance has been dropped, or the enclosure damaged.
e. The appliance does not appear to operate normally.
1. USB SOCKET
2. SD-CARD SOCKET
3. BLUETOOTH PAIRING LED
4. BACK/ TUNE - KEY
5. PLAY/ PAUSE/ PAIR KEY
6. NEXT/ TUNE + KEY
7. VOL+ KEY
8. MEM. -/ FOLDER - KEY
9. STOP KEY
10. VOL. - KEY
11. MEM. +/ FOLDER + KEY
12. FUNCTION KEY
13. EQ/ BASS KEY
14. REPEAT/ PROGRAM KEY
15. OPEN/ CLOSE KEY
16. ON/ STANDBY KEY
17. REMOTE CONTROL SENSOR
18. AUX IN SOCKET
19. SUBWOOFER OUTPUT
20. SPEAKER LIGHTING SOCKETS
21. SPEAKER OUT SOCKETS
22. DC JACK
23. HEADPHONE JACK
24. FM ANTENNA WIRE

10
19
20
21
22
23
18
24
Instruction Manual
43
8
12 13 14 15
9
5 6 7
10
11
16
17
1 2

11
eNInstruction Manual
• Take the appliance andaccessoriesoutthebox.Removethe stickers,protective
foilorplasticfrom thedevice.
• Place the device on a flat stable surface and ensure a minimum of 10 cm. free
space around the device. This device is not suitable for installation in a cabinet or
for outside use.
• You can power your portable system by plugging the detachable AC power cord
into the AC inlet at the back of the unit and into a wall AC power outlet. Check
that the rated voltage of your appliance matches your local voltage. Make sure
that the AC power cord is fully inserted into the appliance.
• This set has a built-in power saving system which will automatically put the set
into a "standby mode" when it detects that the set is not in use.
• Connect the audio and lightning cable of the speakers in the designated sockets
on the back of the unit, please make sure you'll insert the gold audio cable in the
red socket.
• The clock will be displayed in standby mode and when you press the "time/
snooze" key.
• Switch the unit to standby mode press and hold the "time/snooze" key to get in
the setting mode. Now use the "tune +" and "tune -" key on the remote control
to set the desired setting, confirm with the "time/snooze" key and follow the
procedure.
• Press the "sleep" key repeatedly to choose the automatic power OFF time.
• Press and hold the "night" key for 2 seconds to switch on and off the display
backlight.
• Press the "EQ/bass" key repeatedly to choose the desired sound effect according
to the music you're listening.
• Press and hold the "EQ/bass" key to switch to bass boost function on or off.
• Press the "function" key repeatedly to choose the radio function.
• Press the "tune +" and "tune -" key to scan manually.
• Press and hold the "tune +" and "tune -" key for two seconds to scan
automatically.
• Press the "prog." key to store the current station. Use the "mem + and -" key's to
choose the desired memory position and confirm with the "prog." key.
• Press the "function" key repeatedly to choose the CD function.
• Press the "open/close" key to open the CD door, place a cd or MP3 onto the centre
spindle with the label side facing upwards. Close the CD door by pressing the
"open/close" key and the first track will start playing.
• For MP3 CD's you can use the "folder + and -" key to choose the required folder.
• Press the "function" key repeatedly to choose the USB or SD function.
• Insert the USB flash drive or SD card and you can start playback.
• Note: SD card (for MP3 playback) support SD (up to 16GB).
• Note: USB (for MP3 playback) support USB 1.1/2.0 (up to 16GB).
• Note: always press "stop" and then press "function" to switch to another source
before removing USB or SD.

12
Instruction Manual
• Press the "function" key repeatedly to choose the AUX function.
• Make sure the external device is switched on, now you can start play music on the
external device.
• Press the "function" key repeatedly to choose the BT function.
• Turn on your Bluetooth device and search for “VERTICAL HIFI”.
• Press the "play/pause/pair" key on the unit, now you have to accept the HI-FI set
on you external device.
• The connection is made, you can start playback on your external device.
• Note: when asked for a pass code, enter "0000".
• Press and hold the "play/pause" key to see the name of the current track on the
display.
gUArAntee
• This product is guaranteed for 24 months granted. Your warranty is valid if the
product is used in accordance to the instructions and for the purpose for which
it was created. In addition, the original purchase (invoice, sales slip or receipt) is
to be submitted with the date of purchase, the name of the retailer and the item
number of the product.
• For the detailed warranty conditions, please refer to our service website:
www.service.tristar.eu
This appliance should not be put into the domestic garbage at the end of
its durability, but must be offered at a central point for the recycling of electric and
electronic domestic appliances. This symbol on the appliance, instruction manual
and packaging puts your attention to this important issue. The materials used in this
appliance can be recycled. By recycling of used domestic appliances you contribute
an important push to the protection of our environment. Ask your local authorities
for information regarding the point of recollection.

13
Cher client,
Nous vous félicitons et vous remercions pour l’achat de ce produit de qualité supérieure.
Veuillez lire attentivement ce manuel d’instructions afin de faire le meilleur usage possible
de cet appareil. Ce manuel comprend toutes les instructions et les conseils nécessaires
pour l’utilisation, le nettoyage et l’entretien de cet appareil. Si vous suivez ces instructions,
vous obtiendrez d’excellents résultats, vous gagnerez du temps et éviterez tout problème.
Nous espérons que l’utilisation de cet appareil vous satisfera pleinement.
Veuillez lire attentivement la notice d’emploi avant l’utilisation de l’appareil. Veuillez
conserver cette notice, le certificat de garantie, le ticket de caisse et si possible, le
carton avec l’emballage intérieur.
Afin de réduire le risque de choc électrique, ne pas retirer le
cache (ou l’arrière) Aucune pièce à l’intérieur n’est réparable par l’utilisateur Confiez
l’entretien à un personnel technique qualifié.
La batterie (batterie ou batteries ou pack de batterie) ne doit pas
être exposée à une chaleur excessive comme les rayons du soleil, le feu ou autre.
La prise secteur sert de dispositif de déconnexion, le dispositif de
déconnexion doit demeurer en état de fonctionnement.
• Les radiations laser invisibles s'échappent lorsque le dispositif de verrouillage est
mis en échec. Évitez de vous exposer aux rayons laser.
• Ne posez pas de source de flamme nue, comme une bougie allumée, sur l'appareil.
• Respectez les consignes applicables en matière d’environnement lors de la mise
au rebut de la pile.
• Utilisez cet appareil dans les climats tempérés.
• Les informations concernant le classement et la marquage de l'appareil se
trouvent sous l'unité.
• Une pression sonore excessive de casque d'écoute ou d'écouteurs peut causer
une perte d'audition.
• La fiche secteur de l'appareil doit être obstruée, elle ne doit pas être facilement
accessible pendant l'utilisation.
• Pour être totalement déconnectée de l'alimentation, la fiche secteur de l'appareil
doit être débranchée du secteur.
• Attention! Danger d'explosion si la batterie n'est pas remplacée correctement.
Remplacez uniquement la batterie par une batterie similaire ou de type
équivalent.
• Pour prévenir des incendies ou des chocs électriques, n'exposez pas cet appareil à
la pluie ou à l'humidité.
• Attention: risque de choc électrique, ne pas ouvrir.
• Avertissement: Risque de choc électrique-ne pas ouvrir.
L'éclair avec symbole de flèche dans un triangle équilatéral est destiné à avertir
l'utilisateur de la présence de tension dangereuse non-isolée à l'intérieur du
boîtier du produit qui peut être de magnitude suffisante à constituer un risque
de choc électrique aux personnes.
Le point d'exclamation dans un triangle équilatéral est utilisé pour indiquer
qu'un composant spécifique peut uniquement être remplacé par le
composant spécifié dans cette documentation pour une raison de sécurité.
L'étiquette suivante a été apposée à l'unité, elle explique la procédure adéquate pour
travailler avec le faisceau laser :
Cette étiquette est apposée à l'appareil comme le montre
l'illustration, pour informer que l'appareil contient un
composant laser.
Étiquette d'avertissement relative aux radiations : Cette étiquette est
placée à l'intérieur de l'appareil. Comme le montre l'illustration. Afin
d'expliquer les mesures de précaution supplémentaires sur l'appareil.
L'équipement contient des rayons laser à radiation de laser qui
respectent les limites pour les produits laser de classe 1.
frMode d’emploi

14
- Tous les avertissements sur cet appareil et
sur les instructions de fonctionnement doivent être pris en compte.
- L'appareil ne doit pas être utilisé à proximité de l'eau, par
exemple, à proximité d'une baignoire, d'un lavabo ou d'un évier de cuisine, de
buanderie, d'une piscine ou dans une cave humide.
- L'appareil doit être situé dans une position ou un endroit qui ne
nuit pas à sa ventilation. Ne placez pas l'appareil sur un lit, un canapé, un tapis
ou une surface similaire susceptible de bloquer les orifices d'aération. N'intégrez
pas l'appareil dans une installation, comme une bibliothèque ou une armoire,
susceptible de bloquer le passage de l'air dans les orifices d'aération.
chAleUr - L'appareil doit être placé à une distance raisonnable des sources
de chaleurs telles que les radiateurs, réchauds et autres appareils (y compris les
amplificateurs) qui produisent de la chaleur.
- L'appareil doit uniquement être connecté à une
source d'alimentation du type décrit dans les instructions de fonctionnement ou
indiqué sur l'appareil.
- Les cordons d'alimentation
doivent être placés de manière à ne pas être piétinés ou pincés par des objets
placés dessus ou contre eux.
- Une antenne extérieure doit être située à une distance
raisonnable des lignes haute tension.
- Il faut prendre soin qu'aucun objet ne
tombe et qu'aucun liquide ne soit renversé à l'intérieur du boîtier par les orifices.
- Si l'affichage ne fonctionne pas correctement ou ne
réagit pas suite à l'actionnement des commandes, c'est peut-être en raison d'une
décharge électrostatique. Éteignez et débranchez l'appareil. Rebranchez-le après
quelques secondes.
- L'appareil doit être entretenu par
un technicien d'entretien qualifié quand:
a. Le cordon d'alimentation ou la fiche a été endommagé.
b. Des objets sont tombés dans le boîtier de l'appareil ou des liquides y ont été
renversés.
c. L'appareil a été exposé à la pluie.
d. L'appareil est tombé, ou le boîtier est endommagé.
e. L'appareil ne semble pas fonctionner normalement.
1. Prise USB
2. Fente carte SD
3. Cordon d’appairage Bluetooth
4. Touche Retour/réglage -
5. Touche lecture/pause/pairage
6. Touche suivant/réglage +
7. Touche Vol.+
8. Touche Mem-/dossier -
9. Touche Arrêt
10. Touche Vol. -
11. Touche Mem +/dossier +
12. Touche de fonctions
13. Touche EQ/graves
14. Touche Répéter/programmes
15. Touche ouvrir/fermer
16. Touche Marche/veille
17. Capteur de la télécommande
18. Prise d’entrée Aux
19. Débit du caisson de basse
20. Prise d’alimentation du haut-parleur
21. Prises de sorties du haut-parleur
22. Prise CC
23. Prise d’écouteurs
24. Fil d’antenne FM
Mode d’emploi

15
19
20
21
22
23
18
24
4
8
12 13 14 15
9
567
10
11
16
17
3
1 2
frMode d’emploi

16
• Retirer l’appareil et les accessoires du carton. Retirer les autocollants, le film ou le
plastique protecteur de l’appareil.
• Posez l’appareil sur une surface plate et stable en laissant 10cm d’espace libre
de chaque côté. Cet appareil ne convient pas à une installation intégrée ou en
extérieur.
• Vous pouvez alimenter votre système portable en branchant le cordon CA
amovible dans la prise CA à l'arrière de l'appareil et dans une prise électrique
murale CA. Vérifiez que la tension nominale de votre appareil correspond à la
tension du secteur. Assurez-vous que le cordon d'alimentation CA est pleinement
inséré dans l'appareil.
• Cet appareil est muni d’un système intégré d’économie d’énergie qui mettra
l’appareil automatiquement en ‘mode veille’ lorsqu’il détecte que l’appareil n’est
pas utilisé.
• Branchez le cordon audio et d’alimentation des haut-parleurs dans les prises
appropriées à l’arrière de l’appareil, veuillez veiller à insérer le cordon audio doré
dans la prise rouge.
• L’heure s’affichera en mode veille et lorsque la touche ‘heure/ronfleur’est appuyée.
• Allumer l’appareil en mode veille, maintenir la touche ‘heure/ronfleur’ enfoncée
pour accéder au mode de réglage. Maintenant, utiliser les touches ‘réglage +’ et
‘réglage –‘ de la télécommande pour effectuer le réglage souhaité, valider avec la
touche 'heure/ronfleur' et suivre la procédure.
• Appuyer plusieurs fois sur la touche ‘sommeil’ pour sélectionner l’heure
automatique d’arrêt.
• Maintenir la touche ‘nocturne’ enfoncée pendant 2 secondes pour allumer et
éteindre le rétro-éclairage de l’écran.
• Appuyer plusieurs fois sur la touche ‘EQ/graves’ pour choisir l’effet sonore désiré
selon la musique écoutée.
• Maintenir la touche ‘EQ/graves’ enfoncée pour allumer ou éteindre la fonction
amplificateur de graves.
• Appuyer plusieurs fois sur la touche ‘fonction’ pour sélectionner la fonction radio.
• Appuyer sur les touches ‘réglage +’ et ‘réglage -‘ pour la recherche manuelle.
• Maintenir les touches ‘réglage +’ et ‘réglage -‘ pendant deux secondes pour la
recherche automatique.
• Appuyer sur la touche ‘prog’ pour sauvegarder la station actuelle. Utiliser les
touches ‘mem +’ et ‘-’ pour choisir la position souhaitée en mémoire et valider
avec la touche ‘prog’.
• Appuyer plusieurs fois sur la touche ‘fonction’ pour sélectionner la fonction CD.
• Appuyer sur la touche ‘ouvrir/fermer’ pour ouvrir le tiroir CD, insérer un CD ou MP3
sur l’axe central avec l’étiquette faisant face vers le haut. Fermer le tiroir du CD en
appuyant sur la touche ‘ouvrir/fermer’ et le premier titre commencera à être lu.
• Pour les CD MP3, il vous est possible d’utiliser les touches ‘dossier + et -‘ pour
sélectionner le dossier requis.
• Appuyer plusieurs fois sur la touche ‘fonction’ pour sélectionner la fonction USB
ou SD.
• Insérer une clé USB ou une carte SD et la lecture peut commencer.
• NB : Carte SD (pour la lecture MP3) supporte SD (maximum 16 Go).
• NB : USB (pour la lecture MP3) supporte USB 1.1/2.0 (maximum 16 Go).
Mode d’emploi

17
• NB : Appuyer toujours sur ‘Arrêt’ et puis appuyer sur ‘fonction’ pour basculer sur
une autre source avant de retirer l’USB ou la SD.
• Appuyer plusieurs fois sur la touche ‘fonction’ pour sélectionner la fonction AUX.
• Veiller à ce que le dispositif externe soit allumé, maintenant il vous est possible de
commencer la lecture du dispositif externe.
• Appuyer plusieurs fois sur la touche ‘fonction’ pour sélectionner la fonction BT.
• Allumez votre appareil Bluetooth et recherchez ‘VERTICAL HIFI’.
• Appuyer sur la touche ‘lecture/pause/pairage’ de l’appareil, maintenant il vous
faut accepter le réglage Hi-Fi de votre dispositif externe.
• La connexion est effectuée, il vous est possible de commencer la lecture de votre
dispositif externe.
• NB : lors de l’invitation à saisir un code d’accès, saisir ‘0000’.
• Maintenir la touche ‘lecture/pause’ enfoncée pour visualiser le nom de la piste en
cours sur l’écran.
gArAntie
• Ce produit est garanti pour une période de 24 mois. Votre garantie est valable
si le produit est utilisé selon les instructions et pour l'usage auquel il est destiné.
De plus, la preuve d'achat d'origine (facture, reçu ou ticket de caisse) doit être
présentée, montrant la date d'achat, le nom du détaillant et le numéro d'article du
produit.
• Pour connaître les conditions de garantie détaillées, veuillez consulter notre site
Internet de service: www.service.tristar.eu
Cet appareil ne doit pas être jeté aux ordures ménagères à la fin de sa
durée de vie, mais doit être rendu à un centre de recyclage d’appareils ménagers
électriques et électroniques. Ce symbole sur l’appareil, La notice d’emploi et
l’emballage attirent votre attention sur ce sujet important. Composants utilisés
dans cet appareil sont recyclables. En recyclant les appareils ménagers. Usagés,
vous contribuez à un apport important à la protection de notre. Environnement.
Adressez vous aux autorités locales pour des renseignements concernant le centre
de Recyclage
frMode d’emploi

18
Sehr geehrter Kunde,
Wir gratulieren Ihnen und bedanken uns für den Kauf dieses hochwertigen Produkts.
Bitte lesen Sie sorgfältig die Bedienungsanleitung, damit Sie das Gerät optimal nutzen
können. Diese Anleitung enthält alle erforderlichen Anweisungen und Hinweise für die
Bedienung, Reinigung und Wartung des Geräts. Wenn Sie diese Anweisungen befolgen,
garantieren wir Ihnen ein hervorragendes Ergebnis, Sie sparen Zeit und vermeiden
Probleme. Wir hoffen, dass Sie mit dem Gerät viel Freude haben.
Bitte lesen Sie die Bedienungsanleitung sorgfältig, bevor Sie das Gerät verwenden.
Bitte bewahren Sie diese Anleitung, die Garantiekarte, die Rechnung und, wenn
möglich, den Karton mit dem Verpackungsmaterial sorgfältig auf.
WArnUng: Zur Vermeidung von Stromschlag öffnen Sie nicht das Gerätegehäuse.
Es befinden sich keine vom Verbraucher wartbaren Komponenten im Gerät. Wenden
Sie sich mit Reparaturen stets an einen autorisierten Kundendienst.
WArnUng: Batterien oder Akkus dürfen nicht übermäßiger Hitze, direkter
Sonneneinstrahlung oder Feuer ausgesetzt werden.
WArnUng: Der Netzstecker dient dem Abtrennen des Geräts vom Stromnetz und
muss jederzeit frei zugänglich sein.
• Unsichtbare Laserstrahlung, wenn das Gerät geöffnet wird und die
Sicherheitsmechanismen umgangen werden. Nicht in den Laserstrahl blicken.
• Keine offenen Flammen wie z. B. brennende Kerzen auf das Gerät stellen.
• Achten Sie auf eine umweltgerechte Entsorgung der Batterien.
• Das Gerät ist zur Benutzung in moderatem Klima ausgelegt.
• Das Typenschild befindet sich auf der Unterseite des Geräts.
• Übermäßiger Schalldruck von Kopfhörern kann zu Hörverlust führen.
• Der Netzstecker muss jederzeit frei zugänglich sein.
• Zum vollständigen Abtrennen des Geräts vom Stromnetz muss der Netzstecker
gezogen werden.
• Vorsicht! Explosionsgefahr bei falsch eingesetzten Batterien. Tauschen Sie
Batterien nur gegen einen gleichwertigen Typ aus.
• Zur Vermeidung von Feuer und Stromschlag setzen Sie das Gerät nicht Regen
oder Feuchtigkeit aus.
• Vorsicht: Stromschlaggefahr, nicht öffnen.
• Warnung: Stromschlaggefahr, nicht öffnen.
Der Blitz im gleichseitigen Dreieck weist auf gefährliche Hochspannung
im Gerät hin, die zu Stromschlag führen kann.
Das Ausrufungszeichen im gleichseitigen Dreieck weist darauf hin, dass
bestimmte Komponenten aus Sicherheitsgründen nur durch Komponenten
ersetzt werden dürfen, wie in der Dokumentation spezifiziert.
Folgender Aufkleber befindet sich auf dem Gerät, der die korrekte Vorgehensweise
bei Arbeiten mit dem Laserstrahl aufführt:
Dieses Schild ist laut Abbildung angebracht mit der Information,
dass das Gerät eine Laserkomponente beinhaltet.
Aufkleber klasse 1 laserprodukt: Dieser Aufkleber ist wie dargestellt
angebracht, um über die Ausstattung des Gerät mit einer
Laserkomponente zu informieren.
Bedienungsanleitung

19
• WARNAUFKLEBERSTRAHLUNG – Dieser Aufkleber ist wie dargestellt im Gerät
angebracht. Er warnt vor weiteren Eingriffen in das Gerät. Das Gerät enthält eine
Laserkomponente gemäß den Grenzwerten für Klasse 1 Laserprodukte.
- Die Warnungen auf dem Gerät und in der
Bedienungsanleitung müssen beachtet werden.
- Gerät nicht in der Nähe von Wasser verwenden,
z.B. in der Nähe einer Badewanne, eines Waschbeckens, einer Küchenspüle, eines
Waschzubers, in einem nassen Keller oder in der Nähe eines Schwimmbeckens.
- Gerät so aufstellen, dass die Belüftung nicht beeinträchtigt wird.
Nicht in einem Bett, auf einem Sofa, Teppich oder ähnlicher Oberfläche aufstellen,
um die Lüftungsöffnungen nicht zu blockieren. Nicht in einem Schrank oder Regal
einbauen, um die Lüftungsöffnungen nicht zu blockieren.
- Gerät fern von Wärmequellen wie Radiatoren, Heizkörpern, Öfen und
anderen wärmeerzeugenden Geräten (einschließlich Verstärkern) aufstellen.
- Gerät nur mit der auf dem Typenschild angegebenen
Stromversorgungsart betreiben.
- Netzkabel so verlegen, dass nicht darauf getreten wird und
dass sie nicht eingeklemmt werden.
- Installieren Sie eine Hausantenne von
Stromleitungen entfernt.
- Achten Sie darauf,
dass keine Fremdkörper oder Flüssigkeiten in das Gerät eindringen.
- Wenn ein Fehler angezeigt wird oder eine
Fehlfunktion besteht, Netzstecker ziehen und alle Batterien entfernen. Danach
erneut anschließen.
- Ziehen Sie stets den
Netzstecker und wenden sich an einen autorisierten Kundendienst, wenn:
a. das Netzkabel oder der Stecker beschädigt ist;
b. Flüssigkeiten oder Fremdkörper in das Gerät eingedrungen sind;
c. das Gerät Regen oder Feuchtigkeit ausgesetzt war;
d. das Gerät fallen gelassen oder beschädigt wurde;
e. das Gerät nicht wie gewöhnlich funktioniert.
teilebeschreibUng
1. USB-Anschluss
2. SD-Kartenanschluss
3. Bluetooth-Pairing-LED
4. Taste Zurück/Senderwahl-
5. Taste Wiedergabe/Pause/Pairing
6. Taste Weiter/Senderwahl+
7. Taste Lautstärke+
8. Taste Speichern-/Ordner-
9. Stopptaste
10. Taste Lautstärke-
11. Taste Speichern+/Ordner+
12. Funktionstaste
13. Taste EQ/Bass
14. Taste Wiederholen/Programm
15. Taste Öffnen/Schließen
16. Taste Ein/Standby
17. Fernbedienungssensor
18. Aux-Ein-Buchse
19. Subwoofer-Ausgang
20. Lautsprecherbeleuchtungs-Anschlüsse
21. Lautsprecher-Ausgänge
22. DC-Buchse
23. Kopfhörerbuchse
24. FM-Antennendraht
duBedienungsanleitung

20
19
20
21
22
23
18
24
4
8
12 13 14 15
9
5 6 7
10
11
16
17
3
1 2
Bedienungsanleitung
Table of contents
Languages:
Other AudioSonic Stereo System manuals

AudioSonic
AudioSonic CL-1563 User manual

AudioSonic
AudioSonic TXCD-1536 User manual

AudioSonic
AudioSonic MHF-220BT User manual

AudioSonic
AudioSonic CD-1588 User manual

AudioSonic
AudioSonic TXCD-1530 User manual

AudioSonic
AudioSonic TXCD-1536 User manual

AudioSonic
AudioSonic HF-1250 User manual

AudioSonic
AudioSonic HF-1253 User manual

AudioSonic
AudioSonic HF-1254 User manual