128-8971a
5 of 32
5
This Remote Start/Alarm System is designed to be used with Automatic Transmission- Fuel Injection
Gas or Diesel Vehicles Only!
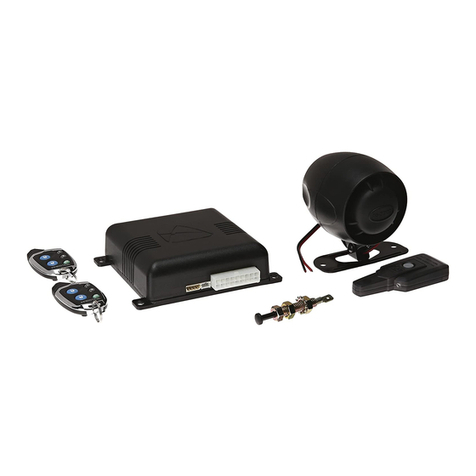
INSTALLATION OF THE MAJOR COMPONENTS:
CONTROLMODULE: PART# 1365186
Selecta mountinglocation insidethepassenger compartment(up behindthe dashboard).The mounting
location selected must be within 24" of the ignition switch wiring harness to allow connection of the 6 pin
main wiring harness. Be certain that the chosen location will not interfere with proper operation of the
vehicle. Avoid mounting the module to or routing the wiring around the steering shaft/column, as the
moduleorwiringmaywraparound orblockthesteeringwheelpreventingproper controlofthe vehicle.The
modulewill besecured afterall wiringis completedwhich willallow completeaccessuntilthejobisdone.
Do Not Mount The Module In The Engine Compartment, as it is not waterproof.
HOOD PIN SWITCH: PART# 1363699
Thepin switchincludedinthispackage isintendedforprotectingthe hoodareaofthevehicle. Inallcases,
theswitch must bemounted toa groundedmetal surface.When thepinswitch isactivated, (hoodopen),
itwill supplya groundto theinputwireactivatingthe alarm.In addition,the hoodswitch isrequired forthe
safety shut down of the remote start unit. If the vehicle is being worked on, this hood switch prevents the
remote start activation even if the RF command to start is issued. This switch must be installed in all
applications. Failure to do so may result in personal injury or property damage.
THEPUSH-BUTTON/PROGRAM SWITCH/LEDASSEMBLY: PART #PRLED
Select a mounting location known and accessible to the operator of the vehicle.Adash knockout plug or
frontdash panelis desirableas thenow Push-ButtonLED assemblyneeds theLED tobe visiblefrom the
outsideof thevehicle andwillbe usedfor valetmodes, programmingfeatures,programming transmitters,
and for overriding the remote start unit when the vehicle is being serviced. Inspect behind the chosen
location to insure that adequate clearance is allowed for the body of the switch, and also that the drill will
notpenetrate anyexisting factorywiring orfluid lines.Drill a5/16"or8mmhole inthe desiredlocation and
mount the switch by passing the connectors, one at a time, through the panel from the front side and
pressing on the bezel until the switch is fully seated.
SHOCKSENSOR: PART # AS9492a
Selecta centrallylocated, solidmounting surfacefor theshock sensorthat willallow consistentoperation
fromallareasofthevehicle. Theselectedlocation mustbewithin 18"ofthecontrolmoduletoallow routing
and connecting of the 4 pin harness. Secure the shock sensor to the chosen location using two #8 self
tapping sheet metal screws. The sensor can also be secured to an existing dash brace using cable tie
straps. Whichever mounting method is used be sure to allow access to the sensitivity adjustment poten-
tiometer for use later in the installation.
STARTER INHIBITRELAY: PART #1363731
Select a mounting location within 12" of the ignition switch's low current start solenoid wire. Secure the
relay to an existing harness in the chosen location using a cable tie around the relay's wiring harness.
CAUTION! Do not wire tie the metal bracket to an existing wiring harness as vibration may cause
chaffingand shortingdamaging thefactory wiring.If anexisting harnessis notavailable
then secure the relay's metal mounting tab to an under dash metal brace with a #8 self
tapping sheet metal screw. Wire the relay as per the diagram found later in this manual.
This unit is to be used in vehicles with AUTOMATIC TRANSMISSIONS only!Although this combination
Alarm/Remote Start unit is a sophisticated system with many advanced features,IT MUST NOT be
installed into a vehicle with a manually operated transmission. Doing so may result in serious
personalinjury andpropertydamage.

