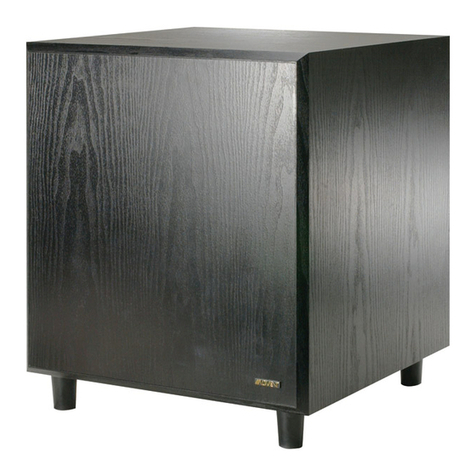
Audiovox BA-200 User manual

AUDIOVOX®
BA·200
BASS·BLASTER
200
WATT
AMPLIFIED SUB-WOOFER
INSTALLATION AND OPERATION INSTRUCTIONS
INSTALLATION
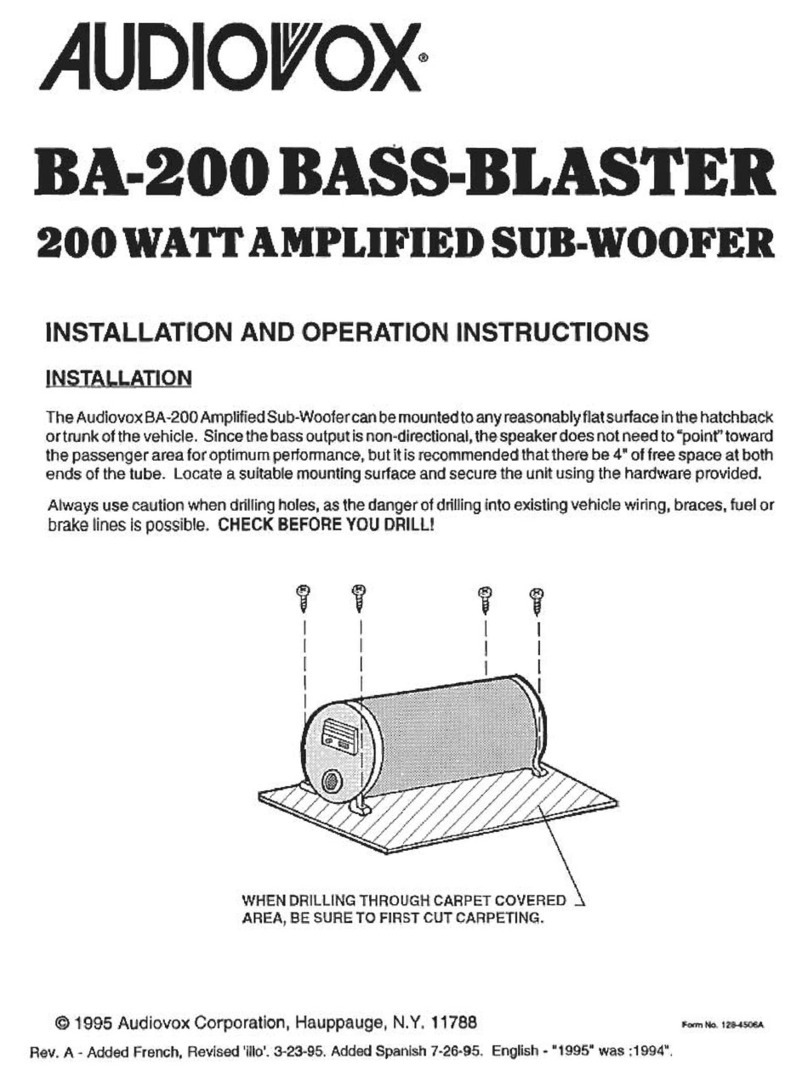
The
Audiovox
SA-2DD
AmplifiedSub-Woofercanbemountedtoanyreasonablyflatsurfaceinthe hatchback
ortrunk
ofthe vehicle. Sincethe bass outputis non-directional,thespeakerdoes
not
needto
"poinf'
toward
the
passengerarea
for
optimum performance, butitis recommended
that
there be 4" offree space
at
both
ends
ofthe tube. Locate a suitable mounting surface and secure the unit using the hardware provided.
Always usecaution when drilling holes, as the dangerofdrilling into existing vehicle wiring, braces, fuel
or
brake lines is possible.
CHECK
BEFORE
YOU
DRILL!
v " , ,
I I
I I
I I
WHEN
DRILLING
THROUGH
CARPET
COVEREO
AREA
,
BE
SURE
TO
FIRST
CUT
CABPET
I
NG.
©
1995
Audiovox
Corporation,
Hauppauge,
N.Y.
11788
Rev. A - Added French, Revised 'illo'. 3-23-95. Added Spanish 7-26-95. English -"1995" was :1994".
Form
No.
128-4506A

.
WIRING
There
are
5 wires
to
connect
to
the
BA-2DD
forproperoperation.
Make
all
connections before plugging the
wire harness into the mating socket
on
the amplifier.
1.
Red
Wire
with
Fuse:
Connect this wire
to
asource of +
12
volts which does not turn off with the ignition
key.
It
may also
be
connected directly
to
the positive
(+)
terminal of the battery.
2.
BlackWire: Securethis
wire
using ascreworbolt
on
agrounded metalsurfaceofthe vehicle. Clean-away
any
rust,
dirt, or paint
from
the surface
to
make sure a good connection
is
made.
3.
Blue
Wire:
This wire activates the
BA-2DD
when
the stereo system
is
turned on. Connectittothe "Power
Antenna" lead
from
your car stereo. If your car stereo does not have or you cannot locate the Power
. Antennalead, the blue wire
can
be connected
to
asource of+
12
volts which
is
turned on and offwith the
ignitionswitch.
In
this
case,
the
BA-2DD
will
be
activatedwhenever
the
ignitionswitch isturned
on,
whether
the car stereo
is
on
or off.
4.
Green
Wire: Splice this
wire
to the wire going
to
the
positive
(+)
terminal (sometimes indicated by a
red
dot) of the left speaker
of
yourstereo system.
5.
G
ray
Wire: Splicethis
wire
to
the wire going
to
the positive
(+)
terminal (sometimes indicated bya
red
dot)
of
the right speaker
of
yourstereo system.
This completes the wiring of the
BA-2DD.
Re-check
all
connections
to
make sure they are secure and well
insulated before plugging the harness connector into the socket
on
the
BA-2DD.
EXISTING
LEFT
SPEAKER
BLACK:
CHASSIS GROUND
RED: +12 VOLTS CONSTANT
BLUE: +12 VOLTS SWITCHED
OPERATION
GREEN
MATING SOCKET
TO SPIN PLUG
EXISTING
RIGHT
, SPEAKER
Operation of the
BA-2DD
is
simple. If wired correctly,
the
amplifier
will
automatically be activated when the
carstereo
is
turned
on
(orwhenthe ignitionswitch
is
turned
on).
Adjustthevolumecontrolofthestereosystem
to
a normal listening level. Adjust the Gain control
on
the
BA-2DD
up
or down to achieve the level of bass
desired
and
matchtheoutputofthe unitto thatofthe
rest
of
you
rsystem. Oncethe propersetting ofthe Gain
control
is
found, it should
be
left at that position
and
no
further adjustment of the system
is
necessary.
GAINCONTROL
TURN CLOCKWISE TO INCREASE AND
COUNTER-CLOCKWISE TO DECREASE
THE VOLUME
Form No. 128-4S06A

..
AUDIOVOX®
BASS·BLASTER
BA·200
,
ENCEINTED'INFRAGRAVESAMPLIFIEE
DE
200
WATTS
DIRECTIVES D'INSTALLATION ET DE FONCTIONNEMENT
INSTALLSTION
L'enceint~
d'infragravesamplifieeAudiovoxmodelsSA-200peutetrefixeeatoute
su
rface raisonnablement
plane du hayon ou du coffre du vehicule. Comme la sortie de graves est non directionnelle,
iI
n'est pas
necessaire que I'enceinte soit dirigee vers I'habitac\e pour obtenir de meilleures performances.
II
est
cependantrecommandedelaisserunespacelibrede10
cm
(4
po) achagueextremitedetube. Determinez
quel sera I'endroit de montage approprie etfixez I'appareil aI'aide
du
materiel de fixation inclus.
Soyeztoujours prudentslorsquevouspercezdestrous carvous risquez
de
percerlesfils electriques
et
les
canalisations d'essence ou de frein existants
du
vehicule. VERIFIEZ AVANT DE PERCER!
, V , V
I 1
! l
1 [
LORsaUE
VOtrlS PERCEZ
UNE
SURFACE
RECOUVERTE
DE
TAP1S!
ASSUREZ
VOUS
DE
COUPER
LE
TAPIS D"
ABORO.
©
1995
Audiovox
Corporation,
Hauppauge,
N.Y.
11788
Form
No.
128-4S06A

N
CABLAGE
II
Ya5
fils
aconnecter
au
BA-200
pou
rqu'ilfonctionne correctement. Effectueztouteslesconnexiionsavant
de brancher
Ie
faisceau
de
fils dans
la
prise correspondante
de
I'amplificateur.
1.
Fil
rouge avec fusible: Connectez
ce
fil
a
une
source
de
+
12
volts dont
Ie
courant n'est pas coupe par
la cle de contact.
II
peut egalement etre connecte directementaune borne positive
(+)
de la betterie.
2.
Fil
noir: Fixezce
fil
aI'aided'une
vis
ou
d'un
boulolJ
surunesurface
de
metalmisealamasse
du
vehicule.
Enlever la rouille, la salete
ou
la peinture
que
peut presenter cette surface pourvous assurer que la
connexion soiteffectueeadequatement.
3.
Fil
bleu:
Ce
fil
actionne
Ie
BA-200lorsque
Ie
systeme
de
son
estallume. Raccordez-Ie
au
til deI'antenne
acommande electrique de systeme audio
de
votre voiture.
Si
Ie
systeme audio de votre voiture n'est
pas dote d'un
fil
pourI'antenne ecommande electrique
ou
si
vous ne pouvez
Ie
trouver,
Ie
fiI
bleu peut
etre connecte aune source
de
+12
volts dont I'alimentation est etablie et coupee par I'interrupteur
d'allumage.
Dans
ce
cas,
Ie
BA-200seraactionne des que
Ie
contactseraetabli, que
Ie
systemeaudio
soit allume
ou
non.
4.
Fil
vert: Raccordez
ce
fiI
au
fil
relie
ala
borne
positive
(+)
(parfois marque d'un point rouge) du haut-
parleurgauche de votre systeme audio.
5.
Fil
gris: Raccordez
ce
fil
au
fiI
relie ala
borne
positive
(+)
(parfois marque d'un point rouge)
du
haut-
parleurdroit de votre systeme audio.
Le
cablage
du
BA-200estmaintenantterrnine. Verifiezanouveautoutes
les
connexions pourvousassurer
qu'ellessontsolides etbien isolees avant
de
brancher
Ie
connecteur
du
faisceau dans laprise
du
BA-200.
HAUT-
PARLEUR
GAUCHE
NOIR:
MISE
LA
MASSE
AU
CH
SSIS
ROUGE:
+12
VOLTS
CONSTANTS
BLEU:
...
12
VOLTS
COMMUTES
FONCTIONNEMENT
SYSTEMEAUDIO
EXISTANT
DE
LA
VOITURE
II
0
~(01I.wR1S!III[
I(ili)~
'\
.Q~
....
'":
_
'o;ai
GREEN I ) GRAY
PRISE
CORRESPONDANT
LA
FICHE
SIX
BROCHES
FICHE
6
BROCHES
HAUT-
PARLEUR
DROIT
Le
fonctionnement
du
BA-200estrelativementsimple.
Si
les
filssontconnectescorrectement, I'amplificateur
seraautomatiquementactionnelorsque
Ie
sustemeaudio
de
la
voitureestallume
(ou
lorsque
Ie
contactest
etabli). Reglez lacommande degain
du
BA-200
en
augmentant
ou
en
diminuant
Ie
volume pouratteindre
Ie
niveau de graves desire et accordez la sortie
de
cet element acelie
du
systeme audio. Lorsque la
commandede gain est
reg
leecorrectement,
on
doitlalaisseracette position etaucun reglagesubsequent
du
systeme be sera necessaire. COMMANDE DE GAIN
TOURNEZ
DANS
LE
SENS HORAIRE
POUR AUGMENTER
LE
VOLUME
ET
DANS
LE
SENS ANTIHORAIRE POUR
LEDIMINUER
Form
No
, 128-4S06A

AUDIOVOX®
,
BA-200 EXPLOSION DE BAJOS
SUBPARLANTE
AMPLIFICADO
DE
SONIDOS BAJOS
CON
200
VATIOS
DE
POTENCIA
INSTRUCCIONES DE INSTALACION Y OPERACION
INSTALAclON
EI
Subparlante Amplificado deSonidos Bajos Modelo BA-200 de Audiovox puede
ser
montado en cualquier
superficie razonablemente plana en el ball! del vehfculo (0 en la parte trasera de los vehfculos tipo
"Hatchback"). Oebido a que la salida de los bajos no es direccional, el parlante no necesita "apuntar" hacia
el
area
de
lospasajerosparadesempeiio6ptimo, peroserecomiendaquesedejen4" deespacio libreaambos
lados del tubo. Localize unasuperficie conveniente para montary asegure la unidad utilizando los tomillos
proporcionados.
Siempredebeejercerprecauci6ncuandoesteperforandoagujeros, yaqueexisteel peligrodetaladrardentro
de los cables, abrazaderas, 0 las Ifneas
de
combustible 0 del sistema de trenos existentes. VERIFIQUE
ANTES DE
TALADRAR!
f
I
I
CUANDO
TALADRE
A TRAVES DE
UN
AREA
CUBIERTACON ALFOMBRA, ASEGURESE
DE
PRIMERO CORTAR
LA
ALFOMBRA
© 1995 Audiovox Corporation, Hauppauge, N.Y. 11788
Form
No.
128-4506A

lit
CABLEADO
Haycinco cables paraconectarelmodeloBA-200para
su
operaci6ncorrecta. Efectuetodaslas conexiones
antes de enchufar
el
ames de cables
en
el
tomacorriente conector
del
amplificador.
1.
Cable Rojo con Fusible: Conecte este cable aunafuente +
12
voltios que
no
se apaga con lalIave de
encendido. Tambien puede serconectado directamente
al
terminal positivo
(+)
de
la baterfa.
2.
Cable Negro: Asegure estecable utilizando
uri
tornillo 0 perno
en
unasuperficiede metal del vel:lfculo
conectadaatierra. Limpie biencualquierherrumbre,suciedad, 0 pinturade
la
superficieparaasegurar
que se neve a cabo una buena conexi6n.
3.
Cable Azul: Este cable activa
el
modelo BA-200 cuando
se
prende
el
sistema estereo. Conectelo
al
cable conductor
de
la"Antenade Potencia" del estereo
de
su
auto.
Si
el
estereo de
su
auto no tiene
ono puedeusted localizar
el
cable de laAntena
de
Potencia,
el
cable azul puedeserconectadoauna
fuente+12voltioslacual puedeserprendidayapagada
con
el
interruptordeencendido.
En
estecaso,
el
modelo BA-200 sera activado cuando quiera
que
el
interruptor
de
encendido se prende,
no
importando que
el
estereo del auto este prendido 0
no.
4.
CableVerde: Empalme este cable
con
el
cable
que
conduce
al
terminal
(+)
positivo (indicado aveces
por
un
punto rojo) del
par1ante
izquierdo
de
su
sistema estereo.
5.
Cable Gris: Empalme este cable
con
el
cable que conduce
al
terminal
(+)
positivo (indicado aveces
porun punto rojo) del
par1ante
derecho
de
su
sistema estereo.
Esto completa el cableado del modelo BA-200. Verifique nuevamente las conexiones para confirmarque
est
an
aseguradas y bien aisladas antes de enchufar
el
conector de ames
al
tomacorriente
en
el
modelo
BA-200.
ALTOVOZ
IZQUIERDO
EXISTENTE
<:)
NEGRO:
A
TIERRA
ROJO:
+12VOLTIOS
CONSTANTE
AZUL:
+12VOLTIOS
CONMUTADA
OPERACION
VERDE
GRIS
TOMACORRIENTE
CONECTOR
AL
ENCHUFE
DE6
CLAVIJAS
<:)
ALTOVOZ
DERECHO
EXISTENTE
La operacion del modelo BA-200
es
sencilla.
Si
se
conecta correctamente,
el
amplificador se activara
automaticamente cuando
el
estereo
del
auto este prendido (0 cuando
el
interruptor del encendido este
prendido). Ajuste
el
control de volumen del sistema estereo a
un
nivel de audici6n normal. Ajuste
el
control
de Aumento (Gain)
en
el
modelo BA-200 hacia arriba 0 hacia abajo para alcanzar
el
nivel de bajos deseado
eigualarlasalidadelaunidad aladel
resto
del
sistema.
Una
vezse haencontrado
el
ajustedeseado
del
control
de Aumento (Gain), deberia dejarse
en
esa posici6n y
no
es
necesario ningun ajuste posterior
al
sistema.
CONTROL
DE
AUMENTO
(GAIN)
GIRESE
EN
DIRECCION
DEL
RELOJ
PARA
INCREMENTAR
Y
EN
DlRECCI
N
CONTRARIA
AL
RELOJ
PARA
DISMINUIR
EL
VOUJMEN
Form No. 128-4506A
Table of contents
Languages:
Other Audiovox Subwoofer manuals

Audiovox
Audiovox Rampage AVW122 User manual

Audiovox
Audiovox Prestige PSW-10DC User manual

Audiovox
Audiovox jensen JPS10 User manual

Audiovox
Audiovox Jensen JPW124 Installation instructions

Audiovox
Audiovox Jensen XS12 User manual

Audiovox
Audiovox Advent User manual

Audiovox
Audiovox BA200 User manual

Audiovox
Audiovox Rampage ACD-12 User manual

Audiovox
Audiovox Prestige PSW-10D User manual

Audiovox
Audiovox Rampage AVW100 User manual