Aussie Traveller SUNBURST ECLIPSE User manual

1300 663 868 | enquiries@aussietraveller.com.au | aussietraveller.com.au
BRISBANE SHOWROOM: 11-15 Oasis Court, Clontarf QLD 4019 | MELBOURNE SHOWROOM: 235 Barry Road, Campbellfield VIC 3061
SUNBURSTECLIPSE AWNING
ROLL OUTPROCEDURE - ALLTERRAIN POSITION
Figure 1A
Figure 2
Figure 3A
Figure 4
Figure 3B
Figure 1B
4. Insert pull rod through the loop in pull strap. Pull
the awning open until fully extended. See Figure
3A & 3B. Do not overextend the roller.
3. Locate Ratchet Lever behind right end of roller.
Using the pull down rod, move lever downward
See Figure 2.
The ratchet mechanism is functioning correctly if a
clicking noise is heard when rolling the awning out
or in.
5. Slide the rafter up support arm until it locks into
position over the black spring button. Tighten
knob on rafter to tension fabric. See Figure 4.
6. Repeat on other arm.
We recommend the All Terrain position (when support
arms remain attached to van) as it is stronger and
more stable than Patio position.
1. Unlock both arms from travel position. To open
travel locks squeeze rafter and top support arm
together and move plastic slider upwards as far as
possible See Figure 1A.
Pull rod may be used to move slider in this step.
2. Loosen black rafter knobs located on back of both
rafters. See Figure 1B.

1300 663 868 | enquiries@aussietraveller.com.au | aussietraveller.com.au
BRISBANE SHOWROOM: 11-15 Oasis Court, Clontarf QLD 4019 | MELBOURNE SHOWROOM: 235 Barry Road, Campbellfield VIC 3061
7. Raise the awning following the steps below:
8. Install Curved Roof Rafters (optional)
a) Fit hook end into the bracket underneath the
awning track.
b) Extend rafter out and slot the spigot end into
the hole in the roller tube.
c) Tighten the black locking knob.
See separate CRR installation guide for more
information.
Ensure that any Anti-Flap Kit’s and Curved Roof
Rafters have been removed before attempting to move
the frameset legs into the patio position.
1. Set up the awning following the previous
instructions for the Roll Out All Terrain Position.
2. Ensure rafter knobs shown in Figure 4 are very
tight.
IMPORTANT: When the awning roller is parallel to
the ground, move the ratchet lever to down (roll
out) position.
3. Depress latch on bottom bracket. Using the lift
handle, swing arm away from van until set in
vertical position. Do not pull trigger during this
step.
4. Adjust roller to desired height using trigger handle
and trigger.
5. Secure bottom foot to ground by driving stakes
(not provided) in crisscross manner. Repeat on
other arm. Take care not to break foot casting.
Additional tie down straps are recommended.
We suggest either of the below:
Caravan Awning Rope Clips - 05000020001000
Tie Down Straps - 36000010001080
MOVING FRAMESET LEGS FROM ALLTERRAIN
POSITION TO PATIO POSITION
NOTE: In light rain conditions, lower one arm 300-
600mm to allow water to drain from fabric to avoid
water pooling. Not required if using Anti Flap Kits &
Curved Roof Rafter’s.
a) Swing trigger handle on
the side of arm upward.
b) Lift handle slightly and
pull and hold the trigger with
index finger.
c) Using the handle, lift the
awning half way up. Release
the trigger and let arm slide
down slowly until trigger
locks.
d) Repeat on other arm
lifting awning all the way up
e) Go back to the first arm
and lift all the way up.

6. When erected ensure the roller pull strap sail track
is positioned at 9 o’clock. See Figure 5.
This will allow rain water to run off the fabric by
minimising pooling behind the roller.
Reposition the roller as follows:
a) Loosen black rafter knobs.
b) Pull down and away from the vehicle to release
pressure from the ratchet and move ratchet lever
to the roll up position.
c) Release the pressure on the pull strap and
allow the roller to roll up until just past the 9
o’clock position. See Figure 5.
d) Again, pull down and away on the pull strap.
e) Check that the 9 o’clock position has been
attained. If not repeat above process. This then
locks the roller against the ratchet.
f) Continue to pull down on the strap/bottom leg
to maintain fabric tightness and tighten black rafter
knob.
g) Move to other end of awning, pull down on pull
strap/bottom leg and tighten black rafter knob.
1. Ensure that any Anti-Flap Kit’s and Curved Roof
Rafters have been removed before attempting to
reposition the frameset legs.
2. Pull stakes from bottom foot. Release ropes.
3. Commencing with the rear arm (with ratchet
mechanism) loosen the knurl knob on the arm. The
ratchet should be in the roll out position.
4. Use lift handle (do not pull trigger) to swing arm
back to bottom bracket. Push support arm firmly
into bottom bracket until latch automatically
secures foot on bottom support arm. See Figure 6.
5. Repeat procedure on other end of awning.
1300 663 868 | enquiries@aussietraveller.com.au | aussietraveller.com.au
BRISBANE SHOWROOM: 11-15 Oasis Court, Clontarf QLD 4019 | MELBOURNE SHOWROOM: 235 Barry Road, Campbellfield VIC 3061
IMPORTANT NOTE FOR POP TOP CARAVANS:
As the awning rafter arm fits to the shoulder of the pop
top caravan and not level with the fabric on the pop
top, moving the arm back and forth from the All Terrain
position to Patio position must be executed correctly.
If not executed correctly the action has the potential
to damage both the ratchet mechanism and the top
frameset mounting bracket on the pop-top shoulder.
NOTE: By leaving the ratchet in the roll in position the
awning will not be able to roll out under wind pressure,
but is relying only on the black rafter knobs to stop it
rolling in. To assist the black rafter knobs and to give
added strength against wind flap and water pooling
the addition of an Anti-Flap Kit and Curved Roof
Rafters is recommended.
Figure 5 - 9 o’clock position (right hand end)
Figure 6
MOVING FRAMESET LEGS FROM PATIO POSITION
BACK ONTO VEHICLE

5. Slide pull strap more towards the centre of awning.
Use pull strap to control speed of awning when
rolling back towards R.V.
To avoid creating a bulge in awning fabric allow
strap to roll up diagonally side by side across roller
and fabric.
6. Lock both support arms in travel position. To lock
squeeze rafter and top support arm together rotate
travel locks behind rafters.
7. Tighten black knurl knobs. Ensure roller does
not move when pull strap is given a slight tug.
This confirms the ratchet mechanism is working
correctly.
1300 663 868 | enquiries@aussietraveller.com.au | aussietraveller.com.au
BRISBANE SHOWROOM: 11-15 Oasis Court, Clontarf QLD 4019 | MELBOURNE SHOWROOM: 235 Barry Road, Campbellfield VIC 3061
ROLL UP PROCEDURE
1. Lower both right and left support arms to the
dome nut position using the lift handle and trigger.
Lower one end 50% then the other fully and then
the first one fully.
2. Loosen knob on rafter. Lower rafter by depressing
lever on the outside of the frameset leg which
will allow the slider to be released. Slide rafter to
bottom of support arm. Repeat on other arm.
3. Slide pull strap to the right until ratchet lever is
within reach.
4. Grasp pull strap, and by pulling out, release the
pressure on the ratchet lever. Locate ratchet lever
behind roller and rotate lever upwards and forward
towards the front of the awning.
If ratchet lever is difficult to operate, use pull strap
to rotate roller slightly as if to slacken fabric further.
This reduces tension on mechanism and lever.
WARNING: The awning is under tension and can
snap back against the vehicle. To avoid damage
to awning or vehicle, DO NOT release ratchet lever
without holding pull strap.

• If the ratchet mechanism is subjected to excessive
force the ratchet lever may become over tensioned
and difficult to operate. To relieve the tension:
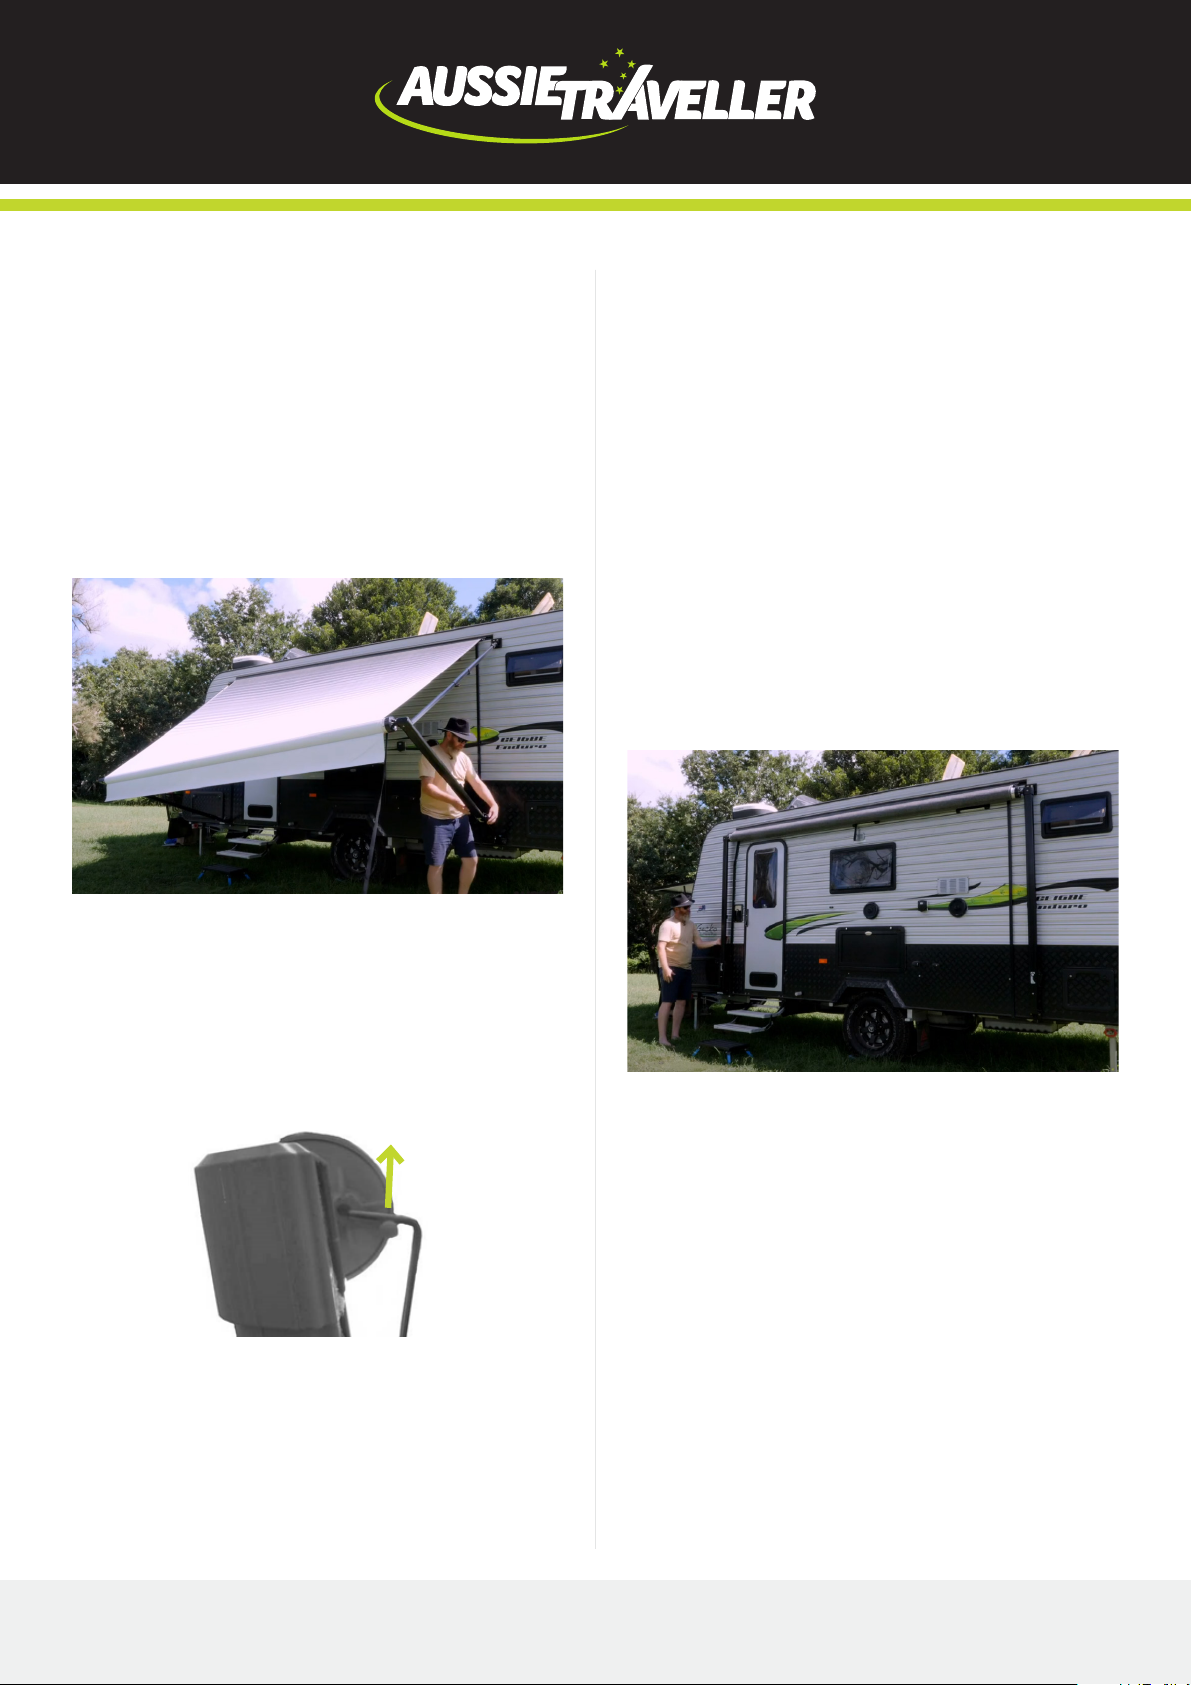
In roll up position - Release right support arm from
bottom bracket. Swing arm away from R.V. slightly
until ratchet lever can be moved to open (roll out)
position. Return support arm to bottom bracket.
In rolled out position - Rotate roller slightly, as if
to slacken fabric. Reverse ratchet lever. When
releasing lever maintain your grip on pull strap, to
prevent awning from snapping back against van.
• Always close the awning in strong winds or rain.
• Damage to awning fabric, hardware and locking
mechanism caused by wind, water pooling or
extremely high/low temperatures is NOT covered
by warranty. NEVER leave awning rolled out when
unattended.
• Do not operate awning in strong winds or rain.
• Do not allow awning to snap closed excessively
hard.
• Do not remove support arm from bracket until
ratchet lever has been placed in up (roll in)
position. Refer to previous instructions.
• Do not overextend awning when rolling out.
• Do not fold or roll out in extreme cold
temperatures.
• Do not get insect spray on the vinyl fabric, as
some solutions may cause staining or discolour.
• Do not allow water to collect on awnings, causing
water pooling.
• Do not overlook small rips or tears. Have them
repaired or separation will result.
• Do not wash your awning with truck wash or a
harsh strong solution, or with an abrasive cleaner.
• Do not BBQ, grill or have campfires underneath
the awning.
• Do not store awnings when damp, or wet. Mildew
may grow on the surface of a damp awning and
permanently stain the fabric (If it is necessary to
roll the awning away wet then roll out and dry at
the first opportunity).
• Do not permit leaves, twigs, etc. to remain on your
awning.
• Do not use a high pressure cleaning jet.
• Lubricate control handles, lock buttons, locking
knobs, support arms and rafter sliders with
silicone or similar lubricant to ensure easy
operation.
• Check correct setting of adjustable stop bolts.
• Ensure all rivets and screws in brackets are tight.
• Keep your awnings clean. This is the best
protection against mildew. Although the fabric
is mildew resistant, mildew can still grow on
accumulated dirt and eventually damage or stain
the fabric.
• Wash down your awning. You can use a mild soap
and water solution, or an approved vinyl cleaner,
brushing lightly with a cloth or soft brush. Rinse
thoroughly and allow drying prior to storage. We
recommend doing this on a hot, sunny day.
• Keep the underside of your awning clean by
simply brushing with a clean household broom. It
may also be washed in the same manner as the
top.
• In light rain conditions, lower one arm 300mm-
600mm to allow water to drain from fabric and
avoid water pooling.
• Accessories such as Aussie Traveller’s Anti Flap
Kit and Curved Roof Rafters will help eliminate
wind flap and water pooling.
• When adding walls we recommend Aussie
Traveller’s Anti Flap Kit with built in wall
attachment system.
• To avoid excessive force being exerted on
ratchet mechanism do not remove support arm
from bottom bracket until ratchet lever has been
placed in down (roll out) position. Refer to label on
support arm. Return ratchet lever to travel position
when arm is replaced.
1300 663 868 | enquiries@aussietraveller.com.au | aussietraveller.com.au
BRISBANE SHOWROOM: 11-15 Oasis Court, Clontarf QLD 4019 | MELBOURNE SHOWROOM: 235 Barry Road, Campbellfield VIC 3061
GENERAL MAINTENANCE
GENERALTIPS
GENERALTIPS
DO NOT....
Table of contents