manuals.online logo
Brands
  1. Home
  2. •
  3. Brands
  4. •
  5. Automationdirect.com
  6. •
  7. Transducer
  8. •
  9. Automationdirect.com AcuAmp 3ACT Series User manual

Automationdirect.com AcuAmp 3ACT Series User manual

Part Number Key
AutomationDirect.com (ADC)
3505 Hutchinson Road, Cumming, GA 30040
Phone: (800) 633-0405 or (770) 889-2858
3ACT/3ACTR
SERIES
INSTALLATION
INSTRUCTIONS
Quick Start Guide
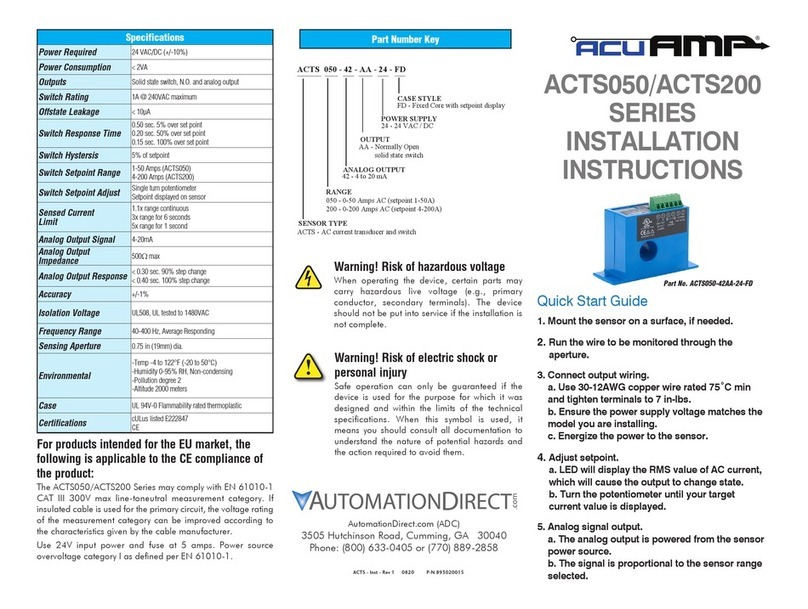
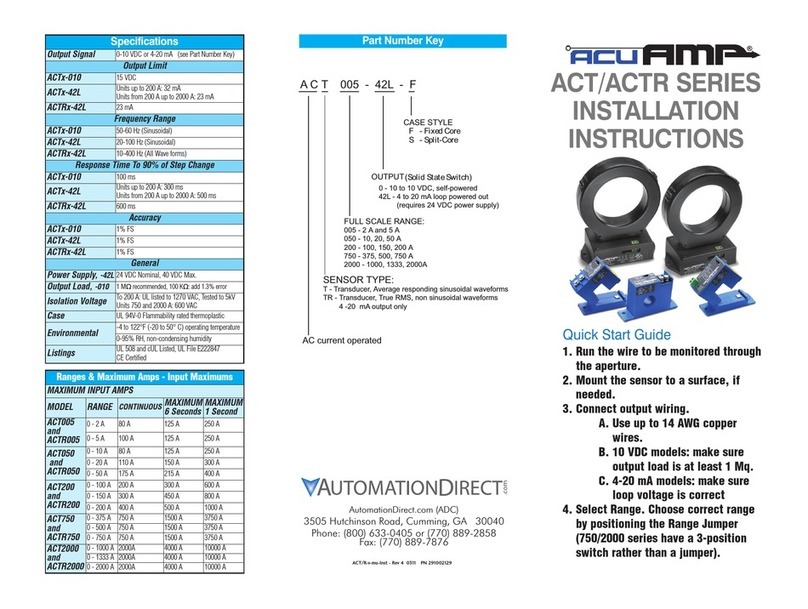
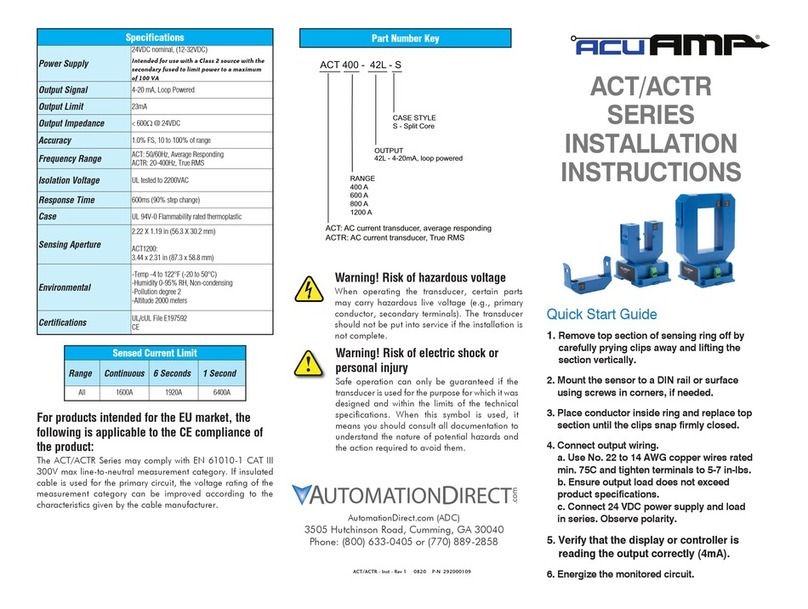
1. Mount the 3ACT/3ACTR Current Transducer to a
DIN rail or panel in a suitable enclosure.
2. With monitored load off, install each phase
through the sensing windows. Designate one
phase as A, B, and C.
3. Select the current range using the slide
switch.
4. Connect output terminals + and - using 22-14
AWG copper wires rated 75/90°C. Tighten to 5-7
inch-pounds torque.
5. Connect power supply voltage to terminals 9-10.
6. The output will be proportional to the current in
each phase, plus one which is the average of the
three.
7. Any of the four analog signals can be used
independently, or all four can be used at the same
time.
3ACT030 - 42 - 24 - F
3ACT: 3-phase AC current transducer, average responding
3ACTR: 3-phase AC current transducer, True RMS
OUTPUT SIGNAL
HOUSING TYPE
CURRENT RANGES
030 - 0-10, 0-15 and 0-30A
100 - 0-30, 0-50, and 0-100A
200 - 0-100, 0-150 and 0-200A
F - Fixed Core
42 - 4-20mA
POWER SUPPLY
24 - 24 VAC/DC (non-isolated)
®
3ACT/3ACTR - Inst - Rev 1 0820 P-N 292000612
Specifications
Power Supply
24 VAC/DC ( +/- 10%), Intended for use with a Class
2 source with the secondary fused to limit power to a
maximum of 100 VA
Note: Power Supply and output signal ARE NOT
isolated. Do not connect the negative terminals
to a common point.
Power Consumption < 6.0 VA
Output Signals 4-20mA
Four outputs, three proportional to the current in that
phase, one an average of all three.
Output Limit 20.8 mA
Output Impedance 500Ωmaximum
Accuracy 1.0% FS
Response Time 220ms (90% step change)
Frequency Range 3ACT: 50/60Hz, Average Responding
3ACTR: 30-100Hz, True RMS
Sensed Current Limit
1.1x range continuous
3x range for 6 seconds
6x range for 1 second
Isolation Voltage UL tested to 1240VAC
Sensing Apertures 0.74 in (18.8 mm) dia.
Case UL 94V-0 Flammability rated thermoplastic
Environmental
-Temp -4 to 122°F (-20 to 50°C)
-Humidity 0-95% RH, Non-condensing
-Pollution degree 2
-Altitude 2000 meters
Certifications cULus listed E197592
CE
Warning! Risk of electric shock or
personal injury
Safe operation can only be guaranteed if
the transducer is used for the purpose for
which it was designed and within the limits
of the technical specifications. When this
symbol is used, it means you should consult
all documentation to understand the nature
of potential hazards and the action required
to avoid them.
Warning! Risk of hazardous voltage
When operating the transducer, certain parts
may carry hazardous live voltage (e.g., primary
conductor, secondary terminals). The transducer
should not be put into service if the installation is
not complete.
For products intended for the EU market, the
following is applicable to the CE compliance of
the product:
The 3ACT/3ACTR Series may comply with EN 61010-1 CAT III
300V max line-to-neutral measurement category. If insulated
cable is used for the primary circuit, the voltage rating of the
measurement category can be improved according to the
characteristics given by the cable manufacturer.
Part No. 3ACT030-42-24-F
Troubleshooting
1. Sensor has no output.
A. Power supply is not energized or connected to the transducer.
Check voltage at terminals 9 and 10. There is no isolation
between the power and the output signals.
B. The monitored circuit is not energized or drawing current.
Check that the monitored circuit is energized.
C. Polarity is not properly matched.
The output signals are polarity sensitive, and the result
would be no signal to the controller or whatever is reading
the transducer outputs.
2. Output signal too low.
A. The transducer range may be too high to read the monitored
circuit current.
Select a lower range using the Range Selection Switch, use
a model with a lower range, or loop each conductor through
the sensing windows to increase the current through each
aperture.
B. Power supply may not have enough capacity to operate the
transducer outputs.
Use a power supply with at least 6VA available to operate
the transducer.
3. Outputs are always at the minimum (4mA).
The monitored load is not energized or is not AC.
Be sure that the monitored circuit is AC (3ACT 50/60 Hz,
3ACTR 30 to 100 hertz).
4. Outputs are always at the maximum (20mA).
The monitored load is drawing more current than the transducer
range.
Select a model with a higher range, or set the range selection
to a higher range. Be very careful when selecting the model
to suit the application. Check the range selection slide
switch. Check the actual current used with a hand-held
ammeter and set the range accordingly.
Description
The 3ACT/3ACTR Series current transducers are intended to
monitor current of three phase loads. They provide an analog
signal proportional to the current in each of the three phases,
and another which will be proportional to the average of the
three phase currents. The transducer can be mounted on a
back panel using screws through the mounting holes in the
base or snapped onto a 35mm DIN rail. Each model can be
set for three current measurement ranges.
Wiring
Power Supply
Connect power supply to transducer as shown in the wiring
diagram. Use 75/90°C rated copper wire. Tighten terminals to
5-7 inch-pounds torque. Use a Class 2 power limited source
fused to limit power to a maximum of 100 VA.
Output Signal
Observe polarity and connect each 4-20 mA output signal to
controller or display using 75/90°C rated copper wire. Tighten
the terminals on the transducer to 5-7 in-lbs torque. Confirm
that the connected load impedance is less than 500 ohms.
Monitored Circuit
Each of the three phases passes through the three windows
of the top section. All conductors should pass through the
sensor in the same direction (from the front or the back) for
appearance, but not required for accuracy or reliability. If the
phases use multiple conductors, all wires of one phase must
pass through the same sensing window or aperture.
The transducer is designed to monitor circuits, whether the
conductor is insulated or bare. Each aperture has an inside
diameter of 0.74" (18.8 mm), allowing 4/0 THHN (120 mm²)
to pass through easily. Centering the conductor in the aperture
is not necessary.
NC NO
12 345678
4-20 mA
Outputs
LOW MID HIGH
RANGE
SELECTION
SWITCH
POWER
NO POLARITY
++ ++
+-
PLC,
Controller, etc.
9
10
MONITORED CIRCUIT CONDUCTORS
--
--
ABCAverage
Top View
ABC
Wiring Schematic Drawing
Note: Power supply and output signal ARE NOT isolated. Do not connect the negative ter-
minals to a common point.

This manual suits for next models

1

Other Automationdirect.com Transducer manuals

Automationdirect.com ACT050 User manual

Automationdirect.com

Automationdirect.com ACT050 User manual

Automationdirect.com AcuAMP ACT Series User manual

Automationdirect.com

Automationdirect.com AcuAMP ACT Series User manual

Automationdirect.com AcuAMP ACTS050 Series User manual

Automationdirect.com

Automationdirect.com AcuAMP ACTS050 Series User manual

Popular Transducer manuals by other brands

Comet P0102 instruction manual

Comet

Comet P0102 instruction manual

Simrad ES38-12 -  REV C Installation

Simrad

Simrad ES38-12 - REV C Installation

Airmar Tilted Element B164 Owner's guide and installation instructions

Airmar

Airmar Tilted Element B164 Owner's guide and installation instructions

HBM T20WN Mounting instructions

HBM

HBM T20WN Mounting instructions

The Guitammer Company BK-LFE supplementary guide

The Guitammer Company

The Guitammer Company BK-LFE supplementary guide

S+S Regeltechnik PREMASGARD 111x manual

S+S Regeltechnik

S+S Regeltechnik PREMASGARD 111x manual

S+S Regeltechnik THERMASGARD MWTM Series Operating Instructions, Mounting & Installation

S+S Regeltechnik

S+S Regeltechnik THERMASGARD MWTM Series Operating Instructions, Mounting & Installation

Pulsar 3 instruction manual

Pulsar

Pulsar 3 instruction manual

Mastech CT300 Operator's manual

Mastech

Mastech CT300 Operator's manual

KEPO KPT-1420A specification

KEPO

KEPO KPT-1420A specification

Siemens SENTRON T 7KG966 Product information

Siemens

Siemens SENTRON T 7KG966 Product information

Setra Systems 526 installation guide

Setra Systems

Setra Systems 526 installation guide

TRANSDUCERS direct CirrusSense TDWLB quick start guide

TRANSDUCERS direct

TRANSDUCERS direct CirrusSense TDWLB quick start guide

Kobold KP46 Series quick start guide

Kobold

Kobold KP46 Series quick start guide

Copal PA-838-D Series instruction manual

Copal

Copal PA-838-D Series instruction manual

Badger Meter Dynasonics TFX-500w installation guide

Badger Meter

Badger Meter Dynasonics TFX-500w installation guide

Siemens SITRANS 7ML1100 Compact operating instructions

Siemens

Siemens SITRANS 7ML1100 Compact operating instructions

celesco PT1 Series Replacement instructions

celesco

celesco PT1 Series Replacement instructions

manuals.online logo
manuals.online logoBrands
  • About & Mission
  • Contact us
  • Privacy Policy
  • Terms and Conditions

Copyright 2025 Manuals.Online. All Rights Reserved.