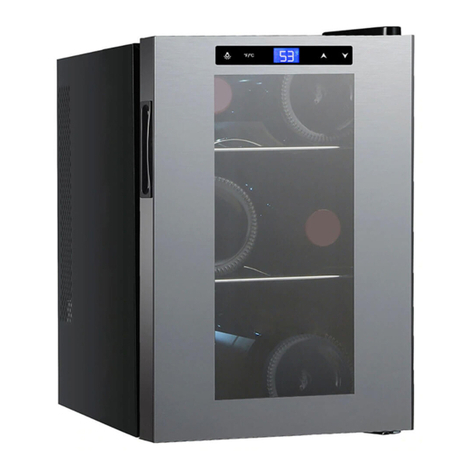
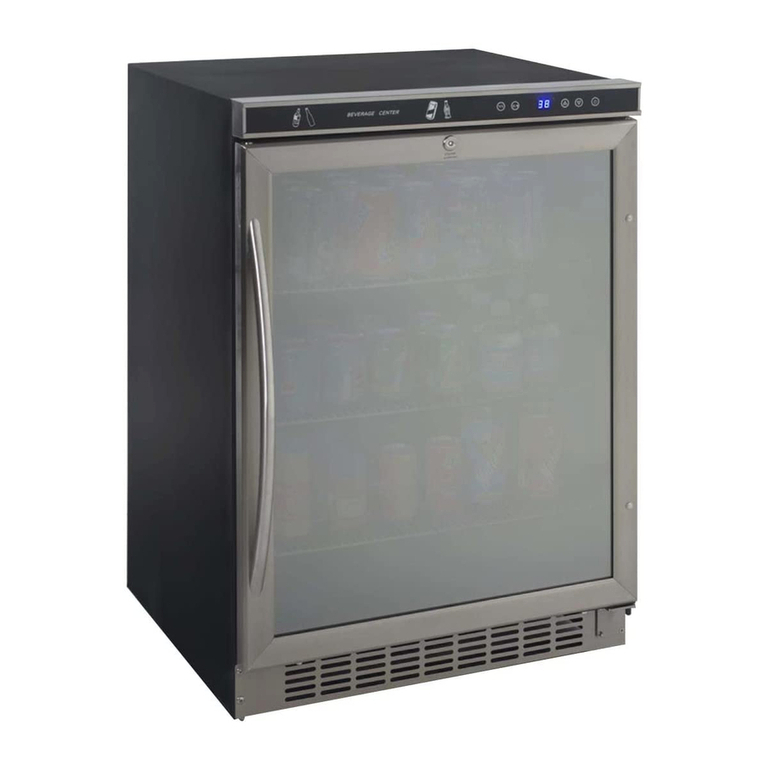
Avanti WBC27W3S User manual

INSTRUCTION MANUAL
MANUAL DE INSTRUCCIONES
MANUEL D’INSTRUCTIONS
Model Number / No. de Modelo / Modéle:
WBC27W3S
Wine and Beverage Center
Vinera / Enfriador de Bebidas
Cellier / Refroidisser de Breuvages
BEFORE USE, PLEASE READ AND FOLLOW ALL SAFETY RULES AND OPERATING
INSTRUCTIONS.
Avanti Products has a policy of continuous improvement on its products and reserves the right to change materials and
specifications without notice.
Avanti Products LLC
P.O. Box 520604 - Miami, Florida 33152
www.avantiproducts.com

2
TABLE OF CONTENTS
Appliance Safety
3
Important Safeguides
4
Help us Help You
5
Parts and Features
6
Important Safety Instructions
7
Electrical Connection / Extension Cord
7
Installation Instructions
8
Before Using Your Appliance
8
Installation of Your Appliance
8
Built-in Cabinet Instructions
8
Installing the Stainless Steel Handles
9
Operating Your Appliance
10 – 11
ON / OFF Power
Light Setting
Temperature Setting
Warning System
Care and Maintenance
12
Cleaning Your Appliance
Power Failure
Moving Your Appliance
Energy Saving Tips
Charcoal Filtration System
Troubleshooting Guide
13
Service for Your Appliance
14
Wiring Diagram
14
Your Avanti Products Warranty
15
Instrucciones en Español
16 – 25
Instructions en Français
26 - 38
Registration Form Last
Page

3
APPLIANCE SAFETY
Your safety and the safety of others are very important.
We have provided many important safety messages in this manual and on your appliance. Always
read and obey all safety messages.
This is the Safety Alert Symbol. This symbol alerts you to potential hazards that
can kill or injure you and others. All safety messages will follow the Safety
Alert Symbol and either the words “DANGER”, “WARNING” or “CAUTION”.
Danger means that failure to heed this
safety statement may result in severe
personal injury or death.
Warning means that failure to heed this
safety statement may result in extensive
product damage, serious personal injury, or
death.
Caution means that failure to heed this
safety statement may result in minor or
moderate personal injury, or property or
equipment damage.
All safety messages will alert you do what the potential hazard is, tell you how to reduce the chance of
injury, and let you know what can happen if the instructions are not followed.
REFRIGERANT GAS WARNINGS / AVERTISSEMENTS GAZ REFRIGERANT
DANGER - Risk of fire or explosion. Flammable refrigerant used.
DO NOT use mechanical devices to defrost wine chiller. DO NOT puncture refrigerant tubing.
DANGER - Risk of fire or explosion. Flammable refrigerant used.
To be repaired only by trained service personnel. DO NOT puncture refrigerant tubing.
CAUTION - Risk of fire or explosion. Flammable refrigerant used.
Consult repair manual / owner’s guide before attempting to service
this product. All safety precautions must be followed.
CAUTION - Risk of fire or explosion. Dispose of property in accordance
with federal or local regulations. Flammable refrigerant used.
CAUTION - Risk of fire or explosion due to puncture of refrigerant tubing;
Follow handling instructions carefully. Flammable refrigerant used.
CAUTION-To Prevent A Child From Being Entrapped, Keep Out Of Reach Of Children And Not
In The Vicinity Of Wine Chiller.
CAUTION-Risk of Fire

4
IMPORTANT SAFEGUIDES
Before the appliance is used, it must be properly positioned and installed as
described in this manual, so read the manual carefully. To reduce the risk of fire,
electrical shock or injury when using the appliance, follow basic precaution,
including the following:
•
Plug into a grounded 3-prong outlet, do not remove grounding prong, do not use an adapter, and
do not use an extension cord.
•
Replace all panels before operating.
•
It is recommended that a separate circuit, serving only your appliance be provided. Use
receptacles that cannot be turned off by a switch or pull chain.
•
Never clean appliance parts with flammable fluids. These fumes can create a fire hazard or
explosion. And do not store or use gasoline or other flammable vapors and liquids in the vicinity of
this or any other appliance. The fumes can create a fire hazard or explosion.
•
Before proceeding with cleaning and maintenance operations, make sure the power line of the
unit is disconnected.
•
Do not connect or disconnect the electric plug when your hands are wet.
•
Unplug the appliance or disconnect power before cleaning or servicing. Failure to do so can result
in electrical shock or death.
•
Do not attempt to repair or replace any part of your appliance unless it is specifically
recommended in this material. All other servicing should be referred to a qualified technician.
FOLLOW WARNING CALL OUTS BELOW ONLY WHEN APPLICABLE TO YOUR MODEL
•
Use two or more people to move and install appliance. Failure to do so can result in back or other
injury.
•
To ensure proper ventilation for your appliance, the front of the unit must be completely
unobstructed. Choose a well-ventilated area with temperatures above 60°F (16°C) and below
90°F (32°C). This unit must be installed in an area protected from the element, such as wind, rain,
water spray or drips.
•
The appliance should not be located next to ovens, grills or other sources of high heat.
•
The appliance must be installed with all electrical, water and drain connections in accordance with
state and local codes. A standard electrical supply (115 V AC only, 60 Hz), properly grounded in
accordance with the National Electrical Code and local codes and ordinances is required.
•
Do not kink or pinch the power supply cord of appliance.
•
The fuse (or circuit breaker) size should be 15 amperes.
•
It is important for the appliance to be leveled in order to work properly. You may need to make
several adjustments to level it.
•
Never allow children to operate, play with or crawl inside the appliance.
•
Do not use solvent-based cleaning agents of abrasives on the interior. These cleaners may
damage or discolor the interior.
•
Do not use this apparatus for other than its intended purpose.
5
HELP US HELP YOU...
Read this guide carefully.
It is intended to help you operate and maintain
your new unit properly.
Keep it handy to answer your questions.
If you don't understand something or you
need more assistance, please call:
Avanti Customer Service
800-220-5570
Keep proof of original purchase date (such as
your sales slip) with this guide to establish the
warranty period.
CAUTION:
THESE UNITS ARE NOT
DESIGNED FOR THE STORAGE
OF MEDICINE OR OTHER
MEDICAL PRODUCTS.
Write down the model and serial numbers.
You'll find them on a plate located on the rear
outside wall of unit.
Please write these numbers here:
_
Date of Purchase
_
Model Number
_
Serial Number
Use these numbers in any correspondence or
service calls concerning your unit.
If you received a damaged unit, immediately
contact the dealer (or builder) that sold you the
unit.
Save time and money. Before you call for
service, check the Troubleshooting Guide. It
lists causes of minor operating problems that
you can correct yourself.
IF YOU NEED SERVICE
We're proud of our service and want you to be
pleased. If for some reason you are not happy
with the service you receive, here are some
steps to follow for further assistance.
FIRST, contact the people who serviced your
unit. Explain why you are not pleased. In most
cases, this will solve the problem.
NEXT, if you are still not pleased, write all the
details, including your telephone number, and
send it to:
CustomerService
Avanti Products
10880 NW 30 Street
Miami, FL 33172 USA

6
PARTS & FEATURES
1
Left Upper hinge
2
Left Zone Control Panel
3
Shelves (6)
4
Right Zone Control Panel
5
Right Upper hinge
6
Right Door
7
Right Door handle
8
Right Lower hinge
9
Adjustable feet
10
Kick Plate
11
Door Seal
12
Carbon Filter Assembly(2)
13
Left Door Handle
14
Left Door

7
IMPORTANT SAFETY INSTRUCTIONS
WARNING
To reduce the risk of fire, electrical shock,
or injury when using your appliance, follow
these basic precautions:
•
Read all instructions before using the appliance.
•
DANGER or WARNING: Risk of child entrapment.
Child entrapment and suffocation are not problems of the past. Junked or abandoned
appliances are still dangerous . . . even if they will “just sit in the garage a few days”.
•
Before you throw away your old appliance: Take off the door. Leave the shelves
in place so that children may not easily climb inside.
•
Never allow children to operate, play with, or crawl inside the appliance.
•
Never clean appliance parts with flammable fluids. The fumes can create a fire
hazard or explosion.
•
Do not store or use gasoline or any other flammable vapors and liquids in the vicinity
of this or any other appliance. The fumes can create a fire hazard or explosion.
-Save these instructions-
ELECTRICALCONNECTION
Warning
Improper use of the grounded plug can result in the risk of electrical shock. If the power cord is
damaged, have it replaced by an authorized Avanti Products service center.
This appliance should be properly grounded for your safety. The power cord of this appliance is
equipped with a three-prong plug which mates with standard three prong wall outlets to minimize the
possibility of electrical shock.
Do not under any circumstances cut or remove the third ground prong from the power cord supplied.
For personal safety, this appliance must be properly grounded.
This appliance requires a standard 115/120 Volt AC ~/60Hz electrical ground outlet with three-prong.
Have the wall outlet and circuit checked by a qualified electrician to make sure the outlet is properly
grounded. When a standard 2-prong wall outlet is encountered, it is your responsibility and obligation
to have it replaced with a properly grounded 3-prong wall outlet.
The cord should be secured behind the appliance and not left exposed or dangling to prevent
accidental injury.
The appliance should always be plugged into its own individual electrical outlet which has a voltage
rating that matches the rating label on the appliance. This provides the best performance and also
prevent overloading house wiring circuits that could cause a fire hazard from overheated. Never
unplug the appliance by pulling the power cord. Always grip the plug firmly and pull straight out from
the receptacle. Repair or replace immediately all power cords that have become frayed or otherwise
damaged. Do not use a cord that shows cracks or abrasion damage along its length or at either end.
When moving the appliance, be careful not to damage the power cord.
EXTENSIONCORD
Because of potential safety hazards under certain conditions, it is strongly recommended that you do
not use an extension cord with this appliance. However, if you must use an extension cord it is
absolutely necessary that it be a UL/CUL-Listed, 3-wire grounding type appliance extension cord
having a grounding type plug and outlet and that the electrical rating of the cord be 115 volts and at
least 10 amperes.

8
INSTALLATION INSTRUCTIONS
BEFORE USING YOUR APPLIANCE
•
Remove the exterior and interior packing.
•
Check to be sure you have all of the following parts:
1
Instruction Manual
6
Wooden Shelves
1
Wire Shelf
2
Glass Shelves
2
Handles
•
Before connecting this appliance to the power source, let it stand upright for approximately 2
hours. This will reduce the possibility of a malfunction in the cooling system from handling
during transportation.
•
Clean the interior surface with lukewarm water using a soft cloth.
INSTALLATION OF YOUR APPLIANCE
•
This appliance is designed to be for free standing installation or built-in (fully recessed).
•
Place your appliance on a floor that is strong enough to support it when it is fully loaded. To
level your appliance, adjust the front leveling legs at the bottom of the appliance.
•
Locate the appliance away from direct sunlight and sources of heat (stove, heater, radiator,
etc.). Direct sunlight may affect the acrylic coating and heat sources may increase electrical
consumption. Extreme cold ambient temperatures may also cause the unit not to perform
properly.
•
Avoid locating the unit in moist areas.
•
Plug the appliance into an exclusive, properly installed-grounded wall outlet. Do not under
any circumstances cut or remove the third (ground) prong from the power cord. Any questions
concerning power and/or grounding should be directed toward a certified electrician or an
authorized Avanti Products service center.
BUILT – IN CABINET INSTRUCTIONS
This unit is designed for both built-in or free standing installation. If you plan to use this unit in a built-
in application please follow the requirements shown to the right.
Cabinet Opening Dimensions
IN (min)
CM (min)
Width
24
61
Depth
24
61
Height
34 ½
87.6

9
INSTALLING STAINLESS STEEL HANDLE
This beverage cooler includes a stainless steel handle that is not required to operate this unit. To install
the
handle please follow the below instructions:
1.
Pull away the door gasket in the area where the handle is to be installed as shown below in
Illustration # 1. The gasket is easily displaced by hand, no tools are necessary.
2.
Align the handle with the screws pre-installed on the backside of the door. Tighten the
screws using a Phillips head screwdriver until the handle sets both flush and secured tightly
against the door frame. (DO NOT overtighten as this will cause damage to the handle
assembly).
3.
Replace the door gasket to its original position.
①Gasket ②Screwdriver③Handle

10
OPERATING YOUR APPLIANCE
It is recommended you install the appliance in a place where the ambient temperature is between 72-
78
degrees Fahrenheit. If the ambient temperature is above or below recommended temperatures,
the
performance of the unit may be affected. For example, placing your unit in extreme cold or hot
conditions may cause interior temperatures to fluctuate. The average temperature range of 40-65 degrees
Fahrenheit may
not be reached.
Temperature Ranges by Side / Zone
WINE Chiller (LEFT SIDE)
37º - 65º F
4º - 18º C
BEVERAGE COOLER (RIGHT SIDE)
40º - 65º F
3º - 18º C
Recommended Temperatures for Chilling Wine.
Red Wines
58 - 65 ºF
15 - 18 ºC
Dry / White Wines
48 - 57 ºF
10 - 14 ºC
Rose Wines
49 - 51 ºF
9 – 11 ºC
Sparkling Wines
40 - 47 ºF
5 - 8 ºC
ON/OFF POWER
- Press and hold for 2 seconds on control panel to turn on or turn off the cooler, when cooler is
turned off, the appliance will stop working.
LIGHT SETTING
- There are two light modes, press and hold for 3 seconds to select light mode.
1. Light on and off mode: The default setting of light will be controlled by sensor and LCD screen
will show , when door is opened, the light will turn on automatically, when door is closed the light will
be turned off.
2. Light on model: Press and hold for 3 seconds to enter light on mode, when in this mode,
LCD screen will display and light will always be on.
TEMPERATURE SETTING
- Press or to adjust the temperature of the appliance, and each press on the button will
alter the temperature by 1°F。
- Press and together and hold for 3 seconds to change temperature display from
Celsius to Fahrenheit
Wine Chiller &Beverage Cooler Control Panel
°C/°F

11
WARNING SYSTEM
1. Door open alarm: When door has been opened for over 5 minutes, door open alarm will be on and
LCD screen display and beep 3 times every 5 seconds, press any key or close the door to stop the
alarm .
2. Low temperature alarm: When inside temperature is below 2°C for over 3 hours, it will beep to
alarm; Press any key to stop the beeping alarm.
3. High temperature alarm: When inside temperature is above 25°C for over 6 hours, it will beep to alarm;
Press any key to stop the beeping alarm.

12
CARE AND MAINTENANCE
CLEANING YOUR APPLIANCE
•
Turn off the power, unplug the appliance, and remove all items including shelves.
•
Wash the inside surfaces with a warm water and baking soda solution. The solution should be
about 2 tablespoons of baking soda to a quart of water.
•
Wash the shelves with a mild detergent solution.
•
Wring excess water out of the sponge or cloth when cleaning area of the controls, or any
electrical parts.
•
Wash the outside cabinet with warm water and mild liquid detergent. Rinse well and wipe dry with
a clean soft cloth.
•
Do not use steel wool or steel brush on the stainless steel. These will contaminate the stainless
steel with steel particles and rusting may occur.
POWERFAILURE
•
Most power failures are corrected within a few hours and should not affect the temperature of
your appliance if you minimize the number of times the door is opened. If the power is going to be
off for a longer period of time, you need to take the proper steps to protect your contents.
MOVING YOUR APPLIANCE
•
Remove all items.
•
Securely tape down all loose items (shelves) inside your appliance.
•
Tape the door shut.
•
Be sure the appliance stays secure in the upright position during transportation. Also protect
outside of appliance with a blanket, or similar item.
ENERGY SAVING TIPS
•
The appliance should be located in the coolest area of the room, away from heat producing
appliances, and out of the direct sunlight.
CHARCOAL FILTRATION SYSTEM
Your wine is a living object that breathes through the cork of its bottle. In order to preserve the quality
and taste of your fine wines, they must be stored at the ideal temperature and ambient
conditions.
Your cellar is equipped with an active charcoal filtration system to ensure air purity, cooling
efficiency,
and to maintain an odor free cabinet for the storage of your good wine. The filter assembly
is located
at the rear panel inside your cooler.
Keep in mind, that this filter must be changed every 12 months.
To replace your filter:
1
Remove the bottles / cans stored on the two (2)
shelves in front of the filter.
2
Remove the shelves and set aside to be replaced
once you have changed the filter
3
Hold the filter and turn it at 90 degrees in the counter-
clockwise direction and then pull it out.
4
Remove the existing filter and replace with a new
one.
5
Put the new filter into the hole and then turn the filter
at 90 degrees in clockwise direction..

13
PROBLEMS WITH YOUR APPLIANCE?
You can solve many common problems easily, saving you the cost of a possible service call. Try the
suggestions below to see if you can solve the problem before calling the servicer.
TROUBLESHOOTING GUIDE
PROBLEM
POSSIBLE CAUSE
Appliance does not operate.
Not plugged in.
The appliance is turned off.
The circuit breaker tripped or a blown fuse.
Appliance is not cold enough.
Check the temperature control setting.
External environment may require a higher
setting.
The door is opened too often.
The door is not closed completely.
The door gasket does not seal properly.
Turns on and off frequently.
The room temperature is hotter than normal.
A large amount of contents has been added to
the unit.
The door is opened too often.
The door is not closed completely.
The temperature control is not set correctly.
The door gasket does not seal properly.
The light does not work.
Not plugged in.
The circuit breaker tripped or a blown fuse.
The light button is “OFF”.
Vibrations.
Check to assure that the appliance is level.
The appliance seems to make too much noise.
The rattling noise may come from the flow of the
refrigerant, which is normal.
As each cycle ends, you may hear gurgling
sounds caused by the flow of refrigerant in your
appliance.
Contraction and expansion of the inside walls
may cause popping and crackling noises.
The appliance is not level.
The door will not close properly.
The appliance is not level.
The gasket is dirty.
The shelves are out of position.
Display flashes Error message “H1 or H2”Temperature sensor failure.
Contact the Avanti Service Department
1 - 800 – 220 - 5570
Display flashes Error message “L1 or L2”
Temperature sensor failure.
Contact the Avanti Service Department
1 - 800 – 220 - 5570
Display flashes Error message “F1 or F2” Inner Fan Failure.
Contact the Avanti Service Department
1 - 800 – 220 - 5570

14
SERVICE FOR YOUR APPLIANCE
We are proud of our customer service organization and the network of professional service
technicians that provide service on your Avanti appliances. With the purchase of your Avanti
appliance, you can have the confidence that if you ever need additional information or assistance, the
Avanti Products Customer Service team will be here for you. Just call us toll-free.
AVANTI PRODUCTS CUSTOMER SERVICES
Product Information
800-323-5029
Whatever your questions are about our products,
help is available.
Part Orders
800-220-5570
You may order parts and accessories that will be
delivered directly to your home by personal
check, money order, Master Card, or Visa.
In-Home Repair Service
800-220-
5570 An Avanti Products authorized service center will
provide expert repair service, scheduled at a time
that is convenient for you. Our trained servicers
know your appliance inside and out.
WIRING DIAGRAM
Electrocircuit Line Diagram

15
YOUR AVANTI PRODUCTS
WARRANTY
Staple your sales receipt here. Proof of original
purchase date is needed to obtain service under
warranty.
WHAT IS COVERED – LIMITED ONE-YEAR W ARRANTY
Avanti Products warrants that the product is free from defects in materials and/or workmanship for a period of
twelve (12) months from the date of purchase by the original owner. The foregoing timeline begins to run upon
the date of purchase, and shall not be stalled, tolled, extended, or suspended for any reason whatsoever unless
described in detail in the warranty document. For one year from the date of purchase by the original owner,
Avanti products will, at its option, repair or replace any part of the product which proves to be defective in
material or workmanship under normal use. Avanti Products will provide you with a reasonably similar product
that is either new or factory refurbished. During this period Avanti Products will provide all parts and labor
necessary to correct such defects free of charge, so long as the product has been installed and operated in
accordance with the written instructions in this manual. In rental or commercial use, the warranty period is 90
days. All Avanti appliances of 4.2 cubic feet capacity or less must be brought/sent to the appliance service
center for repair.
LIMITED SECOND THROUGH FIFTH YEAR W ARRANTY
For the second through the fifth year from the date of original purchase, Avanti Products will provide a
replacement compressor free of charge due to a failure. You are responsible for the service labor and freight
charges. In rental or commercial use, the limited compressor warranty is one year and nine months. Costs
involved to move the product to the service center and back to the user’s home, as maybe required, are the
user’s responsibility.
WARRANTY EXCLUSIONS / WHAT IS NOT COVERED:
The warranty coverage described herein excludes all defects or damage that are not the direct fault of Avanti
Products, including without limitation, one or more of the following:
•
A failure to comply with any applicable state, local, city, or county electrical, plumbing and/or building codes,
regulations, or laws, including failure to install the product in strict conformity with local fire and building codes
and regulations.
•
Any external, elemental and/or environmental forces and factors, including without limitation, rain, wind, sand,
floods, fires, mud slides, freezing temperatures, excessive moisture or extended exposure to humidity,
lightning, power surges, structural failures surrounding the appliance, and acts of God.
•
Content losses of food or other content due to
spoilage.
•
Incidental or consequential damages
•
Parts and labor costs for the following will not be
considered as warranty:
•
Evaporator doors, door springs, and/or frames.
•
Inner door panels, door shelves, door rails,
and/or door supports.
•
Light bulbs and/or plastic housing.
•
Plastic cabinet liners.
•
Punctured evaporator that voids the warranty on
the complete sealed system.
•
Shipping and handling costs associated with the
replacement of the unit.
•
Repairs performed by unauthorized servicers.
•
Service calls that are related to external problems,
such as abuse, misuse, inadequate electrical
power, accidents, fire, floods, or any other acts of
God.
•
Failure of the product if it is used for other than it
intended purpose.
•
The warranty does not apply outside the
Continental USA.
•
Surcharges including but not limited to, any after
hour, weekend, or holiday service calls, tolls, ferry
trip charges, or mileage expense for service calls to
remote areas.
In no event shall Avanti Products have any liability or responsibility whatsoever for damage to surrounding
property, including cabinetry, floors, ceilings, and other structures and/or objects around the product. Also
excluded from this warranty are scratches, nicks, minor dents, and other cosmetic damages on external surfaces
and exposed parts; Products on which the serial numbers have been altered, defaced or removed; service visits
for customer education, or visits where there is nothing wrong with the product; correction of installation problems
(you are solely responsible for any structure and setting for the product, including all electrical, plumbing and/or
other connecting facilities, for proper foundation/flooring, and for any alterations including without limitation
cabinetry, walls, floors, shelving etc., as well as the resetting of breakers or fuses.
OUT OF WARRANTY PRODUCT
Avanti Products is under no obligation, at law or otherwise, to provide you with any concessions, including
repairs, pro-rates, or product replacement, once this warranty has expired.
WARRANTY – REFRIGERATION - COMPRESSOR

16
MEDIDAS DE SEGURIDAD IMPORTANTES
Antes de enfriador de bebidas se utiliza, debe ser colocado correctamente e
instalado como descrito en este manual, así que lea cuidadosamente el manual.
Para reducir el riesgo de incendio, descarga eléctrica o lesiones al utilizar el
enfriador de bebidas, Siga las precauciones básicas, incluyendo las siguientes
•Enchufe en unas 3 clavijas con conexión a tierra toma de corriente, hacer No retire de puesta a tierra
púa, hacer No utilice un adaptador, y no utilice un cable de extensión
• Reemplazar todos los paneles antes operativos
• Eso se recomienda usar un circuito separado, que sólo sirve a su enfriador de bebidas, ser
proporcionado. Use recipientes ese no poder ser desactivado por un interruptor o cadena
• Nunca limpia electrodoméstico piezas con líquidos inflamables. Estos vapores pueden crear un riesgo
de incendio o explosión. Y no almacene ni use gasolina u otros vapores y líquidos inflamables en la
proximidad de este o cualquier otro electrodoméstico. Los vapores pueden crear un riesgo de
incendio o explosión.
• Antes de proceder con las operaciones de limpieza y mantenimiento, asegúrese de que la línea de
alimentación de la unidad se desconecta.
• hacer No conecte o desconecte el enchufe eléctrico con las manos mojadas
• Desenchufe el electrodoméstico o desconectar la alimentación antes de la limpieza o el
mantenimiento. El no hacerlo puede provocar una descarga eléctrica o la muerte.
• hacer No intente reparar o reemplazar cualquier parte de su electrodoméstico a menos que se
recomiende específicamente en este material. Cualquier otro servicio debe ser realizado por un
técnico cualificado.
• Se recomienda utilizar dos o más personas para mover e instalar el electrodoméstico. El aparato es
pesado y puede resultar en daños de la espalda u otras lesiones.
• Para garantizar una ventilación adecuada para su electrodoméstico, la unidad debe estar
completamente despejada. Elija un área bien ventilada con temperaturas superiores a 55ºF (13ºC) y
por debajo de 90ºF (32ºC). Esta unidad debe ser instalada en un área protegida de los elementos,
tales como el viento, la lluvia, rocío de agua o luz de sol.
• El electrodoméstico no debe colocarse cerca de hornos, parrillas u otras fuentes de calor.
• El electrodoméstico debe ser instalado con todas las conexiones eléctricas, de agua y de desagüe
según los códigos estatales y locales. Hace falta un suministro eléctrico estándar (sólo 115 V CA, 60
Hz), debidamente conectada a tierra de acuerdo con el Código Eléctrico Nacional y los códigos y
ordenanzas locales.
• Hacer No doble ni apriete el cable de alimentación del electrodoméstico.
• Los fusibles (o disyuntor) tamaño debe ser de 15 amperios.
• Eso Es importante que el electrodoméstico a nivelarse con el fin de funcionar correctamente. Puede
que tenga que hacer varios ajustes para nivelarla.
• Toda la instalación debe realizarse de acuerdo con los requerimientos locales de plomería.
• Asegúrese de que los tubos no están aplastar ni dañado durante instalación.
• Compruebe si hay fugas después de la conexión.
• Nunca permita que los niños operen, jueguen o gatear el interior del electrodoméstico
• Hacer No utilice productos de limpieza a base de disolvente-abrasivos en el interior. Estos limpiadores
pueden dañar o decolorar el interior.
• No utilice este electrodoméstico para que no sea su finalidad.
• Do not use this apparatus for other than its intended purpose.
17
Ayúdenos a ayudarte...
Lea detenidamente esta guía.
Se pretende que ayudan a utilizar y mantener su
nuevo electrodoméstico correctamente.
Mantenga a la mano para responder a sus
preguntas.
Si no entiende algo o si necesita más ayuda, por
favor llame a:
Avanti Servicio al Cliente
800-220-5570
Mantenga prueba de la fecha original de compra
(como el recibo de venta) con esta guía para
establecer el período de garantía.
Escribir se establece el modelo y número de
serie.
Los encontrará en una placa situada en la pared
exterior trasera del electrodoméstico.
Por favor, escriba estos números aquí:
_________________________________
Fecha de compra
_________________________________
Número de modelo
_________________________________
Número de serie
Utilice estos números en cualquier
correspondencia o llamadas de servicio con
respecto a su electrodoméstico.
Si ha recibido un electrodoméstico dañado,
póngase inmediatamente en contacto con el
distribuidor (o constructor) que le vendió el
electrodoméstico.
Ahorrar tiempo y dinero. Antes de llamar al
servicio técnico, consulte la Guía de solución de
problemas. En él se enumeran las causas de los
problemas de funcionamiento de menor
importancia que se pueden corregir a sí mismo.
Si necesita servicio
Estamos orgullosos de nuestro servicio y
queremos que usted esté satisfecho. Si por
alguna razón usted no está satisfecho con el
servicio que recibe, aquí hay algunos pasos a
seguir para obtener más ayuda.
PRIMERA, póngase en contacto con las personas
que servicio de reparación del electrodoméstico.
Explicar por qué usted no está satisfecho. En la
mayoría de los casos, esto va a resolver el
problema.
A continuación, si usted todavía no está contento,
escribir todos los detalles, incluyendo su número
de teléfono, y enviarlo a:
PRECAUCIÓN:
ESTE ELECTRODOMÉSTICO NO
ESTÁ DISEÑADO PARA EL
ALMACENAMIENTO DE
MEDICINA U OTROS
PRODUCTOS MÉDICOS.
Servicio al cliente
Avanti Products
10880 NW 30 Street
Miami, FL 33172 EE.UU.

18
PARTES Y CARACTERÍSTICAS
1
Bisagra superior
2
Control de temperatura
3
Repisas (6)
4
Control de temperature
5
Bisagra
6
Puerta
7
Manija
8
Bisagra inferior
9
Pata niveladora
10
Parilla
11
Sello de la Puerta
12
Filtro de Carbón
13
Manija
14
Puerta

19
INSTRUCCIONES DE INSTALACIÓN
ANTES DE UTILIZACIÓN DEL APARATO
•
Retire la envoltura interna y externa.
•
Compruebe para asegurarse de que tiene todas las siguientes partes:
1
Manual de instrucciones
6
Repisas de madera
1
Repisa de alambre
2
Repisas de vidrio
2
Manijas
•
Ante de conectar el aparato a la fuente de alimentación, se deja reposar en posición vertical
durante aproximadamente 2 horas. Esto reducirá la posibilidad de un mal funcionamiento en
el sistema de refrigeración de la manipulación durante el transporte.
•
Limpiar la superficie interior con agua tibia con un paño suave.
INSTALACIÓN DEL APARATO
•
El aparato está diseñado para ser para la instalación de pie o incorporado (totalmente
empotrado).
•
Coloque el aparato sobre un piso que sea lo suficientemente fuerte como para soportar su
peso cuando está totalmente cargado. Para nivelar el aparato, ajuste las patas niveladoras
delanteras en la parte inferior del aparato.
•
Coloque el aparato lejos de luz solar directa y de fuentes de calor (cocina, calefacción,
radiador, etc.). La luz solar directa puede afectar el recubrimiento acrílico y fuentes de calor
puede aumentar el consumo eléctrico. Temperaturas ambiente extremas de frío también
pueden hacer que la unidad no funcione correctamente.
•
Evite colocar la unidad en áreas húmedas.
•
Conecte el aparato a una toma de pared exclusivo, tierra adecuada-instalado. Bajo ninguna
circunstancia corte o retire la tercera pata (tierra) del cable de alimentación. Cualquier
pregunta relacionada con la energía y / o puesta a tierra deben ser dirigidas a un electricista
certificado o un centro de servicio de Avanti Products.
INSTRUCCIONES PARA EMPOTRAR LA UNIDAD
La unidad está diseñada tanto para ser empotrada o para instalación independiente. Si va a utilizar
esta unidad en una aplicación empotrada por favor, siga los requisitos que se muestran a la derecha.
Dimensiones de la apertura
Pulgadas(min)
CM (min)
Ancho
24
61
Profundidad
24”
61
Altura
34 ½
87.6

20
INSTALACIÓN DE LAS MANIJAS
El aparato incluye dos manijas de acero inoxidable que no se requiere para operar esta unidad. Para
instalar las manijas por favor, siga las siguientes instrucciones:
1.
Jale la junta de la puerta en la zona donde el mango debe ser instalado como se muestra
a continuación en la ilustración # 1. La junta está fácilmente desplazada a mano, no
herramientas son necesarias.
2.
Alinea la manija con los tornillos pre-instalados en la parte trasera de la puerta. Apretar los
tornillos con un destornillador de cabeza Phillips hasta que el mango quede asegurado
firmemente contra el marco de la puerta. (No apriete demasiado ya que esto puede causar
daños en el conjunto del mango).
3.
Vuelva a colocar la junta de la puerta a su posición original.
Table of contents
Languages:
Other Avanti Kitchen Appliance manuals

Avanti
Avanti WC500CL User manual

Avanti
Avanti CK36 User manual

Avanti
Avanti WC600CL User manual

Avanti
Avanti WCR496DS User manual

Avanti
Avanti BCA5102SS-1 User manual

Avanti
Avanti WCD52SZ3S User manual

Avanti
Avanti WCF281E3SS User manual

Avanti
Avanti WC602D User manual

Avanti
Avanti Wine Cooler EWC1600M User manual

Avanti
Avanti BCC6Q1BG User manual

Avanti
Avanti WC492D User manual

Avanti
Avanti BD555 User manual

Avanti
Avanti PARTY PUB CB350S User manual

Avanti
Avanti WC412D User manual

Avanti
Avanti BCAD353 User manual

Avanti
Avanti BCA5448 User manual

Avanti
Avanti PPO12X3S User manual

Avanti
Avanti PPO12X3SIS User manual

Avanti
Avanti BCA280 User manual

Avanti
Avanti CK3016 User manual