Avee Sony XM3 Manual
Problem solving
1. Bad ATC reception – reading you two
The most common problem for fresh aviators, is that the microphone is placed too far away
from the mouth. This makes the intercom and radio pick up little or no audio from you, and
this will of course lead to problems. Keep the microphone approx. 6mm from your mouth
at all times – and let the flat side & white dot face your mouth.
A good basic rule is that when you hear yourself well in the intercom, ATC and other
aircrafts hear you well. However – the aircraft intercom and the radio are usually two
separate and independent systems and they behave differently.
2. Intercom squelch setting.
On most GA aircrafts intercoms, the squelch is set manually.
If the first part of the word is clipped – or the intercom squelch is not opening at all – this
must be corrected by adjusting the squelch threshold in the aircraft.
3. Audio in left ear only:
The Avee microphone is set to stereo mode. Set to mono mode to fix this issue.
TECHNICAL SPECIFICATIONS
Document information
Document version: 4.7- September 9th 2022
Valid for products: AveeXM3/XM4 NG (for Sony WH1000XM3/XM4)
Connectors
Headphone connector: 3.5mm - four pin audio
Connector to aircraft interface cable USB C
Bias voltage accepted: 9-16VDC
Microphone
Type: Noise reduction
Output signal: Adjustable with potentiometer
Output signal level: Adjustable between 0.5V RMS and 2V RMS
Default output level: 0.7 V RMS @ 1khz / 74dB SPL
Headphone speaker
Audio level: Adjustable with potentiometer (10-100%)
DISCLAIMER
Avee is an unlicensed third-party accessory and is not affiliated with Bose™or Sony™.
Bose™or Sony™ does not approve or endorse the products manufactured by Avee.
Sony™ XM3/XM4 Edition
The Avee Aviation Microphone
Setup Instructions & User Guide
Tusen takk (which is thank you in Norwegian ) – for purchasing the Avee aviation
microphone ! We hope it gives you as much joy flying with it – as it gives us
designing it - and flying with it!
In this leaflet we will show you how to prepare and connect the Avee microphone
to your headset – and how to use it.
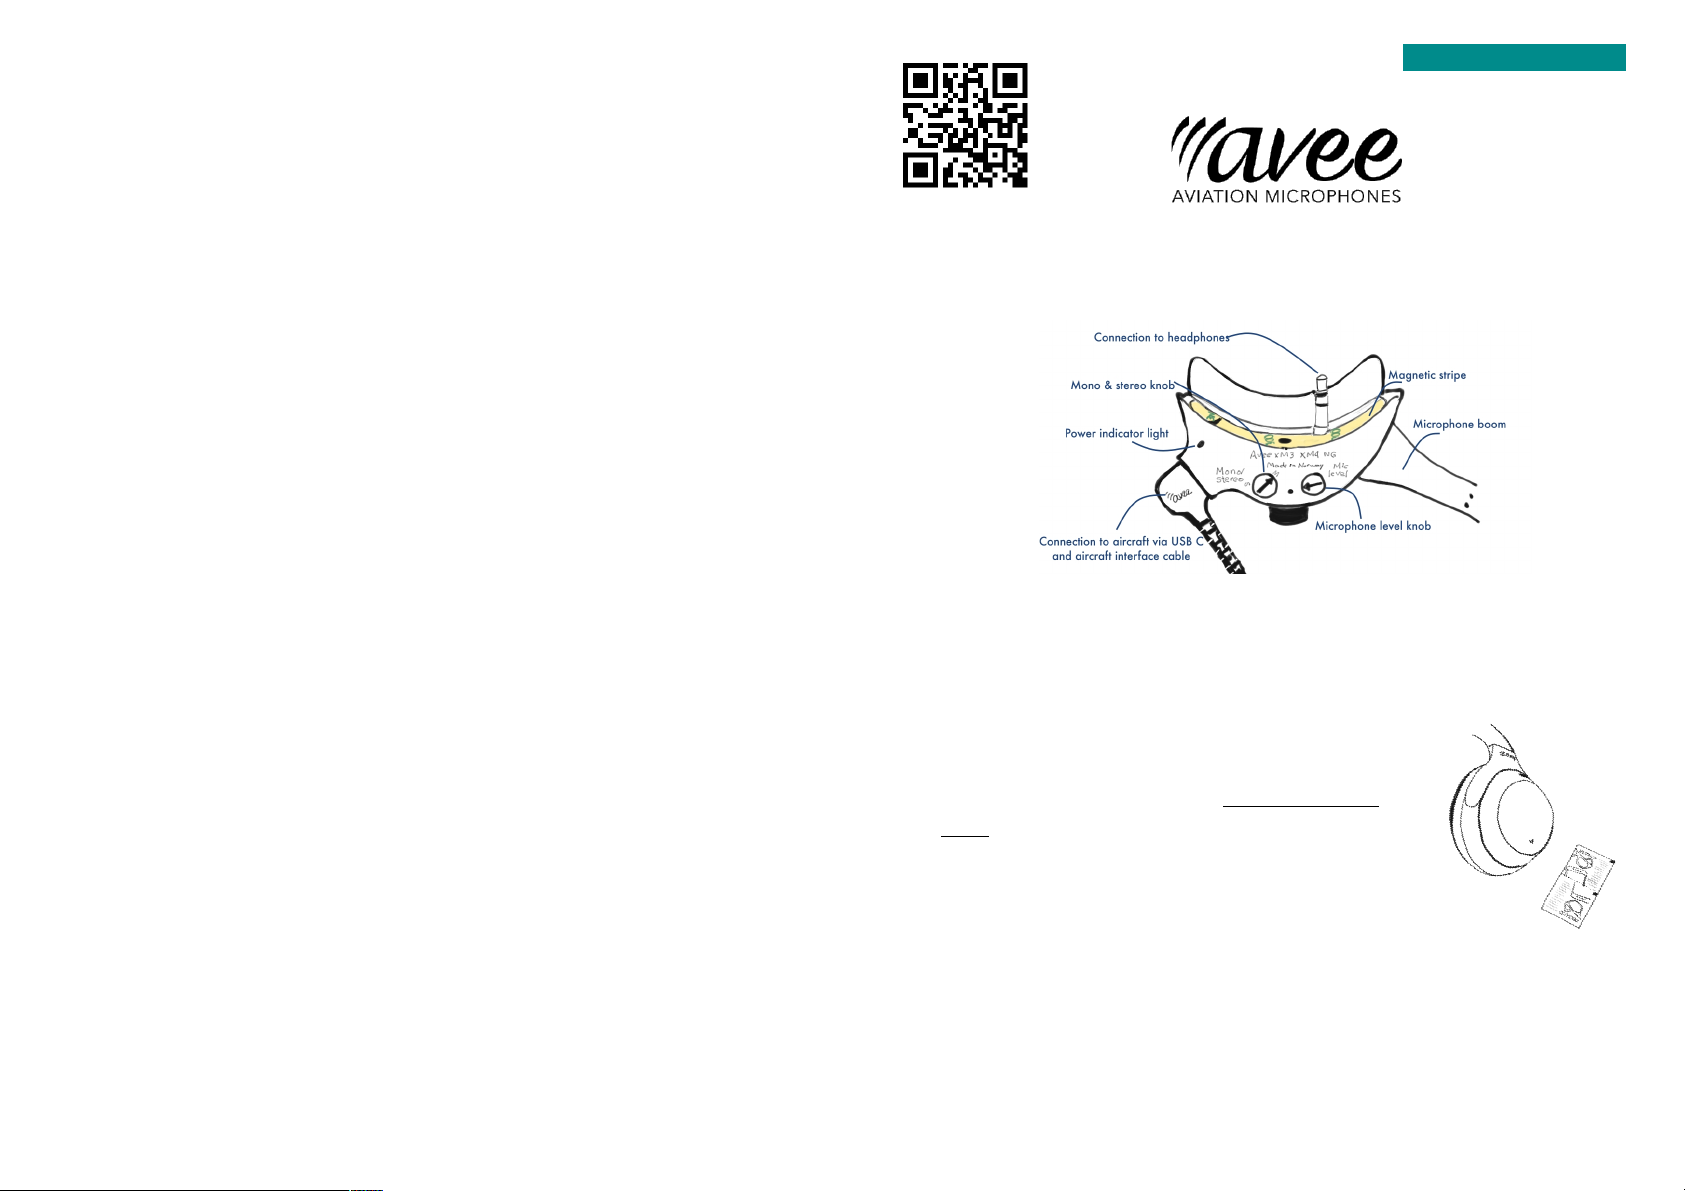
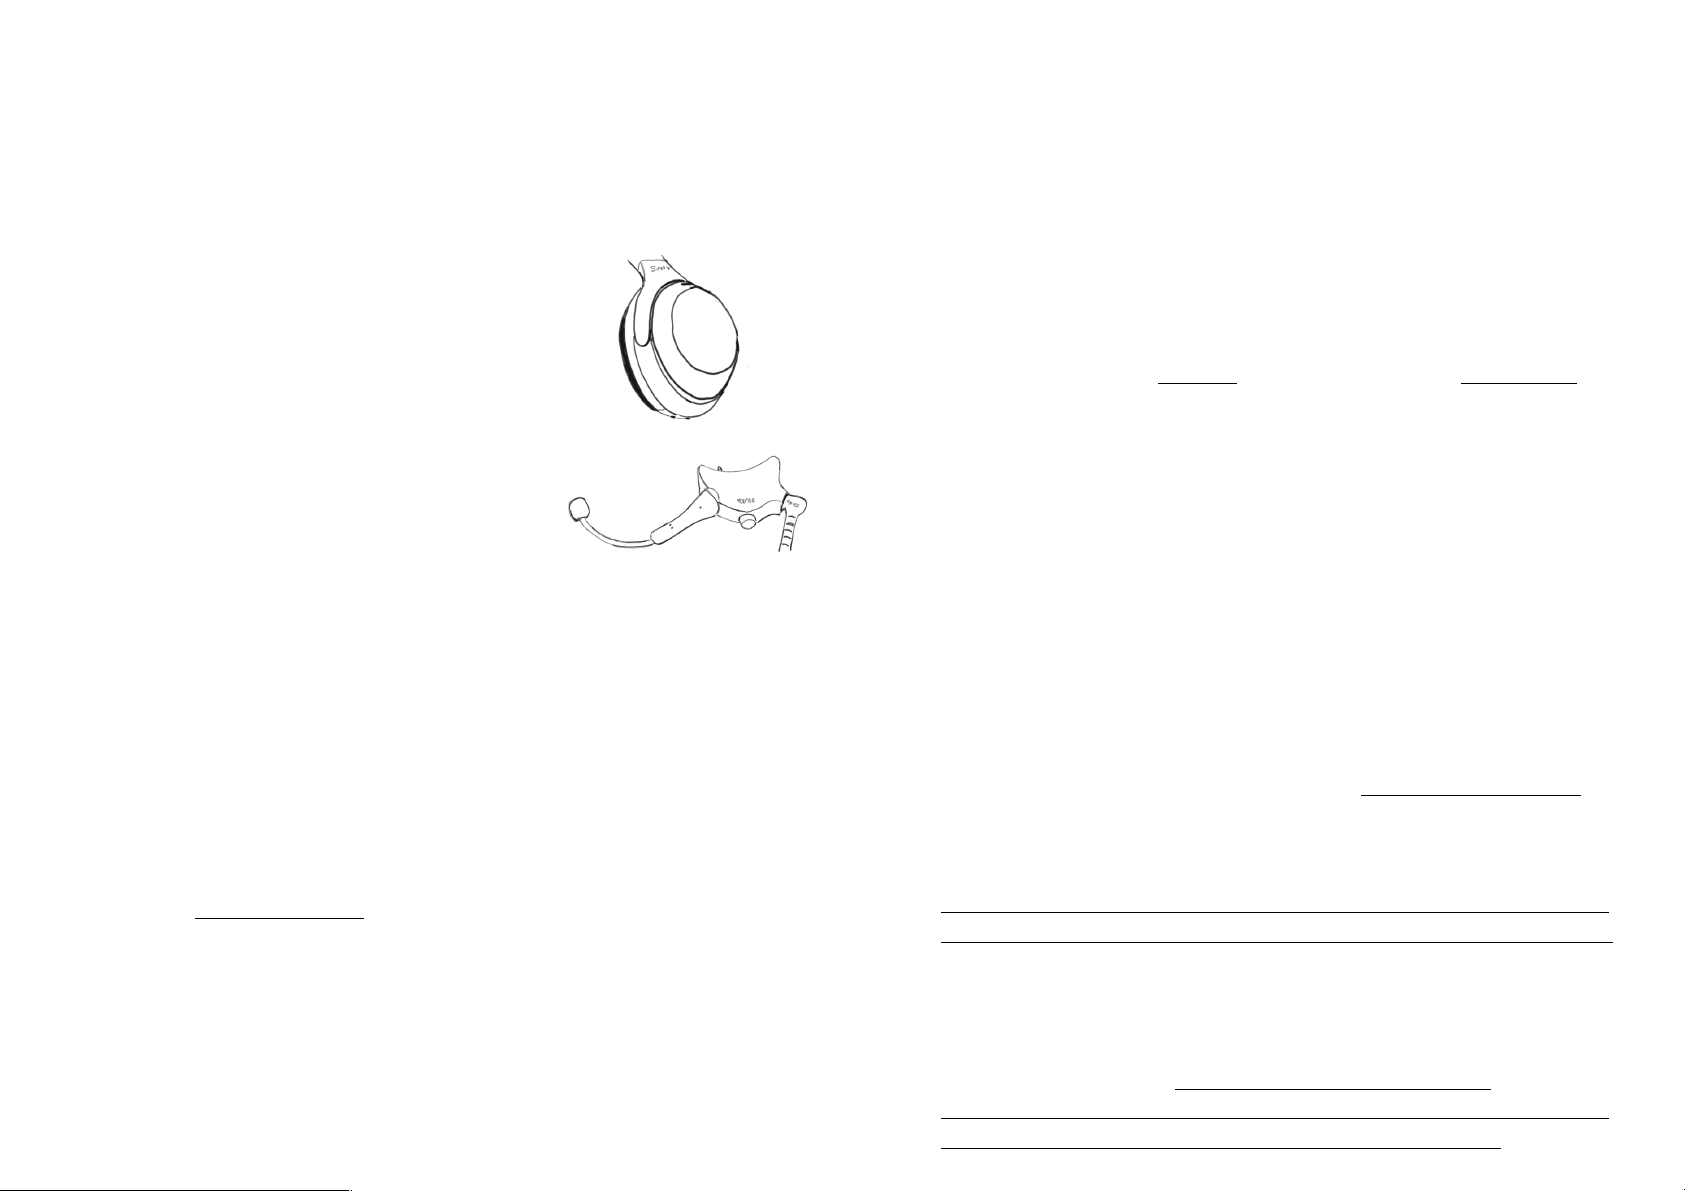
How to prepare your headphones
The Avee microphone is using an adhesive magnetic
stripe to attach safely to your Bose™or Sony™headset.
This solution makes it easy to attach and detach the
Avee microphone from the headphone in seconds,
and the Avee microphone stays safely in place
whenever it is connected to the headphones.
Please follow these instructions to install the magnetic stripe properly to your
headphones. You can also scan the QR-code in the upper left corner of this page
to get a video on how to do it.
Step 1:Using the cleaning wipe supplied, clean the base of your headphones
including the area surrounding the input jack. Ensure that you remove any
residue that is adhered to the headphones. Let dry for a minute or two.
Step 2: We are now preparing to transfer the magnetic stripe to the headphones
using the Avee microphone as a jig. Let the magnetic stripe be attached to the
Avee microphone, and remove the adhesive stripe protective backing from the
magnetic stripe.The magnetic stripe should stay on the Avee microphone and the
adhesive side should be facing the headphone.
Step 3:Guide the add-on to the base of the left headphone and firmly press it in
place for minimum 30 seconds. Once attached, carefully
unplug it to reveal the adhesive magnetic stripe being
transferred to the headphones.
Press firmly on the tape to ensure all edges of the tape
have adhered to the headphones.
Optimally the adhesive on the magnetic stripe needs a
24 hrs curing time.
That is all - the Avee aviation microphone is ready to
be used!
Connecting the Avee microphone to the aircraft
To start using the Avee microphone in the aircraft, follow this procedure:
1. Plug the Avee aircraft interface cable into the Avee microphone using the
angled USB connector. Use force to make the USB C connector go all the
way into the USB socket. The connection may be done in two directions –
either the cable pointing upwards – or the cable is pointing downwards.
2. Switch on the ANR on the headphones before attaching the Avee to
the headset. Please note that you will always have audio in your
headphones regardless of headphone battery level or headphones ANR
status and
The Avee microphone output is NOT affected by headphone battery power
level.
3. Attach the Avee microphone to the headset. Make sure the Avee
microphone is clamped safely to the headset.
4. Plug the Avee aircraft interface into the aircraft. Please note that the
aircraft connector might be the dual GA, Lemo Redel, Neutricon or XLR-5 –
all depending on what you have purchased from us & what is available in
your aircraft.
5. When the aircraft radio & intercom is switched on, the mic add-on will get
bias power from the aircraft. This is indicated with a steady dimmed Power
indicator light on the bottom side of the Avee microphone.
6. The internal Bluetooth®available in your headset will automatically
disconnect all units connected via Bluetooth®when the Avee microphone
is connected.
To be able to listen to music or use your phone when flying, you need the
Avee BlueLink. Check out our web pages for more info on this product.
Headphone volume setting
Adjust the headphone volume by using the Volume knob on the bottom of the
Avee microphone. Rotate clockwise for minimum volume and anti-clockwise for
maximum volume.
Please note that for most pilots the normal procedure for adjusting the
headphone volume is by setting the Avee headphone volume to maximum – and
then adjusting the volume from the aircraft audio panel.
In small GA aircrafts, the headset volume is typically adjusted individually for
pilot and co-pilot. Volume level in the left back seat is following the pilot volume
level, while the right back seat is following the level set by the co-pilot.
In this case we suggest letting the back seaters adjust the volume level to lower
level (if needed) using the volume control on the Avee microphone.
Microphone output level
The microphone output level is factory set to a normal output level, and will
usually not require adjustments.
The output level may however be set by using the Mic level adjustment knob on
the bottom side of the Avee microphone and your finger nail or the corner of a
credit card as a tool.
Level 9 is maximum and level 1 is minimum level. Factory setting level is 3.
Avoid setting the output level to high. This will make the noise cancelling microphone
in the Avee pick up unnecessary cockpit/ambient noise and the signal might saturate.
Headset mono & stereo mode
The Avee microphone is set to the mono mode (factory setting), by turning the
mono / stereo adjustment knob fully to ‘M’. To set stereo mode, turn the
adjustment knob fully to S.Please note that most aircrafts have a
mono radio & intercom system. If you set the Avee to stereo mode in an aircraft
with mono support, you will loose the sound in the right earphone.
This manual suits for next models
1
Other Avee Microphone manuals


Popular Microphone manuals by other brands


Avermedia
Avermedia LIVE STREAMER MIC 350 quick start guide

Motorola
Motorola PMMN4089 user guide

LY International Electronics
LY International Electronics CM12 Operation instructions

AmazonBasics
AmazonBasics B076ZSR6BB manual

SEAL Innovation
SEAL Innovation SwimSafe SB001 user guide

Lewitt
Lewitt LCT 540 Authentica user manual