avenli 17792DE User manual

OP1-19-GB(V1)
IMPORTANT SAFETY RULES
READ, UNDERSTAND, AND FOLLOW ALL INSTRUCTIONS CAREFULLY
BEFORE INSTALLING AND USING THIS PRODUCT !
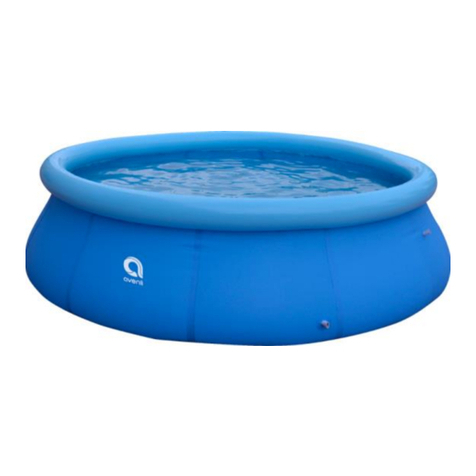
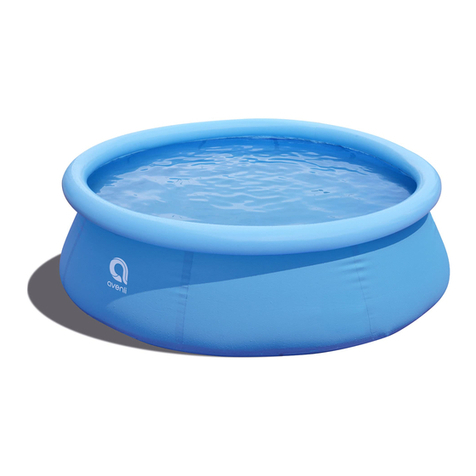
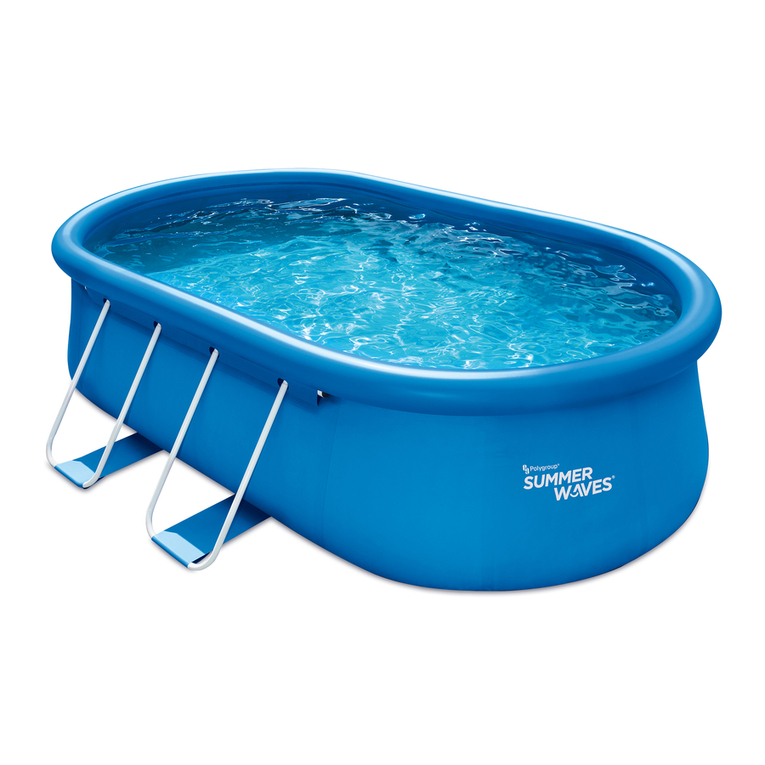
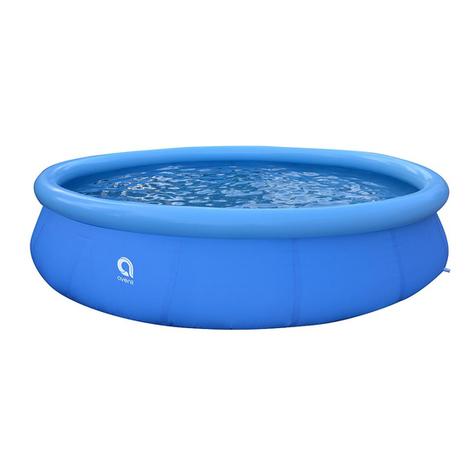
INFLATABLE RING POOL
1
OWNER’S MANUAL
FOR FOLLOWING SIZES:
-Ф8’x25” (Ф2.4mx63 cm) -Ф10’x30” (Ф3mx76 cm)
-Ф12’x30” (Ф3.6mx76 cm) -Ф14’x33” (Ф4.2mx84 cm)
DO NOT RETURN PRODUCT TO STORE
Drawing for illustration purpose only. Actual product may vary. Not to scale.
Please read carefully and keep for future reference.
Detailed information of product model and size is shown at the end of this manual!
STOP!
Shanghai Jilong Plastic Products Co. Ltd.
2555 XiuPu Road, Pudong Area,Shanghai,China.
www.avenli.com
JILONG PLASTIC PRODUCTS(JIANGSU)CO.,LTD
NO.1 Industrial Area South Zhongchen Road Zhongyang Town,Suqian,Jiangsu,China
TM

32
OP1-19-GB(V1)
THE SAFETY INSTRUCTIONS------------------------------------------------------------------------------------------------02
PART REFERENCE---------------------------------------------------------------------------------------------------------------04
SITE SELECTION-------------------------------------------------------------------------------------------------------------------06
SET UP THE POOL---------------------------------------------------------------------------------------------------------------07
FILL THE POOL WITH WATER--------------------------------------------------------------------------------------------------07
WINTERISING AND LONG-TERM STORAGE---------------------------------------------------------------------------08
IN-SEASON POOL MAINTENANCE AND WATER CARE------------------------------------------------------------09
TROUBLE SHOOTING -------------------------------------------------------------------------------------------------------------11
LIMITED WARRANTY ------------------------------------------------------------------------------------------------------------ 12
CONTENTS
PART1-THE SAFETY INSTRUCTIONS
Non Swimmers safety
1). Continuous, active, and vigilant supervision of weak swimmers and non-swimmers by a competent adult is required at all times
(remembering that children under ve are at the highest risk of drowning);
2). Designate a competent adult to supervise the pool each time it is being used;
3). Weak swimmers or non-swimmers should wear personal protection equipment when using the pool;
4). When the pool is not in use, or unsupervised, remove all toys from the swimming pool and its surrounding to avoid attracting
children to the pool.
Safety devices
1). It is recommended to install a barrier (and secure all doors and windows, where applicable) to prevent unauthorized access
to the swimming pool;
2). Barriers, pool covers, pool alarms, or similar safety devices are helpful aids, but they are not substitutes for continuous and
competent adult supervision.
Safety equipment
1). It is recommended to keep rescue equipment (e.g. a ring buoy) by the pool;
2). Keep a working phone and a list of emergency phone numbers near the pool.
Safe use of the pool
1). Encourage all users especially children to learn how to swim;
2). Learn Basic Life Support (Cardiopulmonary Resuscitation - CPR) and refresh this knowledge regularly. This can make a life-
saving difference in the event of an emergency;
3). Instruct all pool users, including children, what to do in case of an emergency;
4). Never dive into any shallow body of water. This can lead to serious injury or death;
5). Do not use the swimming pool when using alcohol or medication that may impair your ability to safely use the pool;
Carefully read, understand, and follow all information in this user manual before installing
and using the swimming pool. These warnings, instructions, and safety guidelines address
some common risks of water recreation, but they cannot cover all risks and dangers in all
cases. Always use caution, common sense, and good judgment when enjoying any water
activity. Please read carefully and keep for future reference.

32
OP1-19-GB(V1) OP1-19-GB(V1)
PART1-THE SAFETY INSTRUCTIONS
6). When pool covers are used, remove them completely from the water surface before entering the pool;
7). Protect pool occupants from water related illnesses by keeping the pool water treated and practicing good hygiene. Consult the
water treatment guidelines in the user’s manual;
8). Store chemicals (e.g. water treatment, cleaning or disinfection products) out of the reach of children.
9). Use the signage as outlined below;
10). Removable ladders shall be placed on a horizontal surface.
11). Warning: a drained pool outdoors may cause unknown hazards.
WARNING: Installation and assembly shall be done by adults.
WARNING: Read and follow the the instruction for use and maintenance to ensure a safe use of the swimming-pool
kit. Not following the instructions for use and maintenance can cause serious health hazards, in particular for children.
WARNING: Only for domestic outdoor use.
WARNING: Drowning hazard. Children have drowned in portable swimming-pools.
WARNING: Empty the pool when not in use. Do not leave a small pool empty outdoor.
WARNING: Keep children under supervision in the aquatic environment.
WARNING: No diving.
This safety sign must be posted in a prominent visible position within 2m of the pool. Alternatively you may purchase a
vinyl base glue (not included) to glue the sign to the pool wall next to the entry and exit point,assuring it is prominently
visible to all users when approaching the pool.

54
OP1-19-GB(V1)
PART2-PART REFERENCE
Ф8'x25" (Ф2.4mx63 cm) Ф10'x30" (Ф3mx76 cm)
NO. NAME QTY SPARE PART QTY SPARE PART
1Drainage Valve
Cover 1 290366 1 290366
2Stopper 2 290311 2 290311
3Drainage Valve
Connector 1 290364 1 290364
4Hole Strainer
(B) 2 290312 2 290312
5Pool Liner 1 393242 1 393243
Color Blue Blue
1
2
4
5
3
Ф8' x 25" (Ф2.4m x63 cm)/Ф10' x 30" (Ф3m x76 cm)
Model Size Water Capacity Pump Ladder
17792DE/17792EU/17792FR/
17792GB Ф8’ x 25” (Ф2.4mx 63 cm) 548Gal(2074L) √ ×
17792 Ф8’ x 25” (Ф2.4mx 63 cm) 548Gal(2074L) × ×
17793DE/17793EU/17793FR/
17793GB Ф10’ x 30” (Ф3.0m x 76 cm) 956Gal(3618L) √ ×
17793 Ф10’ x 30” (Ф3.0m x 76 cm) 956Gal(3618L) × ×

54
OP1-19-GB(V1) OP1-19-GB(V1)
PART2-PART REFERENCE
Ф12'x30"
(3.6m x76 cm)
Ф14'x33"
(4.2m x84 cm)
NO. NAME QTY SPARE PART QTY SPARE PART
1Drainage Valve
Cover 1 290366 1 290366
2Stopper 2 290311 2 290311
3Drainage Valve
Connector 1 290364 1 290364
4Hole Strainer (B) 2 290312 2 290312
5Pool Liner 1 393244 1 393246
Color Blue Blue
1
2
4
5
3
NOTE: Drawing for illustration purpose only. Actual product may vary. Not to scale.
Ф12' x 30" (Ф3.6m x76 cm)/Ф14' x 33" (Ф4.2m x84 cm)
Model Size Water Capacity Pump Ladder
17794DE/17794EU/17794FR/
17794GB/17794RU Ф12’ x 30” (Ф3.6m x 76 cm) 1421Gal(5377L) √ ×
17794 Ф12’ x 30” (Ф3.6m x 76 cm) 1421Gal(5377L) × ×
17796DE/17796EU/17796FR/
17796GB/17796RU Ф14' x 33" (Ф4.2m x 84cm) 2286Gal(8652L) √ ×
17796 Ф14' x 33" (Ф4.2m x 84cm) 2286Gal(8652L) × ×

76
OP1-19-GB(V1)
It is absolutely essential to select a suitable site for your pool BEFORE attempting to
ll it with any water. Please select a set-up site which strictly conforms to the following
guidelines:
Guide1. Ensure that the area is rm, at (no bumps or mounds of earth) and extremely level, with a grade not exceeding
3° of slope at any point in the set-up area.
Guide2. Make sure that the area you have selected to set-up the pool is completely free of sticks, stones, sharp objects or
other foreign debris.
Guide3. Select an area that is not directly underneath overhead power lines or trees. Additionally, make sure that the pool
set-up area does not contain underground utility pipes, lines, or cables or any kind.
Guide4. If a ground cloth is provided with your pool kit, its use is highly recommended. The ground cloth will help protect
the pool liner from damage due to weed growth, sharp objects, and debris.
Guide5. If at all possible, choose an open location on your property that is exposed to direct sunlight. This will help to
warm your pool.
WARNING:
Pools installed on inadequately level surfaces are subject to leaking,
forming irregularities, or collapse, which can result in property damage or serious in-
jury for those in or around the pool area!
WARNING:
Do not use sand during setup process. If it appears that there is a need
for use of a “leveling agent”, then your set-up site is likely unsuitable. FAILURE TO
OBEY THIS WARNING MAY RESULT IN SERIOUS PERSONAL INJURY.
CAUTION:
Please choose your set-up area carefully, as lawn and other desirable
vegetation underneath the ground cloth(If applicable) will die. Furthermore, try to avoid
setting the ground cloth(If applicable)in areas prone to aggressive plant and weed spe-
cies, as they may grow through the ground cloth(If applicable).
CAUTION:
The pool must be accessible to a 110 or 230-volt AC outlet protected by
a Ground Fault Circuit Interrupter (GFCI). The pool should be set no closer than 2 m to
the power source, but no further than the length of the lter pump cord. Under no cir-
cumstances should an extension cord be used to extend the range of the connection.
+3°
Bumpy,Sloping Ground-INCORRECT
Flat,Level Ground-CORRECT
PART3-SITE SELECTION

76
OP1-19-GB(V1) OP1-19-GB(V1)
PART4-SET UP THE POOL
Step1. ACCOUNT FOR ALL PARTS.
Remove all the parts from the carton(s) and place them on the ground in the location where they are to be assembled
Check each part according to “PART REFERENCE” .Make sure all the pieces to be assembled are accounted for.
IMPORTANT: Do not start assembly if any pieces are missing. For replacement pieces call the Consumer Service
telephone number in your area.
The number of persons required for installation: 2 adult at least.
Total installation time except the time for site preparation and water lling :
10 minutes for size Ф8’x25”/Ф10’x30”/Ф12’x30”/Ф12’x33”/Ф12’x36”
30 minutes for size Ф14’ x 33”
Step2. INSTALL DRAIN VALVES COVER AND STOPPER
Make sure that outer drain plug is inserted into the outer drain cap and drain valve cover is screwed on tightly.Plug the con-
nection holes with the stoppers. (The out drain plug changes according to different size of pool.)
STOPPER Out Drain Plug A Out Drain Plug BDrain Vavle Cover
Step3. INFLATE THE TOP RING
Keeping the top ring in the middle of the pool (the top ring must be kept inside the circumference of
the pool bottom.)
VERY IMPORTANT: The top ring should be lled to approx. 85% capacity only. DO NOT attempt
to inate the ring past this point.Excessive ination of the top ring can cause the ring to burst or
cause damage to the ring’s seams.
80%
WARNING:
Do not leave pool unattended while lling with water.
WARNING:
If more than 1~2 inches of water collects on any one side before you
start lling in the center.The pool is not level enough, and must be corrected! You
shall pull out the drain plug, release the water completely, disassemble the pool
completely,locate the pool on a plane surface, repeat set up instruction.
WARNING:
DO NOT OVERFILL as this could cause the pool to collapse.In times of
heavy rainfall you may need to empty some of the water to ensure the level is correct.
PART5-FILL THE POOL WITH WATER

98
OP1-19-GB(V1)
1. Make sure the drain tting is plugged securely and the cap
is in place. Start lling the pool with water. After about 1-inch of
water is on the bottom, stop lling and smooth wrinkles out of the
bottom of the pool. Pull the outer wall out from the top edge, all
around the bottom of the pool, so that it lls evenly.
2. Contineue lling the pool until water level.
WARNING:
Do not let your children stand at downfold and face the water outlet
during the drainage. The water current may sweep your children.
WARNING:
Pool should be stored at places where is cool and dry, with no sharp
object surround, or no heavy objects lying above, which may cause damage to the
pool.
PART6-WINTERISING AND LONG-TERM STORAGE
Step1. If you have a lter pump, make sure that the electricity source to the lter pump has been disconnected.
Step2. Check to ensure that the out drain plug is rmly inserted on the inside of the pool.
Step3. Attach your garden hose to the drainage valve connector, and placing the other end of the hose in an area where the
water can drain safely, such as a storm drain or street gutter. Remember that because water always nds its own level, the end
of the hose must be lower in elevation than the pool to ensure complete drainage.
Step4.If you have a lter pump, insert the stopper into the inlet and outlet xtures, on inside of pool, and then disconnect the
lter pump hoses.
Step5. Attach the drainage valve connector to the drain outlet by turning connector in a clockwise direction.
Step6. Open the out drain plug on the inside of the pool and the water will begin to drain immediately.
Step7. Disconnect the hose and drainage valve connector when nished.
Step8. Replace the out drain plug on the inside of the pool.
Step9. Be sure that the pool liner is completely dry before folding the pool for long-term storage. Leaving the pool exposed to
sunlight for a few hours will clean and speed the drying process and make it easier to fold the pool for storage. (Never attempt
to fold or stow a pool that is not completely dry as this could lead to a proliferation of mold or mildew build-up during the time
the pool is in storage.)
Step10. Remember, proper off-season storage is critical to protect your investment in your pool.(espeically in winter) Once
drained and dry, your pool should be carefully folded and wrapped in a ground cloth (if available) or other similar protective
tarp-like material. The pool and all applicable accessories such as the pump, cover, ground cloth, ladder, hoses, clamps, and
hardware should be kept together and stored indoors, in a reasonably warm, dry and weatherproof location.
Before folding, it’s better to dry all parts and pool completely by lying them in the sun
for one hour or so.(PIC.1). And then, spread some talcum powder to prevent the vinyl
from sticking together.
FOLDING INSTRUCTION
Step1. Please fold the protrusion sides inside to gain rectangle shape.(PIC.2).
Step2. Fold each half of the rectangle to gain a smaller rectangle shape.(PIC.3).
Step3. Fold each ends backwards. (PIC.4).
Step4. Fold the rest ends together to create an ultimate rectangle one.(PIC.5).
TIPS1. Please remove air inside to make the folded pool thin and at during each folding.
TIPS2. The original packing can be used for storage.
PART5-FILL THE POOL WITH WATER
80 %

98
OP1-19-GB(V1) OP1-19-GB(V1)
PART6-WINTERISING AND LONG-TERM STORAGE
PIC.1 PIC.3 PIC.4PIC.2
PIC.5
PART7-IN-SEASON POOL
MAINTENANCE AND WATER CARE
WARNING:
If applicable, the lter pump included with your pool is designed to remove dirt and
other small particles from your pool water. However, to maintain pool water that is perfectly clear, algae
free, and safe from harmful bacteria, it is VERY IMPORTANT TO ENGAGE IN A CONSISTENT REGIMEN
OF CHEMICAL TREATMENT. Contact your local pool supply retailer for guidance on the safe and effec-
tive use of chlorine, shock, algaecide and other such chemicals.
WARNING:
To avoid skin and eye irritation or even injury to bathers, never add chemicals to the
pool while it is occupied. Never add any chemicals or substances to your pool if you cannot verify the
exact quantity or type to add to the water. Consult a pool supply retailer for specic instructions and
guidelines concerning the use of chemicals in your pool.
WARNING:
It is highly recommended that pool owners frequently test their pool water to ensure
that the pH and chlorine concentration in the water is optimal for safe and enjoyable bathing throughout
the season. Please consult your pool supply retailer to nd a suitable testing kit and instructions on its
use.
WARNING:
Non-respect of the maintenance rules may result in serious hazards for health and
especially for the children.
This product is designed to be storable, seasonal pools. If you live in a temperate area in which the pool will not be in use
year-round, it is STRONGLY RECOMMENDED that you drain your pool, clean and dry it thoroughly, and store it in a protected
area for the off-season. This will help extend the life of your pool and prevent a safety hazard from developing while the pool is
not in use.During the season of use of the pool kit, the ltration system (if applicable)must be put into service each day, long
enough to ensure at least a complete renewal of the volum of water.
In order to keep your pool water clean and hygienic all season long please closely adheres to the follow-
ing guidelines:
1. The proper and consistent use of basic pool chemicals are required to maintain the proper pH balance in your pool water.
Furthermore, the application of chemicals will help prevent the growth of harmful bacteria or algae in your pool, and assist your

1110
OP1-19-GB(V1)
PART7-IN-SEASON POOL
MAINTENANCE AND WATER CARE
lter-pump in keeping your water crystal clear. Chemicals that your pool may require include but are not limited to:
1) Tabular, Granular, or Liquid Chlorine: Disinfects pool water and inhibits algae growth.
2) PH Adjusting Chemicals: These are used to correct PH level and make water more or less acidic.
3) Algaecides: These chemicals are formulated to remove algae.
4) “Shock” (Super chlorinator): Eliminates certain organic and other combination compounds that can affect water clarity.
In order to obtain specic details on the use of chemicals, please consult a local pool supply retailer and provide them with
the volume of water in your specic pool, and if desired, a sample of your pool water. This will enable them to properly instruct
you on: 1) which chemicals to purchase, 2) what quantities of chemicals to purchase, and 3) how to use specic chemicals
safely and effectively.
2. Never let chlorine come into direct contact with the pool liner until it has completely dissolved. This means that granular or
tabulated chlorine is rst dissolved in a bucket of water before applying to pool water, and likewise, liquid chlorine is slowly and
evenly poured into pool water from various locations around perimeter of pool.
DANGER: NEVER add water to chemicals. INSTEAD, always add chemicals to water. Also, never mix separate chemicals
together, rather, add chemicals to the pool separately and allow them to circulate throughout the pool before adding additional
types of chemicals.
3.We recommend that you purchase a test kit, and frequently test your pool water to make sure that your PH balance and
chlorine levels are optimal. Your local pool supply retailer can provide information on purchasing and using a test kit that is
most suitable for your needs. NOTE: Excessive chlorine levels or low (acidic) pH levels can damage your pool liner, so please
take corrective action as soon as possible if testing reveals either condition.
The tasks of removing larger debris from your pool and keeping the inside of the pool liner clean are simplied by using a
Prompt Set Pool Maintenance Kit, which includes a leaf skimmer and garden hose powered vacuum. Maintenance Kits are
included as a bonus feature in larger pool systems, and can also be purchased separately as an accessory.Please contact
your local after sale service center if you want to get advice on any repair during the life of the pool kit.
4. If applicable, check your lter-pump cartridge every two weeks (or more frequently during periods of heavy usage) to verify
whether it needs to be cleaned or replaced. If your cartridge is no longer white in color, attempt to spray it clean with a strong
blast of water from your garden hose. If your cartridge cannot be cleaned in this manner, the cartridge must be replaced.
Failure to frequently clean and/or replace your cartridges will affect the effectiveness of your lter pump and could shorten its
useful life.
5. If your pool system included a cover, try to keep your pool covered at all times when not in use. This will help keep the wind
and other elements from depositing dirt and debris in your pool, and will also prevent excess rainwater from overlling your
pool.
6. Remind your family and friends to always hose or rinse off any dirt or tanning oil from their hands, feet, and body prior to
entering the pool.
7. It’s necessary to monitor the bolts and hardware of the pool (eg. rust stain) when possible.
8. Once your pool has been lled with water for the season, take note if your pool becomes overlled due to rainwater or ac-
cidental overll. If this should occur, it is important to drain or bale out the excess water as soon as possible. If it is an inatable
ring pool, the water level should never be higher than the bottom edge of the inatable ring.
9. Irrespective of materials used for swimming pool construction, accessible surfaces have to be checked regularly to avoid
injuries.
1110
OP1-19-GB(V1) OP1-19-GB(V1)
PART8-TROUBLE SHOOTING
Repair Patch Instructions
(Small pinhole and small puncture leaks can be repaired with the included repair patch)
a) Locate the leak place.
b) Deate the air.
c) Clean the area surrounding the leakage and wipe up all water from the surface.
d) Take out the repair patch, cut it into required shape and size, which should be larger than the leaking area, put the patch
on leaking area and press tightly.
e) Wait 30 minutes for open-air drying of the repaired position.
If the damage is too big, we recommend using a Silicone or rubber based glue for repair.
Repair Glue Instructions
1 Locate the leak place.
2 Deate(if necessary),and drain thoroughly
3 Clean the area surrounding the leakage and wipe up all water from the surface.
4 Thoroughly clean the area surrounding the leak .Cut a piece of repair material in round shape, which should be larger than
the damaged area.
5 Gluing (need to purchase adhesive separately) one side of the material patch to the repair area. Please notice the material
patch need to be applied glue evenly.
6 Put the patch on the damaged area and press tightly. Wait 12 hours for drying. After patch has dried, apply glue around the
edges for a complete seal (dry 4 hours) swimming pool storage.

PB12
OP1-19-GB(V1)
PART9-LIMITED WARRANTY
If any of the components have been consumer-replaced, damaged, or misused, the corresponding warranty on those compo-
nents is invalidated. In this situation, you will be advised of the cost of replacement parts and processing instructions.
If a veriable manufacturing defect is found during the relevant time period, we agree to repair or replace at its option any
product under warranty provided proper proof of purchase is presented.
This limited warranty is not valid if the product is used for commercial purposes, or if the damage is caused by an accident, an
act of God, consumer misuse, neglect or abuse, vandalism, improper use of chemicals, exposure to extreme weather condi-
tions or negligence during product set up or disassembly.
We cannot be held responsible for the cost of installation, labor, or transportation expenses incurred due to the replacement of
defective parts. This limited warranty, furthermore, does not cover any unauthorized alterations to the product.
PROBLEM DESCRIPTION CAUSE REMEDY
FILLED
POOL
IS NOT
ROUND
• Pool has taken on an oval, rectan-
gular or “egg-like” shape.
• Pool appears to slope to one side
or pool water depth is uneven.
• Wrinkles in bottom of liner were
not adequately smoothed out prior
to filling.
• Side walls were not properly
“pushed out” as pool was filled,
causing circumference of top ring
to be outside that of the pool's side
walls.
• Pool is resting on bumpy or slop-
ing ground.
• Drain pool to a 1” water depth and
then smooth out as many wrinkles
as possible.
• Drain pool to a 1” water depth and
then push out side walls until they
are outside of the circumference of
the top ring.
• Make sure ground underneath
pool is very flat, level and free of
any mounds of soil.
COLORED
WATER
• Water turns blue, brown, or black
when first treated with chlorine.
• The chlorine is oxidizing minerals
in your water. This commonly occurs
with water from different sources.
• Adjust pH to recommended level.
• Run filter until water is clear.
• Regularly clean cartridge.
PARTICALS
SUSPENDED
IN WATER
• Water looks “milky” or cloudy.
• “Hard Water” caused by an elevat-
ed pH.
• Chlorination is inadequate.
• Foreign debris in water.
• Bathers are not cleaning their feet
prior to entering pool.
• Adjust pH. Check with a swimming
pool supply retailer for correct water
treatment.
• Ensure proper chlorine level.
• Clean or replace your filter.
• Spray off dirt with a high-pressure
hose before entry.
PERSISTENT
LOW WATER
LEVEL
• Pool appears to be losing water on
a daily basis.
• Tear or hole in pool liner.
• Tear or hole in a filter pump hose.
• Hose clamps are too loose.
• Evaporation from high summer
temperatures.
• Locate damage and repair with the
included patch kit.
• Repair or replace hoses.
• Tighten all hose clamps.
• Keep pool covered when not in
use.
ALGAE
• Water has greenish tint.
• Green, brown or black spots
appear on pool liner.
• Pool bottom is slippery and/or an
unpleasant odor is present.
• Algae is present.
• Apply “shock” treatment (super-
chlorinator). Check pH and adjust to
an appropriate level per your local
pool supply retailer.
• Vacuum or lightly scrub pool liner.
• Test water often to maintain proper
chlorine levels.
POOL
WATER
IS COOL
• Water is not warming to a comfort-
able swimming temperature.
• Pool was set up in an excessively
shady or tree lined area.
• Heat is escaping from pool water.
• Relocate pool to a more open
location where it can get maximum
exposure to sunlight during peak
daylight hours.
• Keep your pool covered whenever
it is not in use.
PART8-TROUBLE SHOOTING

OP1-19-FR(V1)
PISCINE GONFLABLE À ANNEAUX
1
MODE D'EMPLOI
POUR LES TAILLES SUIVANTES :
-Ф8’x25” (Ф2.4mx63 cm) -Ф10’x30” (Ф3mx76 cm)
-Ф12’x30” (Ф3.6mx76 cm) -Ф14’x33” (Ф4.2mx84 cm)
1
RÈGLES IMPORTANTES DE SÉCURITÉ
LISEZ, COMPRENEZ ET SUIVEZ ATTENTIVEMENT TOUTES LES
INSTRUCTIONS AVANT D'INSTALLER ET D'UTILISER CE PRODUIT !
ARRÊTEZ!
À LIRE ATTENTIVEMENT ET À CONSERVER POUR CONSULTATION ULTÉRIEURE!
NE RETOURNEZ PAS LE PRODUIT AU
MAGASIN
Dessin à but d'illustration uniquement. Le produit réel peut varier. N'est pas à l'échelle.
Des informations détaillées sur le modèle et les dimensions du produit se trouvent à la n de ce manuel !
Shanghai Jilong Plastic Products Co. Ltd.
2555 XiuPu Road, Pudong Area,Shanghai,China.
www.avenli.com
JILONG PLASTIC PRODUCTS(JIANGSU)CO.,LTD
NO.1 Industrial Area South Zhongchen Road Zhongyang Town,Suqian,Jiangsu,China
TM

OP1-19-FR(V1)
2
SOMMAIRE
PARTIE 1-CONSIGNES DE SÉCURITÉ
CONSIGNES DE SÉCURITÉ--------------------------------------------------------------------------------------------02
RÉFÉRENCE DES PIÈCES---------------------------------------------------------------------------------------------04
SÉLECTION DU SITE-----------------------------------------------------------------------------------------------------06
INSTALLER LA PISCINE------------------------------------------------------------------------------------------------07
REMPLIR LA PISCINE D'EAU-----------------------------------------------------------------------------------------07
AMÉNAGEMENT POUR L’HIVER ET STOCKAGE DE LONGUE DURÉE--------------------------------08
MAINTENANCE DE LA PISCINE ET SOIN DE L'EAU EN SAISON----------------------------------------09
DÉPANNAGE--------------------------------------------------------------------------------------------------------------11
GARANTIELIMITÉE----------------------------------------------------------------------------------------------------------12
Avant d’installer et d’utiliser, la piscine, veuillez lire attentivement, assimiler et respecter
toutes les informations contenues dans cette notice d’utilisation. Ces avertissements, in-
structions et consignes de sécurité portent sur certains des risques usuels associés aux
loisirs aquatiques, mais ils ne peuvent pas couvrir la totalité des risques et dangers dans
tous les cas. Faites toujours preuve de prudence, de discernement et de bon sens lors des
activités aquatiques. Conservez ces informations an de pouvoir vous y référer ultérieure-
ment.
Sécurité des non-nageurs
1) Une surveillance attentive, active et continue par un adulte compétent des enfants qui ne savent pas bien nager et des non-na-
geurs est requise en permanence (en gardant à l’esprit que le risque de noyade est le plus élevé pour les enfants de moins de cinq
ans).
2) Désignez un adulte compétent pour surveiller le bassin à chaque fois qu’il est utilisé.
3) Il convient que les enfants qui ne savent pas bien nager ou les non-nageurs portent des équipements de
protection individuelle lorsqu’ils utilisent la piscine.
4) Lorsque le bassin n’est pas utilisé ou est sans surveillance, retirez tous les jouets de la piscine et ses abords an de ne pas
attirer les enfants vers le bassin.
Dispositifs de sécurité
1)Il est recommandé d’installer une barrière (et de sécuriser toutes les portes et fenêtres, le cas échéant) an d’empêcher tout
accès non autorisé à la piscine.
2)Les barrières, couvertures, alarmes de piscines ou dispositifs de sécurité similaires sont des aides utiles, mais ils ne remplacent
pas la surveillance continue par un adulte compétent.
Équipements de sécurité
1) Il est recommandé de garder du matériel de sauvetage (une bouée, par exemple) près du bassin ;

OP1-19-FR(V1)
3
PARTIE 1-CONSIGNES DE SÉCURITÉ
2) Gardez un téléphone en parfait état de marche et une liste de numéros d’urgence à proximité du bassin.
Sécurité d’emploi de la piscine
1) Incitez tous les utilisateurs, en particulier les enfants, à apprendre à nager ;
2) Apprenez les gestes qui sauvent (réanimation cardiopulmonaire) et remettez régulièrement à jour vos connaissances. Ces
gestes peuvent sauver une vie en cas d’urgence ;
3) Expliquez aux utilisateurs de la piscine, enfants inclus, la procédure à suivre en cas d’urgence ;
4) Ne plongez jamais dans un plan d’eau peu profond, sous peine de blessures graves ou mortelles ;
5) N’utilisez pas la piscine sous l’emprise d’alcool ou de médicaments susceptibles de réduire votre capacité à utiliser la piscine
en toute sécurité ;
6) Si la piscine est recouverte d’une couverture, retirez-la entièrement de la surface de l’eau avant d’entrer dans le bassin ;
7) Traitez l’eau de votre piscine et instaurez de bonnes pratiques d’hygiène an de protéger les utilisateurs des maladies liée à
l’eau. Consultez les consignes de traitement de l’eau données dans la notice d’utilisation ;
8) Stockez les produits chimiques (produits de traitement de l’eau, de nettoyage ou de désinfection, par exemple) hors de portée
des enfants .
9) Utilisez les pictogrammes décrits ci-dessous. (pas nécessaire pour piscine hors sol en kit puisque les pictogrammes sont déjà
placés sur la piscine dans une position visible) ;
10) Placez les échelles amovibles sur une surface horizontale.
11) Avertissement : une piscine vide à l’extérieur peut causer des dangers inconnus.
ATTENTION :Le montage doit être effectué par un/des adulte(s)
ATTENTION : L’utilisation du kit piscine implique le respect des consignes de sécurité décrites dans la notice d’entretien et
d’utilisation. Le non-respect des consignes d’entretien et d’utilisation peut engendrer des risques graves pour la santé, notamment
celle des enfants.
ATTENTION : Uniquement pour usage domestique en extérieur.
ATTENTION :Risque de Noyade. Les enfants peuvent se noyer dans de petites quantités d’eau.
ATTENTION :Videz la piscine quand elle n’est pas utilisée. Ne pas laissez une piscinette à l’extérieur, vide.
ATTENTION : Garder les enfants sous surveillance dans l’environnement aquatique.
ATTENTION : Ne pas plonger.
Cette afche de sécurité doit être placée bien en évidence à moins de 2 m de la piscine. À défaut, vous pouvez acheter une colle
à base de vinyle (non fournie) an de coller l’afche sur le mur de la piscine, à côté des points d’entrée et de sortie, en veillant à ce
qu’elle soit bien visible pour tous les utilisateurs qui s’approchent de la piscine.

OP1-19-FR(V1)
4
PARTIE 2-RÉFÉRENCE DES PIÈCES
Ф8'x25" (Ф2.4mx63 cm) Ф10'x30" (Ф3mx76 cm)
NO. NOM QUANTITÉ NUMÉRO DE SÉRIE QUANTITÉ NUMÉRO DE SÉRIE
1Capuchon de
valve de purge 1 290366 1 290366
2Butée 2 290311 2 290311
3Connecteur de
valve de purge 1 290364 1 290364
4Crépine de
l'orifice (B) 2 290312 2 290312
5Liner de la
piscine 1 393242 1 393243
Couleur Bleu Bleu
1
2
4
5
3
Ф8' x 25" (Ф2.4m x63 cm)/Ф10' x 30" (Ф3m x76 cm)
Modèle Taille Capacité en eau Pompe Échelle
17792DE/17792EU/17792FR/
17792GB Ф8’ x 25” (Ф2.4mx 63 cm) 548Gal(2074L) √ ×
17792 Ф8’ x 25” (Ф2.4mx 63 cm) 548Gal(2074L) × ×
17793DE/17793EU/17793FR/
17793GB Ф10’ x 30” (Ф3.0m x 76 cm) 956Gal(3618L) √ ×
17793 Ф10’ x 30” (Ф3.0m x 76 cm) 956Gal(3618L) × ×

OP1-19-FR(V1)
5
PARTIE 2-RÉFÉRENCE DES PIÈCES
Ф12'x30"
(3.6m x76 cm)
Ф14'x33"
(4.2m x84 cm)
NO. NOM QUANTITÉ NUMÉRO DE SÉRIE QUANTITÉ NUMÉRO DE SÉRIE
1
Capuchon
de valve de
purge
1 290366 1 290366
2Butée 2 290311 2 290311
3
Connecteur
de valve de
purge
1 290364 1 290364
4Crépine de
l'orifice (B) 2 290312 2 290312
5Liner de
la piscine 1 393244 1 393246
Couleur Bleu Bleu
1
2
4
5
3
REMARQUE : Dessin à but d'illustration uniquement. Le produit réel peut varier. N'est pas à l'échelle.
Ф12' x 30" (Ф3.6m x76 cm)/Ф14' x 33" (Ф4.2m x84 cm)
Modèle Taille Capacité en eau Pompe Échelle
17794DE/17794EU/17794FR/
17794GB/17794RU Ф12’ x 30” (Ф3.6m x 76 cm) 1421Gal(5377L) √ ×
17794 Ф12’ x 30” (Ф3.6m x 76 cm) 1421Gal(5377L) × ×
17796DE/17796EU/17796FR/
17796GB/17796RU Ф14' x 33" (Ф4.2m x 84cm) 2286Gal(8652L) √ ×
17796 Ф14' x 33" (Ф4.2m x 84cm) 2286Gal(8652L) × ×

OP1-19-FR(V1)
6
PARTIE 3-SÉLECTION DU SITE
Il est absolument essentiel de sélectionner un site adapté pour votre piscine
AVANT d'essayer de la remplir avec de l'eau. Veuillez sélectionner un site
d'installation qui respecte strictement les directives suivantes :
Guide1. Assurez-vous que la zone est ferme, plane (aucune bosse ou butte de terre) et extrêmement horizontale,
avec une déclivité ne dépassant pas 3° de pente en tout point de la zone d'installation.
Guide2. Assurez-vous que la surface que vous avez choisie pour mettre en place la piscine est complètement
exempte de bâtons, de pierres, d'objets tranchants ou d'autres débris étrangers.
Guide3. Sélectionnez une zone qui n'est pas directement sous les lignes électriques aériennes ou les arbres. De
plus, assurez-vous que la zone d'installation de la piscine ne contient pas de canalisations, de lignes ou de câbles
souterrains d'aucune sorte.
Guide4. Si une toile de sol est fournie avec votre ensemble de piscine, son utilisation est hautement
recommandée. La toile de sol permet de protéger le liner de la piscine des dommages dus aux mauvaises herbes,
aux objets pointus et aux débris.
Guide5. Si possible, choisissez un emplacement ouvert de votre propriété qui est exposé à la lumière directe du
soleil. Ceci vous permettra de chauffer votre piscine.
AVERTISSEMENT :
Les piscines installées sur des surfaces insufsamment de
niveau sont soumises à des fuites, à la formation d'irrégularités, ou à l'effondrement, ce
qui peut entraîner des dommages matériels ou des blessures graves pour les personnes
à l'intérieur ou autour de la piscine !
AVERTISSEMENT :
N'utilisez pas de sable pendant le processus d'installation. S'il
apparaît qu'il y a besoin d'utiliser un « agent de nivellement », votre site d'installation est
probablement inadapté. NE PAS RESPECTER CET AVERTISSEMENT PEUT CAUSER DE
GRAVES BLESSURES.
ATTENTION :
Veuillez choisir soigneusement votre zone d'installation car la pelouse
et la végétation souhaitée sous la toile de sol (le cas échéant) mourra. De plus, essayez
d'éviter d'installer la toile de sol (le cas échéant) dans des zones sujettes à des espèces
de plantes et de mauvaises herbes agressives, car elles peuvent pousser à travers la
toile de sol (le cas échéant).
ATTENTION :
La piscine doit être accessible à une prise CA 110 ou 230 V protégée
par un disjoncteur différentiel de fuite à la terre (DDFT). La piscine ne doit pas être instal-
lée à moins de 2 mètres de la source d'alimentation, mais pas au-delà de la longueur du
cordon de la pompe ltrante. En aucun cas une rallonge électrique ne doit être utilisée
pour étendre la portée du raccordement.
+3°
Bumpy,Sloping Ground-INCORRECT
Flat,Level Ground-CORRECT
Sol plat, horizontal CORRECT Sol bosselé, en pente-INCORRECT

OP1-19-FR(V1)
7
PARTIE 4-INSTALLER LA PISCINE
IMPORTANT : Ne commencez pas le montage si des pièces sont manquantes. Pour des pièces de rechange,
appelez le numéro de téléphone du Service client dans votre région.
Le nombre de personnes nécessaire pour le montage: Au moins 2 personne.
Le temps indicatif de rèalisation globale hors prèparation du terrain et hors mise en eau :
10 minutes pour taille Ф8’ x 25”/Ф10’ x 30”/Ф12’ x 30”/Ф12’ x 33”/Ф12’ x 36”
30 minutes pour taille Ф14’ x 33”
Étape3. GONFLEZ L’ANNEAU SUPÉRIEUR
Maintenir l'anneau supérieur au milieu de la piscine (l'anneau supérieur doit être maintenu à
l'intérieur de la circonférence du fond de la piscine.)
TRÈS IMPORTANT: L'anneau supérieur doit être rempli à seulement 85 % de la capacité
environ. N'essayez PAS de goner l'anneau passé ce point. Un gonage excessif de l'anneau
supérieur peut causer l'éclatement de l'anneau ou endommager les coutures de l'anneau.
80 %
PARTIE 5-REMPLIR LA PISCINE D'EAU
Zone horizontale
Étape1. PRISE EN COMPTE DE TOUTES LES PIÈCES.
Retirez toutes les pièces du/des carton(s) et placez-les au sol, à l'emplacement où elles doivent être assemblées
Vériez chaque pièce selon la « RÉFÉRENCE DES PIÈCES ». Assurez-vous que toutes les pièces à assembler sont
prises en compte.
Étape2. INSTALLEZ LE CACHE ET LE BOUCHON DES SOUPAPES DE VIDANGE
Assurez-vous que le bouchon de vidange extérieur est inséré dans le capuchon de vidange extérieur et que le cache
de la soupape de vidange est vissé fermement. Insérez les trous de raccordement avec les bouchons. (Le bouchon
de vidange de sortie change en fonction des différentes tailles de piscine.)
BUTÉE Bouchon de vidange de sortie A Bouchon de vidange de sortie BCache de la vanne de vidange
AVERTISSEMENT :
Ne laissez pas la piscine sans surveillance lors de son
remplissage d'eau.
AVERTISSEMENT :
Si plus d'1 à 2 pouces d'eau s'accumule sur un côté avant que
vous ne commenciez à remplir au centre. La piscine n'est pas assez horizontale, ce qui
doit être corrigé ! Vous devez retirer le bouchon de vidange, vider complètement l'eau,
démonter complètement la piscine, localiser la piscine sur une surface plane et répéter
les instructions d'installation.
AVERTISSEMENT :
NE REMPLISSEZ PAS TROP car cela pourrait entraîner
l'effondrement de la piscine. En cas de pluie importante, vous devrez peut-être vider de
l'eau pour vous assurer que le niveau est correct.

OP1-19-FR(V1)
8
PARTIE 6-AMÉNAGEMENT POUR L’HIVER ET STO-
CKAGE DE LONGUE DURÉE
INSTRUCTIONS DE PLIAGE
PARTIE 5-REMPLIR LA PISCINE D'EAU
1. Assurez-vous que le raccord de vidange est solidement
inséré et que le capuchon est en place. Commencez à
remplir la piscine d'eau. Dès qu'environ 1 pouce d'eau est
sur le fond, arrêtez de remplir et lissez les plis sur le fond de
la piscine. Retirez la paroi extérieure du bord supérieur, sur
tout le fond de la piscine, an qu'il se remplisse de manière
homogène.
2. Continuez à remplir la piscine jusqu’à ce que la de niveau
d’eau.
AVERTISSEMENT :
Ne laissez pas vos enfants se tenir sur le pli du bas et face à la
sortie de l'eau pendant la vidange. Le courant de l'eau peut emporter vos enfants.
AVERTISSEMENT :
La piscine doit être stockée dans un endroit frais et sec, sans
objet pointu autour ni objets lourds situés au-dessus, ce qui peut endommager la piscine.
Étape1. Si vous avez une pompe ltrante, assurez-vous que la source électrique de la pompe ltrante a été
débranchée.
Étape2. Vériez que le bouchon de vidange est inséré fermement à l'intérieur de la piscine.
Étape3. Attachez votre tuyau d'arrosage au connecteur de la soupape de vidange et placez l'autre extrémité du
tuyau dans une zone où l'eau peut s'écouler en toute sécurité, telle qu'un collecteur d'eaux pluviales ou un caniveau.
N'oubliez pas que vu que l'eau trouve toujours son propre niveau, l'extrémité du tuyau doit être moins élevée que la
piscine pour assurer une vidange complète.
Étape4.Si vous avez une pompe ltrante, insérez le bouchon dans les dispositifs d'entrée et de sortie, à l'intérieur de
la piscine, puis débranchez les tuyaux de la pompe ltrante.
Étape5. Fixez le connecteur de la soupape de vidange à la sortie de vidange en tournant le connecteur dans le sens
des aiguilles d'une montre.
Étape6. Ouvrez le bouchon de vidange à l'intérieur de la piscine et l'eau commence à s'évacuer immédiatement.
Étape7. Débranchez le tuyau et le connecteur de la soupape de vidange dès que terminé.
Étape8. Remettez le bouchon de vidange à l'intérieur de la piscine.
Étape9. Assurez-vous que le liner de la piscine a complètement séché avant de plier la piscine pour un stockage à
long terme. Laisser la piscine exposée à la lumière du soleil pendant quelques heures nettoie et accélère le processus
de séchage et facilite le pliage de la piscine pour son stockage. (N'essayez jamais de plier ou de ranger une piscine
qui n'est pas complètement sèche car cela pourrait entraîner une prolifération de moisissure pendant que la piscine est
stockée).
Étape10. N'oubliez pas qu'un stockage correct hors saison est crucial pour protéger votre investissement dans votre
piscine (en particulier en hiver). Une fois vidée et sèche, votre piscine doit être soigneusement pliée et enveloppée
dans un tapis de sol (le cas échéant) ou un autre élément de protection similaire de type bâche. La piscine et tous les
accessoires applicables tels que la pompe, le couvercle, le tapis de sol, l'échelle, les tuyaux, les brides de xation et la
quincaillerie doivent être conservés ensemble et stockés à l'intérieur, dans un emplacement raisonnablement chaud,
sec et résistant à l'eau.
Avant le pliage, il est préférable de sécher complètement toutes les pièces et la
piscine en les laissant au soleil pendant environ 1 heure (IMG.1). Puis appliquez du
talc pour empêcher le vinyle de rester collé.
Étape1. Veuillez plier les bords de la protrusion à l'intérieur pour obtenir une forme rectangulaire. (IMG.2).
Étape2. Pliez chaque moitié du rectangle pour obtenir une forme rectangulaire plus petite.(IMG.3).
Étape3. Pliez chaque extrémité vers l'arrière. (IMG.4)
Étape4. Pliez ensemble les extrémités restantes pour créer un dernier rectangle.(IMG.5).
CONSEIL1. Veuillez retirer l'air à l'intérieur pour rendre la piscine pliée ne et plate lors de chaque pliage.
CONSEIL2. L'emballage d'origine peut être utilisé pour le stockage.
80 %
This manual suits for next models
21
Table of contents
Languages:
Other avenli Swimming Pool manuals

avenli
avenli 17796 User manual

avenli
avenli 17612 Series User manual

avenli
avenli 17795DE User manual

avenli
avenli RF-21-CZ2 User manual

avenli
avenli RF1-21-CZ User manual

avenli
avenli SPA User manual

avenli
avenli RP2-21-GB User manual

avenli
avenli 17792XX User manual

avenli
avenli 17806 Series User manual

avenli
avenli SPA4 User manual