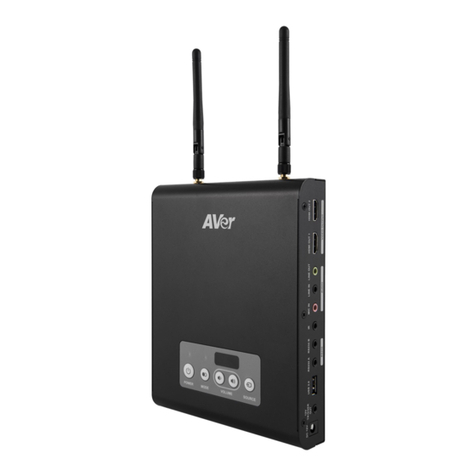
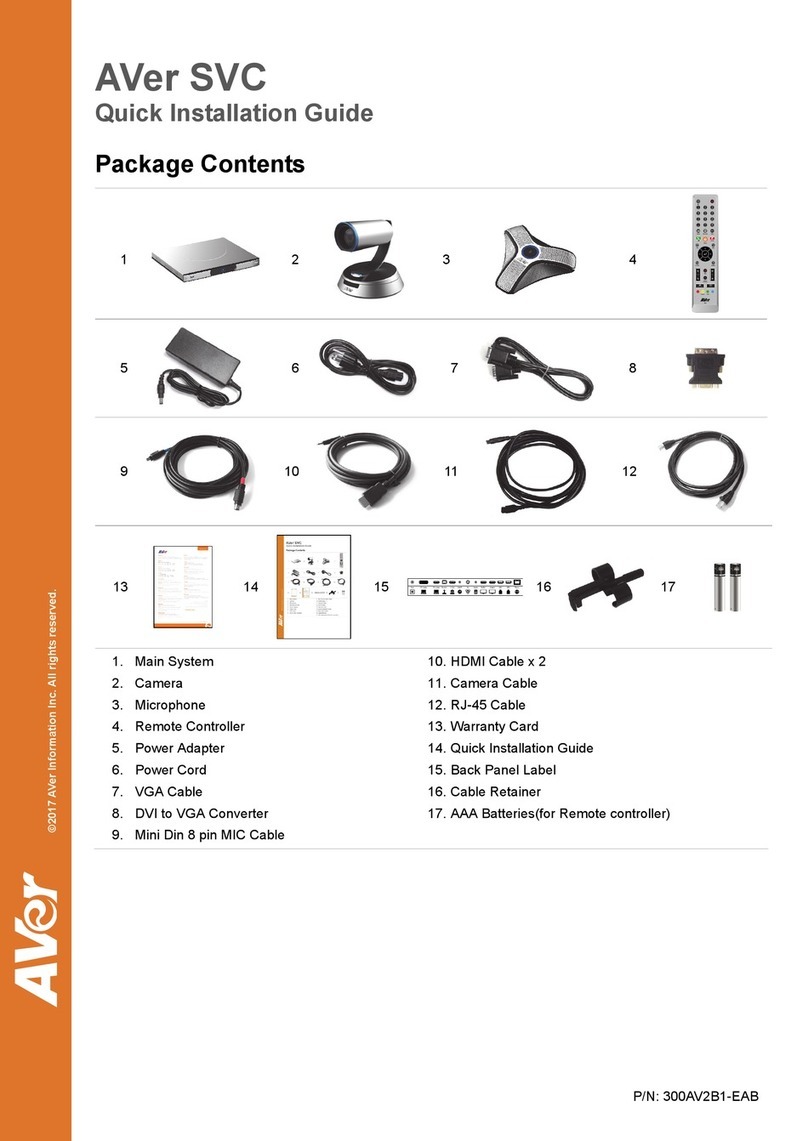
AVer CB-310 User manual

互動控制盒
Interactive Control Box
AVer CB-310
簡易安裝手冊/Quick Guide

商標
AVer 為圓展科技股份有限公司之商標。因本內容之描述出現的商標分屬個別公司所有且均受智慧財
產權相關法令保護。本文內所有提及之產品或企業名稱僅供識別與說明用途,且為各自擁有者之商
標或註冊商標。
著作權
©2019 圓展科技 版權所有
本內容相關權利係圓展科技股份有限公司所有,任何人未得事先書面同意不得就本內容為一部或全
部之重製、改作、或任何型式之散布行為 。圓展科技股份有限公司保留變更產品規格及內容的權利
無須另為通知。
若產品上標有打叉記號的滾輪垃圾桶,表示不得將產品與其他家用垃圾一同丟棄。請將
廢棄的設備交由指定之廢電機電子設備回收站處理。關於處理廢棄設備之詳細資訊,請
洽當地的家庭垃圾處理服務處或您購買產品的商家。
安全警告及注意事項
本產品在設計時已經考慮了確保人身的安全因素,並在出廠時經過嚴格的測試。但不正確的安裝、使
用可能會導致電擊與火災等危害,為了確保安全及延長本產品的使用壽命、保證本機的最佳性能得于
充分發揮,請在使用本產品之前仔細閱讀理解所有使用說明及銘牌標示,認真遵守安全注意事項,並
妥善保存好使用說明書,以備日後使用。
低功率電波幅射性電機管理辦法
第十二條 經型式認證合格之低功率射頻電機,非經許可,公司、商號或使用者均不得擅自變更頻率、
加大功率或變更原設計之特性及功能。
第十四條 低功率射頻電機之使用不得影響飛航安全及干擾合法通信:經發現有干擾現象時,應立即
停用,並改善至無干擾時方得繼續使用。
前項合法通信,指依電信法規定作業之無線電通信。
低功率射頻電機須忍受合法通信或工業、科學及醫療用電波幅射性電機設備之干擾。
遙控器電池安全資訊
- 請將電池存放在涼爽與乾燥的位置。
- 不要將電量用盡的電池棄置在家庭廢棄物中。請將電池棄置在特定回收處,或送回原購
買的商店。
- 如果長時間不使用電池,請將其取出。電池漏液與腐蝕可能會損壞遙控器,請以安全方
式棄置電池。
- 不可混用新舊電池。
- 不可混用不同類型的電池:鹼性、標準(碳鋅)或可充電(鎳鎘)電池。
- 不可將電池棄置於火源中。
- 請勿嘗試讓電池端子短路。

單元Unit
限用物質及其化學符號
鉛Lead
(Pb)
汞Mercury
(Hg)
鎘Cadmium
(Cd)
六價鉻
Hexavalent
chromium
(Cr+6)
多溴聯苯
Polybromin
ated
biphenyls
(PBB)
多溴二苯醚
Polybrominate
d diphenyl
ethers (PBDE)
電路板及零組件(電子料或電
機料…等) - ○ ○ ○ ○ ○
塑膠組件(外殼或導電泡棉…
等) ○ ○ ○ ○ ○ ○
金屬組件(鐵殼或鐵條或螺
柱…等) - ○ ○ ○ ○ ○
配件(電源供應器或遙控器或
電纜線…等) - ○ ○ ○ ○ ○
紙製品及包裝件(紙盒或手冊
或泡殼…等) ○ ○ ○ ○ ○ ○
備考 1.〝超出 0.1 wt %〞及〝超出 0.01 wt %〞係指限用物質之百分比含量超出百分比含量基準值。
Note 1:“Exceeding 0.1 wt %” and “exceeding 0.01 wt %” indicate that the percentage content of the
restricted substance exceeds the reference percentage value of presence condition.
備考 2.〝○〞係指該項限用物質之百分比含量未超出百分比含量基準值。
Note 2:“○” indicates that the percentage content of the restricted substance does not exceed the
percentage of reference value of presence.
備考 3.〝-〞係指該項限用物質為排除項目。
Note 3:The “−” indicates that the restricted substance corresponds to the exemption.
警告、發燙表面、請勿碰觸
在移動產品之前,請移除所有外部連接線材並關閉設備電源,設備的底部溫度較高需注意安全防止受傷。
連絡資訊
圓展科技股份有限公司
新北市 236 土城區大安路 157 號 8 樓
電話:02-2269-8535
網址:http://tw.aver.com/technical-support
手冊、線上教學影片和保固資訊,請到下面所列網址查尋或下載:
http://tw.presentation.aver.com/download-center/
CCAI14LP1670T2

目錄
包裝內容物 ...................................................................................................................................... 1
選配配件 .......................................................................................................................................... 1
連接埠 .............................................................................................................................................. 1
連接埠(接續) ................................................................................................................................... 2
互動控制盒按鈕 ............................................................................................................................. 2
遙控器介紹 ...................................................................................................................................... 3
連接電腦/筆記型電腦 .................................................................................................................. 4
電源連接 .......................................................................................................................................... 4
連接網路 .......................................................................................................................................... 5
HDMI 輸出連接 ............................................................................................................................. 5
壁掛安裝 .......................................................................................................................................... 5
首次啟動 .......................................................................................................................................... 6
關機 ................................................................................................................................................... 7
無
無線
線網
網路
路連
連線
線 ................................................................................................................................. 7
調整日期和時間 ............................................................................................................................. 9
規格表 ........................................................................................................................................... 10

繁體中文-1
包裝內容物
1
2
3
4
5
6
7
1. CB-310 互動控制盒
2. 無線天線
3. 遙控器
4. 簡易安裝手冊
5. 電源線和變壓器
6. AAA 電池(遙控器使用)
7. 腳墊 x 4
(可用於黏貼在 CP-310 機身底部的四角)
選配配件
USB 線HDMI 線
連接埠
(1) (2) (3) (4) (5) (6) (7) (8) (9) (10)
編號 說明 編號 說明
1 DC 電源孔 6 麥克風輸入埠
2 12V 輸出啟動埠 7 音源輸入埠
3 USB 2.0 埠 8 音源輸出埠
4 RS232A 和 RS232B 埠 9 HDMI1 和 HDM2 輸出埠
5 IR 延長線孔 10 天線連接孔

繁體中文-2
連接埠(接續)
(3) (4) (5)(2)(1) (6)
編號 說明
1 天線連接孔
2 HDMI 1、HDMI2、HDMI3 輸入埠
3 VGA 輸入埠
4 Touch-USB 埠
5 USB 3.0 埠
6 網路埠(1Gbps)
互動控制盒按鈕
(1) (2) (3) (4)
(5)
(7)
(6)
編號 說明
1 電源鈕
2 模式切換鈕
3 音量調整鈕
4 輸入源選擇鈕
5 紅外線接收區域
6 模式切換燈號(見下表)
7 電源燈號(見下表)
燈號 說明
電源 - 開機: 綠燈
- 待機: 紅燈
- 關機:無燈號
- 版本升級:紅燈閃爍
- 螢幕關閉: 綠燈
模式 - 基本模式: 亮燈
- 進階模式: 燈滅

繁體中文-3
遙控器介紹
使用遙控器來操作互動控制盒的功能,使用前請先安裝內含的電池。
(1)
(2)
(3)
(5)
(6)
(7)
(4)
(10)
(11)
(13)
(14)
(18)
(15)
(12)
(16)
(17)
名稱 功能
(1) 呼叫出輸入源選單。
(2) 切換到 HDMI1/HDMI2/HDMI3 連接的
設備輸入畫面。
(3) 切換到 USB 裝置的輸入源畫面。
(4) 切換到分割畫面設定。
(5) 在一般和進階模式間切換。
(6) ▲▼ 方向鍵,可用於移動來選擇選項。
(7) 從縮放的畫面回到原本畫面比例。
(8) Zoom +/- 放大或縮小影像畫面。
(9) 0~9 數字鍵 數字鍵,可用於輸入時使用。
(10) 呼叫出關機選單,使用▼和▲選擇「螢
幕鎖定」、「重新啟動」或「關機」選項,
選擇好了按「 」鍵確定。
(11) 切換到 VGA 連接的輸入源畫面。
(12) 呼叫出鏡像分享軟體。
(13) 回到主畫面。
(14) 回到上一頁或上一選項。
(15) 確定選項。
(16) 切換為靜音模式。
(17) 暫時凍結畫面,無法操作功能。再按一
次可解除凍結。
(18) 音量+/- 調整系統音量大小。

繁體中文-4
連接電腦/筆記型電腦
筆記型電腦
HDMI線
HDMI線
HDMI線
USB線
VGA線
筆記型電腦
USB線
電源連接
電源變壓器
電源線
牆面插座

繁體中文-5
連接網路
乙太網路線
牆面上的網路孔
路由器/交換器
或
HDMI 輸出連接
互動觸控螢幕 LCD/DLP 投影機
HDMI線
HDMI線
壁掛安裝
鎖附於互動控制盒底部的壁掛安裝方式,請參見使用手冊,網址如下:
http://tw.presentation.aver.com/download-center/07/-1/2269/182

繁體中文-6
首次啟動
將電源連接到牆面上的電源插座。然後按下電源開關啟動互動控制盒。首次啟動會進入到設定嚮導。其
設定嚮導會引導進行下列設定,請遵循其引導完成設定。
語言:選擇系統語言,點選 ▼ >「繁體中文」。
無線網路設定: 啟動無線網路功能並連接無線網路。點選無線網路啟動,系統會搜尋可連接的無線
網路,選擇然後連接。如不使用無線網路,請記得連接網路線。
設定日期和時間:設定目前的日期和時間。預設是「自動判斷日期和時間」。使用者可自行設定日期
與時間。
創建裝置的別名: 此名稱會用做於做鏡橡分享時的識別名稱。名稱最長 20 個字元,系統會給一個
預設名稱,若不想變更可直接套用。選擇「保存」完成設定。
軔體更新:在設定好裝置別名後,系統會偵測並看是否有無更新版本於網路上,若有最新版本,則會
自動更新。若無更新,會顯示訊息於螢幕上。
安裝 Google 應用程式:點選「安裝」開始安裝。
登錄: 在系統重新啟動後,登入你的 Google 帳號。
開機訊號源設定:選擇開機後的要顯示的來源畫面(主畫面、HDMI1、HDMI2、HDMI3、VGA、USB
裝置、無線鏡像分享、上一次全螢幕顯示的訊號源)。然後可以開始使用互動控制盒。
在完成設定嚮導後,會進入到所選擇的訊號源畫面(下圖是選擇主畫面為開機後畫面)。

繁體中文-7
關機
在開機狀態下,按遙控器上的 > 鍵即可關機。或按互動控制盒上的電源鍵( ),螢幕右
下方會顯示選單,請選擇「關機」。或是長按按互動控制盒上的電源鍵( )可直接關機。
無
無線
線網
網路
路連
連線
線
透過無線網路連接到無線 AP 上。
1. 點選「設定」。

繁體中文-8
2. 在設定頁選擇「網路」
。
3. 開啟無線網路。
4. 選擇可連線的無線網路。

繁體中文-9
調整日期和時間
1. 從應用程式清單中點選「設定」。
[註] 自動校對時間需要有網路連線。
2. 點選「日期和時間」。
3. 可設定時間、日期、時區和時間格式。預設是為「自動判斷日期和時間」。

繁體中文-10
規格表
系統版本 Android 7.1
RAM/ROM 4GB DDR3/ 8GB
處理器 雙核心ARM Cortex-A72 1.8Ghz 處理器和四核心ARM Cortex-A53
1.4Ghz 處理器
GPU ARM Mali-T860MP4
輸入 /輸出
(含解析度)
HDMI 輸入源 x3 (最高 1920x1080)
VGA輸入源x1 (最高1920x1080)
USB-type A x2
HDMI 輸出源 x2 (系統最高支援4K解析度)
連接介面 USB-type B
網路 Giga‐Ethernet
電源 12V/4A; 最大為500mA
壁掛 有
保固 3 年
作業環境 相對濕度:≤80﹪
工作溫度: 0~+40℃以上
儲存溫度:-10~+60℃
尺寸(不含壁掛架) 190mm(L) x 154mm(W) x 33mm(H)
包裝尺寸 305mm(W) x 255mm(D) x 231mm(H)
淨重 2.7±0.1 kg

Federal Communications Commission Statement
This device complies with Part 15 of the FCC Rules. Operation is subject to the
following two conditions: (1) This device may not cause harmful interference, and (2)
this device must accept any interference received, including interference that may
cause undesired operation.
This equipment has been tested and found to comply with the limits for a Class B digital device,
pursuant to Part 15 of the FCC Rules. These limits are designed to provide reasonable
protection against harmful interference in a residential installation. This equipment generates,
uses and can radiate radio frequency energy and, if not installed and used in accordance with the
instructions, may cause harmful interference to radio communications. However, there is no
guarantee that interference will not occur in a particular installation. If this equipment does
cause harmful interference to radio or television reception, which can be determined by turning
the equipment off and on, the user is encouraged to try to correct the interference by one of the
following measures:
- Reorient or relocate the receiving antenna.
- Increase the separation between the equipment and receiver.
- Connect the equipment into an outlet on a circuit different from that to which the receiver is
connected.
- Consult the dealer or an experienced radio/TV technician for help.
FCC Caution: Any changes or modifications not expressly approved by the party responsible for
compliance could void the user's authority to operate this equipment.
Europe – EU Declaration of Conformity
This device complies with the essential requirements of the Radio Equipment Directive
(2014/53/EU). The following test methods have been applied in order to prove presumption of
conformity with the essential requirements of the Radio Equipment Directive (2014/53/EU)
DISCLAIMER
No warranty or representation, either expressed or implied, is made with respect to the contents of
this documentation, its quality, performance, merchantability, or fitness for a particular purpose.
Information presented in this documentation has been carefully checked for reliability; however,
no responsibility is assumed for inaccuracies. The information contained in this documentation is
subject to change without notice.
In no event will AVer be liable for direct, indirect, special, incidental, or consequential damages
arising out of the use or inability to use this product or documentation, even if advised of the
possibility of such damages.
TRADEMARKS
“AVer” is a trademark owned by AVer Information Inc. Other trademarks used herein for
description purpose only belong to each of their companies.

COPYRIGHT
©2019 AVer Information Inc. All rights reserved.
All rights of this object belong to AVer Information Inc. Reproduced or transmitted in any form
or by any means without the prior written permission of AVer Information Inc. is prohibited. All
information or specifications are subject to change without prior notice.
NOTICE
SPECIFICATIONS ARE SUBJECT TO CHANGE WITHOUT PRIOR NOTICE. THE
INFORMATION CONTAINED HEREIN IS TO BE CONSIDERED FOR REFERENCE ONLY.
WARNING
TO REDUCE RISK OF FIRE OR ELECTRIC SHOCK, DO NOT EXPOSE THIS APPLIANCE TO
RAIN OR MOISTURE. WARRANTY VOID FOR ANY UNAUTHORIZED PRODUCT
MODIFICATION.
Remote Control Battery Safety Information
- Store batteries in any cool & dry place.
- Do not dispose used batteries in domestic waste. Dispose batteries at special collection points or
return to stores if applies.
- Remove the batteries if they are not in use for a long period of time. Battery leakage and corrosion
can damage the remote control, dispose batteries safely.
- Do not mix and use old and new batteries.
- Do not mix and use different types of batteries: alkaline, standard (carbon-zinc) or rechargeable
(nickel-cadmium).
- Do not dispose batteries in a fire.
- Do not attempt to short-circuit the battery terminals.
FOR PORTABLE DEVICE USAGE (<20m from body/SAR needed eg. BT dongle, smartphone)
Radiation Exposure Statement:
The product comply with the FCC portable RF exposure limit set forth for an uncontrolled
environment and are safe for intended operation as described in this manual. The further RF
exposure reduction can be achieved if the product can be kept as far as possible from the user body
or set the device to lower output power if such function is available.
FOR MOBILE DEVICE USAGE (>20cm/low power eg. AP routers)
Radiation Exposure Statement:
This equipment complies with FCC radiation exposure limits set forth for an uncontrolled
environment. This equipment should be installed and operated with minimum distance 20cm
between the radiator & your body.

THE MARK OF CROSSED-OUT WHEELED BIN INDICATES THAT THIS PRODUCT
MUST NOT BE DISPOSED OF WITH YOUR OTHER HOUSEHOLD WASTE.
INSTEAD, YOU NEED TO DISPOSE OF THE WASTE EQUIPMENT BY HANDING IT
OVER TO A DESIGNATED COLLECTION POINT FOR THE RECYCLING OF WASTE
ELECTRICAL AND ELECTRONIC EQUIPMENT. FOR MORE INFORMATION ABOUT
WHERE TO DROP OFF YOUR WASTE EQUIPMENT FOR RECYCLING, PLEASE
CONTACT YOUR HOUSEHOLD WASTE DISPOSAL SERVICE OR THE SHOP
WHERE YOU PURCHASED THE PRODUCT.
CAUTION
Hot Surface
Before you move the product, disconnect all external connections and power off the device.
Move the product carefully to prevent you from being scalded, especially the device's bottom,
which may cause safety issues.
Contact Information
Global
AVer Information Inc.
www.aver.com
8F, No.157, Da-An Rd., Tucheng Dist.,
New Taipei City
Ta i w an
Tel: +886-2-2269-8535
USA
AVer Information Inc.
www.averusa.com
668 Mission Ct
Fremont, CA 94539, USA
Toll-free: 1(877)528-7824
Local: 1(408)263-3828
Support.usa@aver.com

Contents
Package Contents .................................................................................................. 1
Optional Accessories .............................................................................................. 1
I/O Ports.................................................................................................................. 1
I/O Ports (Continued).............................................................................................. 2
Control Panel .......................................................................................................... 2
Remote Controller................................................................................................... 3
Connect to Laptop/PC ............................................................................................ 4
Power Connection .................................................................................................. 4
Ethernet Connection ............................................................................................... 5
HDMI Output Connection ....................................................................................... 5
Wall Mount Installation............................................................................................ 5
First Time Start-up .................................................................................................. 6
Power Off................................................................................................................ 7
W
Wi
iF
Fi
i
C
Co
on
nn
ne
ec
ct
ti
io
on
n ..................................................................................................... 7
Adjust Date and Time ............................................................................................. 9
Specification.......................................................................................................... 10

English-1
Package Contents
1
2
3
4
5
6
7
1. CB-310 Interactive Control Box
2. Antenna x 2
3. Remote controller
4. Quick Guide
5. Power adapter and power cord
6. AAA Batteries( for remote controller)
7. Foot rubber x4
(Stick to the four corners at bottom of
CP-310)
Optional Accessories
USB cable HDMI cable
I/O Ports
(1) (2) (3) (4) (5) (6) (7) (8) (9) (10)
# Description # Description
1 DC power jack 6 MIC input port
2 12V trigger out port 7 Line in port
3 USB 2.0 port 8 Line out port
4 RS232A & RS232B port 9 HDMI1& HDM2 output port
5 IR extender port 10 Antenna port

English-2
I/O Ports (Continued)
(3) (4) (5)(2)(1) (6)
# Description
1 Antenna port
2 HDMI 1, HDMI2, HDMI3 input port
3 VGA input port
4 Touch-USB port
5 USB 3.0 port
6 Ethernet port (1Gbps)
Control Panel
(1) (2) (3) (4)
(5)
(7)
(6)
# Description
1 Power button
2 Mode button
3 Volume +/- button
4 Source button
5 IR receive area
6 LED of mode button
7 LED of power button
LED Description
Power - Power on: Green
- Standby: Red
- Power off: Off
- Upgrading: Flash
Red
- Backlight off: Green
Mode - Entry mode: On
- Advanced mode:
Off
Other manuals for CB-310
2
Table of contents
Other AVer Control System manuals
Popular Control System manuals by other brands

ZONEMASTER
ZONEMASTER MAXIPOINT V2 installation manual

Waterway
Waterway OASIS troubleshooting guide

Raven
Raven SmarTrax installation manual

Ecolab
Ecolab Apex2 Installation and operation manual

iAIRE
iAIRE ultraDRY manual

Schweitzer Engineering Laboratories
Schweitzer Engineering Laboratories SEL-421-7 manual