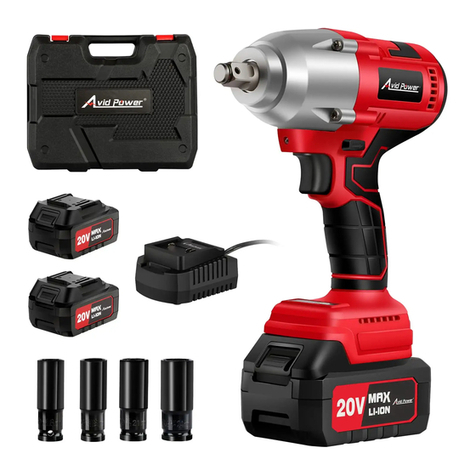
Avid Power ACIW326 User manual


1
TABLE OF CONTENTS
IMPORTANT SAFETY INSTRUCTIONS······················································P2
SATETY NOTES FOR BATTERIES AND CHARGER·····································P4
SPECIFICATIONS···················································································P4
PACKAGE CONTENTS············································································P4
FUNCTION DESCRIPTION········································································P5
OPERATING PROCEDURES····································································P6
MAINTENANCE······················································································P10
COMPONENT LIST AND EXPLODED VIEW················································P11

2
IMPORTANT SAFETY INSTRUCTIONS
KEEP WORKING AREA CLEAN. Clean areas to prevent injuries.
CONSIDER YOUR WORK AREA ENVIRONMENT. Don’t use power tools in damp, wet,
or poorly lit locations. Don’t expose your tool to the rain. Keep the work area well lit.
Don’t use tools in the presence of flammable gases and liquids.
KEEP CHILDREN AWAY. All children should be kept away from the work area. Don’t
let them handle machines, tools and extensions cords.
STORE UNUSED EQUIPMENT. To avoid being rusted, the machine must be stored in a
dry area. Equipment also should be placed in high or locked up to let the children have
no chance to touch it.
DON’T FORCE THE TOOL. It will do the job better and more safely at the rate for which
it was intended.
USE THE RIGHT TOOL. Don’t force a small tool or attachment to do the work of a larger
industrial tool. Don’t use a tool for a purpose for which it was not intended.
DRESS PROPERLY. Don’t wear loose clothing or jewelry, they can get caught in
moving parts. Protective, non-electrically conductive gloves and non-skid footwear are
recommended when working.Wear protective hair covering to contain long hair and keep
it from harm.
USE EYE PROTECTION. Use a full face mask if the work you’re doing produces metal
filings, dust or wood chips.Wear a clean dust mask if the work involves creating a lot of
sparks or coarse dust.
DO NOT TOUCH BITS OR BLADES WITH HANDS AFTER USE.They can become
extremely hot after the job is completed.
DON’T OVERREACH. Keep proper footing and balance at all times. Do not reach over
or across machines when running.
When using electric tools, machine or equipment, basic safety
instructions should be always followed to reduce the risk of fire,
electric shock and injury.

3
IMPORTANT SAFETY INSTRUCTIONS
MAINTAIN TOOLS WITH CARE. Keep tools clean for better and safer performance.
Follow instructions regarding lubricating, safe performance and changing accessories.
Keep handles dry, clean and free from oil and grease.
REMOVE ALL ADJUSTING KEYS AND WRENCHES. Make it a habit to check that
keys and adjusting wrenches are removed from any rotating tool before using.
AVOID UNINTENTIONAL STARTING. Don’t carry tools with your finger pressing on the
switch. Make sure the direction switch is in the STOP position when your machine is not
in use or changing attachments.
STAY ALERT. Don’t operate any tool when you are tired.
CHECK FOR DAMAGED PARTS. Before using the tool, any part that is
damaged should be carefully checked to determine that it will operate properly and
perform its intended function. Any part that is damaged should be properly repaired or
replaced by an authorized service center unless indicated elsewhere in the instruction
manual. Don’t use the tool if the switch does not turn on and off properly.
REPLACEMENT PARTS. When servicing, use only identical replacement parts.

4
The warnings, cautions, and instructions detailed in this manual cannot cover all
possible conditions and situations that occur. Please use common sense and
caution when operating this tool.
SATETY NOTES FOR BATTERY AND CHARGER
RIGHT TEMPERATURE FOR CHARGING. Room temperature must be higher than
32°F and lower than 122°F.
DO NOT CHARGE IF THE CHARGER’S CORD OR PLUG IS
DAMAGED.
Charging
with a damaged cord may result a fire and electrical shock. If the charger is damaged in
any way, have it repaired by a trained serviceman.
DO NOT CAUSE SHORT CIRCUITS IN YOUR BATTERY
.If
connection is made
between the positive (+) and negative (-) terminal directly or via accidental contact with
metallic objects, the battery is short circuited and an intense current will flow causing
heat generation which may lead to casing rupture or fire.
SPECIFICATIONS
PACKAGE CONTENTS
Chuck Size
1/2’’(13mm)
Voltage
20 Volts DC
Variable Speed
0-2000 RPM
Impact Frequency
0-2700BPM
Max Fastening Torque
450NM / 330 ft-lbs
Nut Busting Torque
500NM / 370 ft-lbs
1 PCS 20V Cordless Impact Wrench
1 PCS 1-2 Hours Charger
1 PCS 20V Li-ion Rechargeable Battery
1 PCS Tool Bag
4 PCS Sockets

5
FUNCTION DESCRIPTION
Important:If you encounter any quality issues regarding this product, please feel free to
No.
Description
1
1/2’’ Square Drive
2
Metal Gear Housing
3
Direction Button (Forward / Stop / Reverse)
4
Variable Speed Trigger Switch
5
Rubber Handle
6
Battery Release Button
7
Battery Pack
8
LED Light
9
Charger

6
OPERATING PROCEDURES
BATTERY PACK
How to charge the battery pack ?
Green light: Power indicator. When the charger is connected to AC household
current, the green light is on.
Red light: Charging indicator. When the battery is properly inserted into the
charger and charging, the red light is on.
1. The battery is not fully charged. You’d better let it charge for 1-2 hours
before the first use. Normal charging time is 1-2 hours when the battery
is completely dead.
2. Replace a new battery when tool performance begins to diminish; Severe
heat is most destructive to a battery; The more heat it generates, the faster
the battery loses power. A battery that gets too hot can have a shortened
life.
3. Never over-discharge a battery when using the tool even after tool
performance has decreased. When tool performance begins to diminish,
please stop letting the tool work and recharge the battery for optimal
performance.

7
How do you know if the battery is fully charged ?
Normal charging time is 1 to 2 hours when the battery is completely dead. The
red light will turn off and the green light remains lit once the battery is fully
charged.
After the charging is completed, remove the battery pack from the charging stand
immediately. When charging more than one battery pack, allow 15 minutes between
charges.
After many charge/discharge cycles, your battery may lose its ability to hold a charge.
If so, please replace it. Dispose of batteries at an appropriate waste disposal facility.
Do not throw batteries away in common trash receptacles.
Install or remove battery pack(Fig.3)
To install : slide battery pack into the bottom of the tool until you hear a click. Make
sure that the latch in place and battery is secure before operation.
To remove: Press the battery release latch and pull the battery pack out at the
Same time.
Latch
Fig 3

8
When the machine is obstructed, please turn off the switch right away and
check if the work piece is right. An obstruction may cause the machine motor
to be burned.
APPLICATION
OPERATING PROCEDURES
Notice: This tool is cordless and does not need to be connected to a power supply.
CAUTION: Do not expose either the tool or charger to the rain or water. Do not
overcharge the battery as this may damage the battery. If the battery power is low,
stop working and recharge the battery pack.To prolong the using life of the tool, do
not work continually for more than 20 minutes at a time.
INSTALL SOCKETS (SEE FIG. 4)
Choose a 1/2’’ driver socket of the correct size and mount it on the drive shaft.
After you place the socket over the fastener, it will self-locked when you align the hole
in the socket with the hole in the fastener.
This tool is intended for loosening and tightening nuts and bolts with a
1/2'' drive impact sockets.
FIG.4

9
VARIABLE SPEED
ROTATION DIRECTION (SEE FIG.5)
OPERATING PROCEDURES
If the tool shows signs of decreased power, stop and recharge the battery. Using the
tool to do heavy work when the battery is weak drains the battery very quickly and
may damage the battery.
Use the variable speed only for starting
You can vary the spindle rotation speed by modulating finger pressure on the trigger.
Your tool is equipped with a 3-position switch ( forward / reverse / self-lock)
through the housing above the trigger.
When the knob is pushed toward the right, the rotation is forward (clockwise).
When pushed from right to left, the rotation is reversed (counter
clockwise).
When in center position, it is locked into stop and the trigger is blocked.
Do not push the rotation direction knob until the drive stops turning.
Reverse
Forward
FIG.5

10
MAINTENANCE
OPERATING PROCEDURES
LED WORKING LIGHT
The impact wrench has 1 LED lights to illuminate the work area and improve
vision when working in areas with insufficient light.
The LED light will be turned on or off accompanied by situation of the trigger
switch.
Keep the tool clean by using a soft damp (not wet) cloth. Do not use solvents
on the plastic parts.
Lubrication is not necessary. After long-term use, find an authorized service
center to maintain and lubricate the tool.
To maintain the best performance of your rechargeable battery, protect it from
overheating and overcharging. Occasionally charger the battery for 6 hours.
The battery may also benefit from a full discharge from time to time.

11
COMPONENT LIST AND EXPLODED VIEW
No.
Description
Qty.
1
Gear box sheet
1
2
Screw ST5x30
4
3
Gear box
1
4
Bearing
1
5
Switch push button
1
6
Spindle washer
1
7
Switch
1
8
Main spindle
1
9
LED transparent cover
4
10
Impact block assembly
1
11
Right housing
1
12
Planet gear
3
13
Pin
3
14
Screw ST4.2x16
10
15
Screw M4x10
2
16
Hook
1
17
Left housing
1
18
Washer
1
19
Gear ring
1
20
Bearing 6002—2Z
1
21
Screw M5x10
2
22
Motor bracket
1
23
Small gear
1
24
Motor
1
25
Battery
1
26
Battery clip assembly
1
27
Label
1

12

Table of contents
Other Avid Power Power Tools manuals
