AVM FRITZ!DECT 200 Owner's manual

Installation and Operation
200
FRI!DECT

Package Contents
Part Illustration
1 FRITZ!DECT200
On/Off
DECT
On/Off
DECT
AIN
All FRITZ!DECT devices have an AIN (actuator ID). Each AIN is
unique. The AIN is displayed in the user interface of the
FRITZ!Box and on the type label on the back of the device.
R987.321.65.498.777
12345 6789012
Serial no.:
Input: 230 V~; 0.02 A; 50 Hz
AIN:
FRITZ!DECT 200
AVM GmbH, 10547 Berlin
Article no.: 2000 2636
Max. load: 10 A
3

Security
Do not subject FRITZ!DECT200 to a load higher than its limit of 2300W/10A (ohmic
load). Overloading can damage FRITZ!DECT200, or cause malfunctions or an
electrical accident.
•Only use FRITZ!DECT200 indoors.
•Operate FRITZ!DECT200 only in a dry location that is free of dust, protected from direct
sunlight, and well ventilated.
•Insert FRITZ!DECT200 into an electrical outlet that is easy to reach.
•Do not insert FRITZ!DECT200 into another FRITZ!DECT200.
•Do not operate any devices that present a risk of re (for instance, electric irons, radiant
heaters) on FRITZ!DECT200.
•Never let liquids get inside FRITZ!DECT200.
•Do not modify FRITZ!DECT200. FRITZ!DECT200 may not be opened, converted, modied
or repaired except by a qualied technician.
•Congure automatic switching for FRITZ!DECT200 only if the connected devices are
designed for such operation. Frequent switching can shorten the service life of electrical
devices. No liability will be accepted for attendant damage to corresponding devices.
4

Technical Specications
•DECT wireless standard
•DECT frequency range:
1880MHz – 1900MHz
•Maximum DECT transmitter power:
250mW
•Range: up to 40m indoors,
up to 300m outdoors
•Maximum power consumption:
- maximum: approx. 1.1W
- on standby: approx. 0.5W
•230V, 50Hz A/C
•Measurement accuracy:
+/- 100mW (up to 5W);
+/- 2% (5W or higher)
•Dimensions (without plug):
93mm x 59mm x 41mm
•Weight: approx. 135g
•For connected devices up to
2300W/10A
•Ambient conditions:
-operating temperature: 0°C–40°C
-relative humidity: 10% – 90%,
no condensation
Online Help
In addition to this quick guide, the online help contains a description of all features and
instructions for operating FRITZ!DECT200.
The online help is opened by clicking the question mark button in the user interface of the
FRITZ!Box (http://fritz.box) .
5

Registering with a FRITZ!Box
1. Insert FRITZ!DECT200 into an outlet near your FRITZ!Box.
The DECT LED ashes regularly.
2. Within 2minutes, press the DECT button on your FRITZ!Box, until the Info or DECT LED
starts ashing.
FRITZ!DECT200 is registered with the FRITZ!Box. The wireless connection has been
established when the DECT LED on the FRITZ!DECT200 lights up.
If the DECT LED continues to ash, registration was not successful. Remove
FRITZ!DECT200 from the power outlet and repeat the registration process.
3. Now insert FRITZ!DECT200 into the socket where you would like to use the device.
FRITZ!DECT automatically reregisters with the FRITZ!Box. When the connection has been
established, the DECT LED lights up.
If the DECT LED keeps ashing, try to register from a dierent outlet closer to the
FRITZ!Box. The outlet must be located within the range of the DECT radio network of
the FRITZ!Box.
6

1
2
Power/DSL
WLAN
Fon/DECT
Connect/WPS
Info
3
Power/DSL
WLAN
Fon/DECT
Connect/WPS
Info
On/Off
DECT
On/Off
DECT
On/Off
DECT
On/Off
DECT
Power/DSL
WLAN
Fon/DECT
Connect/WPS
Info
On/Off
DECT
On/Off
DECT
DECT
7

Conguring on the Computer
FRITZ!DECT200 can be congured with a
Smart Home prole in the user interface of
the FRITZ!Box:
1. Open a web browser.
2. Enter http://fritz.box in the address eld.
3. Open the Smart Home / Device Manage-
ment menu.
4. Click on behind your FRITZ!DECT200.
The Smart Home prole of FRITZ!DECT200
appears.
Smart Home Prole
•A Smart Home prole combines features
like LED display, automatic switching (for
instance, by schedule), switch status, and
push service.
•Manual changes remain intact until the
next switching point congured in the
Smart Home prole is reached. The
Smart Home prole is not aected by
manual settings.
•For detailed descriptions of the features
and settings options included in Smart
Home proles, see the online help for the
FRITZ!Box.
8

Switch the Socket On/O
•with the On/O button on
FRITZ!DECT200
•with a computer via the FRITZ!Box user
interface in the Smart Home / Operation
menu
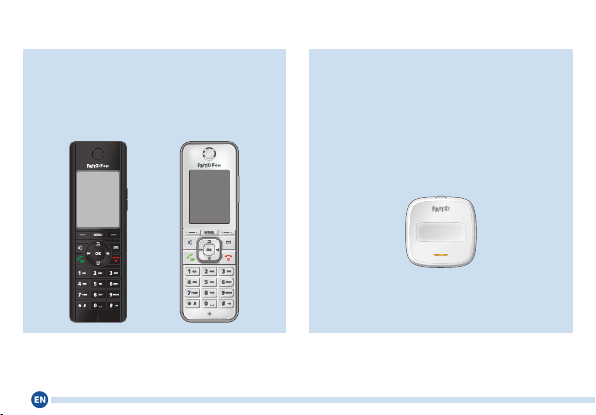
•with a FRITZ!Fon; see page 10
•with a FRITZ!DECT 400 switch; see page
10
•with the FRITZ!AppSmartHome; see
page 11
In addition, you can congure automatic
switching and control the FRITZ!DECT200
with a weekly calendar or Google calendar.
Even when automatic switching is
enabled, you can turn
FRITZ!DECT200 on and o by hand,
on a computer, with a FRITZ!Fon,
FRITZ!DECT400 or with FRITZ!App
Smart Home.
Conguring Automatic
Switching
1. Open a web browser.
2. Enter http://fritz.box in the address eld.
3. Open the Smart Home / Device Manage-
ment menu.
4. Click on behind your FRITZ!DECT200.
5. Click on the Switch Automatically tab.
6. Enable the Automatic switching enabled
option.
7. Select the kind of switching and cong-
ure the automatic switching.
The types of switching are described
in the online help for the FRITZ!Box.
Click on in the FRITZ!Box user
interface.
8. Click on OK to save the settings.
9

Operation with FRITZ! Devices
FRITZ!DECT 400
With the FRITZ!DECT400 switch you
can control the FRITZ!DECT200. How to
congure your FRITZ!DECT400 for this is
described in the Knowledge Base under
en.avm.de/service/fritzdect-400.
FRITZ!Fon
With the Smart Home start screen you
can control FRITZ!DECT200 and other
Smart Home devices.
10

Switching with
FRITZ!App Smart Home
You can switch FRITZ!DECT200 with the
FRITZ!App Smart Home. For this the app
must be installed on your smartphone and
connected to the FRITZ!Box directly or via
remote access.
In the app you can display the switch status,
the current power, and the measured
temperature.
The FRITZ!App Smart Home can be down-
loaded for free from the App Store and from
Google Play.
App StoreGoogle Play Store
Deregistering
If you would like to register FRITZ!DECT200
with another FRITZ!Box, deregister it from
the current FRITZ!Box rst:
1. Hold the DECT button down for at least
6 seconds.
2. FRITZ!DECT200 is deregistered from the
FRITZ!Box.
3. After a brief delay the DECT LED begins
ashing.
Now you can register FRITZ!DECT with
another FRITZ!Box; see page 6.
Removing FRITZ!DECT200 from the
power outlet does not deregister it from the
FRITZ!Box.
11

LEDs and Buttons
Display/Operation Condition
On/OffOn/Off Press the button Switch the socket on and o
o Socket is switched o
on Socket is switched on
ashing Firmware update
ashes briey at
regular intervals Socket is switched o because the power limit was exceeded; see page 14
DEC
T
DEC
THold the button
down for at least
sixseconds
Deregister; see page 11
on Registered with FRITZ!Box
ashing Is being registered with FRITZ!Box, or rmware update
ashes briey at
regular intervals
No connection to the FRITZ!Box
FRITZ!DECT200 is not registered, or is outside the range of the FRITZ!Box.
On/O
DECT
On/O
DECT
On/O
DECT
On/O
DECT
12

Display/Operation Condition
On/OffOn/Off
Press the button Switch the socket on and o
o Socket is switched o
on Socket is switched on
ashing Firmware update
ashes briey at
regular intervals Socket is switched o because the power limit was exceeded; see page 14
DECTDECT
Hold the button
down for at least
sixseconds
Deregister; see page 11
on Registered with FRITZ!Box
ashing Is being registered with FRITZ!Box, or rmware update
ashes briey at
regular intervals
No connection to the FRITZ!Box
FRITZ!DECT200 is not registered, or is outside the range of the FRITZ!Box.
13

No Connection to FRITZ!Box
The DECT LED ashes briey at regular
intervals.
1. Insert FRITZ!DECT into an outlet near
your FRITZ!Box.
2. When the DECT LED lights up, the
previous outlet is located outside the
range of the FRITZ!Box, or the wireless
connection is faulty.
Typical sources of interference include
closed doors and zones with high
humidity (damp walls, clothes drying
racks).
If the outlet is outside the range of
the FRITZ!Box and needed there,
use a FRITZ!DECT Repeater.
If the DECT LED continues ashing,
FRITZ!DECT200 is not registered with the
FRITZ!Box. Register FRITZ!DECT200 again.
Socket Switched O
The On/O LED ashes briey at regular in-
tervals and the connected electrical device
does not work. The socket is switched o.
1. Remove the electrical device from the
FRITZ!DECT200 socket.
2. Press the On/O button. The socket is
switched back on.
The On/O LED lights up.
3. Insert the electrical device back into
FRITZ!DECT200.
Help in Case of Errors
14

Disposal
In accordance with the Waste of
Electrical and Electronic Equipment
Directive, FRITZ!DECT200 may not
be disposed with household waste.
Please bring the device to a local collection
point for disposal after use.
Declaration of Conformity
CE Declaration of Conformity
AVM hereby declares that the device is
compliant with the Directive 2014/53 / EU.
UKCA Declaration of Conformity
AVM hereby declares that the device is
compliant with the Radio Equipment
Regulations 2017 (S.I. 2017/1206).
The full text of the declarations of
conformity is available at
https://en.avm.de/service/declarations.
15

Manufacturer’s Warranty
We oer a manufacturer’s warranty of 2 years for this original product. The warranty period
begins with the date of purchase by the rst end user. Compliance with the warranty period
can be proven by submission of the original invoice or comparable documents. This war-
ranty does not restrict your warranty rights based on the contract of sale or other statutory
rights.
Within the warranty period, we will remove defects to the product which are demonstrably
due to faults in materials or manufacturing. Our warranty does not cover defects which
occur due to incorrect installation, improper use, non-observance of instructions in the user
manual, normal wear and tear or defects in the environment of the system (third-party
hardware or software). We may, at our discretion, repair or replace the defective product.
Claims other than the right to the removal of defects which is mentioned in these terms of
warranty are not constituted.
We guarantee that the software conforms with general specications, not, however, that
the software meets your individual requirements. Delivery costs will not be reimbursed.
Products which have been replaced revert to our ownership. Claims recognized under war-
ranty entail neither an extension or recommencement of the warranty period. If we reject a
warranty claim, this claim lapses no later than six months after being rejected by us.
This warranty shall be governed by German substantive law, to the exclusion of the United
Nations Convention on Contracts for the International Sale of Goods (CISG).
16

Lieferumfang
Teil Abbildung
1 FRITZ!DECT200
On/Off
DECT
On/Off
DECT
AIN
Alle FRITZ!DECT-Geräte haben eine AIN (Aktor-Identikations-
nummer). Die AIN ist individuell. Sie wird in der Benutzer-
oberäche der FRITZ!Box und auf dem Typenschild auf der
Geräterückseite angezeigt:
R987.321.65.498.777
12345 6789012
Serien-Nr.:
Input: 230 V~; 0.02 A; 50 Hz
AIN:
FRITZ!DECT 200
AVM GmbH, 10547 Berlin
Artikel-Nr.: 2000 2572
Max. load: 10 A
17

Sicherheit
Belasten Sie FRITZ!DECT200 nur bis zur Leistungsgrenze von 2300W/10A
(Ohm’sche Last). Eine Überlastung kann FRITZ!DECT200 beschädigen, Fehlfunktionen
oder einen elektrischen Unfall auslösen.
•Verwenden Sie FRITZ!DECT200 nur in Gebäuden.
•Betreiben Sie FRITZ!DECT200 nur an einem trockenen, staubfreien Ort ohne direkte
Sonneneinstrahlung und mit ausreichender Belüftung.
•Stecken Sie FRITZ!DECT200 in eine leicht erreichbare Steckdose.
•Stecken Sie FRITZ!DECT200 nicht in einen anderen FRITZ!DECT200.
•Betreiben Sie keine Geräte mit Brandgefahr (z.B. Bügeleisen, Heizstrahler) unbeaufsich-
tigt am FRITZ!DECT200.
•Lassen Sie keine Flüssigkeiten in das Innere von FRITZ!DECT200 eindringen.
•Verändern Sie FRITZ!DECT200 nicht. FRITZ!DECT200 darf nicht geönet, umgebaut,
modiziert oder unsachgemäß repariert werden.
•Richten Sie für FRITZ!DECT200 nur eine automatische Schaltung ein, wenn die an-
geschlossenen Geräte dafür ausgelegt sind. Häuges An- und Ausschalten kann die
Lebensdauer elektrischer Geräte verkürzen. Für entsprechende Schäden an angeschlos-
senen Geräten wird nicht gehaftet.
18

Technische Daten
•Funkstandard DECT
•Frequenzbereich DECT:
1880 MHz – 1900 MHz
•Maximale Sendeleistung DECT: 250 mW
•Reichweite: in Gebäuden bis zu 40m,
im Freien bis zu 300m
•Leistungsaufnahme:
•maximal: ca. 1,1W
- im Standby: ca. 0,5W
•230V, 50Hz A/C
•Messgenauigkeit:
+/- 100 mW (bis 5W); +/- 2 % (ab 5W)
•Maße (ohne Stecker): 93x 59x 41mm
•Gewicht: ca. 135g
•für angeschlossene Geräte bis
2300W/10A
•Umgebungsbedingungen:
-Betriebstemperatur: 0 °C – 40 °C
-relative Luftfeuchtigkeit: 10 % – 90 %,
nicht kondensierend
Online-Hilfe
Neben dieser Kurzanleitung enthält die Online-Hilfe eine Beschreibung aller Funktionen und
Anleitungen zur Bedienung von FRITZ!DECT200.
Die Online-Hilfe wird in der Benutzeroberäche der FRITZ!Box (http://fritz.box) über das
Fragezeichen-Symbol aufgerufen.
19

An einer FRITZ!Box anmelden
1. Stecken Sie FRITZ!DECT200 in eine Steckdose in der Nähe Ihrer FRITZ!Box.
Die LED DECT blinkt gleichmäßig.
2. Drücken Sie an Ihrer FRITZ!Box innerhalb von 2Minuten die Taste DECT, bis die LED Info
bzw. die LED DECT blinkt.
FRITZ!DECT200 wird an der FRITZ!Box angemeldet. Die Funkverbindung ist hergestellt,
wenn die LED DECT am FRITZ!DECT200 leuchtet.
Falls die LED DECT weiter blinkt, war die Anmeldung nicht erfolgreich. Ziehen Sie
FRITZ!DECT200 aus der Steckdose und wiederholen Sie die Anmeldung.
3. Stecken Sie FRITZ!DECT200 jetzt in die Steckdose, an der Sie das Gerät einsetzen
möchten.
FRITZ!DECT meldet sich automatisch wieder an der FRITZ!Box an. Wenn die Verbindung
hergestellt ist, leuchtet die LED DECT.
Falls die LED DECT dauerhaft blinkt, versuchen Sie die Anmeldung aus einer anderen
Steckdose, die näher an der FRITZ!Box ist. Die Steckdose muss innerhalb der
Reichweite des DECT-Funknetzes der FRITZ!Box liegen.
20
Other manuals for FRITZ!DECT 200
1
Table of contents
Languages:
Other AVM Home Automation manuals