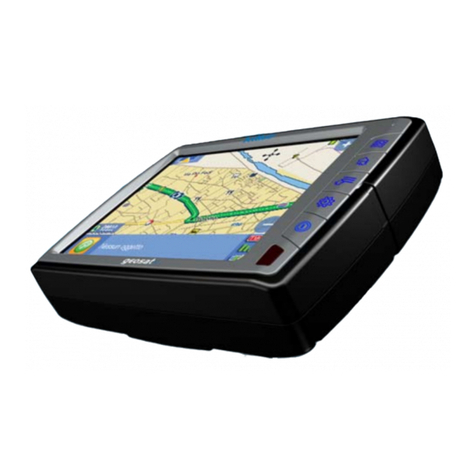
AvMap GeoPilot II User manual

QUICK GUIDE

www.avmap.it

3
This chapter provides general information about the functions of the keys and
entering data (connecting the GeoPilot2 to power).
QUICK GUIDE
1.1 THE KEYBOARD
The GeoPilot2 has 7 keys, which access and control features. Some keys perform
different tasks based on the operation mode. A quick key guide is displayed at the
bottom of many menus for easy reference.
Below we indicate the keys in capital letters enclosed between single inverted
commas, for example ‘MENU’. When a key, for example ‘MENU’, must be pressed
and held down for more than 1 second it is shown as ‘MENU’ 1 sec.
The NEAR key
‘NEAR’: press and hold to turn the GeoPilot2 On.
‘NEAR’ 3 sec.: once the GeoPilot has been turned On turns the GeoPilot Off.
‘NEAR’: (immediately release!) Displays a list of the 20 nearest objects, including
private airports which contain runways of at least 500 ft. in lenght, relative to x
position or cursor position if no x is available.
‘NEAR’: 1 sec once the GeoPilot2 has been turned On displays the
Brightness and the Night Palette Menu.
The GoTo key
Activates a Flight Plan to the cursor position (in Moving Map) or to selected object (in
other modes).
GOTO 1 sec.: allows the user to quickly lter mapping information on the display.
There are three Cycle modes selectable and holding GOTO shifts from one to the
other in succession. The default Cycle is the Cycle 1 that normally activates all
features to be visible on the display.
To set user preferences for the Cycle Key:
‘MENU’ + “SELECTIVE DISPLAY” + ‘ENTER’
The Cycles appear in the rst three columns and are labeled 1, 2 and 3. In order to
adjust at which Cycle features appear, use the Cursor Control key to highlight an item
4
and hit ‘ENTER’ to remove the item from appearing. Hit ENTER again to check the
item so that it will appear on the display when that Cycle is activated. Continue to use
this procedure to activate features in Cycles 1 - 3 as desired.
The - key
Shows less detail of a larger area by changing the chart scale and zooming out on the
map display.
The cursor key
Moves the cursor on the Moving Map, quickly and accurately. Also scrolls to the
desired options in menu page(s).
If pressed on the center it works as an ‘ENTER’ key, it selects the desired option or
conrms selection. Also opens the Cursor/Position Menu.
The + key
Shows more detail of a smaller area by changing the chart scale and zooming in on
the map display. If pressed outside the Moving Map it can be used as an ‘ENTER’ key
The Esc key
Rejects an action, closes a window or activates Home or Auto Zoom mode.
‘Esc’ 3 sec. on the moving map changes the position of the x icon : one
conguration displays the x icon on the 20% central area of the Moving Map and the
other on the exact center of the screen.
1.2 THE MENU KEY
The MENU key provides access to different menus : Moving Map Menu, Main Menu,
System Setup.
1.2.1 Moving Map Menu
The Moving Map Menu provides access
to the set up functions of the Moving
Map
display.From Moving Map press ‘MENU’
to display the Moving Map Menu. From
the
Moving Map Menu you can select the
following options :
Viewed FP
This item enables you to select the Flight
Plan to display on the Moving Map from

5
the list of stored Flight Plans.
Auto Position Mode
It is possible to select the Auto Zoom mode, Home Auto mode or deactivate the
function.
Data Window Mode
This window provides navigation information relating to the Flight Plan and GPS data.
Setup Data Fields
You can select the item to be displayed in each of the elds of the Data Window.
Map Orientation
Map Orientation controls the direction that the Moving Map is pointing to.
Map Presentation
Map Presentation allows you to select the priority of the map display and color
selections among
AERO+TERRESTRIAL/AERONAUTICAL/MARINE settings.
Automatic Info
The display of Automatic Information is
controlled by this setting.
VFR, Airspace, Land, Marine and
other Settings
The following menus enable/disable the
display of categories of data.
Terrains
With this you can enable/disable Terrain
Depiction or the TAWS.
Selective Display
The Selective Display feature allows you to further customize the display by selecting
thechart scale level at which the category of data will begin displaying on the map.
POI Settings
This feature is similar to the Selective Display, but refers to the Points of Interest
(POI).

6
1.2.2 Main Menu
The Main Menu provides access to
the set up of the main features of the
GeoPilot. Press and hold for 1 sec
‘MENU’ to display the Main Menu. From
the Mainp Menu you can select the
following features :
Navigation & Location
The Navigation and Location screen
displays a full page of navigation
information with
location coordinates.
HSI Screen
The HSI screen presents the desired
course to be own and the current
Track in a graphical format similar to
the Horizontal Situation Indicator of an
aircraft; using the compass rose as the
center of the display.
Flight plan
The Flight Plan mode allows you to
create a Flight Plan with User Points,
Temporary
Waypoints or Jeppesen object as
Waypoints.
GPS Page
The GPS page shows GPS data in graphic mode, displaying satellite availability and
status.
Database
The Database functions allow the user to search for and display information stored
in the data cartridges on Airports, VOR, NDB, Intersections and User Waypoints, and
to save User Data (User Waypoints, Flight Plans and Tracks) in the CF through File
Manager.
Calculator
The Calculator functions assist the user in preight and in-ight calculations for

7
Vertical Navigation, Wind and Fuel consumption. In addition, clock functions and trip
data can be found in this menu.
Checklist
Provides a checklist of standard procedures for Engine Start, Ground Check, Pre-
Take-off, Cruise in Flight and Landing.
Simulator
The built-in Simulator function allows you to become procient in the use of the
GeoPilot before ever taking it into the cockpit. No current position x is required
because the GeoPilot simulates position data internally. The GeoPilot simulates ight
in two ways: a straight ight path or following a selected route.
Communication
The Communications Menu contains options that control the GPS data output.
1.2.3 System Setup Menu
The System Setup Menu allows the user
to change how the GeoPilot2 displays
information.
Press MENU 3 times to display the Main
Menu. From the System Setup you can
select the following options :
General Setup
The General Setup sub-menu controls
the general GeoPilot settings like sound,
scale,
language, etc.
Fix Setup
The Fix Setup sub-menu contains options relating to GPS data input and display.
Alarm Setup
The GeoPilot2 provides alarm settings for various functions. Here you can set the
system for your navigational requirements.
Track Setup
Track is the actual course traveled, which the GeoPilot2 can display as a series of
connected dots. The interval setting and the color can be dened in this section by the
pilot.

8
Units Setup
This sub-menu contains the various options that dene how the Geopilot2 displays
units of measurement
Date & Time Setup
These functions control how the Geopilot2 displays time and date settings.
Clear User Data
Deletes all Flight Plans, Track history and User Waypoints.
Clear all Radials
You can delete all stored Projected Radial lines displayed on the Moving Map with this
one function.
Factory Defaults
This will restore the GeoPilot2 to all factory default settings.
1.3 TURNING THE GeoPilot2 ON/OFF
Before powering On the GeoPilot2, check for the correct voltage (10-35 Volt DC).
1.3.1 TURNING ON
Press and hold ‘NEAR’ for 1 second. The GeoPilot2 emits one rapid beep sound
and a Title page containing information about the Product name, Software version,
library version and cartridges installed is displayed. This data can also be viewed in
the “About” page in the “Main Menu”.
After a few seconds the Warning page is displayed, reminding you that the GeoPilot2
is an aid to navigation and should be used with appropriate prudence. The electronic
charts are not intended to substitute for the ofcial charts. Press ‘ENTER’ to open the
Moving Map screen.
1.3.2 TURNING OFF
‘NEAR’ 3 sec.: a countdown timer appears on the screen, if you release the key
before the countdown timer reaches zero, the GeoPilot2 will remain On.
1.4 CHANGING BRIGHTNESS
Press and hold 1 sec ‘NEAR’ to adjust the brightness of the display and keyboard (do
not press and hold the key for 3 sec. or the “power-off ” message will be displayed!).

9
To increase/decrease the brightness use respectively up/down cursor key.
In addition the Time and the GPS State are shown.
1.5 SELECTING THE LANGUAGE
It is possible to select the language in which the information is displayed (for screen
labels, menus and options, but it does not affect the map information). The default
setting is English.
> ‘MENU’ 1 sec. + “SYSTEM SETUP” + ‘ENTER’ + “GENERAL SETUP” + ‘ENTER’ +
“LANGUAGE” +‘ENTER’
Choose the language you want and press ‘ENTER’ again to conrm.
1.6 DATA ENTRY
Information is keyed into the GeoPilot2 when editing a Waypoint, entering a Flight
Plan, using the calculator and searching the Database. When the eld is highlighted:
- Enter or edit data by pressing up/down cursor key to step through the available
characters until the desired character is displayed.
- Press right cursor key to move the cursor to the right.
- Use left cursor key to move the cursor to the left. Some pilot-entered data requires
either a +, - or a hemisphere identication:
- Move the cursor over the displayed symbol and press up/down cursor key until the
desired symbol appears.
-Press ‘ENTER’ to continue to the next line or to return to the previous menu.
1.7 FINAL NOTES
1.7.1 Use with Terrestrial Maps
The GeoPilot2 is compatible with AvMap terrestrial cartography : with a terrestrial SD
inserted the GeoPilot2 becomes a Geosat 4 Drive
1.7.2 Full Geopilot2 Manual
You can downoad the full version of the Geopilot2 manual from our site www.avmap.
it in the support section.

Appendix A :
Conversion table from Aeronautical to Terrestrial use
AvMap Geopilot II is compatible with the terrestrial Maps of AvMap car
navigators (Geosat 4 series), thus adding a new depth to the navigation.
In order to use GeoPilot II as a Car navigator please consult the Geosat 4
manual (available on line at www.avmap.it ). This conversion table shows how
to convert the Keyboard from Geopilot II to Geosat.
MENU MENU
GOTO FIND
ESC ESC
+ +
- -
NEAR PAGE


SATELLITE NAVIGATION
133 Falmouth Rd. Suite E
Mashpee MA 02649
www.avmap.us
AvMap
Table of contents
Other AvMap GPS manuals

AvMap
AvMap Geosat 5 BLU User manual

AvMap
AvMap Geosat 5 BLU User manual

AvMap
AvMap Ultra EFIS Operating manual

AvMap
AvMap EKPV User manual

AvMap
AvMap GeoPilot plus User manual

AvMap
AvMap EKP IV User manual

AvMap
AvMap EKP-IV PRO User manual

AvMap
AvMap Geosat 5 User manual

AvMap
AvMap EKP III C User manual

AvMap
AvMap Geosat 6 User manual

AvMap
AvMap G6 Farmnavigator User manual

AvMap
AvMap EKPV User manual

AvMap
AvMap Geosat 4 DRIVE User manual

AvMap
AvMap EKP IV User manual

AvMap
AvMap EKP IV Installation and operating instructions

AvMap
AvMap EKPV User manual

AvMap
AvMap Geosat 4 ALL User manual

AvMap
AvMap GeoPilot II PLUS User manual

AvMap
AvMap Geosat 5 User manual

AvMap
AvMap Geosat 5 APRS User manual