Before connecting the AC power cord to the DC adapter outlet ,make sure the
voltage designation of the LCD TV corresponds to the local electrical supply .
If you are unsure of your power supply , ask your local power company .
Never insert anythingmetallic into thecabinet openings ofthe LCD TV;
otherwise may causethe danger ofelectric shock.
To avoid electric shock, never touch the inside of the LCD TV / adapter.
Only a qualified technician should open the case of the LCD TV/adapter.
Never use your LCD TV/adapter when the power cord has been damaged .
Make sure thereis nothing restingon the powercord, and keepthe cord
away from places where people can trip over it .
Be sure to hold the plug, not the cord when disconnecting the adapter from
an electric socket.
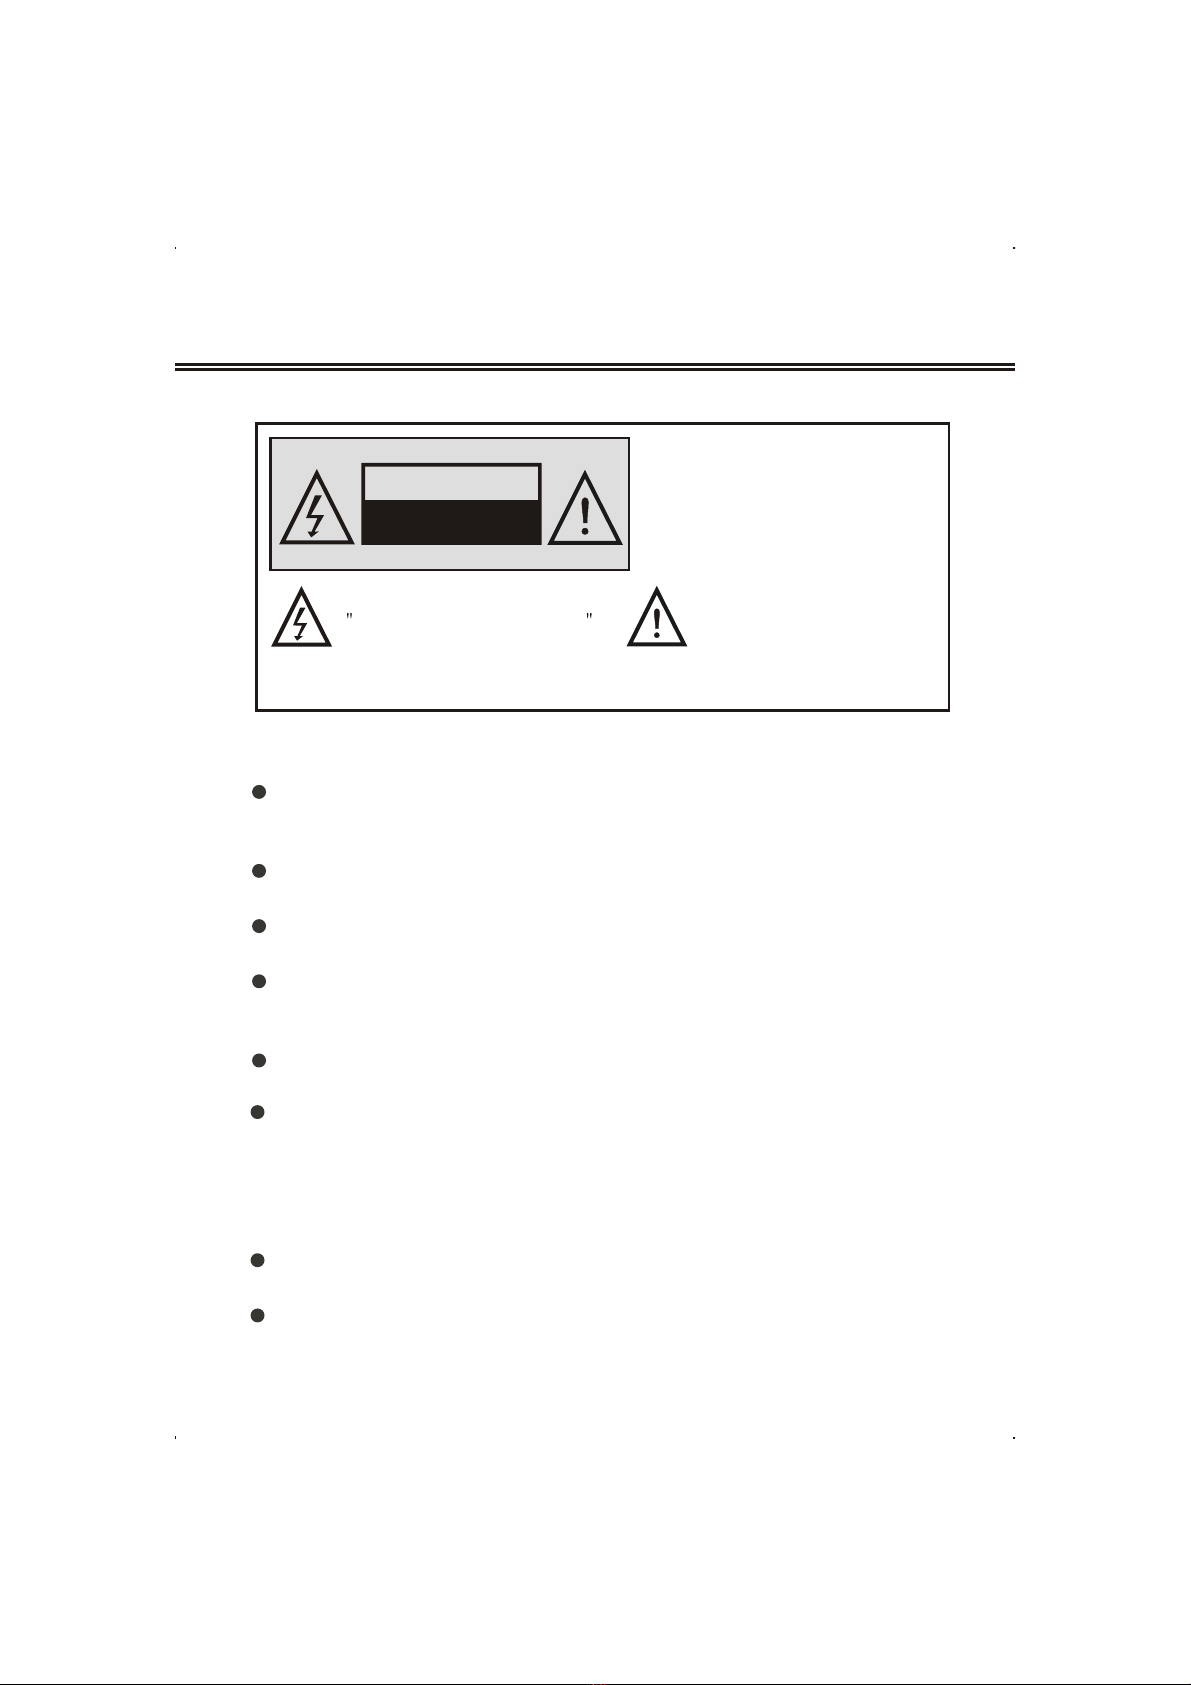
CAUTION
RISK OF ELECTRIC SHOCK.
DO NOT OPEN.
TO PREVENT ELECTRICAL SHOCK.
DO NOT REMOVE THIS COVER. NO
USER- SERVICEABLE PARTS INSIDE.
REFER SERVICING TO QUALIFIED
SERVICE PERSONNEL.
This symbol indicates
dangerous voltage
inside the product that
presents a risk of electric
shock or personal injury.
This symbol indicates
important instructions
accompanying the
product.
Please read thismanual carefully before using this product.
IMPORTANT SAFETY INSTRUCTIONS
Openings in the LCD TV/adapter cabinet are provided for ventilation.
To prevent overheating, these openings should not be blocked or covered.
Also, avoid usingthe LCD TV on abed ,sofa ,rug,or other soft surface. As
this, may block the ventilation openings in the bottom of the cabinet. If you
put the LCD TV in a bookcase or some other airless space, be sure to provide
adequate ventilation.
Do not exposethe LCD TV to extreme temperature conditions or to extreme
humidity conditions.
The apparatus shouldnot be exposedto dripping orsplashing and noobjects
filled with liquids,such as vases,should be placedon the apparatus.