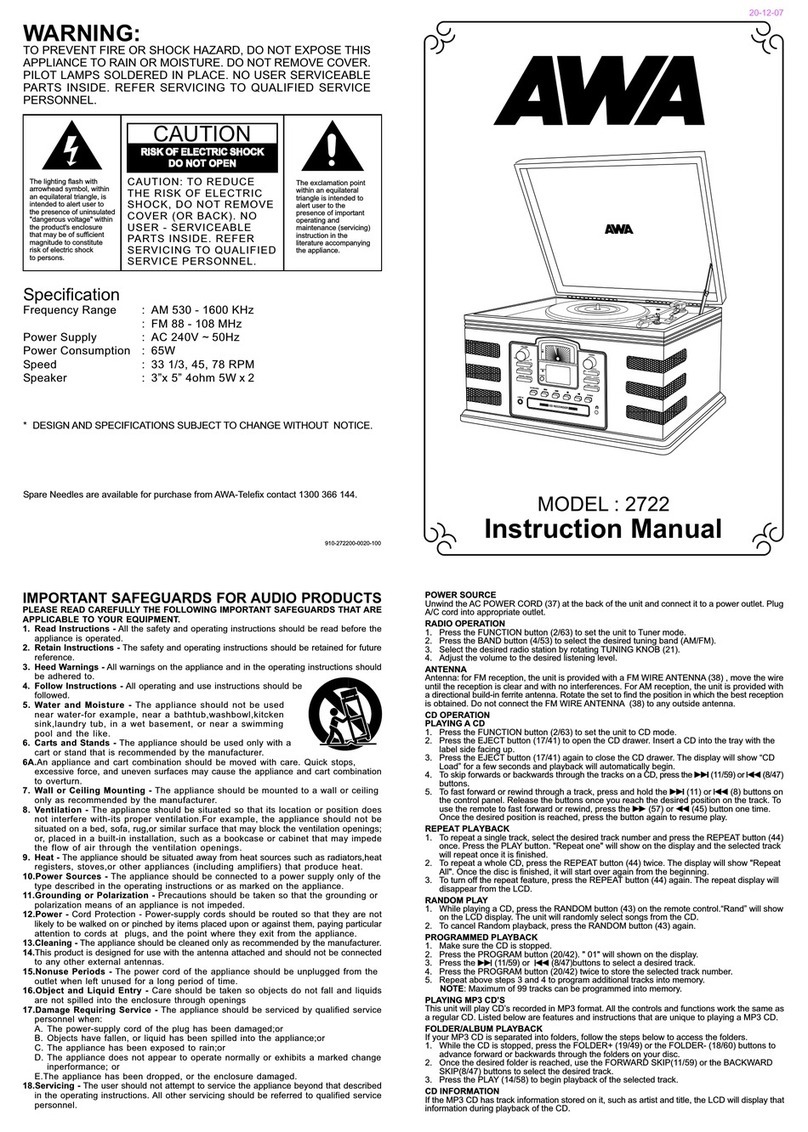
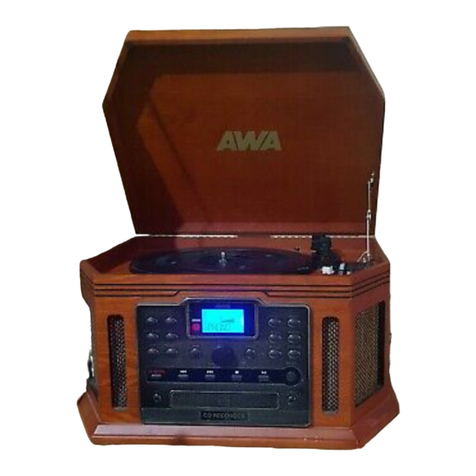
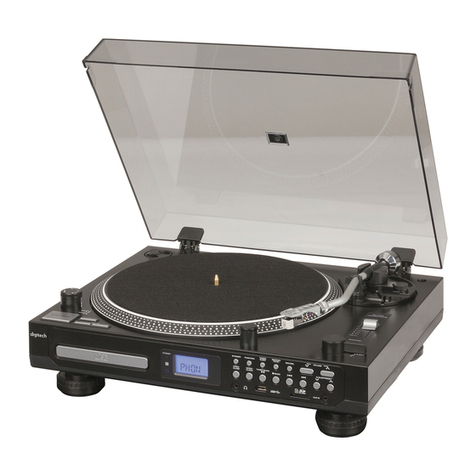
AWA E-E07H User manual

AWA iPhone Docking Turntable
E-E07H
USER’S MANUAL
Thank you for purchasing this product. Please read this manual thoroughly before operating
the unit, and keep it for future reference.

2
TABLEOFCONTENTS
IMPORTANTSAFETYINSTRUCTIONS...............................................................4
PRECAUTIONS....................................................................................................6
BEFOREUSE.......................................................................................................7
RECORDMAINTENANCE.................................................................................8
DISCMAINTENANCE.......................................................................................9
REMOTECONTROLUNIT...............................................................................10
PROGRAMMEDPLAYBACK..............................................................................13
DISPLAY...........................................................................................................14
REPEATPLAYBACK...........................................................................................15
SHUFFLEPLAYBACK........................................................................................15
LOCATIONOFCONTROLS...............................................................................16
PRELIMINARIES.............................................................................................17
CONNECTINGTOTHELOUDSPEAKERS.............................................................17
CONNECTINGTOTHEEXTERNALSPEAKERS.................................................17
CONNECTINGTOOTHERDEVICE..................................................................17
CONNECTINGTHECOMPOSITETERMINALFORVIDEOPLAY...........................17
BASICOPERATION...........................................................................................18
LISTENINGTOARECORD...............................................................................19
PLAYINGANEXTERNALAUDIOSOURCE........................................................20
LISTENINGTOYOURiPOD/iPHONE................................................................20
PLAYINGMUSICFROMIPOD/IPHONE.............................................................21
LISTENINGTOACD........................................................................................22
RECORDINGOPERATIONSTEPS.....................................................................24
RECORDING...................................................................................................25
TORECORDFROMARECORDTOCD................................................................26
RECORDFROMIPOD/IPHONETOACD............................................................28
RECORDFROMEXTERNALAUDIOSOURCE.....................................................28
SOFTWARE:RECORDANDUPLOADTOACOMPUTER....................................29
AUDACITYSOFTWARE.....................................................................................29
AUDACITYINSTALLATIONANDUSBCONNECTION......................................29
AUDACITYFORWINDOWSUSERS..................................................................30
INSTALLINGTHEAUDACITYSOFTWARE..........................................................31
CONFIGURINGAUDACITYFORMICROSOFTWINDOWS..................................34
AUDACITYCONTROLBUTTONS...................................................................34
AUDACITYPREFERENCES.............................................................................35
PREPARINGTOEXPORTANDSAVEFORMP3FORMAT.................................37
RECORDINGOPERATION.................................................................................39
TODOWNLOADMUSICFROMPHONOTOCOMPUTER...............................39
DIVIDINGTRACKS........................................................................................40
EXPORTANDSAVEFORMP3FORMAT........................................................42
TOCHANGETHETITLES(FORMP3FORMATONLY).....................................43
EXPORTANDSAVEFORWAVANDOGGFORMATS..........................................44
TODOWNLOADMUSICFROMCDTOCOMPUTER..........................................46
TODOWNLOADMUSICFROMAUXTOCOMPUTER.........................................47
TODOWNLOADMUSICFROMIPOD/IPHONETOCOMPUTER.........................48
AUDACITYFORMACUSERS...........................................................................49
CONFIGURINGAUDACITYFORMAC................................................................50
AUDACITYCONTROLBUTTONS....................................................................51
AUDACITYPREFERENCES..............................................................................51
IMPROVERECORDINGQUALITY..................................................................54

3
EXPORTANDSAVEFILES(AFTERRECORDINGISCOMPLETED).........................55
AUDACITY1.3BETAVERSION........................................................................56
SETUPFORWINDOWSSYSTEMS......................................................................56
RECORDINGOPERATIONSFORWINDOWS.....................................................66
SETUPFORMACOSX.......................................................................................70
RECORDINGOPERATIONSFORMAC................................................................75
COPYINGTHEMUSICFILETOANMP3PLAYER...............................................79
GENERALPROBLEMSFORALLWINDOWSVERSIONS.....................................80
ADJUSTMENTFORWINDOWS7ANDSOMEVISTASYSTEMSONLY................84
TROUBLESHOOTINGGUIDE...........................................................................87
FORUSBPCRECORDING.................................................................................87
FORNORMALOPERATIONOFTHETURNTABLE..............................................89
SPECIFICATIONS............................................................................................90

4
IMPORTANTSAFETYINSTRUCTIONS
READTHOROUGHLY
When using electrical products, basic precautions should always be followed
including:
1.ReadInstructionsAllthesafetyandoperatinginstructionsshouldberead
beforetheproductisoperated.
2. Retain Instructions The safety and operating instructions should be
retainedforfuturereference.
3. Heed Instructions All warnings on the product and in the operating
instructionsshouldbeadheredto.
4.FollowInstructionsAlloperatinganduserinstructionsshouldbefollowed.
5.CleaningUnplugthisproductfromthewalloutletbeforecleaning.Donot
useliquidcleanersoraerosolcleaners.Useadampclothforcleaning.
6.Attachments Do not use attachments not recommended by the product
manufacturerastheymaybehazardous.
7.WaterandMoistureDonotusethisproductnearwaterforexample,neara
bathtub,washbowl,kitchensink,orlaundrytub,inawetbasement,orneara
swimmingpool,Etc.
8.AccessoriesDonotplacethisproductonanunsteadysurface.Theproduct
mayfall,causingseriousinjurytoachildoranadultandseriousdamagetothe
product.Useonlywithastand,bracket,ortablerecommended
bythemanufacturer,orsoldwiththeproduct.Anymountingof
theproduct should follow the manufacturer's instructions, and
should use a mounting accessory recommended by the
manufacturer.
9. Transporting This product should be moved with care to
avoiddamageorinjury.
10.VentilationSlotsandopeningsinthecabinetareprovidedforventilation,
toensurereliableoperationoftheproductandtoprotectitfromoverheating.
Theseopeningsmustnotbeblockedorcovered.Theopeningsshouldneverbe
blocked by placing the product on a bed, sofa, rug, or similar surface. This
productshouldnotbeplacedinabuiltininstallationsuchasabookcaseorrack
unless proper ventilation is provided or the manufacturer's instructions have
beenadheredto.
11. Power Sources This product should be operated only from the type of
powersourceindicatedonthemarkinglabel.Ifyouarenotsureofthetypeof
power supply to your home, consult your product dealer or local power
company. For products intended to operate from battery power, or other
sources,refertotheoperationinstructions.
12.PowerCordProtectionPowersupplycordsshouldberoutedsothatthey
arenotlikelytobetrappedinanyway.
13. Mains plug The mains plug is used as the disconnect device. The
disconnectdeviceshallremainreadilyaccessible.
14.LightningForaddedprotectionforthisproductduringalightningstorm,or
whenitisleftunattendedandunusedforlongperiodsoftime,unplugitfrom
the wall outlet and disconnect the antenna or cable system. This will prevent
damagetotheproductduetolightningandpowerlinesurges.

5
15. Power Lines An outside antenna system should not be located in the
vicinity of overhead power lines or other electric light or power circuits, or
where it can fall into such power lines or circuits. When installing an outside
antenna system, extreme care should be taken to keep from touching such
powerlinesorcircuitsascontactwiththemmightbefatal.
16. Overloading Do not overload wall outlets, extension cords, or integral
conveniencereceptaclesasthiscanresultinariskoffireorelectricshock.
17.ObjectandLiquidEntryNeverpushobjectsofanykindintothisproduct
through openings as they may touch dangerous voltage points or shortout
partsthatcouldresultinafireorelectricshock.Neverspillliquidofanykindon
theproduct.
Theapparatusshallnotbeexposedtodrippingorsplashingandnoobjectfilled
withliquids,suchasvases,shallbeplacedontheapparatus.
18. Servicing Do not attempt to service this product yourself as opening or
removingcoversmayexposeyoutodangerousvoltageorotherhazards.Refer
allservicingtoqualifiedservicepersonnel.
19.Damage RequiringServiceUnplugthis productfromthe walloutletand
referservicingtoqualifiedservicepersonnelunderthefollowingconditions:
a. Ifthepowersupplycordorplugisdamaged.
b. Ifliquidhasspilled,orobjectshavefallenintotheproduct.
c. Iftheproducthasbeenexposedtorainorwater.
d. If the product does not operate normally by following the operating
instructions. Adjust only those controls that are covered by the
operatinginstructions,asanimproperadjustmentofothercontrolsmay
result in damage and will often require extensive work by a qualified
techniciantorestoretheproducttoitsnormaloperation.
e. If the product has been dropped or damaged in any way, and the
productexhibitsadistinctchangeinperformancethisindicatesaneed
forservice.
20. Replacement Parts When replacement parts are required, be sure the
servicetechnicianhasusedreplacementpartsspecifiedbythemanufactureror
have the same characteristics as the original part. Unauthorized substitutions
mayresultinfire,electricshock,orotherhazards.
21. Safety Check Upon completion of any service or repairs to this product,
ask the service technician to perform safety checks to determine that the
productisinproperoperatingcondition.
22. HeatTheproductshouldbesituatedawayfrom heat sources such as
radiators, heat registers, stoves or other products (including amplifiers) that
produceheat.

6
PRECAUTIONS
SafetyInformationCaution:
1. Use of controls and adjustments or performance of procedures other than
thosespecifiedhereinmayresultinhazardousradiationexposure.
2.Ifthisproductdevelopstrouble,contactqualifiedservicecenters,anddonot
usetheproductindefectivestates.
SafetyPrecautions
WARNING:
Toreducetheriskoffireorelectricshock,donotexposethisappliancetorain
ormoisture.
CAUTION
RISKSOFELECTRICSHOCKDONOTOPEN!
Toreducetheriskoffireorelectricshock,donotexposethisapparatustorain
ormoisture.Also,donotremovethecoverorback.
Nouserserviceablepartsinside.Referservicingtoqualifiedservicepersonnel.
Thelightningflashwitharrowheadsymbol,withinanequilateral
triangle, is intended to alert user to the presence of
noninsulated‘dangerousvoltage’withintheproduct’senclosure
thatmaybeofsufficientmagnitudetoconstituteriskofelectric
shocktopersons.
The exclamation point within an equilateral triangle is intended
to alert user to the presence of important operating and
maintenance (servicing) instructions in the literature
accompanyingtheappliance.
CAUTION:
Forcompactdiscunitsonly: invisiblelaser radiationwhen open
and interlock failed or defeated. Avoid direct exposure to laser
beam.
Caution:
Topreventelectricshock,matchwidebladeofplugtowideslot,fullyinsert.
NOTE:PRODUCTCOMPLIESWITHDHHSRULE21CFRSUBCHAPTERJINEFFECT
ATDATEOFMANUFACTURE.

7
BEFOREUSE
1.Chooseunit installationlocationcarefully. Avoidplacing itindirectsunlight
or close to a source of heat. Also avoid locations subject to vibrations and
excessive dust, cold or moisture. Keep away from sources that hum, such as
transformersormotors.
2. Do not open the cabinet as this might result in damage to the circuitry or
electricalshock.Ifaforeignobjectshouldgetintotheset,contactyourdealer.
3.Besurenottohandlediscsandrecordswithdirtyfingers.Neverinsertadisc
orarecordthathasacrackonthesurface.
4.Whenremovingthepowerplugfromthewalloutlet,alwayspulldirectlyon
theplug,neverpullthecord.
5.Tokeepthelaserpickupclean,donottouchit,anddonotforgettoclosethe
disctray.
6.Donotattempttocleantheunitwithchemicalsolventsasthismightdamage
thefinish.Useaclean,drycloth.
7.Inordertoshutoffthepowertothisproductcompletely,unplugthepower
cordfromthewalloutlet.Besuretounplugtheunitifyoudonotintendtouse
itforanextendedperiodoftime,suchaswhileonvacation.
8.Keepthismanualinasafeplaceforfuturereference.
BEWAREOFCONDENSATION
Whentheunitismovedfromacoldorwarmplace,orisusedafterasudden
temperaturechange,thereisadangerofcondensation.Watervaporintheair
couldcondenseonthemechanism.Topreventthis,ifyouaregoingtousethe
unitinaconditionwherecondensationcouldoccur,youshouldleavetheunit
for1or2hoursafterpluggingitintoanACoutletdependingontheamountof
condensation. If this is done, the unit will stabilize at the temperature of its
surroundings.

8
RECORDMAINTENANCE
HANDLINGRECORDS
1.Donottouchtherecord'sgrooves.Onlyhandlerecordsbytheedgesorthe
label with clean hands. Otherwise, a dirty hand can leave a residue on the
recodesurfacethatwillgraduallydeterioratethequalityofyourrecord.
2.Useasoftantistaticclothtogentlywipetherecordsurfacewhentherecord
hasbecomedirty.
3.Keeprecordsintheir“jacket”whennotinuse.
4. Store records upright on their edges. Storing flat could cause them to
becomecurved.
5. Avoid placing them in direct sunlight or close to a source of heat such as
radiators, stoves. Also avoid location subject to vibration and excessive dust,
heat,coldormoisture.
CLEANINGARECORD
Preparation
Getallyourcleaningmaterialsready,suchasasoftlintfreecloth(notincluded)
and a recordcleaning pad (not included). If you decide on a wetcleaning, a
recordcleaningfluid(notincluded)isrequired.
ToCleanontheturntable
1.Lockthetonearmonthetonearmrest.
2.Washyourhands.
3. Place a record on the turntable, handling the record by edges and labeled
area.
4.Drycleantherecordifitisnotverydustyandhasbeencleanedregularly.
5.Followthemanufacturer’sinstructionsforapplyingfluidifyoudecidetowet
clean.Besurenofluiddripsontotheturntable.
6.Manuallyrotatetheturntableinaclockwisedirectionwhilecleaninggently
intothegrooves.
7.Sweeptheclothupandawayandliftdustfromtherecordsurface.
8.Getridofthedustfromclothanddoitawayfromtheturntable.
9.Repeatuntilyouseenodustontherecord.
Tocleanonapad(notincluded)
1.Washyourhands.
2.Placethepadonadryflatsurface.
3.Placearecordonthepad,handlingtherecordbyedgesandlabeledarea.
4.Drycleantherecordifitisnotverydustyandhasbeencleanedregularly.
5.Followthemanufacturer’sinstructionsforapplyingfluidifyoudecidetowet
clean.Besurenofluiddripsontotheturntable.

9
6.Gentlywipethegroovesoftherecordinaclockwisedirection.
7.Sweeptheclothupandawayandliftdustfromtherecordsurface.
8.Getridofthedustfromclothanddoitawayfromtherecord.
9.Repeatuntilyouseenodustontherecord.
DISCMAINTENANCE
yAlwaysplacethedisconthedisctraywiththelabelfacingupward.(Compact
discscanbeplayedorrecordedonlyononeside.)
yTomoveadiscfromitsstoragecase,pressdownonthecenterofthecase
andliftthediscout,holdingitcarefullybytheedges.
y If the disc becomes dirty, wipe the surface from the center hole outward
towardstheouteredgewithasoft,drycloth.
yNeverusesuchchemicalsasrecordspray,antistaticspraysorfluid,benzine
orthinnertocleanthediscs.Suchchemicalswilldoirreparabledamagetothe
disc'splasticsurface.
yDiscsshouldbereturnedtotheircasesafterusetoavoiddustandscratches
thatcouldcausethelaserpickuptoskip.
yDonotexposediscstodirectsunlightorhighhumidityandtemperaturefor
extendperiods.Longexposuretohightemperatureswillwarpthedisc.
y Use a soft oilbased felttipped pen to write the information on the label
side.Neveruseaballpointorhardtippedpen,asthismaycausedamageto
therecordedside.
y Do not use CDs with an irregular shape(octagonal, heart shaped, business
cardsize,etc).CDsofthissortcandamagetheunit:

10
REMOTECONTROLUNIT
TheRemoteControlUnitcanoperatetheunitfromadistance.
Whenoperatingtheremotecontrolunit,pointittowardsthefrontpanelofthe
unit.
xEven if the remote control unit is operated within the effective range,
remote control operation may be impossible if there are any obstacles
betweentheunitandtheremotecontrol.
xIftheremotecontrolunitisoperatednearotherapplianceswhichgenerate
infraredrays,orifotherremotecontroldevicesusinginfraredraysareused
near the unit, it may operate incorrectly. Conversely, the other appliances
mayoperateincorrectly.
BATTERYINSTALLATION
1. Release the battery compartment
cover.
2.Removethebatterycompartment
cover.
3. Insert two “AAA” batteries (not
included), observing the correct
polarities.
4.Refitthecover.
BatteryReplacement
If the distance required between the remote control unit and main unit
decreases,thebatteriesareexhausted.Inthiscase,pleasereplacethebatteries
withnewones.
Precautionsconcerningbatteries
xBe sure to insert the batteries with correct positive + and negative
polarities.
xUse batteries of the same type. Never use different types of batteries
together.
xRechargeable and nonrechargeable batteries can be used. Refer to the
precautionsontheirlabels.
xWhentheremotecontrolunitisnottobeusedforalongtime(morethana
month),removethebatteriesfromtheremotecontrolunittopreventthem
from leaking. If they leak, wipe away the liquid inside the battery
compartmentandreplacethebatterieswithnewones.
xDonotheatordisassemblebatteriesandneverdisposeofoldbatteriesby
throwingtheminafire.

11
REMOTECONTROL

12
1.PHONO:Selecttoplayarecord.
2.OPEN/CLOSE:Openandclosethedisctray.
3.AUX:SelecttolistentotheexternalsourcethatisconnectedtotheAUXIN
jacks.
4.CD:SelecttoplayaCD.
5.iPod/iPhone:Selecttoplayadockeddevice.
6.MANUAL/AUTOINCREMENT:Selectamodeoftracknumberassignment.
7.TRACKINCREMENT:Duringrecording,presstodividetracks.
8.MUTE:Presstomutethespeakers.
9. FF (
): For disc only. Press to skip to a next track; hold to search for a
portionofatrack.
10.VOL+/VOL:Adjustthevolumelevel.
11.STOP(
):Fordisconly.Stopplayingorrecording.
12. FR/
/
/FF/ENTER: Act as keys of left/up/down/right/Enter on
iPod/iPhone.
13.MENU:Actas“menu”oniPod/iPhone.
14.iPOD/iPHONESHUFFLE:SetashuffleplaybackoniPod/iPhone.
15.iPOD/iPHONEREPEAT:SetarepeatplaybackmodeoniPod/iPhone.
16.TV:SwitchavideoplaybackbetweeniPod/iPhoneandTVset.
17.iPOD/iPHONEPLAY/PAUSE:Actas“Play/Pause”oniPod/iPhone.
18. PLAY/PAUSE: For disc only. Start or pause a playing/recording, or activate
thefinalizing/erasingprocess.
19.FR(
):Fordisconly.Presstoskiptoaprevioustrack;holdtosearchfora
portionofatrack.
20.RECVOL+/RECVOL:Adjusttherecordvolume.
21.RECORD:StarttorecordaCD.
22.ERASE:EraseaCDRWdisc.
23.FINALIZE:FinalizeaCDR/RWdisc.
24.PROGRAM:Fordisconly.Makeaprogramplayback.
25.REPEAT:Fordisconly.Selectarepeatmode.
26.SHUFFLE:Fordisconly.Setashuffleplayback.
27.DISPLAY:Fordisconly.Viewtheplaytime/elapsetime.
28.CLEAR:Fordisconly.Clearprogrammedtracks.

13
PROGRAMMEDPLAYBACK
xUpto32trackscanbeprogrammedinadesiredorder.
xInsertadiscandselectCDbeforebeginningprogramming.
xShuffleplaybackdoesnotworkduringprogrammedplayback.
xProgrammedplaybackworkswithfinalizeddiscsonly.
1.PressthePROGRAMbuttonwhenCDstops.
Indicator “PROGRAM” and “P01” appear on the
display.
2.Presstheorbuttontoselectatrack.
3PressthePROGRAMbutton.
Thetrackisprogrammed,and‘P02’showsonthe
display.
4.Presstheorbuttontoselectatrack.
5.PressthePROGRAMbutton.
Thetrackisprogrammed,and‘P03’showsonthe
display.
6.Repeatstep2and5toprogrammoretracks. You
canprogramupto32tracks.
TOSTARTAPROGRAMPLAY
PressthePLAY/PAUSEbutton( ).
TOPAUSEORSTOPPLAYING
PressthePLAY/PAUSEbuttonorSTOPbutton.
TORESTRATTHEPLAY
PressthePLAY/PAUSEbuttonagain.
TOCHECKTHEPROGRAMMEDORDER
Stoptheprogrammedplaying,thenpresstheorbuttonrepeatedly.
TOADDATRACKTOTHEENDOFTHEPROGRAM
Stoptheprogrammedplaying,thenthePROGRAMbutton.
PresstheorbuttontoselectatrackthenpressthePROGRAMbutton.
Thetrackisaddedtotheendoftheprogram.
TODELETETHELASTTRACKFROMTHEPROGRAM
Stoptheprogrammedplaying,presstheCLEARbutton.Thelasttrackfromthe
programhasbeendeleted.

14
TOCLEARTHEPROGRAM
Press the STOP button () once or twice, the indicator “PROGRAM” will
disappear.
Or,pressoneofthefollowingbuttons:OPEN/CLOSE,PHONO,AUXoriPOD.
DISPLAY
EachtimetheDISPLAYbuttonispressed,thedisplaychangesasfollows:
AnunfinalizedCDR/RWinstopstate
Duringrecording
CDplay
1stpress–4:39
Totaltimeofthetrack–itwilltracktimedown.
2ndpress–00:01
Itwilltracktimeup.
3rdpress–72:39
Totaltimefromalltracks–itwilltracktimedown.
Itwillshow thebalanceoftimeontheCDR/RW
disc(i.e.80minonblankCD).
Pressdisplaybuttononremote,itwillshowthe
balanceoftimeonapartiallyrecordeddisc.
Itwillshowtherecordingtime.
Pressdisplaybuttononremote,itwillshowtime
left tracking time down. (The same applies to
recordingontopartiallyuseddisc.)

15
REPEATPLAYBACK
EachtimetheREPEATbuttonispressed,therepeatmodeischangedasfollows:
REPEATALL:(RepeatALLtheTracks)
PresstheREPEATbuttononce.
Thediscwillbeplayedcontinuously.
REPEAT1:(Repeatonetrack)
PresstheREPEATbuttontwice.
Thecurrenttrackwillbeplayedrepeatedly.
Youcanalsochangetoanothertracktoberepeatedlyplayingbypressingthe
orbutton,thentheselectedtrackwillbeplayedrepeatedly.
CLEARTHEREPEATPLAYBACK:
Pressoneofthefollowingbuttons:OPEN/CLOSE,PHONO,AUXoriPOD.
NOTE:Repeatplaybackworkswithfinalizeddiscsonly.
SHUFFLEPLAYBACK
Thetrackscanbeplayedrandomlyinshufflemode.
Press the SHUFFLE then PLAY button, or during playback press the SHUFFLE
button.
CLEARTHESHUFFLEPLAYBACK:
Pressoneofthefollowingbuttons:OPEN/CLOSE,PHONO,AUXoriPOD.
NOTES:
Whenalltrackshavebeenplayedrandomly,thediscwillstop.The“SHUFFLE”
indicatorwilldisappearandtheSHUFFLEmodeiscancelled.
Duringshuffleplaybackyoucanskiptrackswiththe
or
button.
Atrackcannotbereplayedduringshuffleplayback.
Shuffleplaybackdoesn'tworkduringprogrammedplayback.

16
LOCATIONOFCONTROLS
1.POWERBUTTON
2.POWERINDICATOR
3.COMPOSITETERMINAL
4.DOCKCONNECTOR
5.IPODCRADLE
6.SPINDLE
7.TURNTABLE
8.33RPMBUTTON
9.45RPMBUTTON
10.78RPMBUTTON
11.PHONOPLAY/PAUSEBUTTON
12.PHONOEJECTBUTTON
13.STYLUS
14.TONEARMREST
15.LIFTHANDLE
16.BALANCEWEIGHT
17.REMOTESENSOR
18.OPEN/CLOSEBUTTON
19.SKIPBUTTON
20.SKIP+BUTTON
21.PLAY/PAUSEBUTTON
22.STOPBUTTON
23.RECBUTTON
24.RECLEVELBUTTON
25.RECLEVEL+BUTTON
26.VOL+BUTTON
27.VOLBUTTON
28.ERASEBUTTON
29.FINALIZEBUTTON
30.iPODFUNCTION
31.AUXFUNCTION
32.PHONOFUNCTION
33.CDFUNCTION
34.CDRECORDERCOMPARTMENT
35.DISPLAY
36.LINEOUTCABLE
37.USBJACK
38.SPEAKEROUTSOCKETS
38.AUXINSOCKETS
39.ACCORD

17
PRELIMINARIES
CONNECTINGTOTHELOUDSPEAKERS
Theplayerhasnoloudspeakers.Youneedtoconnecttheplayertoanexternal
appliancebeforeuse.
CONNECTINGTOTHEEXTERNALSPEAKERS
1. Plug the SPEAKER OUT cable located at the rear of the speakers into the
SPEAKER OUT socket at rear of the player, making sure that the RCA cables'
colorsmatchtheSPEAKEROUTjacks.
2.PressthePOWERbuttontoturnontheplayer.
3.PressVOLorVOL+buttontoadjustthevolume.
NOTE: If you mute the player, no signals will output to the external speakers.
Checkthevolumelevelandthemutekeyifyouhearnosound.
CONNECTINGTOOTHERDEVICE
Youcanconnecttheplayertoexternalappliancethathasloudspeakers.
1.PlugtheLineOutcablelocatedattherearoftheunitintotheauxiliaryinput
(AUX) on your TV, home entertainment receiver or other music system, again
beingsurethatthecorrectcolorcodedjacksareused.
2. Press the POWER button to turn on the player. Turn the volume to the
minimumlevel.
3.TurnonyourTVorhomeentertainmentreceiverandadjustthevolume.
IfconnectedtoaTVset,alsoneedtoswitchtoAUXorAVmode.
4.Ifnecessaryadjustthevolumeontheplayer.
NOTE:Ifyoumutetheplayer,nosignalswilloutputtotheconnectedexternal
device.Checkthevolumelevelandthemutekeyifyouhearnosound.
CONNECTINGTHECOMPOSITETERMINALFORVIDEOPLAY
InserttheCompositeplugintothecompositesocketlocatedatthesideofthe
unit.Thenconnecttheotherendoftheplugintotherespectivesocketonyour
TV.

18
BASICOPERATION
1.ConnecttheACpowercordtothewalloutlet.
2. Remove white protective needle cover by gently pulling downward toward
frontofunit.Keepneedlecoverinasafeplacewhennotinuse.
3. Screw the balance weight which comes with the product on the tone arm
ontothescalemark.RefertopicturesA&Bbelow.
Thebalanceweightistoadjustthepressureoftheneedle.Ifthepressureistoo
much, the sound will become distorted; if the pressure is too little, track
skipping will easily happen. Please adjust the balance weight by turning the
balanceweightclockwiseorcounterclockwiseperinstructionsbelow.
x Putthebalanceweightintoscalemark ofthetonearm,thenrotateitto
thedesignatedpositionofthescalemark .
x Rotate the balance weight counterclockwise so that it moves outward
towardsposition iftrackskippingoccurs.
x Rotate the balance weight clockwise so that it moves inward towards
position ifthesoundisdistortedorthebasspoor.
x Fine tune the balance weight position between and to achieve
optimumsoundperformance.
NOTE:
x
Donottrytoadjustthebalanceweightwhileplayingarecordasthiscould
breaktheneedleandscratchtherecord.
x
Pleaseremovethebalanceweightbeforetransportationtopreventdamage
orbreakagetotheunit.
4.PressthePOWERbuttontoturntheplayeron.

19
LISTENINGTOARECORD
1.PressthePHONObuttontoselectthePHONOfunction.
2.Putarecordontotheturntable.Whenplayinga45rpmrecord,rememberto
usetheadapterpackedinthepolybagalongwiththemanual.
3. Select player speed (331/3, 45 or 78rpm) according to the record you are
playing.
4.Releasethetonearmrestholder.
5.Liftthelifthandleandmovethetonearmgentlytothedesiredpositionover
therecord.Lowerthelifthandleslowlyandrecordwillstarttoplay.
6.Readjustthevolumelevelifnecessary.
7.Youcancontroltheplaywiththefollowingbuttons:
TOPAUSETHEPLAY:PressPHONOPLAY/PAUSEbutton.
TOCONTINUETHEPLAY:PressthePHONOPLAY/PAUSEbuttonagain.
TOSTOPTHEPLAYMANUALLY: PresstheEject button.Tonearm willlift up
fromtherecordandautomaticallyreturntothearmrest.
8. When the music plays to its end, the tonearm will return to the armrest
automatically. PLEASE NOTE: It could take approximately 20 seconds for the
tonearmtoreturntothearmrestwhenplayingrecordsat78rpm.
TIPS: You can cover the turntable lid
duringtheplaytopreventthedust.
NOTES:
xDo not put any object on top of the
turntablelidespeciallywhenarecord
isplaying.
xRemember to unplug the plug when
not playing the unit for extended
periodsoftime.
HOWTOREPLACETHESTYLUS(NEEDLE)
Removingoldstylus
1.Holdthetipofthestylusinthedirection‘A’.
2.Removethestylusbypullingitforward.
Installinganewstylus
1.Holdthetipofthestylusinthedirection‘A’.
2.Pushthestylusinside.
Cautions:x Donotremoveorbendthestylus.
x Donottouchtheneedleasitcouldinjureyourhand.
x Turnofftheunit'spowerbeforeyoureplacethestylus.
x Avoiddirectsunlightorbeingclosetoasourceofheat.

20
PLAYINGANEXTERNALAUDIOSOURCE
Anexternal(auxiliary)audiosource(i.e.,personalCDplayerorMP3player)can
beconnectedtothisunitandrecordtotheCD.
1. Press the AUX button to select the AUX
function.
2.PlugoneendoftheAUXINcable(included)
intotheAUXINsocketatrearoftheunit.
3. Plug the other endofthecableintothe
headphoneorLineOutsocketoftheexternal
source.
4.Turntheaudiosourceonandadjustvolume
level.
LISTENINGTOYOURIPOD/IPHONE
BeforeyoustarttoenjoyyourmusicfromiPod/iPhone,pleasemakesureyour
model(s)is/areinthecompatiblelist.
Madefor
iPodtouch(2n
d
generation) iPhone4S
iPodtouch(1s
t
generation) iPhone4
iPodclassic iPhone3GS
iPodwithvideo iPhone3G
iPodnano(2nd,3rd,4thand5th generation) iPhone
iPodmini
iPod
ThroughtheuseofinterchangeableinsertscalledDockAdaptors,youcandock
youriPod/iPhoneonthisappliance.
BeforedockingyouriPod/iPhoneyoumustfirstcheckyouriPod/iPhonehasa
dock connector. The docking connector is located on the base of the
iPod/iPhone.
Also you must first fit the correct iPod/iPhone adaptor on the cradle. Each
iPod/iPhone adaptor matches the shape of a particular iPod/iPhone and is
necessarytoensurethatyouriPod/iPhoneisheldsecurelywhendocked.
NOTES:
x
Use the adaptor that supplied with the iPod/iPhone or a commercially
availableonetousetheothertypesofiPod/iPhone.
x
Donotdock aniPod/iPhonewithout fittingthecorrectadaptorotherwise
youmaydamagetheiPod/iPhoneandyourunit.
Table of contents
Other AWA Turntable manuals
