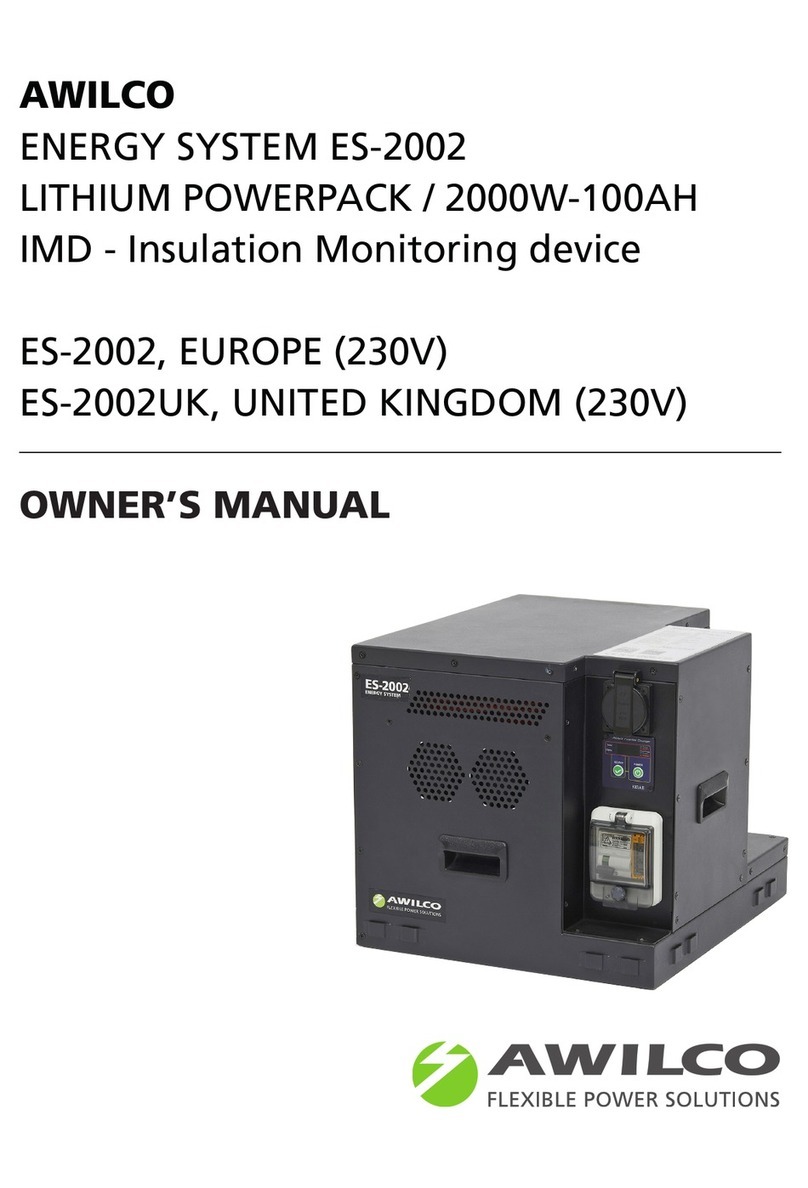
AWILCO EnergySystem ES-2000 User manual

AWILCO
ENERGYSYSTEM ES-2000
LITHIUM POWERPACK
2000W-100AH
ES-2000, EUROPE (230V)
ES-2000UK, UNITED KINGDOM (230V)
OWNER’S MANUAL

For safe and optimum performance, the
Energysystem must be used properly.
Carefully read and follow all instructions and
guidelines in this manual and give special
attention to the CAUTION and WARNING
statements.
PLEASE KEEP THIS MANUAL
FOR FUTURE REFERENCE
DISCLAIMER
While every precaution has been taken to en-
sure the accuracy of the contents of this guide,
AWILCO ApS assumes no responsibility for
errors or omissions. Note as well that
specifications and product functionality may
change without notice.
IMPORTANT
Please be sure to read and save the entire ma-
nual before using the Energysystem.
Misuse may result in damage to the unit and/or
cause harm or serious injury. Read manual in its
entirety before using the unit and save manual
for future reference.
SERVICE CONTACT INFORMATION
Phone: +45 56 56 54 00
Web: www.awilco.dk
PRODUCT NUMBERS
ES-2000 2000W / 100Ah - 230VAC (Schuko Socket - CEE 7/4)
ES-2000UK 2000W / 100Ah - 230VAC (British Socket - BS1363)
ES-2000AUS 2000W / 100Ah - 230VAC (Australia Socket – NS/NZS3112)
ES-2000US 2000W / 100Ah - 120VAC (NEMA 5-20)
DOCUMENT PART NUMBER
MUIC122055-100Ah Rev A
02 Awilco Energysystem ES-2000

IMPORTANT SAFETY INFORMATION 4
1. INTRODUCTION 6
2. PRODUCT DESCRIPTION 6
3. INSTALLATION 7
4. CONNECTING TO BLUETOOTH 10
5. INVERTER/CHARGER OPERATION 11
6. FEATURE SETTING 14
7. TROUBLESHOOTING 20
8. SPECIFICATIONS 21
9. WARRANTY 24
APPENDIX I 26
APPENDIX II 27
TABLE OF
CONTENTS:
03
Awilco Energysystem ES-2000

This section contains important safety infor-
mation for the ES-2000 Powerpack. Each time,
before using the unit, READ ALL instructions
and cautionary markings on or provided with
the unit, and all appropriate sections of this
guide. The unit contains LiFePO4 batteries are
considered as hazardous goods due to the fact
that they can overheat and ignite under certain
conditions.
Lithium battery is classified as dangerous goods
UN 3481, Class 9, Packing instruction 966 and
967 respectively. The Lithium Powerpack con-
tains a power source with high energy density
and hazardous materials mounted in metal
cabinet. The unit contains no user-serviceable
parts. See Warranty section for how to handle
product issues.
Make sure to study the technical specification
before use. The technical specification applies
to the 12V LiFePO4 battery and describes the
type and size, performance, technical characte-
ristics, warning and caution of the rechargeable
cell.
DANGER: FIRE AND/OR CHEMICAL BURN
HAZARD
• Do not cover or obstruct any air vent
openings and/or install in a zero-clearance
compartment.
IMPORTANT SAFETY
INFORMATION:
DANGER: SHOCK HAZARD. KEEP AWAY
FROM CHILDREN. FAILURE TO FOLLOW
THESE INSTRUCTIONS CAN RESULT IN
DEATH OR SERIOUS INJURY
• When working with electrical equipment,
have someone nearby in case of an
emergency.
• Unit contains Lithium battery, study and
follow all the battery manufacturer’s specific
precautions when using and servicing the
battery.
• Avoid moisture. Never expose unit to snow,
water etc.
• Unit provides high voltage AC, treat the
AC output socket the same as regular wall
AC sockets at home.
• Must not be used or stored in the
environment of corrosively, explosives, high
temperature (like in hot environments or
direct sun exposure).
• Prolonged contact to high heat or freezing
temperatures will decrease the working life
of the battery.
• Do not short circuit terminals. Do not
demolish or disassemble the battery.
• Guarantee is two years as of invoice date.
Life time: 2000 cycles or 2 years*. Any
damage by incorrect use will void the
guarantee. Free service will not be provided
by the manufacturer.
04 Awilco Energysystem ES-2000
• The system must be used in the assigned
application. For further warranty information,
see Warranty
• Disposal of the system must be at approved
recycling centers and in accordance with
national legislation.
STORAGE
The unit must be fully charged before it is
placed into storage (please see the technical
specification for information). Furthermore,
please note that the battery must be recharged
every 3-6 months.
FCC and EMC INFORMATION
This equipment has been tested and found
to comply with the limits for a Class B digital
device, pursuant to part 15 of the FCC Rules
on 120V model and comply with the limits for
CE EMC standard on 230V model. These limits
are designed to provide reasonable protection
against harmful interference in a residential
installation. This equipment generate, uses
and can radiate radio frequency energy and, if
not installed and used in accordance with the
instructions, may cause harmful interference
to radio communications. However, there is no
guarantee that interference will not occur in a
particular installation. If this equipment does
cause harmful interference to radio or television
reception, which can be determined by turning
the equipment off and on, the user is encoura-
ged to try to correct the interference by one or
more of the following measures:
• Reorient or relocate the receiving antenna.
• Increase the separation between the
equipment and the receiver.
• Connect the equipment into an outlet on a
circuit different from that to which the
receiver is connected.
• Consult the dealer or an experienced radio/
TV technician for help.
*) See warranty
05
Awilco Energysystem ES-2000

LIMITATIONS ON USE
Do not use in connection with life support
systems or other medical equipment or devices.
INTRODUCTION
Thank you for purchasing the AWILCO Energy-
system. With our state of the art, easy to use
design, this product will offer you reliable ser-
vice by providing AC power, DC power and 5V
USB power for your vehicle, home, cabin, boat,
RV or Trailer and recharge the built-in Lithium
battery by means of an engine alternator* or
by a utility AC grid connection. The Lithium
Powerpack can run many AC-powered applian-
ces
when you need AC power anywhere. The
5V USB power can charge many USB-powered
devices e.g a smartphone or tablet, which can
be used to monitor the batterystatus via the
build-in Bluetooth connection. The built-in
transfer switch will automatically switch the
load to the battery power when the utility
power is interrupted.
1. INTRODUCTION
2. PRODUCT DESCRIPTION:
This manual will explain how to use this unit
safely and effectively. Please read and follow
these instructions and precautions carefully
* Please contact authorized installer for proper
connection to an engine alternator.
PRODUCT DESCRIPTION
ES-2000 includes the items list below.
• 1 pcs. Base unit
• 1 pcs. Owner’s manual
• 3 pcs. Andersson connectors, black,
red, blue.
• 2 pcs. RSTMini connectors 1 pcs. Male
and 1 pcs. Female
• 4 pcs. Mounting brackets
• 1 pcs. power cable 1,5m with schuko plug
SERIES MODEL NO. RATING AC OUTPUT TYPES
INVERTER CHARGER TRANSFER
SWITCH
120V ES-2000US 2000W 55A/12V 30A US NEMA 5-15 (15A)
230V ES-2000, ES-2000UK, 2000W 55A/12V 16A -EU (16A) / -UK (13A)
ES-2000AUS -AU (10A)
06 Awilco Energysystem ES-2000

ANDERSSON CONNECTORS
The RED and BLACK Andersson
connectors are intended for use with DC
applications which draw higher DC currents.
Both terminals in the red connector are
connected to battery positive (+), and both
terminals in black connector are connected to
battery negative (-). Please refer to tech spec
table for max allowed DC currents
The BLUE Andersson connector is
intended for easy/quick installation to vehicle
alternator. Pin marked with (+) is connected to
battery positive (+) and pin marked with (-) is
connected to battery negative (-). Please refer
to tech spec table for max allowed DC currents.
3. INSTALLATION:
INSTALLATION
WARNING: It is recommended that all
wiring be done by a certified technician
or electrician to ensure adherence to
the applicable electrical safety wiring
regulations and installation codes.
Failure to follow these instructions can
damage the unit and could also result
in personal injury or loss of life.
CAUTION: Before beginning unit installation,
please consider the following:
• The unit should be used or stored in an
indoor area away from direct sunlight, heat,
moisture or conductive contaminants.
• When placing the unit, allow a minimum
of 8 cm. of space around the unit for optimal
ventilation.
(Continued on next page)
REAR FRONT
07
Awilco Energysystem ES-2000
AC Input Plug
AC Output Plug
5V DC output
Andersson Connectors
AC Output Socket
Display
AC Output
Circuit Breaker
Mounting
for brackets

(Continued from page 9)
• Secure that the unit can rest on a flat
surface for optimal support
• Please choose a well-ventilated area for
mounting the unit.
• The unit is to be mounted horizontally.
Do NOT mount the unit upside down, or
the unit can be damaged.
• Please use the supplied metalbrackets to
mark for drillingholes in suitable positions,
after inserting the brackets in to cabinet
slots. Brackets can be inserted in 8
different positions around the cabinet.
It is recommended to use all 4 brackets
for secure installation of the ES-2000.
• Please use the according screws or
bolt/nut, at correct size, min ø6 / M6,
recommended ø8 / M8 for the material
to which the system will be attached and
mounted.
• Observe that your target area will allow
proper support for the brackets, proper
room for cables leading to/from the AC
and DC connectors as well as the USB
connector on the rear.
3. INSTALLATION:
Connecting to an engine alternator via other
12V battery, using the Andersson connectors.
• When connecting to an engine alternator
via other 12V battery, you are free to use
any of the (+) positive terminals in the unit.
Please observe that you do need to install a
battery separator between engine battery
and energysystem – for advice on correct
battery separator, please contact authorized
installer.
• For correct dimensioning of cable between
ES-2000 and batteryseperator, please refer
to batteryseperator manual
• Use suitable crimping tool for the cables for
the 120A Andersson connectors.
• Make sure that it is firmly crimped for good
connection.
• If your batteryseperator of choise allows for
reverse connection (in order to transfer
energy from ES-2000 to vehicle battery),
please observe use of cables supporting the
full current in reverse mode.
8 Awilco Energysystem ES-2000

9
Awilco Energysystem ES-2000
DISCHARGING WITH DC CURRENTS
USING THE ANDERSSON CONNECTORS:
ES-2000 allows for up to 200A continuous
discharge* Please use cables, red/black with
max length of 1,5m and 50mm2. If you need
longer cables, please refer to official cablesta-
bles in order to dimension the correct square of
cable to the desired cablelength.
* Please see section: Andersson Connectors
Should you choose to connect (-) negative on
the energysystem to engine battery, please
observe that the black negative cable should
be of same square and length as the red (+)
positive cable to the same battery.
FUSES:
When connecting ES-2000 to vehicle alternator
or DC consumption, it must be observed to use
proper size of fuse in serial connection.
For charging from alternator, 125A fuse is
recommended.
For discharging to max DC currents, 200A fuse
is recommended.
3. INSTALLATION:
CHASSIS GROUNDING CONNECTION:
DANGER: The unit chassis has to be
grounded properly. Never operate the unit
without proper grounding. Failure to do so can
result in death or serious injury.
• Connect the grounding cable’s ring terminal
to the unit ground screw.
• Connect the other side of the cable to the
common grounding point.
TEST THE UNIT:
• Plug the unit to an AC source.
• The LED on display will turn on. If AC input
source is available, ‘Status’ LED turns green.
This indicates the unit is running in By-pass
mode meaning AC output is running from
the AC input source. On the app you will
shortly see indication that battery is being
charged *see point 4 for additional
information on Bluetooth connection.
• Disconnecting the AC input source will
change the ‘Status’ LED on the Display to
amber.
• Both AC output and 5V USB are now
available and the unit is running on battery
power.
• Plug in a small AC load like a 40W table
lamp or small appliance to the AC socket to
verify AC is available.
• The unit is successfully installed and
functioning properly.

Every ES-2000 can be connected and
monitored by a smart phone/tablet via
Bluetooth. However, the APP only supports
Android and IOS.
Attention: Please note that only one user
at a time can be connected to the Bluetooth
feature.
1. Download the APP by scanning APP-store
or Play store - AWILCO.
2. Open the APP
a. Scanning.
b. Found Bluetooth!
4. CONNECTING TO BLUETOOTH
IN YOUR ENERGY SYSTEM:
3. Under ”Devices” – find and choose the
according battery
a. Trying to create new connection
b. Connecting to GATT server
c. Connected!
4. When ”status connected” is shown
– press ”start”
a. Under U.I.T.C. info you can follow the
battery temperature and – cycles
b. Under System info ”Events” includes
a log status of the battery.
5. Choose the dots in the lower right corner
and the box ”Login dialog” will appear
6. Login dialog: Info about battery cell status
– press1234 + confirm
7. Login dialog: Rename device – press 5678
+ confirm.
10 Awilco Energysystem ES-2000
• Phone need Bluetooth 4.0 BLE
( Bluetooth low energy)
• Require Android 4.3+
• Active Distance < 5.0 m
• Compatible with Iphone 4S or later
• Require IOS 6.0+
• Active Distance < 5.0 m

5. INVERTER/CHARGER
OPERATION:
11
Awilco Energysystem ES-2000
Auto Backup Mode (whatever “In”
setting except “In0 and In3”):
The inverter-unit is fully automatic. When utility
power is available, the unit is running in AC
By-Pass mode. AC output is supplied from the
utility and the charger is active. When there is a
power failure from the utility or an AC source is
not available, the unit will run on battery power
and the inverter will generate pure sinewave
AC output to maintain and operate the load
continuously (With ‘In2’ setting, there is a mini-
mum of 10W AC-Load sense threshold for the
inverter to fully turn on).
Non-Backup Mode (with “In0” setting)
Same as Auto Backup Mode but when there is
a power failure from the utility or the AC input
source is not available; the inverter will not turn
ON automatically. To turn on the inverter you
are required to get into the setting mode to
change the “In0” setting to “In1” or others.
See more details on Inverter Setting.
UNDERSTANDING THE DISPLAY
FUNCTION:
Note:
‘Status’ LED is used to indicate the status of
the unit.
Green: By-Pass Mode
Amber: Battery (Inverter) Mode
‘Display’ LED is used to indicate the digital
display function.
Green: Display is showing Battery voltage
in volts.
Amber: Display is showing Output power
in KW.
(Continued on next page)

STATUS LED DISPLAY LED DISPLAY FUNCTION/STATUS
Green Green ‘Ful’ By-Pass Mode / Charger Mode.
(solid) Battery is fully charged
Green OFF ‘bul’ By-Pass Mode / Charger Mode. Battery charging
(flashing) in progress and is in ‘BULK’ stage
OFF ‘abs’ By-Pass Mode / Charger Mode. Battery charging
in progress and is in ‘ABSORPTION’ stage
Amber Green ‘12.5’ Battery / Inverter Mode, inverter is running,
(solid) display shows battery voltage in DC volts
Amber ‘0.80’ Battery / Inverter Mode, inverter is running,
display shows output power in kW (e.g. 0.8 kW
= 800W as shown
Amber Battery / Inverter Mode and AC Input is detected and AC output will switch to
(flashing) By-Pass / Charger Mode within 20 seconds
Red OFF E01-E12 Unit has shutdown. Display shows error code
(solid) (See error code reference chart below)
5. INVERTER/CHARGER
OPERATION:
UNDERSTANDING THE ‘POWER’ AND
‘SELECT’ PUSH BUTTON FUNCTION
DURING NORMAL OPERATION:
A beep sound will occur every time when the
‘Power’ or ‘Select’ button is triggered.
‘Power’ button function:
• Turns the inverter On/Off during
Battery Mode. Press and hold for 1
second to turn the unit either ON
or OFF.
Note: The ‘Power’ button can be used to
turn AC Output OFF during AC By-Pass mode
with ‘ln4’ setting without the need to disconne-
ct the AC-Input as per “ln1” setting. See more
on “Understanding the unit setting”.
‘Select’ button function:
• Check unit setting: Press once to
check or verify unit’s present set
functions
12 Awilco Energysystem ES-2000

13
Awilco Energysystem ES-2000
5. INVERTER/CHARGER
OPERATION:
CODE CONDITION CORRECTIVE ACTION
E01 Input battery voltage is too low and Recharge battery immediately and
unit has shutdown restart unit
E02 Input battery voltage is too high and Check battery voltage or determine if
unit has shutdown any external charger is connected to the
battery bank
E03 AC output is overloaded or short Check load connected to the output.
circuited and unit has shutdown Reduce load and restart the unit
E04 Internal temperature is too high and Turn unit off and wait for 15 minutes
unit has shutdown before restarting. Check if any object
has blocked the air flow of the unit
E05 ‘Input battery voltage is low and Recharge battery as unit will shutdown
warning occurs shortly
E06 At Battery Mode, AC output load Reduce load
connected has sensed high and is
close to shutdown limit
E07 Internal temperature is high and is Reduce load and check if any ventilation
close to shutdown limit of the unit is blocked
E10 Battery Charging voltage too high Check battery setting
E11 Battery is bad Battery did not accept charge
E12 Internal transfer switch temperature Reduce load and check if any ventilation
is high and shutdown occurs of the unit is blocked
UNDERSTANDING THE ERROR CODE:
AC LOAD ON INVERTER:
Although the Power Inverter can provide high
surge power up to two times the rated output
power, some high surge loads like sump-
pumps, heavy duty motors etc. may still trigger
the inverter protection system even though the
load falls within the power rating of the inver-
ter. A higher power system with bigger inverter
is required for these appliances.

To understand more about the unit features,
read the following section and follow the
instructions to make changes to the desired
setting.
14 Awilco Energysystem ES-2000
6. FEATURE SETTING:
Default Factory Setting:
In (Inverter):
In1- inverter enabled in standby mode
with load sense off
Cu (Charger):
40A or 55A – charger enabled (40A for
1000W models and 2000W models)
AL (Alarm):
AL1 – alarm enabled
Sd (UV shutdown):
SdL – Under voltage shutdown set to
low setting
bAt (Battery type):
LI – Lithium
Cb (Maximum current):
Cb3 – Maximum Shore Power Current
draw is 30A for 120V models and 16A
for 230V models.
FAO (Fan Operation Setting)
Fd (Factory default)

15
Awilco Energysystem ES-2000
INVERTER SETTING
In0 Inverter is disabled. AC Output is getting the power from utility (AC Input) only.
But when utility power is not available, the unit will not provide AC backup function from
the inverter, the display automatically turns off in about 10 seconds. When the Power
button is pressed again, the display will turns on for another 10 seconds.
To enable the inverter or turn on the backup function, this ln0 setting has to be changed
to other different setting.
In1 Inverter is set to standby condition with power save mode OFF. Unit will provide AC
backup function when utility power is not available.
In2 Inverter is set to standby condition with power save mode ON. Unit will provide
continuous AC backup function only when utility power is not available AND the load
connected to the output is >10W. Once it is ON, the unit will automatically return to
power save (load sense) mode when the connected AC load drops to < 3W.
Note: During power save mode, the Inverter will turn ON every few seconds for a few
AC cycle to check on the 10W power consumption.
In3 Use this setting when you decide to have all AC Output power coming from inverter only.
Even when utility is available, the utility AC Power will only use to charge the battery
only. The AC Input power will not By-pass to AC Output.
Note: This mode is specially designed for the AC Output is always getting ‘Pure Sinewave’
Output from the inverter. This used to avoid getting ‘Non-Pure Sinewave’ Output from
AC input when it is connected to a non-sinewave AC Generator. When this mode is
used, in order to provide a constant AC Output, please be sure the AC Output power
consumption is less than or equal to the AC Charger can provide to charge the battery.
In4 Same function as PS1 and the ‘Power’ button can be used to turn the AC Output ON and
OFF, even with the AC Input power being present in By-pass mode. When the unit is
turned off using the ‘Power’ button, the display remains ON showing the battery voltage
and the ‘Status’ LED will turn off.
5A-55A Bulk/Float current setting:
5A/1.5A, 15A/3A, 35A/4A, 55A/6A.
6. FEATURE SETTING:
UNDERSTANDING THE UNIT SETTINGS:

16 Awilco Energysystem ES-2000
BATTERY TYPE AND VOLTAGE SETTING (BULK/ABSORPTION/FLOAT)
LI Lithium: 14.6V.
BATTERY UNDER VOLTAGE SETTING
SdL Battery under voltage setting is set to LOW (setting used for normal operation)
Under voltage alarm: 11.0 Vdc
Under voltage alarm recovery: 11.3 Vdc
Under voltage shutdown: 10.5 Vdc
Under voltage recovery: 12.0 Vdc
SdH Battery under voltage setting is set to HIGH (setting to avoid battery over discharge when
connected to car start battery)
Under voltage alarm: 12.1 Vdc
Under voltage alarm recovery: 12.3 Vdc
Under voltage shutdown: 11.8 Vdc
Under voltage recovery: 12.6 Vdc
ALARM SETTING
AL0 Fault and warning audible alarm is disabled. Display panel only shows error code and
audible alarm will not sound.
AL1 Audible alarm will sound when fault or warning occurs.
6. FEATURE SETTING:

17
Awilco Energysystem ES-2000
MAXIMUM SHORE POWER CURRENT DRAW SETTING
Cb1-3 This setting limits the total AC current draw from the shore power during the
By-Pass/Charger mode to avoid tripping the shore power Branch Breaker.
Based on the table below, when there is a high demand on the AC Load Current, the
unit will automatically reduce the Charger Current to the presets value.
(E.g. with Cb1 setting, when the unit sense the AC load current is between 6 to 11Aac,
it will reduce the charger current to 15A maximum).
ES-2000US ES-2000EU/UK/AUS
IC122055 (120V MODEL) IC122055I (230V MODEL)
AC Load Current AC Charger Current AC Load Current AC Charger Current
Cb1 Use this setting when the shore power Use this setting when the shore power
circuit breaker rating is 15A or higher circuit breaker rating is 8A or higher
>11Aac 5 Adc >7Aac 5 Adc
>6Aac and <11Aac 15 Adc >5Aac and <7Aac 15 Adc
>1Aac and <6Aac 35 Adc >2Aac and <5Aac 35 Adc
<1Aac 55 Adc <2Aac 55 Adc
Cb2 Use this setting when the shore power Use this setting when the shore power
circuit breaker rating is 20A or higher circuit breaker rating is 10A or higher
>16Aac 5 Adc >9Aac 5 Adc
>11Aac and <16Aac 15 Adc >7Aac and <9Aac 15 Adc
>6Aac and <11Aac 35 Adc >3Aac and <7Aac 35 Adc
<6Aac 55 Adc <3Aac 55 Adc
(Continued on next page)
6. FEATURE SETTING:

Cb3 Use this setting when the shore power Use this setting when the shore power
circuit breaker rating is 30A or higher circuit breaker rating is 16A or higher
>26Aac 5 Adc >14Aac 5 Adc
>21Aac and <26Aac 15 Adc >12Aac and <14Aac 15 Adc
>16Aac and <21Aac 35 Adc >8Aac and <12Aac 35 Adc
<16Aac 55 Adc <8Aac 55 Adc
FAN OPERATION SETTING
FA0 Allows the continuous activation of the fans at low (silent) speed (since the unit starts)
and only in Bypass mode.
If the maximum temperature threshold is reached, the over temperature shutdown is
triggered. If so, once the temperature drops to a certain level, the unit can be manually
turned on again by pushing the “Power” button.
The charging current is de-rated to reduce the chance of getting a high-temperature
shutdown.
We suggest using this setting when a silent operation is required; for example when
sleeping and having the unit in/close to the same room in Bypass (Charging) mode).
This setting may represent more stress for the unit.
In Inverter mode (with no shore power) the fans operate normally as per the “FA1”
setting.
FA1 In this setting, the fans are activated only when needed (as per the internal temperature
sensed). There is no fans slow-speed (they run at full speed when activated). This is the
factory default setting.
MANUFACTURING DEFAULT SETTING
Fd Reset all settings to manufacturing default settings (In1, AL1, SdL, AGM, Cb3
and maximum current setting for the charger)
18 Awilco Energysystem ES-2000
6. FEATURE SETTING:

19
Awilco Energysystem ES-2000
UNDERSTANDING THE UNIT SETTINGS:
The charger current will be de-rated when the
environment temperature reaches 60 °C (140
°F) or the internal temperature reaches the
pre-set values.
UNIT DE-RATED VALUES
Internal >90°C (194°F) Maximum charger will de-rated to half
Temperature >95°C (203°F) Charger current reduced to 5A
<85°C (185°F) Charger current recover back to set value
Environment >60°C (140°F) Charger current reduced to 5A
Temperature >55°C (131°F) Charger current recover back to set value
ENTER FUNCTION MENU FOR UNIT
SETTING:
To enter unit Function Menu, press and hold
“Power” and “Select” button together for
about 5 seconds until a beep sounds.
When you are in Function Menu:
• Press ‘Power’ button for 1 second to
toggle between different Functions Menu
like ‘Cu’, ‘In’, ‘AL’, ‘Sd’, ‘bAt’, ‘Cb’ and
‘Fd’ etc.
• Press ‘Select’ button for 1 second to
enter Individual Function Set Menu and
you can make change to the settings.
• The unit will EXIT the Main Menu
automatically if ‘Power’ and ‘Select’
buttons are not triggered for more than
5 seconds.
When you are in Individual Function Set
Menu:
• Press ‘Select’ button for 1 second to
toggle between different setting values.
• Press ‘Select’ button for 5 seconds to
set selected setting and exit to next
Main Menu.
See more details on flow chart in
Appendix I.
6. FEATURE SETTING:

20 Awilco Energysystem ES-2000
7. TROUBLESHOOTING:
To troubleshoot the unit, please note the error
code displayed on the main unit and review
“Understanding the Error Codes” in section 4.
PROBLEM POSSIBLE SOLUTION
CAUSE/CONDITION
No AC Output. The unit is off. Turn the unit ON by pressing the “Power” button
All the LEDs and (when the unit is in Battery/inverter mode, or in
the display are By-Pass mode if the ln4 parameter is set) otherwise
off the unit should always turn on automatically at
the moment the AC-Input power is connected.
No power coming. Check the battery DC fuse, the Disconnect switch
into unit (if installed), the AC Input Source and the AC Input
Branch Breaker is either tripped or turned OFF.
No AC output on 230V Model: The AC Check loads and reset the breaker.
AC Output Output Circuit Breaker
Socket is tripped.
Status LED is
Green or Amber (1)
AC Output turns Power Safe mode The load connected must be below the AC load
ON and OFF. (“ln2”) enabled and sense threshold of 10W +/-25%.
AC load <10W.
No AC Output. The unit has shutdown, Verify the error condition and make correction.
Status LED is check Error code shown
red on display.
During AC Input
The unit is set to “Non-
Change the “ln0” setting to different setting if you
Power Outage, Backup” mode (“ln0”) want to turn ON the inverter.
there is no AC and AC Input Power is With “ln0” setting, the inverter is completely OFF.
Output when not available. When the AC Input Power is not available and the
battery power is “Power” button is pressed once, the display and
available. LEDs stay working for about 10 sec only. With this
setting, the unit will provide AC Output Power only
when the AC Input Power is available.
Other manuals for EnergySystem ES-2000
1
This manual suits for next models
3
Table of contents
Other AWILCO Power Pack manuals