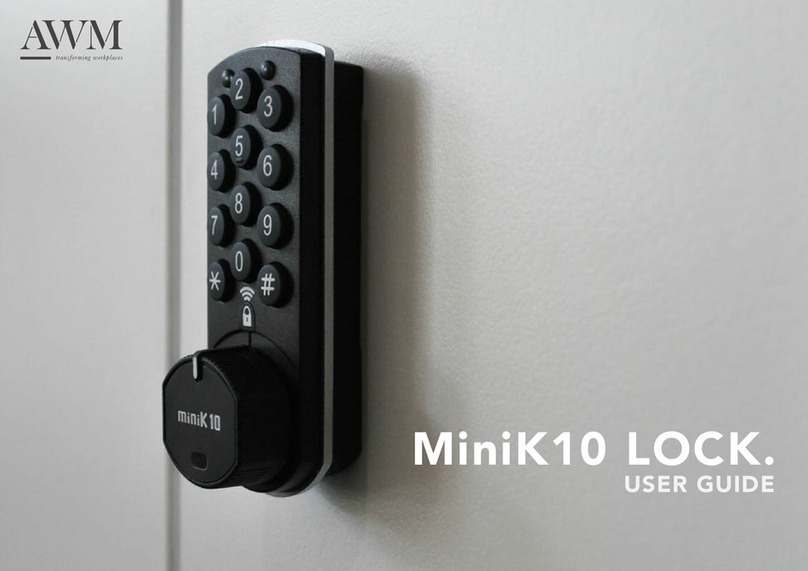
AWM MiniK10 User manual

MiniK10 LOCK.
USER GUIDE

awm.net.au2
Programming MiniK10 Locker
Programming mode
To make changes to the lock’s settings, you must rst enter programming mode. To enter
programming mode manually via the keypad, simply enter the following sequence.
Changing the master password
Set and test new Master code before installing the lock
Changing between public and private
By Default, the minik10 is set to public user mode. The Minik10 can easily be set to permanent user
mode in 2 simple steps.
Forgotten password
By Default, the minik10 USER PIN IS 1010. If a user has lost /forgotten their pin, you can easily reset it
back to the factory default user code so the user can reset their desired PIN.
Light and audio notication
Password correct: Green LED with 2 repeated audio sounds
Password incorrect: Red LED with 4 repeated audio sounds
Low Battery: Red LED blinks 5 times after every operation
Lock is open: 1 minutes after door is opened, lock gives audible warning 8 times every 5 seconds.
Default master password is 101010
MASTER PASSWORD
MASTER PASSWORD
MASTER PASSWORD
OLD MASTER PASSWORD NEW MASTER PASSWORD
#
#
#
#
# # #
*
*
*
1
4
0
0
X
X
X
X
X
X
X
X
X
X
X
X
X
X
X
X
X
X
X
X
X
X
X
X
X
X
X
X
X
X
PROG.
NO
SELECT.
NO
FOR ADMINISTRATOR
Red LED lightGreen LED light
Lock / Unlock

3MiniK10 Lock
MASTER PASSWORD
#*
X X X X X X
PROG.
NO
SELECT.
NO
ACCESSING THE PROGRAM MENU
PROG
NO
0
SELECT
NO
1
EXPLANATION
0-1 Restores factory default settings:
Prog. No 1-1: Locker mode operation (Multiple user operation)
Prog. No 2-1: Audible beeps and conrmations
Prog. No 3-0: Penalty operation is not active
Prog. No 4-0: Sets user password to factory default
Prog. No 5-0: Service password is not active
Prog. No 6-1: Closing without password active
Prog. No 7-0: Warning of open door is not active
Prog. No 8-0: Resetting user password is not active
Prog. No 9-0: Blocking of the lock is not active
10 Personal Operation (Individual Operation)
1 Locker Mode Operation (Multiple User)
20 Mute operation except for warnings
1 Audible operation- button feedback, warnings and conrmations
30 Penalty passive
1 Penalty active (Lock blocked for 5mins if wrong code entered 3 times)
40 Sets user default code to factory default (For forgotten combinations)
1 -
50 Service Password is passive
1 Service Password is active
60 Closing with password required is active
1 Closing without password is active (for personal usage)
70 Warning of door open is passive
1 Warning of door open is active (beeps 8 times every 5 sec.)
80 Resetting user password is passive (if service password is active)
1 Resetting user password is active (if service password is active)
90 Blocking of the lock is passive (if service password is active)
1 Blocking of the lock is active after using service password (if it is active)

awm.net.au4
Programming MiniK10 Locker
First time use
To open the locker, press turn the handle clockwise
Changing the user code
To change user code, press , a conrmation beep and green LED will conrm
Changing back to the default password
To change back to default locker code, press
Forgotten password
By Default, the minik10 User Code is 1010. If a user has lost /forgotten their pin, you can easily reset it back to the factory
default user code so the user can reset their desired PIN.
Default locker code is 1010
CURRENT CODE
CURRENT CODE
NEW CODE
*
*
*
*
X
X
XX
X
XX
X
X
1
1
1
1
X
X
X
0
0
0
0
FOR USER
MASTER PASSWORD
#*4 0X X X X X X

5MiniK10 Lock


awm.net.au8
The “Hopinlock” software allows users to easily access multi-
threaded cabinets via a mobile Android device. The user can
manage and control the locks from one central device. This
prevents unauthorized master password sharing, mass changing
of functions and information can be backed up on the tablet.
The “Hopinlock” compatible models of VEMUS products based
mobile application. By downloading the “hopinlock-manager”
your tablet from computer, you can begin to manage your
compatible locks easily while you sit down.
Change your device settings to enable Apps upload
from unknown sources.
Connect your device to the Internet and enter this linked
web browser:
http://hopinlock.com/app/hopinlockmanagerv2.0.apk
The installation will start automatically.
The hopinlock manager App only works on NFC enabled
Android devices, and can only be downloaded via the
link.
APP INSTALL
MiniK10
Integrating Mobile App

LOGIN MENU
Once opening the App, login using the account information provided to
you.
Once you have logged in, you can edit the user information. e only
information that cannot be changed is the user name.
The main menu is where all tasks can be actioned.
Search Icon - This allows you to search for a lock by its assigned
number. Please note that all locks from all zones with the same
number will appear.
Sort Icon - This sort icon will allow you to sort the list of zones by
name, by lock count and by task count. You can also sort locks by
cabinet number, zone or by task.
General Settings - This is where the general settings for the
Hopinlock are set such as remembering the master password and
allowing permanent tasks to be set. It also has the option for a
manual back up.
Main Menu - This is the main menu and has a list of features
including adding zones, deleting zones, opening all locks,
changing the master password to all locks, resetting all locks to
factory default settings, canceling all active tasks and event logs.
9MiniK10 Lock

awm.net.au10
Zone - All the locks that have been
assigned to that zone.
Lock - All the locks that are active
within the app.
Task - All the locks that have tasks
assigned to them.
1.ZONES
Putting the locks into different zones gives you the convenience of
partitioning the locks you will save.
There are 3 different zones that can be used By Zone / By Lock / By Task
To add a zone press on the menu key and then click add
zone. Once the zone has been named it can be edited by using
the options. All the zones are visible on the opening screen.
MiniK10
Integrating Mobile App
SPECIFYING AREAS FOR THE APPLICATION AND LOCKS ADDING ZONES

To delete a zone, go into the zone you wish to delete. The option to
delete is the second option on the screen. Select the delete icon to
delete the zone
REMOVING ZONES
11MiniK10 Lock

awm.net.au12
The locks can be read using the NFC area of the mobile device. The
NFC area must make contact with the handle on the lock.
M
U
Turn all locks on/off. Afterwards the locks that are required to
open or close are changed by entering the master password.
Delete all locks. The locks that need to be deleted can be
done by entering the master password.
Changing the master password for all locks can be done by
entering the current master password and then entering the
new master password.
Changing the user password for the lock can be done by
entering the current master password and then entering the
new user password.
Reset all locks to factory settings by entering the current
master password.
Remove all tasks removes all the tasks from all the locks.
Remove the permanence of all tasks removes all the
permanence of all tasks on the locks.
MiniK10
Integrating Mobile App
2.LOCKS
LOCK IDENTIFICATION LOCK MENU

If a lock has not yet been dened, when it is read for
the rst time the “Add Lock” window will open. A
zone can be added and a number dened. An optional
description can also be added. The zone needs to be
created before a lock is added.
STEP 1:
STEP 2:
STEP 3:
If a lock is dened (already added to the app) the
general settings window for the lock is opened when it
is scanned from the mobile device or when it is selected
from the main screen. The drop down menu will open
and the desired tasks can be carried out after entering
the master password.
Once the lock is scanned the task that is required needs
to be selected and the master password entered. The
general setting window then needs to be exited by
pressing the back arrow in the top left corner. When
back on the opening screen scan the lock again and the
task will be actioned.
ADDING A LOCK
13MiniK10 Lock

awm.net.au14
MiniK10
Integrating Mobile App
2.LOCKS
EDIT LOCK DELETE LOCK
In the Locks section, press and hold the lock to edit the saved locks.
By clicking Update button in the pop up window, the Lock zone, lock
number and description can be changed.
In the Locks section, press and hold the lock to edit
the saved locks. By clicking Delete button in the pop
up window, the lock selected can be changed.

15MiniK10 Lock
LOCK SETTING
Locker Mode is the lock that is opened with the
password entered when closing the lock. The password
entered when unlocked becomes the new password.
Personal Mode is the lock that is opened with a xed
password. To change the pass word you need to know
the current password.
Sound Control:
Activates or deactivates the audible warning of the
lock. When disabled, it does not beep when keys are pressed,except for lock
error warnings.
Penalty Mode:
Prevents unauthorized use of the lock. If 3 incorrect passwords are entered
consecutively, the lock is blocked for 5 minutes.
Service Password:
5-digit private password authorized to unlock only. When activated, the service
password is “10101.
Closing Mode:
When the lock is opened in individual mode, the handle is released. To lock,
simply turn the handle. The lock is automatically locked when the handle is
turned. If passive, password must be entered both on and off.
Note: This feature is for individual use only.
Lock Open Warning:
The lock beeps 8 times every 5 seconds 1 minute after the door is opened to
notify the user that the door remains open.
Note: This feature is for individual use only.
Resetting User Password:
When the service password is opened, user password is reset. The user
password returns to the factory settings. “1010”
Blocking Lock:
When unlocked with the service password, the lock is blocked. The lock can
only be used again if the master password is unlocked.
Write to Lock:
After selecting the desired settings, tap th e ‘Write to Lock’ button. The task is
created by entering the master password
Write to All Locks:
After selecting the desired settings, tap the ‘Write to All Locks’ button. In the
pop up window , the master password is entered and any zone or all zones can
be selected. All locks of the selected zones are assigned a task.

awm.net.au16
MiniK10
Integrating Mobile App
LOCK OPERATION
You can perform the following
operations from the menu to all locks
or locks in zones.
1.To unlock all locks, tap ‘Open All Locks.’ Then select the
desired locks in the window that opens and enter the master
password.
2.To delete all locks, tap ‘Delete All Locks.’ Then select the
desired locks in the zones in the window that deletes and enter
the master password.
3.To change the master password of the locks, tap ‘Change
Master Password of All Locks’. After that, it is changed by
entering ‘Current Master Password / New Master Password’ in
the window that opens.
4.To restore the locks to the factory settings, tap ‘Reset All
Locks to Factory Settings’. After that, it is changed by entering
“Existing Master Password” in the window that opens.
5.To cancel all tasks for locks, tap ‘Cancel All Tasks’. After that,
the relevant regions or all regions are selected from the window
that opens and the tasks are canceled.
2.LOCKS
1
2
3
4
5
6
7

17MiniK10 Lock
6.Locker Mode Card Setup
If the Open Lock Once task is assigned to Master Card, tap this menu
in order to remove this task from the Master Card. If you do not release
the Master Card, the task assigned to Master Card will be executed
continuosly.
To close more than one lock with a single card, rst tap the ‘Setup
MultiCard’ button in the menu section. The desired number of
locks from one to four is selected from the pop up window and this
information is written on the card. The user can close the specied
number of open cabinets with this card. This allows multiple locks to be
controlled with a single card.
7.Event Records can be accessed via the mobile application
records of the last 500 transactions.
The severity rating is indicated in three different ways.
means logs for your information
means logs for your attention
means logs for critical transactions.

awm.net.au18
The Task section contains tasks created by the administrator such as
Unlock, Change Password, Lock Settings, and so on.
When each task is executed on a lock, it disappears from the Tasks
section. If the task appears in this section, that task has not been
performed.
MiniK10
Integrating Mobile App
3.TASK
TASK MENU
1.To unlock, tap the “Unlock” button and enter the master
password.
2.To change the master password, tap
the “Change Master Password” button. The new master
password is created by entering the correct master password
and the new one in the pop up screen.
3.To change the user password, tap the “Change User
Password” button. The new user password is created by entering
the correct master password and new user password in the pop
up screen.
4.To access the lock settings, tap the “Lock Settings” button.
The setting parameters of the lock appear on the pop up screen.
The lock settings menu is available in detail under “
5.“Default Settings” button to restore the lock to the factory
settings. In the pop up screen, the master password is entered
and clicking OK creates the task that returns the lock to the
factory settings.
6.“Remove Task” button to remove the current task from the
Task section.

The task section contains tasks assigned to the zone or lock
section. The task can be changed or canceled by taping the
assigned lock.
(Mode change, Master card opening once, master card
change and individual card insertion operations can be done.)
TASK ASSIGNMENT
19MiniK10 Lock
1. To switch the lock from individual mode to multiple mode, tap
the “Multiple Mode” button.
(Multiple Mode means the lock can be locked by any card if the
lock is in unlock position.)
2.Tap the “Unlock Once with Master Card” icon to unlock the
selected card with the master card only once.
3. To change the Master Card, tap the Change Master Card icon
and move a card that you want to become a Master Card closer
to the NFC antenna area of your mobile device. The mobile
Device will program the new card as a Master Card.
4.To assign an Individual Card to the lock, touch the “+” button
to select a user in the window that opens and touch the Save
button. One or more Individual Cards can be assigned to the
selected lock. To do so, this card must rst be assigned to any
User.

awm.net.au20
MiniK10
Integrating Mobile App
4.USER
CREATE USER PASSWORD
To create a user password
-In the “USER” section of the main page, click a user icon to create a
password.
-By clicking the “Create User Password” button from the window that
opens, the relevant lock is selected, the current master password is
entered and the transmission format of the password is selected
-If the 4 digit password to be randomly generated is to be sent to the
user via SMS, “Send SMS” is selected, or “Send E mail” is selected.
-Clicking Save button assigns user password creation task. This task is
listed on the “TASK” tab.
In order for the password to be transmitted to the user, the task must
be executed in the lock. The mobile device is brought closer to the
lock and the password is transmitted to the lock. The corresponding
task is deleted from the list.
In order to send the password to the user, the relevant user is selected
in the “USER” section and the transmission is conrmed.
On this page, the User Code generation process for another lock can
be initiated if desired, or all other pending approvals can be issued.
Notes:
-In order to create a user password, the lock user must be dened.
-In order to send password by email, a valid e mail address of the user
must be dened in the user information.
-In order to send a password via SMS, a valid phone number of the
user must be dened in the user information.
-In order to send a password via SMS, the hopinlock manager
application must have a valid SMS package.
Other manuals for MiniK10
1
Table of contents
Other AWM Lock manuals
Popular Lock manuals by other brands

Assa Abloy
Assa Abloy effeff EX118R installation instructions

Assa Abloy
Assa Abloy d12-B2 installation instructions

Assa Abloy
Assa Abloy OneSystem 519N Assembly instructions

G-U
G-U Secury 21 EK installation instructions

Vescent
Vescent D2-135 Quick setup instructions

U-tec
U-tec Ultraloq UL3 installation instructions

National Cabinet Lock
National Cabinet Lock C8711 Dimensional drawing

HOWA MACHINERY
HOWA MACHINERY H063M instruction manual

HVS
HVS EFL Operation manual

YLI
YLI YM-500 Wiring instructions

National Cabinet Lock
National Cabinet Lock C8111 Dimensional drawing

Assa Abloy
Assa Abloy APERIO P100 Setup instructions