UP/ DOWN A DJUS T "MENU ": EXIT
AUT O
Cab le Syst em
Sta rt to Sca n
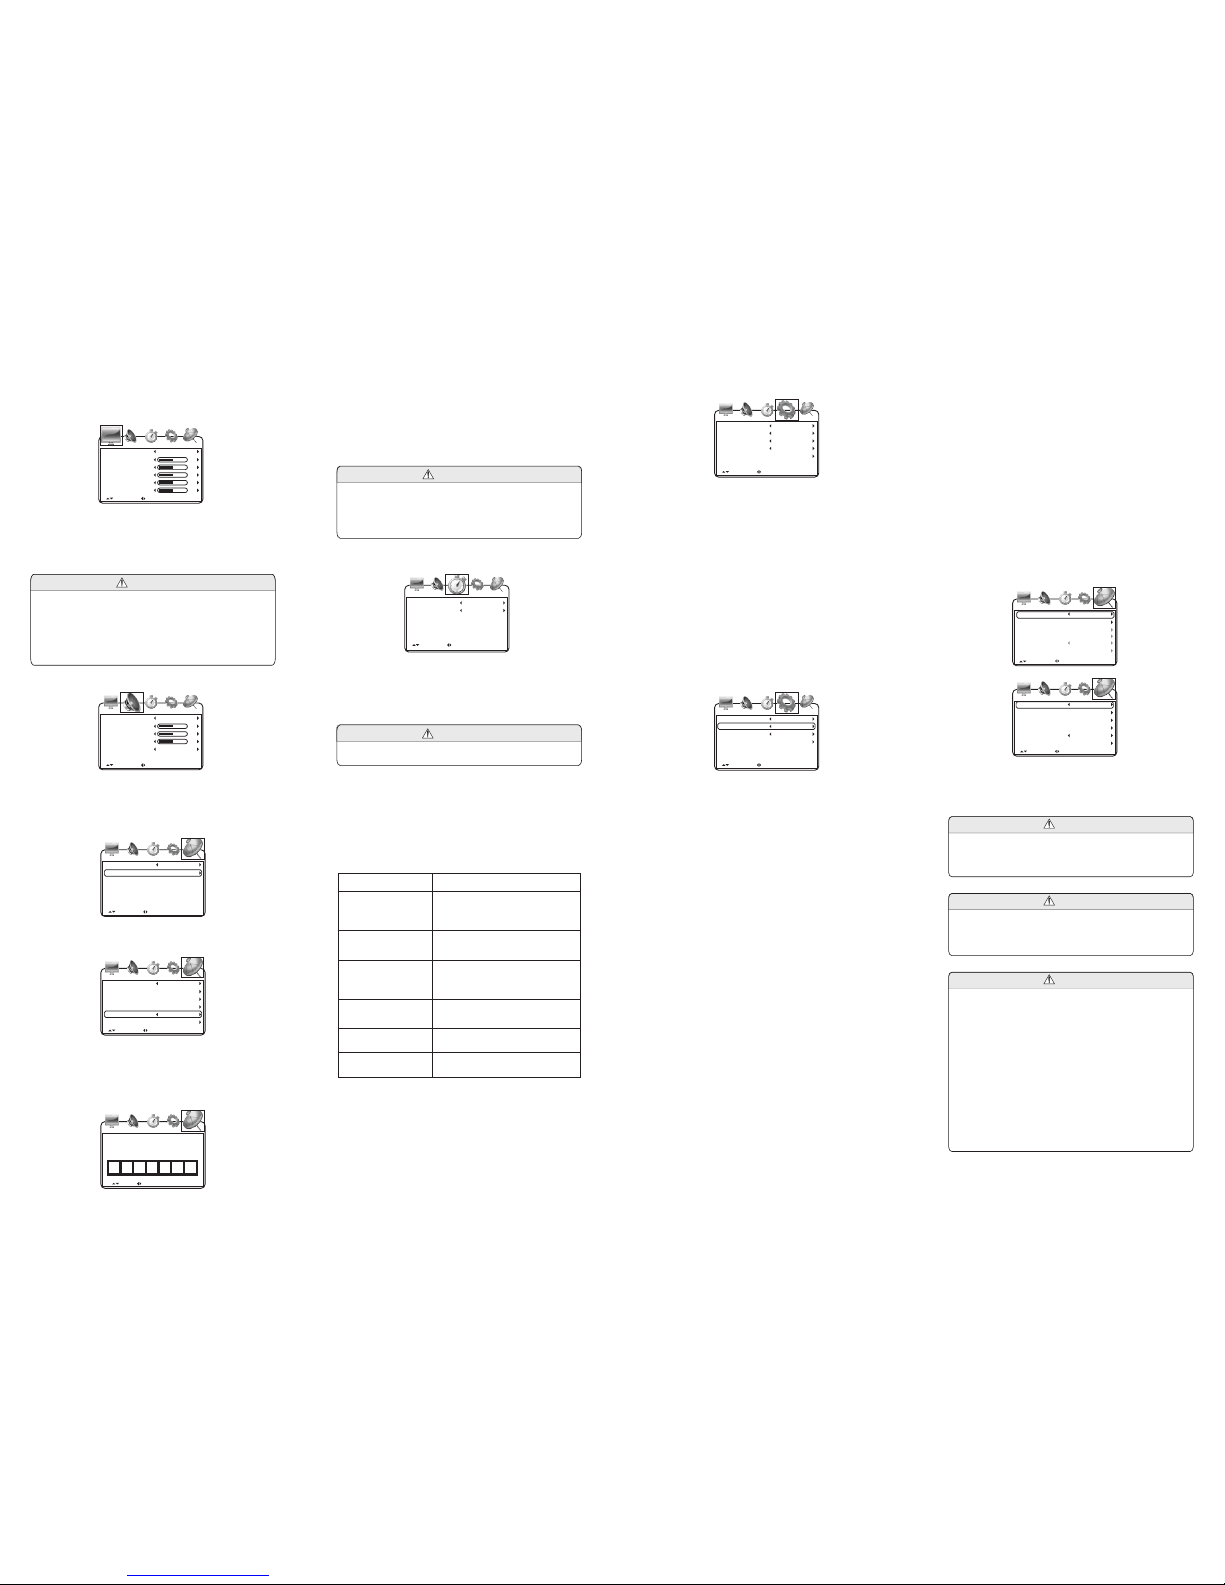
6.5.2. In the Start to scan item, press VOL+ to start searching.
Auto searching will clear the primary program.
6.5.3. Change channel number
choose channel number as in the following picture :
Press VOL+ or VOL- to change curren channel number.
6.5.4. Change or Edit Program Name
Choose Channel Label and press VOL+ to enter the following picture.
Alter the characters and numbers in the box to change the program
name according to your preference as in the following picture.
EDI T SEL ECT "MENU": E XIT
F D 38 0 3
Antenna
Aut o Scan
Aut o Scan Add C H
Cha nnel Sk ip
Cha nnel No .
Cha nnel La ble
UP/ DOWN A DJUS T "MENU ": EXIT
Air
4-1
Ant enna
Aut o Scan
Fav orite
Sho w/Hide
Cha nnel No .
Cha nnel La ble
UP/ DOWN A DJUS T "MENU ": EXIT
Air
4-1
Ant enna
Aut o Scan
Fav orite
Cha nnel No .
Cha nnel La ble
UP/ DOWN A DJUS T "MENU ": EXIT
CATV
Sho w/Hide
6.5. VOLume key settings:
Press MENU Key to enter the menu list, press Left and Right Key to
enter the following list, press Up and Down Key to enter the sub-list
and then press Left and Right Key to setup the contents.
Select the menu of lock, press Down key to enter password...,
Then press figure key to setup the contents.
Antenna can be setuo as CATV and Air.
There are three CC Modes, which are Off (closed caption off), On
(closed caption always on when information is available) and CC on
Mute (closed caption on when TV is in mute and closed caption off
when TV is not in mute).
Basic Selection can choose among CC1, CC2, CC3, CC4, Text1,
Text2, Text3 and Text4
6.5.1. Searching.
Press MENU key to enter menu, list press Left and Right key to
enter the following list, then press Left and Right key to setup the
contents.
6.4. Settings
Press MENU key to enter the menu list and then press left or right key
to enter the above list. Press up and down key to choose to enter the
sub-list, press left and right key to setup the contents.
6.4.1. OSD Language Settings
Press Up and Down Key to choose Language, and press Left and
Right Key to choose among English, French and Spanish.
6.4.5. Closed Caption Settings
Many TV programs contain closed caption information, and the
audience can see the caption in words on the screen. Not all the
channels at any time have closed caption code information.
6.4.4. Press up and down key to choose ZOOM mode, press left and
right key to choose WIDE, NORMAL.
6.4.3. Color Auto-adjustment
Press Up and Down Key to choose Color Mode. Press Left and
Right Key to choose among Normal, Warm and Cool.
6.4.2. Menu State Settings
Press UP and Down Key to choose Transparency, and press Left
and Right Key to choose Off (menu transparency off) or On (menu
transparency on).
Press Up and Down Key to choose Closed Caption and press Left
and Right Key or ENTER Key to enter the following picture.
Men u Langu age
Tran spar ency
Col or Mode
zoo m mode
Clo sed Cap tion
Res tore De fault
Eng lish
Off
Nor mal
wid e
UP/ DOWN A DJUS T "MENU ": EXIT
CC Mo de
Bas ic Sele ction
Adv ance Se lecti on
Opt ion
Off
CC1
Ser vice1
On
UP/ DOWN A DJUS T "MENU ": EXIT
Press MENU key to enter the menu list and then press left or right
key to enter the above list. Press up and down key to choose to enter
the sub-list, press left and right key to adjust the numerical value or
setup the contents, then press Menu to confirm and return to
previous list. Press Menu again or press EXIT key on the remote
controller to quit the sub menu list directly after the adjustment.
Precautions
1. Time Zone has six areas to be chosen.
2. Day Saving Time can be setup as Off or On (Summer time off or on).
Press MENU key to enter the menu list and then press left or right
key to enter the above list. Press up and down key to choose to enter
the sub-list, press left and right key to adjust the numerical value or
setup the contents, then press Menu to confirm and return to
previous list. Press Menu again or press EXIT key on the remote
controller to quit the sub menu list directly after the adjustment of
sound effect.
1. There are four options of sound mode, which are Personal,
Standard, Movie and Music.
2. Bass adjust bourdon.
3. Treble adjust alt.
4. Balance adjust the balance between left and right sound track.
Precautions
6.3. Time Adjustment
UP/ DOWN A DJUS T "MENU ": EXIT
Time Z one
Day S aving Ti me
Eas tern
Off
Clo ck 2004/12/ 31 16:0 0
-7- -8- -9- -10-
-11-
6.2. Sound Adjustment
VI TV Menu Operation
6.1. TV/AV Image Quality Adjustment
Press MENU key to enter the menu list and then press left or right key
to enter the above list. Press up and down key to choose to enter the
sub-list, press left and right key to adjust the numerical value or setup
the contents, then press Menu to confirm and return to previous list.
Press Menu again or press EXIT key on the remote controller to quit
the sub menu list directly after the adjustment of image quality.
1. There are four options of picture mode, which are Personal,
Standard, Dynamic and Soft.
2. Contrast adjust the black and white contrast of the image
3. Brightness adjust the brightness of the image
4. Color adjust the color of the image
5. Sharpness adjust the sharpness of the image
6. Tint adjust the red and green balance of the image
Precautions
Pic ture Mo de
Con trast
Bri ghtness
Col or
Sha rpness
Tint
UP/ DOWN A DJUS T "MENU ": EXIT
Per sonal
50
50
50
50
0
UP/ DOWN A DJUS T "MENU ": EXIT
50
50
50
Sou nd Mode
Bas s
Treb le
Bal ance
Aud io Lang uage
Sta ndard
Eng lish
Warning
This operation instruction is only intended for reference. No further
notice is available to any modification of all information contained
therein. Due to continuing improvements, the features and design
are subject to change without notice.
Warning
No repairable components exist in the machine. Don't try to dismantle
and improve the TV box, and the high voltage in the machine may
cause danger. Maintenance and adjustment of the TV box is
subject to professionals.
●To prevent injury, this apparatus must be securely attached to the
floor/wall in accordance with the installation instructions.
●The mains plug is used as the disconnect device, the disconnect
device shall remain readily operable, and it shall be disconnected
from the mains completely.
●The plug is used as disconnect device form the mains supply, the
plug shall remain readily operable.
●The apparatus should not be exposed to dripping or splashing
and that no objects filled with liquids, such as vases, shall be
placed on the apparatus.
●No naked flame sources, such as lighted candles, should be
placed on the apparatus.
●Batteries (battery pack or batteries installed) shall not be exposed
to excessive heat such as sunshine, fire or the like.
●Danger of explosion if battery is incorrectly replaced. Replaced
only with the same or equivalent type.
Warning
-13-
Input
ATSC frequency: 54MHz~803MHz
NTSC receiving frequency: 55.25MHz~801.25MHz
LCD Screen Technical Parameter
LCD screen: 9" LCD
Resolution: 640(H)× RGB × 234(V)
LCD screen scale: 16:9
Capability Parameter
Power Supply: AC INPUT 100-240V 50/60HZ
DC OUTPUT 12V/1200mA
Dimensions: 258×156×39mm
Net Weight: About 780g
Power Consumption: About 10W
Build-in battery: 7.4V/1300mAh
IX Technical Parameter
-12-
VII Before Repair
The following phenomenons do not mean that the TV set has fault.
Please check it according to the following methods before repair.
Phenomenon Reason
No image and sound
AC adapter or automobile adapter
connecting improperly; using
unauthorized power; the power switch is
on the state of off.
No signal
Whether chosen the right channel; auto
setup receiving channel again; channels
need to be reset in a new place.
No sound
Whether the volume has been turned
down at the bottom; whether the
earphone is inserted; signals too weak;
the mute function is working.
Mosaic in the image
Whether the antenna has been adjusted
properly, and maybe the signals are too
weak.
Could not receive
signals
Maybe the local signals are too weak;
open antenna or cable TV preferred.
Image too dark Whether the brightness and contrast are
proper, and please adjust again.
-14-