5
5. Clock Display and Adjustment
Press and hold BAND button for 2 seconds to display clock. When the clock is displayed, press and
hold BAND button for 2 seconds until the hour number is ashing. Then use the VOLUME buttons
to adjust hours. Once hour number is set, press BAND button to display minutes. Use the VOLUME
buttons to adjust minutes.
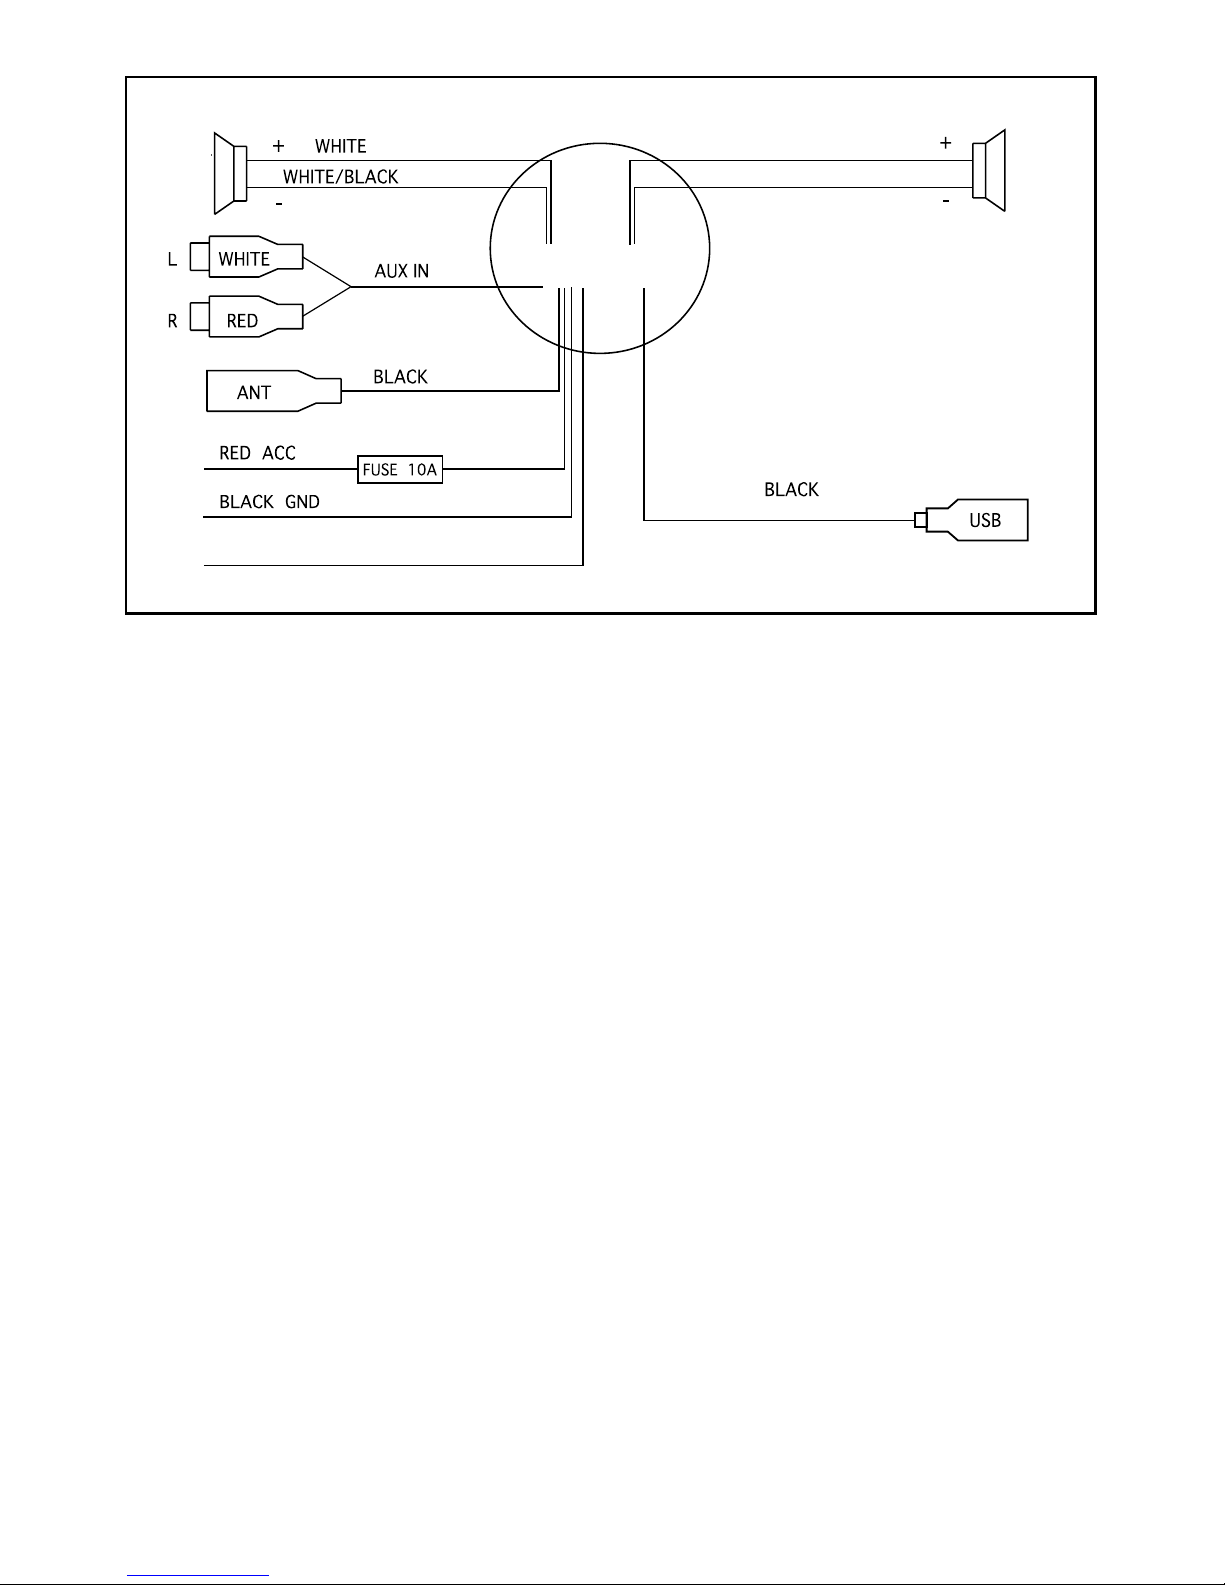
6. Installation and Wiring
WARNING!
Before installing this unit to any panel, ALWAYS ensure that there is sucient clearance behind the
panel and that no wire harnesses, fuel lines, moving linkages, or any other critical components are
exposed or damaged by the installation. NEVER risk damaging the hull when installing.
INSTALLATION
This unit operates with a negative ground 12 Volt power supply.
a. Before starting:
Read these instructions carefully. Be sure to disconnect the
battery "-" terminal rst. This is to prevent short circuits during
installation. To avoid interference, do not install the unit in
the proximity of the engine compartment. Always check wire
connections to ensure proper installation before turning on the
unit. Consult with your nearest dealer for installation solutions or if
additional accessories are needed.
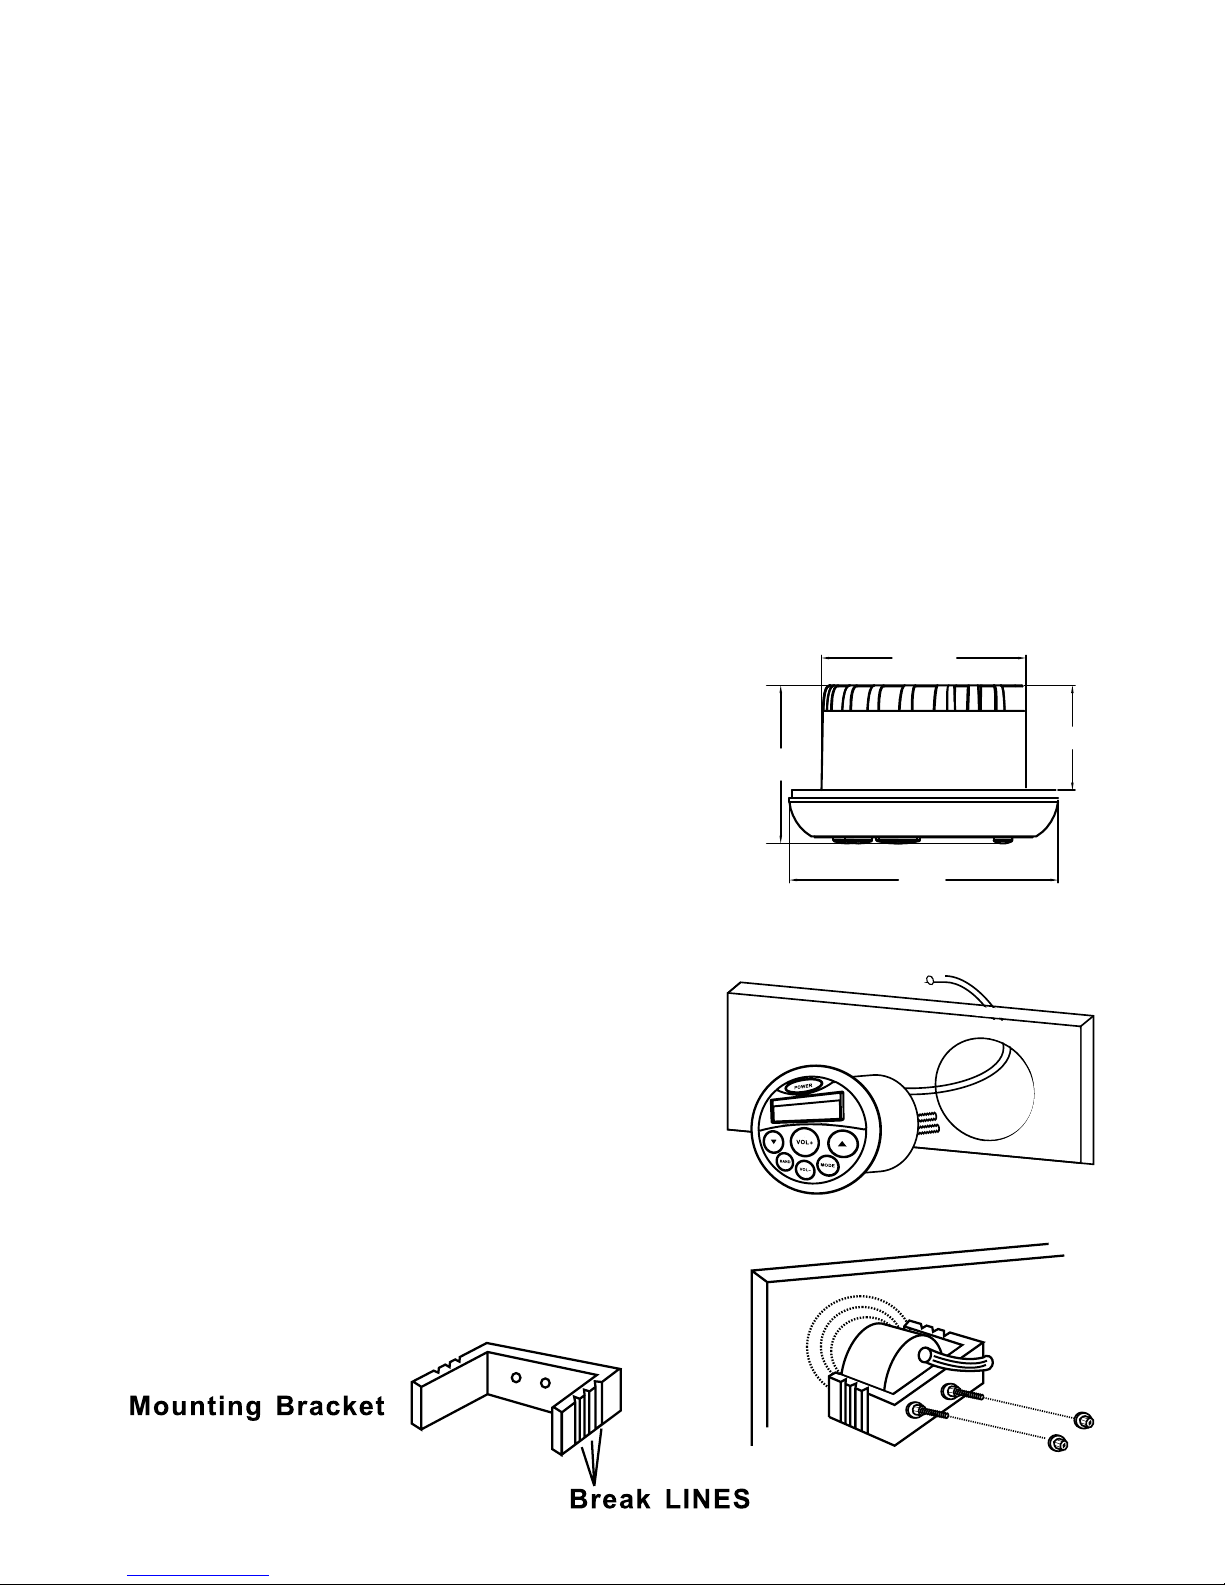
b. Installing:
The unit should be mounted to a dry, clean and at surface so the
installation remains fully watertight.
Please make sure that the location has sucient mounting
depth to avoid damaging cables or fuel lines. The unit
requires a 75mm diameter round hole. Cut the hole and
install the unit into the opening as shown. Ensure the
rear gasket is fully sealed to the mounting surface without
distorting the unit. Use the mounting bracket to securely
fasten the chassis of the unit. If the mounting bracket is too
long, remove some breakaway segments.
75mm
66mm
41mm
89mm