10
Create some shortcut keys on the touchscreen to directly unlock a door, call the intercom or pull
up an intercom camera feed.
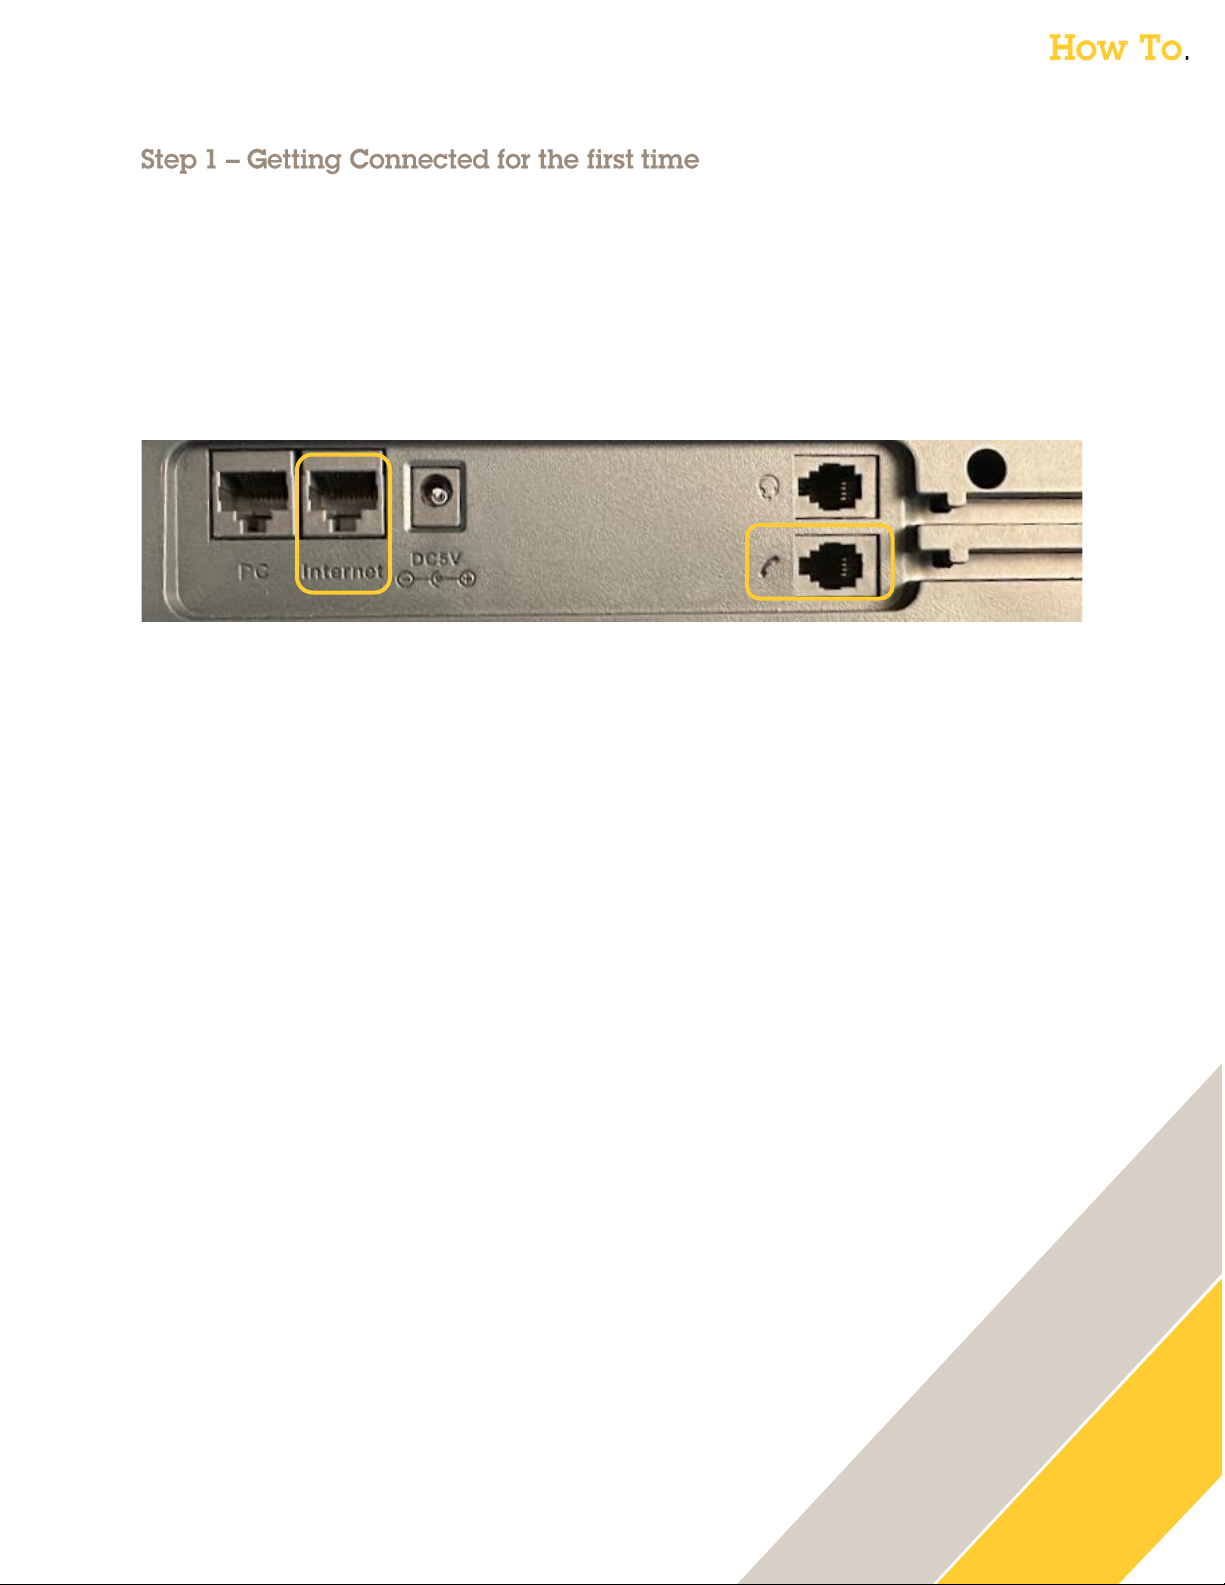
Unlock the Door
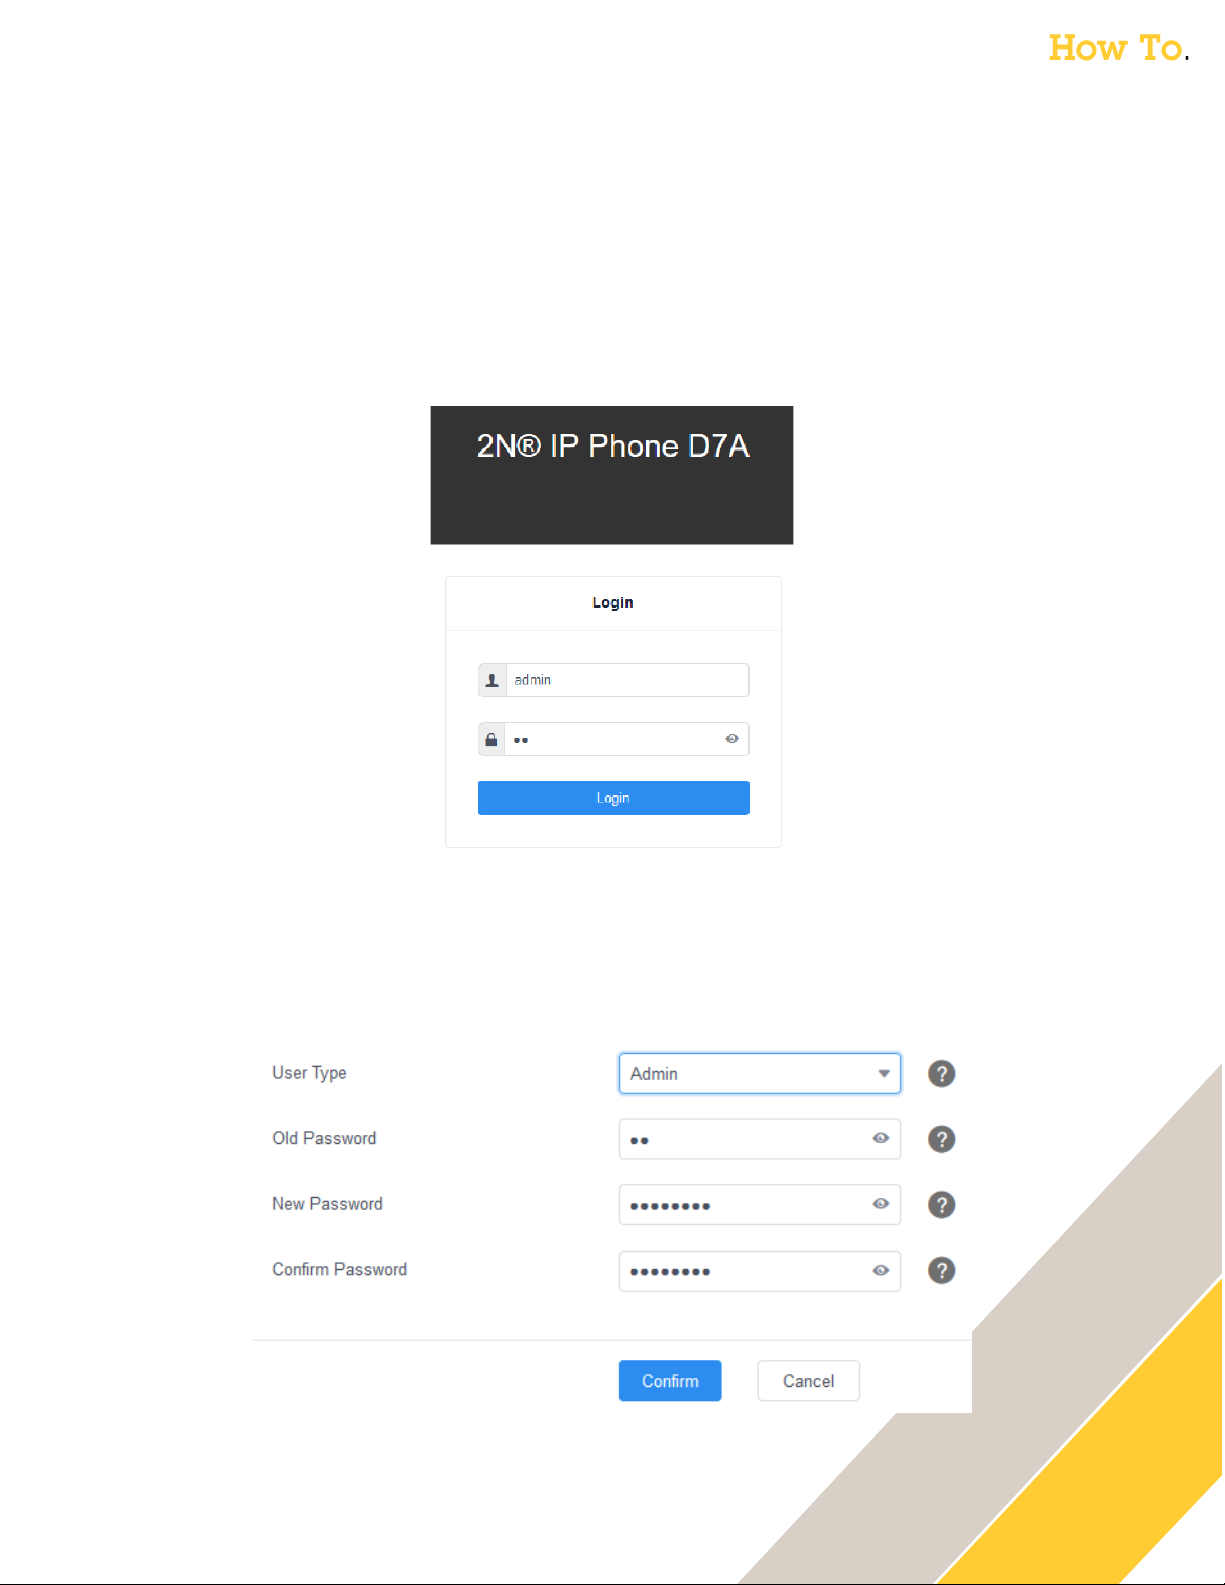
The following steps are performed in the web GUI of the 2N D7A Phone
1. Click on Dsskey then Line Key
2. Set the key type
oType = Open Door
3. The value is the trigger/command we will send to the (Axis or 2N) intercom
oAxis Intercom:
Value = https://<IP_of_Axis_Intercom>/axis-cgi/io/port.cgi?action=4%3A%2F5000%5C
The above action triggers relay 1 (port 4) for 5000 milliseconds (5 seconds) on the I8016-
LVE. If you have a different model Axis Intercom, you can verify the Relay 1 port number
under System →Accessories in the Axis GUI (firmware 11.x).
o2N Intercom:
Value = https://<IP_of_2N_Intercom>/api/switch/ctrl?switch=1&action=trigger
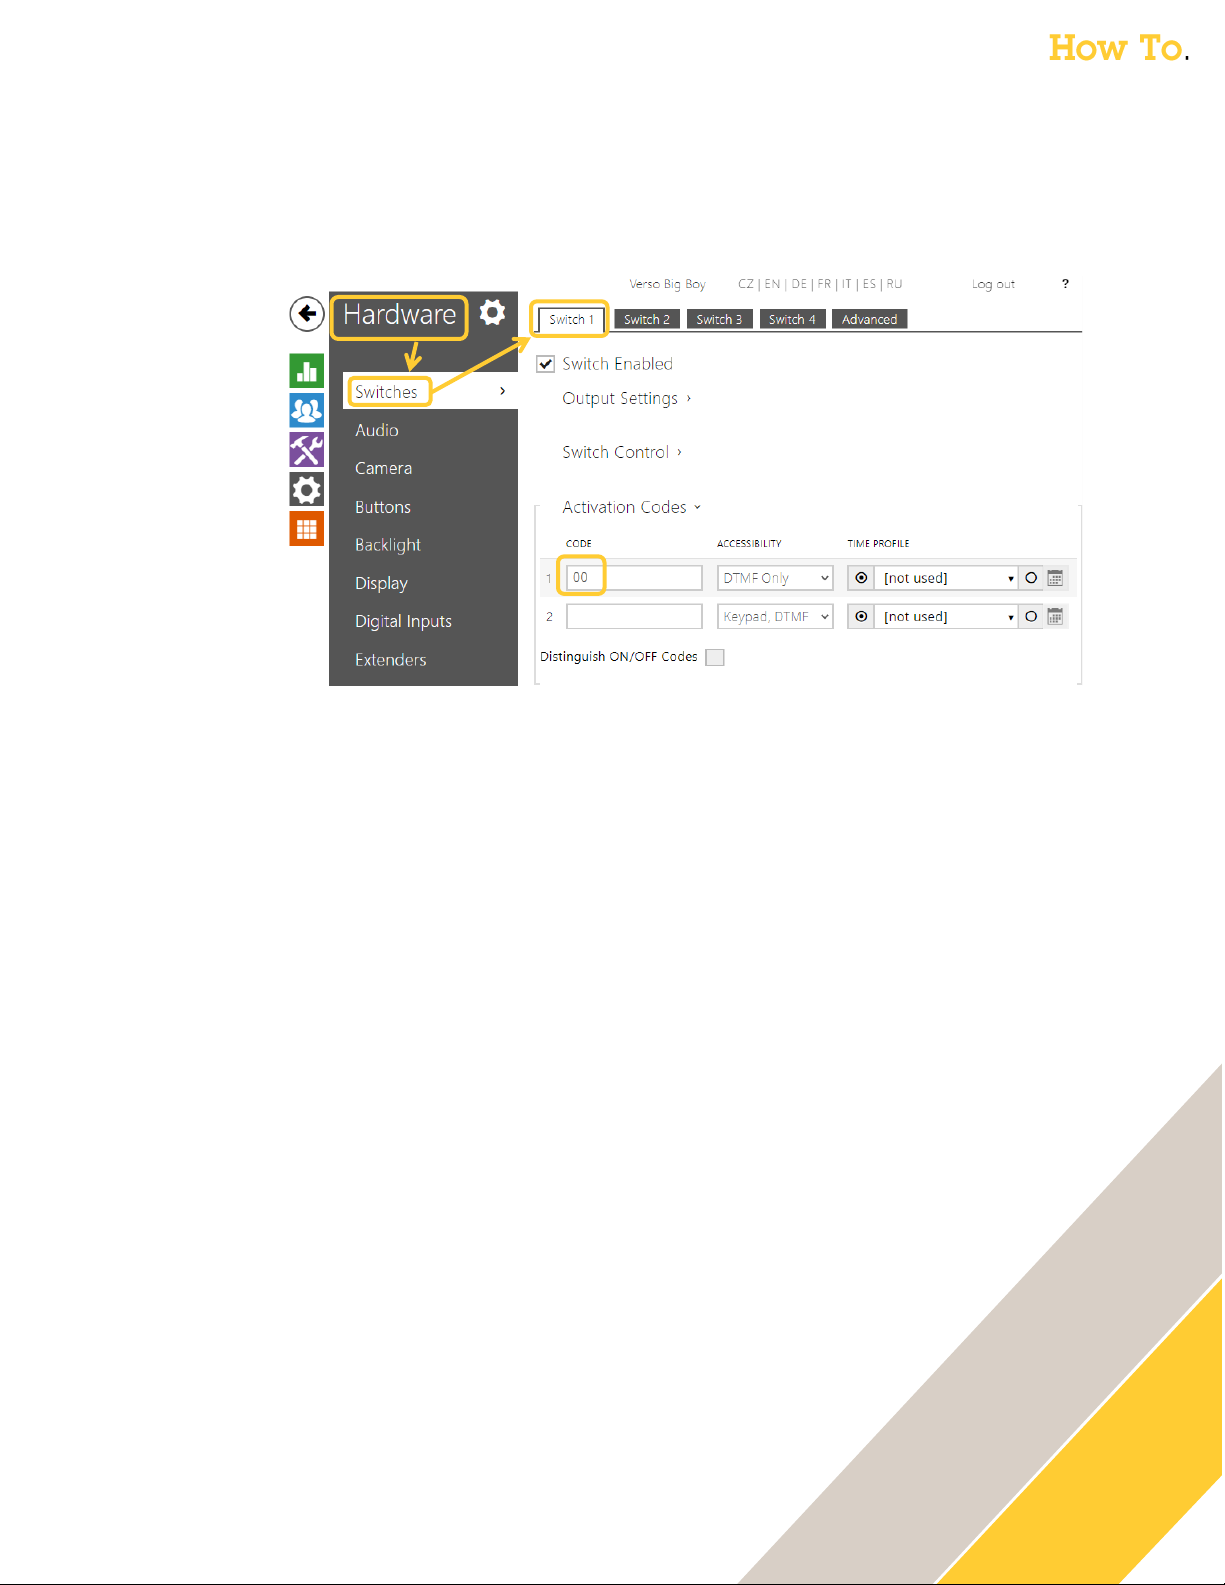
The above action triggers Switch 1 (the default Door Lock switch). It is triggered for the
duration specified in the 2N Intercom GUI under Hardware then Switches for Switch 1.
4. Create a descriptive label
oExample: Label = Unlock Front Door
5. Set the Extension / IP address of the intercom
oExtension = <IP_of_Intercom>
6. Click Confirm