manuals.online logo
Brands
  1. Home
  2. •
  3. Brands
  4. •
  5. Axxess
  6. •
  7. Automobile Accessories
  8. •
  9. Axxess AXDI-GMLN11 User manual

Axxess AXDI-GMLN11 User manual

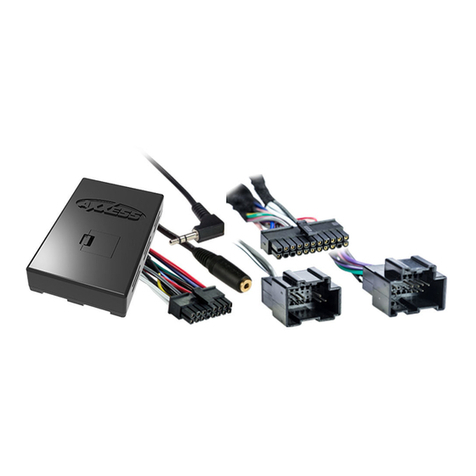
Installation instructions for part AXDI-GMLN11
REV. 1/20/2020 INSTAXDI-GMLN11
axxessinterfaces.com •metraonline.com © COPYRIGHT 2020 METRA ELECTRONICS CORPORATION
Axxess Integrate
CAUTION!
All accessories, switches, climate controls panels, and
especially air bag indicator lights must be connected before cycling
the ignition. Also, do not remove the factory radio with the key in the
on position, or while the vehicle is running.
• Provides accessory power (12-volt 10-amp)
• Retains R.A.P. (retained accessory power)
• Provides NAV outputs (parking brake, reverse,
and speed sense)
• Retains chimes through an onboard speaker
• Pre-wired AXSWC harness (AXSWC sold
separately)
•
Designed for non-amplified models, amplified
models, or when bypassing a factory amplifier
• Retains balance and fade
• Micro “B” USB updatable
INTERFACE FEATURES
• Wire cutter • Crimp tool • Solder gun • Tape
• Connectors (example: butt-connectors, bell caps, etc.)
TOOLS REQUIRED
AXDI-GMLN11
GM Data Interface
2006-2012
APPLICATIONS
Connections to be made................................................... 2
Installing the AXDI-GMLN11............................................. 3
Initializing the AXDI-GMLN11........................................... 3
Table of Contents
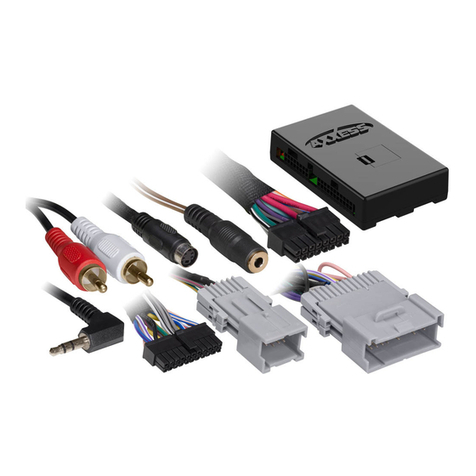
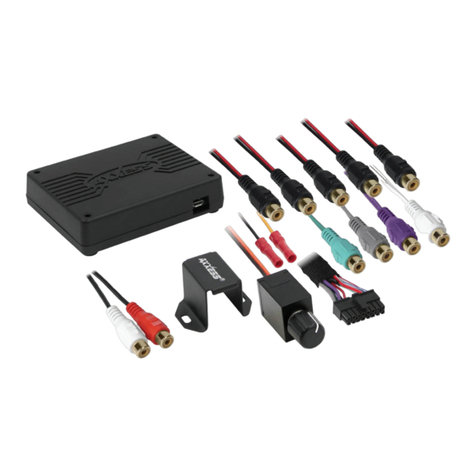
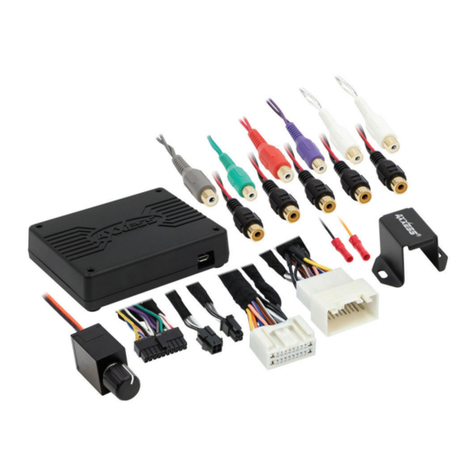
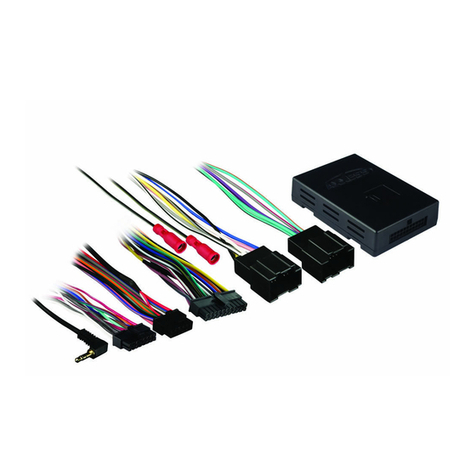
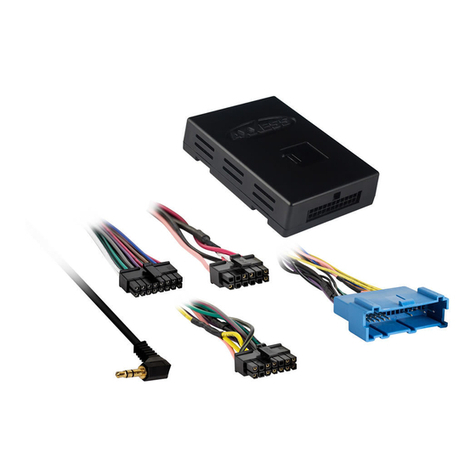
• AXDI-GMLN11 interface • AXDI-GMLN11 harness
INTERFACE COMPONENTS
CHEVROLET
Cobalt 2007-2010
HHR 2006-2011
Malibu 2008-2012
PONTIAC
G5 2007-2009
G6 2010
PONTIAC (CONT)
G6 (5th digit of VIN must
be a J, K, or L) 2009
Solstice 2006-2009
SATURN
Aura 2007-2009
Sky 2007-2009
AXDI-GMLN11
2
Connections to be made
From the AXDI-GMLN11 harness to the aftermarket radio:
• Connect the Black wire to the ground wire.
• Connect the Yellow wire to the battery wire.
• Connect the Red wire to the accessory wire.
• Connect the Blue wire to the amplifier turn on wire.
• If the aftermarket radio has an illumination wire, connect the Orange wire to it.
• Connect the Gray wire to the right front positive speaker output.
• Connect the Gray/Black wire to the right front negative speaker output.
• Connect the White wire to the left front positive speaker output.
• Connect the White/Black wire to the left front negative speaker output.
• Connect the Green wire to the left rear positive speaker output.
• Connect the Green/Black wire to the left rear negative speaker output.
• Connect the Purple wire to the right rear positive speaker output.
• Connect the Purple/Black wire to the right rear negative speaker output.
The following (3) wires are only for multimedia/navigation radios that require these wires.
• Connect the Blue/Pink wire to the VSS/speed sense wire.
• Connect the Green/Purple wire to the reverse wire.
• Connect the Light Green wire to the parking brake wire.
12-pin pre-wired AXSWC harness:
• This harness is to be used along with the optional AXSWC (not included) to
retain steering wheel audio controls. If the AXSWC is not being used, disregard
this harness. If it will be used, please refer to the AXSWC instructions for radio
connections and programming.
Note: Disregard the harness that comes with the AXSWC.
• The following wire must be cut before programming the AXSWC:
• For the following vehicles cut the Green/Orange wire. If your vehicle is not
listed, do not cut anything:
CHEVROLET
Cobalt 2007-2010
HHR 2006-2011
Malibu 2008-2012
PONTIAC
G5 2007-2009
G6 2010
PONTIAC (CONT)
G6 (5th digit of VIN must
be a J, K, or L) 2009
Solstice 2006-2009
SATURN
Aura 2007-2009
Sky 2006-2009
AXDI-GMLN11
3
Initializing the AXDI-GMLN11
Attention! If the interface loses power for any reason, the following steps will need
to be performed again. Also, if installing an AXSWC connect it after you initialize and
test the interface/radio, with the key in the off position.
• Turn the key (or push-to-start button) to the ignition position and wait until the
radio comes on.
Note: If the radio does not come on within 60 seconds, turn the key to the
off position, disconnect the interface, check all connections, reconnect the
interface, and then try again.
• Turn the key to the off position, and then to the accessory position. Test all
functions of the installation for proper operation, before reassembling the dash.
Installing the AXDI-GMLN11
With the key in the off position:
• Connect the AXDI-GMLN11 harness into the interface, and then to the wiring
harness in the vehicle.
Note: If using the AXSWC, connect it after you initialize and test the AXDI-
GMLN11, with the key in the off position.
Installation instructions for part AXDI-GMLN11
REV. 1/20/2020 INSTAXDI-GMLN11
KNOWLEDGE IS POWER
Enhance your installation and fabrication skills by
enrolling in the most recognized and respected
mobile electronics school in our industry.
Log onto www.installerinstitute.com or call
800-354-6782 for more information and take steps
toward a better tomorrow.
®
Metra recommends MECP
certified technicians
axxessinterfaces.com •metraonline.com © COPYRIGHT 2020 METRA ELECTRONICS CORPORATION
Axxess Integrate
IMPORTANT
If you are having difficulties with the
installation of this product, please call our
Tech Support line at 1-800-253-TECH.
Before doing so, look over the instructions a
second time, and make sure the installation
was performed exactly as the instructions
are stated. Please have the vehicle apart
and ready to perform troubleshooting steps
before calling.

Other Axxess Automobile Accessories manuals

Axxess AXDSPL-HN3 User manual

Axxess

Axxess AXDSPL-HN3 User manual

Axxess CHTO-03 User manual

Axxess

Axxess CHTO-03 User manual

Axxess AX-BM90112 User manual

Axxess

Axxess AX-BM90112 User manual

Axxess LC-GMRC-LAN-09 User manual

Axxess

Axxess LC-GMRC-LAN-09 User manual

Axxess AXDSPX-TY1 User manual

Axxess

Axxess AXDSPX-TY1 User manual

Axxess AXDIS-TY1 User manual

Axxess

Axxess AXDIS-TY1 User manual

Axxess AXDSPL-HN2 User manual

Axxess

Axxess AXDSPL-HN2 User manual

Axxess AXDIS-GMLN29 User manual

Axxess

Axxess AXDIS-GMLN29 User manual

Axxess AXTO-NI1 User manual

Axxess

Axxess AXTO-NI1 User manual

Axxess NITO-01 User manual

Axxess

Axxess NITO-01 User manual

Axxess AXDIS-GMLN44 User manual

Axxess

Axxess AXDIS-GMLN44 User manual

Axxess AXDSPL-WR User manual

Axxess

Axxess AXDSPL-WR User manual

Axxess AXDSPX-CH5 User manual

Axxess

Axxess AXDSPX-CH5 User manual

Axxess AX-ADBOX2 User manual

Axxess

Axxess AX-ADBOX2 User manual

Axxess AX-AM-AU91 User manual

Axxess

Axxess AX-AM-AU91 User manual

Axxess AX-GMLAN44-SWC User manual

Axxess

Axxess AX-GMLAN44-SWC User manual

Axxess AX-ADXSVI-GM1 User manual

Axxess

Axxess AX-ADXSVI-GM1 User manual

Axxess AXDSPX-CH3 User manual

Axxess

Axxess AXDSPX-CH3 User manual

Axxess AX-AU12-SWC User manual

Axxess

Axxess AX-AU12-SWC User manual

Axxess AXDSPL-VW1 User manual

Axxess

Axxess AXDSPL-VW1 User manual

Axxess AX-TYAMP2-SWC User manual

Axxess

Axxess AX-TYAMP2-SWC User manual

Axxess AXDSPL-MST1 User manual

Axxess

Axxess AXDSPL-MST1 User manual

Axxess AXDIS-CL2 User manual

Axxess

Axxess AXDIS-CL2 User manual

Axxess GMOS-044 User manual

Axxess

Axxess GMOS-044 User manual

Popular Automobile Accessories manuals by other brands

Kemo Electronic M176 manual

Kemo Electronic

Kemo Electronic M176 manual

Thule 1373 Fitting instructions

Thule

Thule 1373 Fitting instructions

Safe Fleet PSA installation guide

Safe Fleet

Safe Fleet PSA installation guide

Hyundai Getz 2004 owner's manual

Hyundai

Hyundai Getz 2004 owner's manual

STL K-FORCE MICRO 14 LINEAR instruction manual

STL

STL K-FORCE MICRO 14 LINEAR instruction manual

Germid TK-073 user manual

Germid

Germid TK-073 user manual

Whelen Engineering Company SA315 installation guide

Whelen Engineering Company

Whelen Engineering Company SA315 installation guide

Team Orion Advantage One user guide

Team Orion

Team Orion Advantage One user guide

Westin 25-2310 instructions

Westin

Westin 25-2310 instructions

Enduro BC260 Assembly instruction and safety regulations

Enduro

Enduro BC260 Assembly instruction and safety regulations

Diamondback 270 installation guide

Diamondback

Diamondback 270 installation guide

A-Tach 50092 quick start guide

A-Tach

A-Tach 50092 quick start guide

Muncie ADVANTAGE+ quick start guide

Muncie

Muncie ADVANTAGE+ quick start guide

Directed Directechs DS3 installation guide

Directed

Directed Directechs DS3 installation guide

NORAUTO 2396725 manual

NORAUTO

NORAUTO 2396725 manual

HUSKY LINERS Hitch Mount Mud Flap installation instructions

HUSKY LINERS

HUSKY LINERS Hitch Mount Mud Flap installation instructions

ADAPT SOLUTIONS ASENTO EV-EXP18R installation manual

ADAPT SOLUTIONS

ADAPT SOLUTIONS ASENTO EV-EXP18R installation manual

DEFA 411050 Fitting instructions

DEFA

DEFA 411050 Fitting instructions

manuals.online logo
manuals.online logoBrands
  • About & Mission
  • Contact us
  • Privacy Policy
  • Terms and Conditions

Copyright 2025 Manuals.Online. All Rights Reserved.