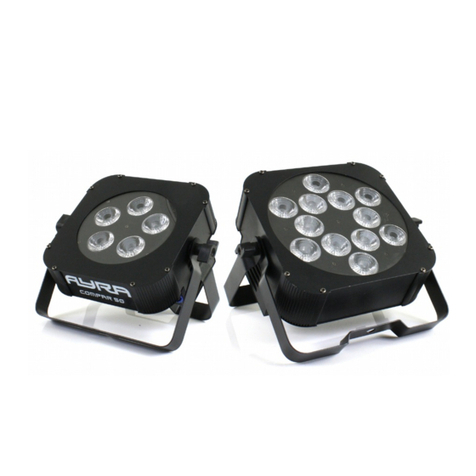
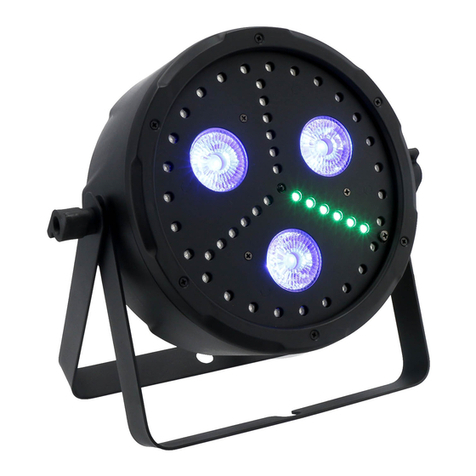
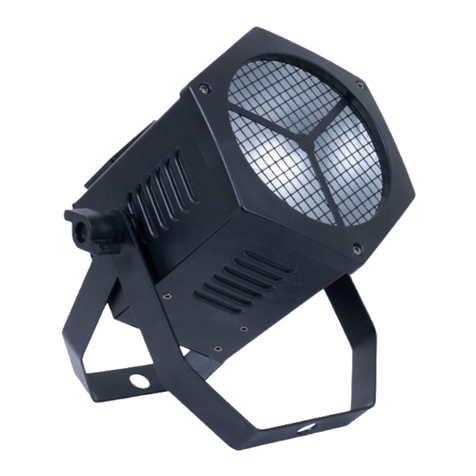
Ayra Q-Par 4 User manual

Q-Par 4 / Q-Par 6
RGBW LED spotlight
User manual
The information in this user manual is subject to change at any time without notice.
Version: 1.0 Date of creation and author's initials:14-02-2017 RV Revision date and author's initials: -

Introdu tion
Thank you for purchasing the Ayra Q-Par 4 / 6. This versatile spotlight armature has powerful R BW
modules that not only provide a wide range of colors, but also have a high light output. This manual provides
all the information you need to know about the product before you start using it.
We advise that you read this user manual in its entirety before unpacking the contents of the box, so that you
are familiar with all of the functionality that this product has to offer. Please be sure to check that all of the
parts and accessories listed below under 'Box contents' are included in the package. In the event that the Q-
Par 4 or 6 does not function properly, or if you have any issues while operating it, please remove the plug
from the power socket and contact your dealer for assistance.
Box ontents:
- Ayra Q-Par 4 or Q-Par 6 armature
Please inspe t the devi e and the in luded a essories.
Should you discover that either the device or one or more of the included parts have been damaged or
rendered defective while in transit, please contact your dealer directly.
Please note that the pictures in this user manual serve illustrative purposes only and may differ from the
actual product.
The information in this user manual is subject to change at any time without notice.
Version: 1.0 Date of creation and author's initials:14-02-2017 RV Revision date and author's initials: -

Safety instru tions
Everyone involved with the installation, operation and maintenance of this device must:
- Be qualified
- Be skilled
- Have read the instructions in this user manual
- Be sure that neither the device nor the included accessories are damaged. Should the device or the
included accessories be damaged, please contact your dealer for more information.
- Ensure that the device is in good working condition and is safe to operate. Please follow the advice and
instructions as they are described in this user manual.
Damage caused by misuse and/or modifications made to the device are not covered by the warranty.
This device does not contain any parts that can be repaired or replaced by the user. Should maintenance or
repairs be necessary, they must be handled by a qualified technician.
The light source of this device is not replaceable. If the light source no longer functions, the entire device
needs to be replaced.
Important information regarding safety and health:
- Do not remove any labels or stickers from this device.
- Do not leave any cables lying around.
- The device should not be opened up, and any hardware or software that may be present should not be
modified.
- To achieve optimal performance, inputs on this device should not be fed with a signal higher than
necessary.
- The device should only be used indoors; contact with water, rain and moisture should always be avoided.
Do not place any objects containing liquid on top of the device.
- Remove the device from any nearby flames or heat sources; do not place it near flammable fluids, gasses
or objects.
- Disconnect this device from a power source if it will not be used for a longer period of time, if maintenance
The information in this user manual is subject to change at any time without notice.
Version: 1.0 Date of creation and author's initials:14-02-2017 RV Revision date and author's initials: -
WARNING!
Keep this devi e away from moisture, water and rain to avoid the han e of ele tri sho ks.
WARNING!
Only onne t this devi e to a suitable power so ket. This devi e fun tions on a spe ifi power
voltage. If it is plugged into a power so ket with a different voltage, it ould result in permanent
damage and even dangerous situations su h as fire or ele tri sho ks.
WARNING!
Be areful when operating this devi e. Tou hing the wires that are onne ted to the mains,
inside or outside the devi e, ould result in ele tri sho ks.

is necessary, or if it needs to be cleaned.
- Do not pull on the cable to remove a connector, as it can cause damage.
- Do not use any cables other than the ones described in this manual. Do not use defective cables. Please
contact your dealer if the included or necessary cables do not function properly with this device.
- Only use this device with a stable AC power supply.
- Only use this device with power form a grounded power source.
- In the event that the device is exposed to extreme temperature changes (e.g. transported through a cold
outside environment into a warm indoor environment), it should not be turned on until it has reached room
temperature. This is necessary to prevent moisture from forming in the device, which could lead to electric
shocks.
Guidelines and operation of this devi e:
- This device is intended for use by professionals on stage, in theatres, in clubs, and in similar entertainment
locations.
- This device is not suitable for use by children, and should always be operated by an adult.
- This device is designed to create light effects for entertainment purposes. It is not suitable for household
illumination.
- This device may only be used in a suitable environment where no damage to the device can occur. Do not
use the device in moist or dusty environments such as:
- indoor swimming pools where chlorine is used
- beaches where there is sand and salt
- outdoors
- indoors in spaces where intense heat sources are present, or where it reaches temperature levels
that would be considered uncomfortable for a person
- Avoid impact and collisions during use and transport. Do not transport the device while it is in use. Avoid
using excessive force when installing and operating the device.
- The user should become familiar with the functions of this device before using it.
- Should the device not be used in the manner described in this user manual, damages or even injuries could
occur. Ayra cannot be held responsible for any injuries or damages that occur as a result of improper use of
this product.
Storage and transport:
- This product was designed for mobile use. Please only transport the device in the original packaging, or in
a flight case with a suitable foam inlay.
- This device was not designed for permanent (24/7) use. The expected lifespan of the device will not be
affected by occasionally turning the device off. Disconnect the device or turn off the power when it is not
actively in use.
- If the device will not be used for a longer period of time, it should be disconnected and stored in a dust-free
environment.
- Do not expose the device to extreme temperature differences.
Housing
- Inspect the device's housing frequently, and always just before use. Avoid operating the device if there are
large dents or cracks, or if screws are missing. Do not use the device if the housing is not in good condition.
Contact your dealer or a qualified technician if you are unsure about the state of the device.
- Check the device and the screws for corrosion. Corrosion must not be present on this device. Contact your
dealer or a qualified technician if you find any corrosion on the screws.
Every power and signal connector should be securely mounted. Do not use the device if the connectors are
not secure.
- Avoid dust and dirt build-up. Clean the device once a month by disconnecting it from the power supply and
wiping it down with a dry or slightly moist cloth. If the device is used frequently, the cleaning intervals should
increase.
The information in this user manual is subject to change at any time without notice.
Version: 1.0 Date of creation and author's initials:14-02-2017 RV Revision date and author's initials: -

Symbol explanation:
WEEE: Ensure that this device is disposed of properly. This product falls under the WEEE
(Waste Electrical and Electronic Equipment) directive. The requirements of this directive apply
to all manufacturers and producers of electronic devices in the EU. Do not throw this product
away with regular rubbish. Please contact your local authority for more information about how
to recycle and dispose of these products in your region. By recycling this product in the proper
manner, we can work together to ensure that we can continue to enjoy these kinds of
products and still protect the environment as much as possible from pollution.
CE: The CE logo indicates that this product meets the European norms and requirements to
which it must legally conform.
Only suitable for indoor use: this product was only designed for indoor use. The maximum
environmental temperature must not exceed 40 degrees Celsius (104 degrees Fahrenheit).
Conta t:
Ayra professional lighting products
Verrijn Stuartweg 18
4462 E oes
The Netherlands
Please do not send any products to this correspondence address.
Should you wish to send in a product for repairs or for a refund, please contact your dealer for an RMA
re uest (Return Merchandise Authorisation).
The information in this user manual is subject to change at any time without notice.
Version: 1.0 Date of creation and author's initials:14-02-2017 RV Revision date and author's initials: -

Guidelines and operation of this devi e
Note: The Q-Par 6 is shown. The Q-Par 4 has the
same onne tors in the same position.
1. tightening knob mounting bracket
2. ventilation slots
3. double mounting bracket (can also be used as a floor
stand
4. eyelet for optional safety cable
5. LED display with menu buttons
6. DMX input via 3-pin XLR
7. DMX output via 3-pin XLR
8. fixed power cable to Schuko (not shown)
9. filter frame and filter frame bracket
10. LEDs en projection lenses for light output
The information in this user manual is subject to change at any time without notice.
Version: 1.0 Date of creation and author's initials:14-02-2017 RV Revision date and author's initials: -
4
5
6
7
8
9
1
3
4
10
2

Operation and mounting
To activate the device, plug it into a mains socket. Once it's connected to an active power source, it will turn
on automatically.
During calibration, ‘AYRA’ will be shown on the display, which means the device is not ready to be operated.
Once the device has fully started up, it will jump to the last-used mode. Operation modes and other settings
shown on the display can now be adjusted or changed by means of the menu buttons.
Should the device detect a DMX signal, it will automatically switch to DMX mode and will display the last-
used address. For new devices, this will normally be DMX address 001. Of course, you can change the DMX
address via the display using the menu buttons.
Using the display and the menu buttons, you can adjust the functions and settings of the device. Press
'Enter' to confirm an adjustment or select a function, use ‘Up’ and ‘Down’ to change amounts and ‘Menu’ to
go back to the menu. By holding the ‘Menu’ button down for 2 seconds after saving a specific setting, the
device will return to operation mode and adopt the setting. This will also be done after any changes in the
operation mode or DMX address. This operation is not always necessary, considering the device
automatically does this after a new setting is confirmed.
The menu contains the following options and functions
display Mode Fun tion
ADDR / A001 DMX address configuration Address A001 … A512
CHND Channel mode selection 2CH/3CH1/3CH2/4CH/7CH
SLND Slave mode Master
Slave
SHND Automatic mode Fade – SP00 – SP99 speed selection
Show – music-activated mode
Colo – COL1 – CO15 Colour preset (press Enter
for D000 – D255 dimmer level and Enter for
S000 - S255 for stroboscope)
Jump – SP00 - SP99 speed select (press Enter
for D000 – D255 dimmer level and Enter for
S000 – S999 for stroboscope)
SOUND Sound-controlled mode Mode: ON / OFF
SENS Sound sensitivity 00 - 99: sensitivity in %
BALA Colour balance basic colours RED: correction red 50 – 255
REE: correction green 50 – 255
BLUE: correction blue 50 - 255
LED LED Display on/off when not in
use
ON/OFF
DISP Display inversion Display inversion, disp - dslp
TEST Test mode The test program runs through each LED colour
one by one to check they are all functioning
correctly.
TEMP Temperature in degrees Celsius 0 ~ 9999 temperature indicator
HOUR Time registration 0000 – 9999 usage in hours
The information in this user manual is subject to change at any time without notice.
Version: 1.0 Date of creation and author's initials:14-02-2017 RV Revision date and author's initials: -

You'll find an explanation of the various functions below:
ADDR: With this function, you can determine the DMX start address of the device. Set it channel 001, and
the device will respond from DMX channel 1. Set it to channel 003, then the device will respond from DMX
channel 3, etc.
CHND: This device is equipped with various DMX channel modes. With this function, you can choose a
concise channel mode if your DMX circle is full and you do not require complete control over the functions. It
is also possible to use the most comprehensive channel mode, which makes more channels available, each
with its own separate function.
SLND: The Master-Slave mode is designed to sync multiple devices. A copy of the internal program is sent
to the daisy-chained devices so that each one projects the same effect. The master-slave function works by
means of standard 3-pin XLR cables. The only difference is that the first device in the chain does not receive
DMX input.
PLEASE NOTE: When Slave mode is activated, the device will wait for a signal from the Master device. In
that case, it is not possible to simply select an automatic or sound-controlled mode! To cancel this, select
'NAST' mode in the SLND menu, so the device goes to Master mode. Then, all standalone functions can be
activated.
SHND: This mode consists of four automatic programs with settings that can be fully adjusted as follows:
Fade: Slow colour fade, where one colour fades into another. Adjustable fade speed.
Show: Music-controlled mode via the built-in microphone with adjustable sensitivity.
Colo: Choose from one of the built-in static colour presets. It's also possible to adjust the dimmer between 0
and 100% after confirming the colour by pressing 'enter'.
Jump: Switch between different colours by skipping from one colour to the next colour preset.
With Fade, Colo and Jump settings, it's also possible to adjust the intensity (0 -100%) and the stroboscope
speed.
SOUN: This setting shows if the microphone function is activated or not, which you can see in the display as
ON or OFF.
SENS: This mode allows you to determine the sensitivity of the internal microphone. The further the device is
from the speaker, the higher the sensitivity of the microphone needs to be so it can react properly to the
music. The microphone is built to handle high sound pressure levels, but the louder the signal and the higher
the microphone sensitivity level, the more difficulty the device will have detecting the beat of the music.
Experiment with the level of sensitivity and distance/positioning of the device to find the best results.
BALA: It is possible to correct the relative colour balance of the three primary colors. This is useful if, for
example, at 100% intensity you notice that one of the primary colours is more dominant than the others. By
adjusting the value lower than 255, the maximum intensity of the dominant primary colour will be reduced.
LED: If the LED display is not in use, it can be de-activated by turning the LED mode OFF. The red symbols
will no longer light up when using the device in a dark environment. Press one of the menu buttons and the
display will light up again and show any relevant information. If the device registers that the menu is not
actively being used, it will automatically turn off within 30 seconds.
DISP: This function determines whether the display is shown normally or inverted. If the device is
suspended, the display may be harder to read. This function allows you to rotate it vertically for better
legibility.
TEST: Should the device need cleaning or maintenance, this function can be used to test one or more
devices simultaneously. The device plays a continuous program while the step motors and LEDs are used.
This way you can quickly detect any abnormalities or defects. The device will run the program until stopped
manually (for example when the sound-controlled mode is activated.)
HOUR: If this device is used professionally or rented, it should be regularly maintained and inspected in
The information in this user manual is subject to change at any time without notice.
Version: 1.0 Date of creation and author's initials:14-02-2017 RV Revision date and author's initials: -

between use. The HOUR function shows exactly how long the device has been in use. This amount of time
accumulates over time as long as the device is being used and cannot be manipulated by the user.
Operating modes
The following overview is designed to show the differences between the various operation modes that are
supported by the above-mentioned menu functions.
Auto:
In automatic mode, choose one of the operating modes where the device is not dependent on external
factors (such as a sound-controlled signals or the presence of noise). Choose one of the basic programs and
set the options such as the switching speed or the intensity correction, if desired.
Sound:
When in Sound-controlled mode, the device's internal microphone detects the music and reacts to the beat.
The device will move in sync with the music and provide an automated light show.
When there is no music for the device to detect or when only high frequencies are audible, the device will
continue its program at a slower pace, so the light show will not stop abruptly. As soon as the microphone
detects music again, it will resume the automated program and follow the beat.
Slave
In Slave mode, you can daisy-chain multiple devices of the same type so they all function a specific way.
This way you can coordinate your light show by having multiple separate devices moving the same way
instead of all different directions, which can be chaotic. Basically, you can connect an unlimited number of
slave devices to a master device, but a DMX booster is required in between. enerally speaking, you can
connect up to four armatures together without the need for a DMX booster.
Be aware that when you attempt to connect devices of different types and brands, they may behave
strangely and you may not get the desired effect because certain functions are linked to the wrong channels.
This is true of DMX lighting of all brands and types.
In the case of Q-Par 4 and 6 it is possible to mix these fixtures when using them in master or slave mode, as
they share the same channel index and controls.
DMX
The DMX mode is the most comprehensive way to maintain ultimate control over all the functions this device
has to offer. It enables you to determine exactly how many functions you want to control via the DMX
controller or DMX software.
This device can be set to various channel modes so the channel layout, which is shown below, corresponds
perfectly with your DMX circle layout, as well as with the functions you will be using.
2CH mode:
CH Fun tion Value
1 Dimmer: 0 - 100% 000-255
2 Colour preset 000-016: Red
017-033: reen
034-050: Blue
051-067: White
068-084: Orange
085-101: Cyan
102-118: Lavender
119-135: Pink
136-152: Bright reen
153-169: Magenta
The information in this user manual is subject to change at any time without notice.
Version: 1.0 Date of creation and author's initials:14-02-2017 RV Revision date and author's initials: -

170-186: Pale Pink
187-203: Amber
204-220: Bright Magenta
221-237: Pale Cyan
238-255: Warm White
3CH1 mode:
CH Fun tion Value
1 Red 0-100% 000-255
2 reen 0-100% 000-255
3 Blue 0-100% 000-255
3CH2 mode:
CH Fun tion Value
1 Dimmer: 0 - 100% 000-255
2 Strobe slow-fast 000-255
3 Colour macros 000-004 Blackout
005-080: Colour 1-15
081-150: Colour jump (slow - fast)
151-220: Colour fade (slow - fast)
221-255: Sound-controlled (sensitivity
low - high)
4CH mode:
CH Fun tion Value
1 Red 0-100% 000-255
2 reen 0-100% 000-255
3 Blue 0-100% 000-255
4 White 0-100% 000-255
7CH mode:
CH Fun tion Value
1 Master dimmer 0-100% 000-255
2 Strobe slow-fast 000-255 slow - fast)
3 Red 0-100% 000-255
4 reen 0-100% 000-255
5 Blue 0-100% 000-255
6 White 0-100% 000-255
7 Operating mode selection 000-004 No function
005-080 Colour macro (1-63)
081-150 Colour jump (slow - fast))
151-220 Colour fade (slow - fast)
221-255: Sound-controlled (sensitivity
The information in this user manual is subject to change at any time without notice.
Version: 1.0 Date of creation and author's initials:14-02-2017 RV Revision date and author's initials: -

low - high)
Installation and onne tion requirements
Now that you know how the Q-Par 4 / Q-Par 6 works, it's important to know how to use it correctly and safely,
according to the installation and connection requirements.
Make sure the device and connection cables are out of reach of children, and that if children are present,
they are under adult supervision at all times. Because this device can be used upright or suspended, children
could pull on the cables, causing the device to fall on top of them. To avoid injury, it is important to pay close
attention to the position and/or installation of this device.
Upright use
If you want to use the Q-Par 4 / 6 in an upright position, ensure that the device is placed on a stable surface
like a table, DJ booth or T-bar. The Q-Par 4 / 6 is equipped with a double mounting bracket that can also be
used a floor stand. By positioning both brackets at an angle of 45 degrees underneath the spotlight and
tightening the knobs, a stable setup can be created. This will also make it easier to move the spotlight into
the required position.
Suspended use (bra kets)
Should you want to suspend the Q-Par 4 /6, use the double mounting bracket.
The armature is equipped with a hanging bracket. Holes are present to mount any -hooks or clamps.. You
can find standard hooks and/or brackets for 35 or 50mm tubes (truss or light stand) at your local dealer.
Hardware for mounting the Q-Par 4 / 6 to a wall, ceiling, or beam is not included. Contact a specialist if
you're not sure which hardware is required for your situation. A wooden beam and stone wall require different
mounting methods.
Should you want to suspend the Q-Par 4 /6, you will need to attach a safety cable to the armature. This is not
included, but is available at your local dealer. The Q-Par 4 / 6 is equipped with an eyelet for hooking a safety
cable. Once it's hooked on, you can wrap the cable around the truss or light stand and attach it again by
means of the same hook. This ensures the device is secured and prevents it from falling, even if one or both
of the brackets should come loose.
Ensure that the safety cable has a load capacity of 10x the weight of the armature and that the device can
not fall farther than 30 cm. You can wrap the safety cable around the truss or light stand several times to
ensure the fall is as short as possible. The shorter the fall, the less chance of damage or injury.
Light sour e
The Q-Par 4 / 6 contains powerful LED modules that create an even more powerful effect thanks to a special
lens that bundles the beams together. Never look directly into the lens at close range, as the human eye
can't adjust to the sudden intensity of the beam of light this device produces. It won't result in permanent
injury, but it can cause temporary blind spots, which may cause disorientation and discomfort.
Filter holder
The Q-Par 4 / 6 is equipped with a filter holder on the front of the device. This filter holder is designed for
colour correction filters or for diffuse filters. The filter frame is fixed with two guides on the sides and two
brackets on the top and bottom. The brackets can be opened so that the filter holder can be removed. This is
done by pushing your thumb against the side of the bracket so that it bypasses the tab that holds it in place.
By moving the bracket from side to side and by lifting it up you'll be able to remove the frame from the holder.
Be aware that adding light filters will result in more heat around the device's lenses. This may mean that the
cooling system will be activated earlier.
The device can also be used safely without the filter frame.
The information in this user manual is subject to change at any time without notice.
Version: 1.0 Date of creation and author's initials:14-02-2017 RV Revision date and author's initials: -

Cooling
The Q-Par 4 / 6 is cooled by a fan that is installed in the housing. It is activated when the device turns on.
Make sure the fan and ventilation slots are not blocked and regularly check that they are functioning
normally. Be aware that should the fan suck in substances like dust, smoke and moisture, this may impair its
operation.
The fan will turn on at low speed from 35 degrees Celsius and is measured close to the LEDs. As the
temperature continues to rise to a maximum of 55 degrees, the fan will gradually change to the fastest
setting.
Above 55 degrees, 'power reduction' will be used. For each degree above the 55 degree limit, the light-
output will be reduced by 5%. The maximum limit is 68 degrees. If that limit is reached, the light output will be
completely disabled until the temperature drops to a maximum of less than 60 degrees. It is strongly
recommended not to use the device permanently or regularly in such extreme conditions.
At normal room temperatures, the device will never reach such extremes, even at full power.
Parts and repair
This product does not include spare parts and can not be repaired by the user. All inspections and overall
maintenance should be done by a specialist.
Cleaning and maintenan e
Clean the exterior of this device monthly with a dry, or slightly damp microfibre cloth. Ensure that the device
is unplugged before cleaning it.
Check if all the screws are intact and secured and tighten or replace them where needed. Check all metal
parts of the device for any signs of corrosion. If corrosion is found, the device needs to be checked
thoroughly.
Fuse
This device is equipped with fixed power cable without a fuse. There is an internal fuse in the device itself but
this cannot be replaced by the user. In the event that the internal fuse blows, this device must be inspected
by someone qualified to do so.
The information in this user manual is subject to change at any time without notice.
Version: 1.0 Date of creation and author's initials:14-02-2017 RV Revision date and author's initials: -

DMX lighting troubleshooting
If you have a problem with your DMX light effect, please consult the troubleshooting section for possible
solutions. If, after consulting this section, the problem remains unresolved, please contact your dealer for
more information and/or help.
This troubleshooting section contains information on how to solve the most common DMX light effect
problems, but it does not and cannot cover every eventuality. It is possible that you won't find your problem,
cause and solution in this section due to differences between various connecting devices.
Problem Possible ause Solution
The device can not be turned on. A fuse is blown If the internal fuse has blown,
contact your local dealer.
Power cable not plugged in Check if the power cable is
properly connected to the device
andplugged into an active power
socket.
The device is not reacting to DMX
signals
Incorrect DMX start address Check if the device has been set
to the correct DMX start address
DMX controller is on ‘Blackout’ Make sure the ‘Blackout’ function
on the DMX controller is not
activated
Make sure the polarity switch on
the DMX controller is set correctly
Try to reverse the DMX polarity
switch on the DMX controller.
The device is not reacting, there is
no DMX signal indication
Make sure the XLR cables are
connected properly and are not
defective. Replace if necessary.
The device does not react to
sound/music
Incorrect operation mode Make sure the sound-activated
mode has been selected
The internal microphone sensitivity
is too low
Check the microphone sensitivity
level and increase it if necessary.
The speaker is too far away, or is
not producing enough low tones
Place the light effect closer to a
speaker (or vice versa) and/or
increase the low-frequency level.
The built-in microphone is not
triggered by high tones.
The amount of projected light is
minimal
Dirty or dusty optics Clean the lens and/or other optics
Dimmer is not completely open Check if the dimmers on the
spotlights themselves and/or if the
master dimmer is completely open.
Also check colour balance
settings.
The DMX signal appears to be
interrupted and some devices are
flashing or behaving strangely
Damaged/defective cables Check and replace the DMX
cables if necessary.
Power interference on the DMX
signal
Avoid connecting signal cables
parallel to power cables
DMX terminator missing Close the DMX circle with a DMX
terminator
The information in this user manual is subject to change at any time without notice.
Version: 1.0 Date of creation and author's initials:14-02-2017 RV Revision date and author's initials: -

Signal loss or interference in the
DMX circle
Close the DMX circle with a
terminator or connect a booster
after maximum 32 fixtures.
The device is not reacting to DMX
commands
Incorrect DMX channel mode Check if the device is set to the
correct DMX channel mode
The operation mode can not be
changed
The device is in Slave mode If the device is in Slave mode, it
will wait for a master signal unless
there is a DMX signal present. Set
the device to Master to activate the
sound-controlled or automated
operation modes.
The information in this user manual is subject to change at any time without notice.
Version: 1.0 Date of creation and author's initials:14-02-2017 RV Revision date and author's initials: -

Te hni al spe ifi ations
Spe ifi ations for both armatures:
- LED projector in die-cast aluminium housing
- 10 W R BW LEDs
- all-metal housing
- double mounting bracket (can also be used as floor projector)
- various operation modes
- Automatic mode with diverse programs
- Auto fade / Auto jump with adjustable speed
- Colour macros with dimmer
- Sound-controlled mode with adjustable sensitivity
- Master/Slave option
- DMX control via 2, 3, 3, 4 or 7 channels
- equipped with eyelet for optional safety cable
- fixed power cable with earhed plug
- fuse: internal, cannot be replaced by user
- 4000 Hz constant current LED driver
- temperature-controlled fan
- to be used in environmental temperature: 0 - 40 degrees Celsius
- power supply: 90-240V AC, 50/60 Hz
- dimensions: 200 x 140 x 140 mm
- weight: 2.2 kg
Menu functions:
- Blackout function when display is not in use
- inverted display possible
- colour balance system
- temperature display
- Test function (checks all the LEDs)
- Time register readable
Spe ifi ations for ea h model
Spe ifi ations Q-Par 4 Q-Par 6
LEDs 4x 10 W R BW LED 6x 10 W R BW LED
Beam angle 20 degrees 36 degrees
Full light output 14290 lux @ 1 m 8200 lux @ 1 m
Light output red, green, blue,
white
R: 2390 lux @ 1 m
: 4150 lux @ 1 m
B: 3730 lux @ 1 m
W: 4560 lux @ 1 m
R: 1450 lux @ 1 m
: 2140 lux @ 1 m
B: 2660 lux @ 1 m
W: 2390 lux @ 1 m
Power onsumption 30.1 W 64.2 W
Power fa tor 0.513 0.588
Power onsumption 0.249 A 0.485 A
Maximum housing
temperature during normal
use
32 degrees Celsius 33.9 degrees Celsius
The information in this user manual is subject to change at any time without notice.
Version: 1.0 Date of creation and author's initials:14-02-2017 RV Revision date and author's initials: -
This manual suits for next models
3
Table of contents
Other Ayra Spotlight manuals