Ayre QX-5 User manual

Ayre QX-5
Owner’s Manual
Digital Hub
Twenty
A y r e
Tw enty
Twenty

Ayre . . . . . . . . . . . . . . . . . . . . . . . . . . . . . . . . . 2
Installation . . .. . . . . . . . . . . . . . . . . . . . . . . . . . 5
Configuration . . . . . . . . . . . . . . . . . . . . . . . . . . 10
Operation . . . . . . . . . . . . . . . . . . . . . . . . . . . . . 26
Customization . . . . . . . . . . . . . . . . . . . . . . . . . 34
Specifications . . . . . . . . . . . . . . . . . . . . . . . . . . 42
Trouble . . . . . . . . . . . . . . . . . . . . . . . . . . . . . . 43
Warranty . . . . . . . . . . . . . . . . . . . . . . . . . . . . . 49
Notes . . . . . . . . . . . . . . . . . . . . . . . . . . . . . . . 53
Table of
Contents
Welcome to
Setup and
Connections and
Controls and
Optimization and
Numbers and
In Case of
Statement of
A Place for

2
Welcome to
Ayre
To our North American
customers, please be sure to
mail your warranty
registration card and
photocopy of your original
sales receipt within 30
days in order to extend the
warranty from 90 days to
five years.
The information required
to get started is contained
in the following three
chapters of this manual. The
remaining chapters cover
additional information that
may be read at your leisure.
Your Ayre QX-5 Twenty offers a significant
advance in the musical performance of high-
fidelity equipment. The warmth and immediacy
of a live performance are apparent from the first
listening. The combination of superb resolution
and a natural, relaxed quality will draw you into
the music time and time again.
This level of performance has been implemented
using the highest level of workmanship and
materials. You can be assured the QX-5 Twenty
will provide you a lifetime of musical enjoyment.
The Ayre QX-5 Twenty is a digital hub, a device
which allows you to integrate all of your digital
sources into one point of control. It is extremely
flexible and versatile, improving the performance
of all your digital sources. In order to immediately
begin enjoying music from the QX-5 Twenty, you
first need to connect any digital sources to the rear
panel of your unit.
Quick Start

One of the first things to
do after unboxing and
powering on the QX-5 is to
decide how you’ll use it in
your system.
3
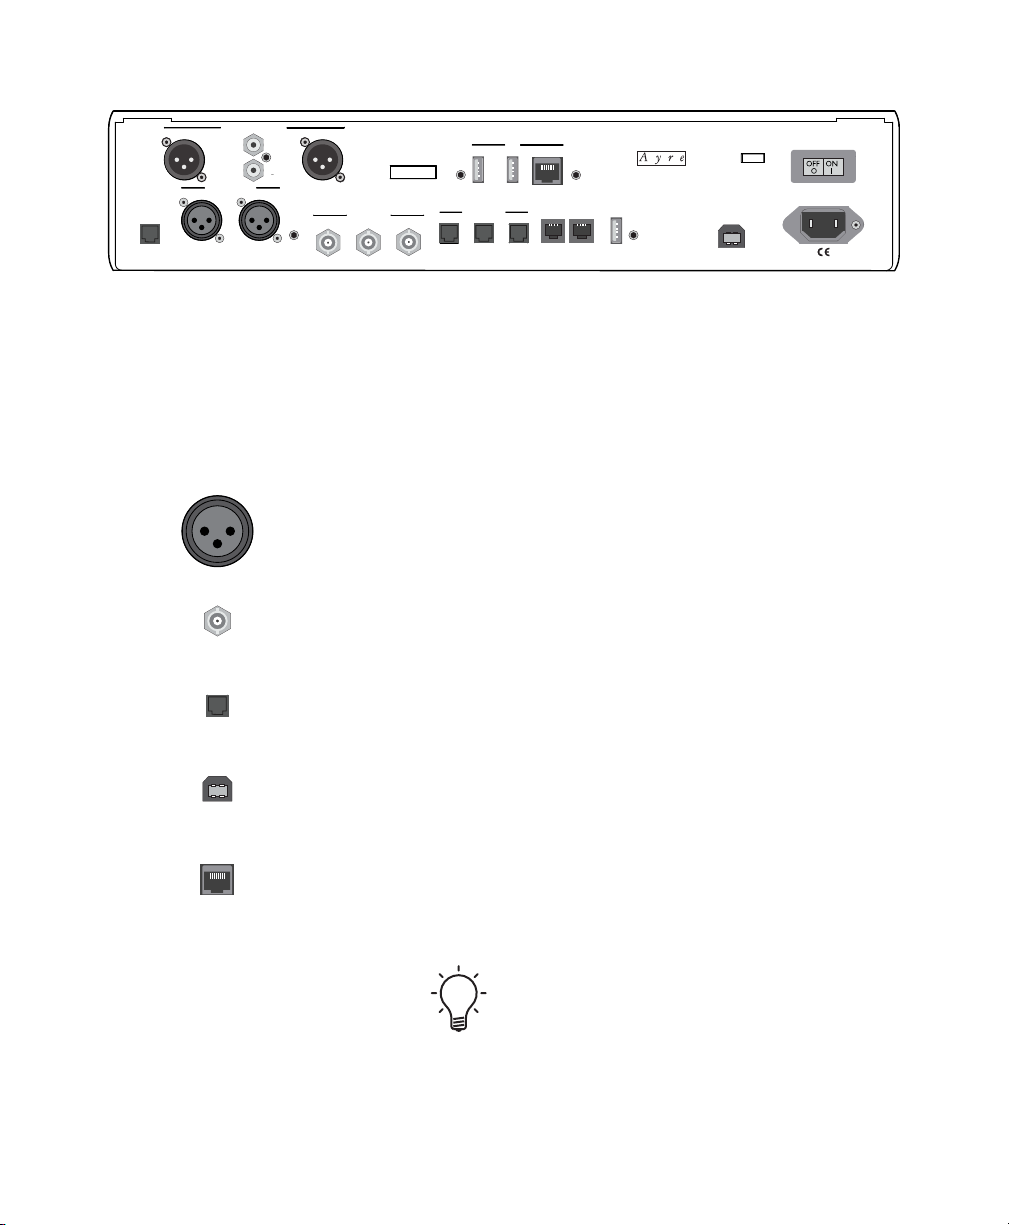
Out of the box, all inputs of the QX-5 Twenty
will be active, but both the Ethernet and USB
inputs will require some configuration. Please see
the section of the manual called Ethernet Input
and USB Input, respectively (pg. 17). For all other
inputs, simply sending them a signal from your
other devices will commence playback.
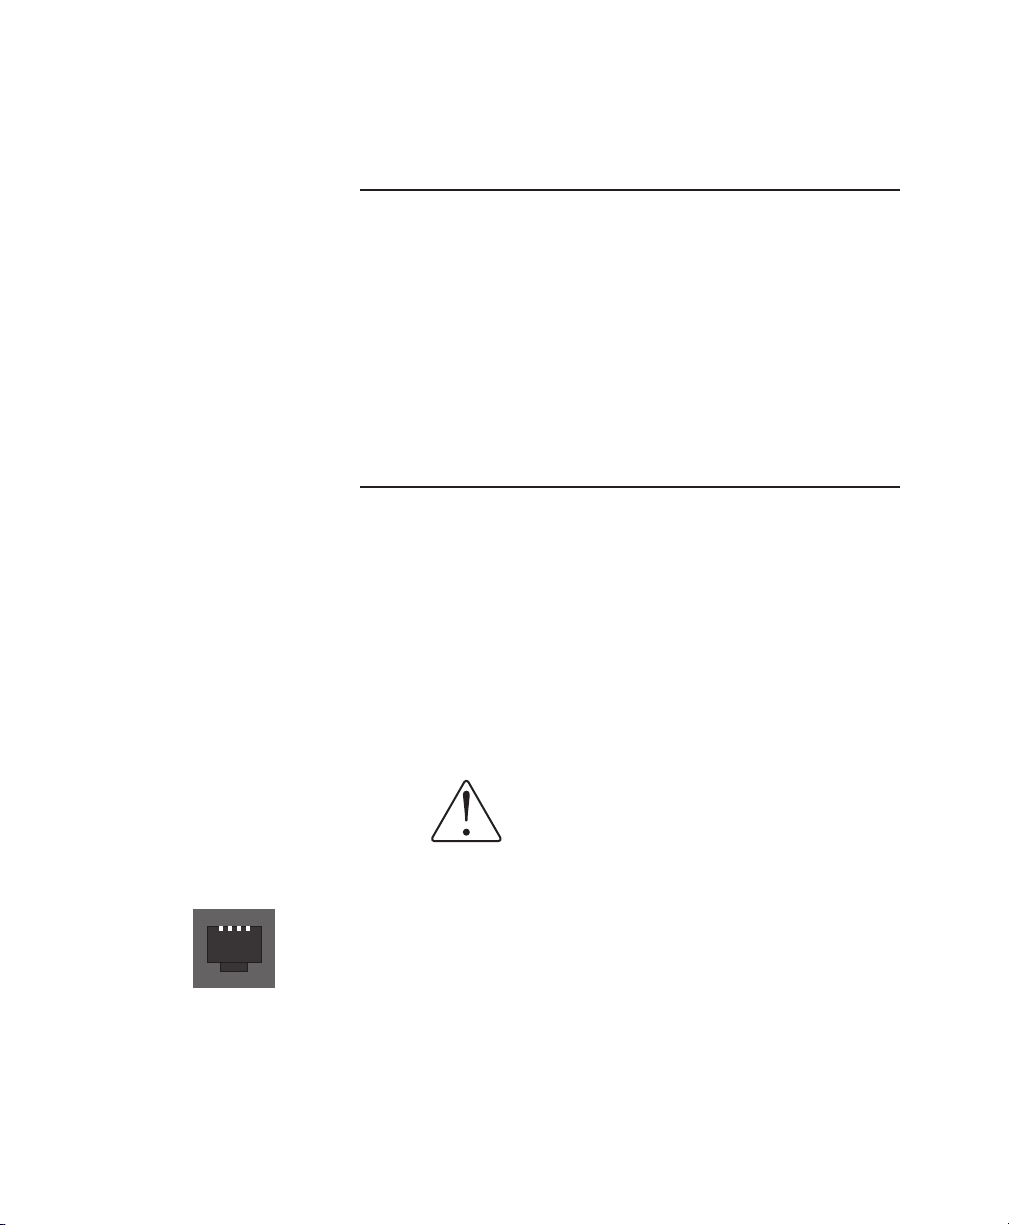
For streamlined use of the QX-5 Twenty, disabling
unused inputs allows for simplified operation, see
(pg. 36).
The QX-5 Twenty can be listened to in three
different ways. Shipped from the factory, it is set
in preamplifier mode. For instructions on how to
change to DAC mode or Headphone mode, see
Modes of Operation (pg. 34).
The default volume level in
preamplifier mode is 60. Use the
control ring on the faceplate or
volume buttons on the remote handset
to adjust the volume.
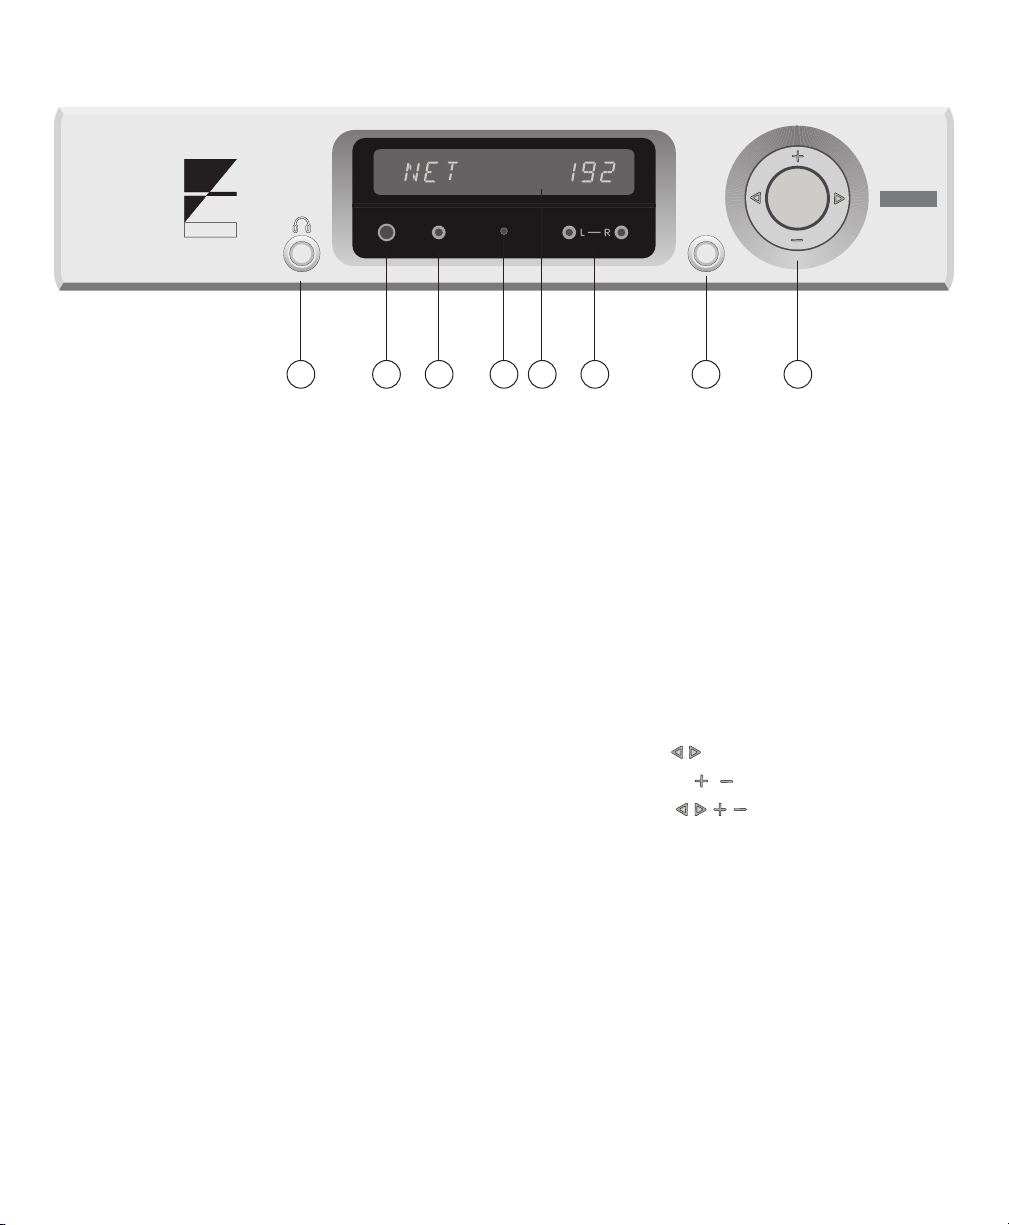
Controls and Display
During normal operation the display of your
QX-5 Twenty will show the selected input in
the left-hand side of the window. In the right-
hand side of the window, information about the
format being played back and the sample rate
will be displayed. If preamplifier mode is being
used, whenever the volume level is changed, the
right-hand side of the display will briefly show the
volume level.

1) Left-hand button
• Headphone functionality
• Menu navigation
2) Right-hand button
• Mute
• System-sleep mode
• Menu navigation
3) Control Ring
• Input selection ( )
• Volume up/down ( )
• Menu scrolling ( )
4) 1/4” single-ended headphone connector
5) 3.5mm single-ended headphone connector
6) 3.5mm balanced headphone connectors (L — R)
7) Display
8) IR receiver
4
A y r e
Tw enty
1
4
5
8 7
6 2
3
A y r e
Twenty

5
Connection and
Installation
The infrared beam of the
remote handset will also
travel through glass.
The Ayre QX-5 Twenty is easy to set up and use.
The following guidelines will ensure that the
installation goes smoothly.
A good location for the QX-5 Twenty is in an
open-backed cabinet or on a shelf. In order not to
block the airflow to other components, the unit
should not be stacked directly on top of another
product.
The receiver for the remote control is positioned
between the headphone jacks on the front panel.
A direct line of sight from the listening position
will ensure maximum range.
Inputs
The Ayre QX-5 Twenty offers ten digital inputs.
In this era of diverse source components, it is not
practical to pre-label the inputs with the name of
the source.

The inputs are labeled “1” through “10”. If you
so choose, you may name each of the numbered
inputs to either one from a pre-selected list or
create a custom name, see (pg. 37). The inputs are
as follows:
Two (2) AES/EBU inputs with XLR connectors,
(labeled “1-2”)
Three (3) S/PDIF inputs with BNC connectors,
(labeled “3-5”)
Three (3) optical inputs with Toslink connectors,
(labeled “6-8”)
One (1) USB input with a USB “A” connector,
(labeled “9”)
One (1) Ethernet input which includes one
RJ45 connector and two associated USB host
connectors, (all labeled with the number “10”)
Make a written note of which source components
are connected to which numbered inputs, if you
plan to create custom names for each input in the
menu.
6
USB Audio Input
9
Firmware
Update
Optical Inputs
S/PDIF Inputs
1
AES/EBU Inputs
Analog Audio Outputs
Right
Word Clock
Right
2
Left
Left
345678AyreLink AyreLink
Output
USB Host USB Host Ethernet Input
10
Boulder, Colorado US A 50/60 Hertz
60 W Ma x
Volts
QX-5 Digital Hu b
S.N.

7
Outputs
The QX-5 Twenty has both line-level outputs
on the rear panel and headphone outputs on the
front panel.
Main Outputs
The QX-5 Twenty connects to your preamplifier,
integrated amplifier, or power amplifier via the
main outputs. The pair of XLR outputs provide
a high quality connection to your system. A
pair of RCA outputs are also provided for legacy
equipment.
Headphone Outputs
Headphones can be connected easily to the front
of the QX-5 Twenty. Directly below the display
you’ll find four connectors; two for single-
ended headphones and two for a set of balanced
headphones.
The two connectors on the left (one in ¼ inch
diameter and the other in a 3.5 mm diameter) will
allow you to listen to headphones in single-ended
mode.
The two connectors (2 x 3.5 mm connectors) on
the right will allow you to listen in an optimized
configuration known as balanced mode or
PHONES OUT

With balanced operation, each
channel has two equal and
opposite signals, compared to
just one signal per channel
with conventional circuits.
8
symmetric mode. We recommend balanced mode
for your listening purposes, as it will improve
the level of performance provided to you by the
headphone amplifier in the QX-5 Twenty.
Pressing the left-hand button on the faceplate
of the QX-5 Twenty will illuminate the button
indicating the headphone outputs of the unit
are active. The display will temporarily show
PHONES OUT after pressing the button. While
the headphone outputs are active, the main XLR
and RCA outputs on the QX-5 Twenty will be
muted.
To re-activate the main outputs, press the left-
hand button again. This will both mute the
headphone outputs and activate the main outputs
on the QX-5 Twenty. The button will no longer
be illuminated and the display will temporarily
show MAIN OUT.
Word Clock Output
Some digital products have word-clock inputs and
provide higher performance when supplied with a
high-quality external word clock. The word clock
output in the Ayre QX-5 Twenty is derived from
the ultra-low phase-noise master clock built into
the unit.

AyreLink connections are
made with commonly
available two-line telephone
line cords using modular
(RJ-11) connectors. (These
are the cords that connect
the telephone set to the wall
in many countries.) They are
readily available in different
lengths and various colors at
most electronics stores.
The linked components may
be joined in any convenient
order.
AC Power
The QX-5 Twenty may be plugged directly into
an unswitched wall outlet. Although proprietary
RFI (radio-frequency interference) filtering is
built into the product, in some situations an AC
power-line filter (such as those offered by Ayre)
may provide additional sonic benefits.
AyreLink Ports
The AyreLink communication system provides a
convenient way to control your audio system.
There are two AyreLink ports on the rear panel
of the QX-5 Twenty. Each port has four contacts
and contains both an input and an output.
Both ports function identically and may be used
interchangeably.
Be sure to use two-line telephone
cords to make AyreLink connections.
These can be identified by the four
gold contacts on each connector.
The linked components should be connected in
daisy-chain fashion, connecting each component
to another until all of the linked components have
been connected. Be careful not to connect the
two ends of the chain. Closing the chain to form
a loop will cause the AyreLink system not to
function.
9
AyreLink

10
Setup and
Configuration
While navigating the
Setup Menu, the buttons
immediately to the left
and right of the display
may be illuminated in red
(left-hand button) or green
(right-hand button) when
they are an available choice.
If they are not available as a
choice, these buttons will not
be illuminated.
Your QX-5 Twenty offers a high level of flexibility
in terms of setup. The following information will
allow you to configure the unit in the best way for
your system and its use.
Setup Menu
In order to change settings or customize your
use of the QX-5 Twenty, you’ll need to access the
Setup Menu.
1) Ensure the unit is in System Sleep Mode by
holding down the button on the right-hand side
of the display for three seconds. A green light will
illuminate the silver button and the display will go
blank.
2) Hold down the left-hand button for three
seconds.
3) The words SETUP MENU will appear briefly
on the display, then the words MAIN INPUT
will be shown.

From here you have access to the Setup Menu.
You can scroll (using the right and left arrows
of the control ring) between menu options in
the menu. To select a sub-menu press the green
button and to exit a sub-menu press the red
button. If an option to select is available, the
right-hand button will be illuminated. If the
right-hand button is not illuminated, you have
reached the end of the selected sub-menu and
your only choice will be to exit the sub-menu by
pressing the left-hand button.
Setup Menu Structure
Below are diagrams of the QX-5 Twenty's menu
structure. These can be used as a reference as to
how the menu works and where each section is
located within the larger structure.
11
QX-5 Main Menu:
Main
INPUT OUTPUT NET FW REV. RESET
Select a Sub-menu:
Input
Sub-menu
Output
Sub-menu
Network
Sub-menu
Firmware
Revision
System
Reset

12

Firmware Updates
Firmware updates may be made available for the
QX-5 Twenty. These updates may provide new
features and/or improve the use and reliability
of your unit. There are two types of firmware
updates that are available for the QX-5 Twenty.
Do not turn off the QX-5 Twenty
while updates are in progress.
Network Updates
Network updates only affect the Ethernet module.
Whenever the QX-5 Twenty is turned off and
then back on again, the installed network device
will connect with the Ayre web server to check
for a network update. If one is available, the unit
will show the word UPDATE? in the display.
Choose either yes by pressing the right-hand
button (illuminated green) or no by pressing
the left-hand button (illuminated red). If you
press the right-hand button, the update will
begin and the word UPDATING along with
numbers (5…10…15…etc.) will appear on the
display, showing the progress of the update until
complete, when the display will read UPDATE
DONE. If you press the left-hand button, the
update will not begin, but will prompt you as
above every time you turn the unit off and then
on again, until the update has been completed.
13

General Updates
General updates affect the firmware for the unit’s
operating system, display, digital filters, etc. The
general firmware of the QX-5 Twenty may be
updated for ease of use and reliability. The unit’s
firmware version can be found by accessing the
Setup Menu, see (pg. 10).
1) Enter the Setup Menu, from MAIN InpuT,
scroll to the right (using the right arrow on the
control ring) until you see FW REV.
2) Press the right-hand button and the firmware
version will be displayed.
3) If the QX-5 Twenty’s firmware version does
not match the version available at www.ayre.com/
qx5_support.htm, then download the new version
from the website to your computer using the link
on the page.
4) Copy the newest version of the firmware to the
root directory of your USB flash drive.
5) Find the rocker switch on the back panel of the
unit and switch it to “OFF”.
6) Insert the USB flash drive into the port labeled
“Firmware Update” on the back panel.
7) Turn the rocker switch on the back panel
of the unit to “ON”. The firmware update
will commence automatically. While the unit
is updating itself, left-hand button will be
14
Firmware
Update

illuminated red. When complete, the unit will
return to system-sleep mode.
8) Return the unit to operation mode by pressing
the right-hand button.
Main Outputs
The QX-5 Twenty can be switched between
preamplifier mode and DAC mode. The
preamplifier mode enables an internal digital
volume control, allowing use directly into a power
amplifier or powered loudspeakers. DAC mode
bypasses the volume control, delivering a full-
level signal at the outputs for use with systems
that already have a volume control (e.g., in a
preamplifier).
DAC and Preamplifier Mode
DAC mode bypasses the digital volume control
of the QX-5 Twenty and sends a full-level signal
to your preamplifier or integrated amplifier. Now
your preamplifier or integrated amplifier controls
the volume of the system.
Engaging DAC mode will cause the
QX-5 Twenty to output full-level
signal. You could cause damage to
your speakers if it is connected
directly to an amplifier without a
volume control.
15

Preamplifier mode allows the use of the unit as
a digital preamp. Please note that the level of
the volume control is retained separately for the
preamplifier outputs and the headphone outputs.
Choosing Main Output Modes
1) Access the Setup Menu, see (pg. 10). You will
see the words MAIN INPUT on the display.
2) Press the arrow on the right-hand side of the
control ring once. The words MAIN OUTPUT
will be displayed.
3) Press the right-hand button once. The current
output mode will be displayed and the display will
either read: MODE DAC or MODE PRE.
4) Using the right- and left-hand arrows on the
control ring allows you to scroll between modes.
5) Once the mode you wish to engage appears on
the display, press the left-hand button twice to exit
the menu.
Digital Inputs
The Ayre QX-5 Twenty provides virtually every
type of digital input available.
16

AES/EBU Inputs (1 and 2)
Connect your source to one of these inputs.
Please ensure you’re using a cable rated for the
transmission of a digital signal (110 ohm).
S/PDIF Inputs (3, 4, and 5)
Connect your source to one of these inputs. Please
ensure the cable you’re using is terminated with
a BNC type connector or adapter. Maximum
performance will be attained when using cables
with 75 ohm BNC terminations and 75 ohm
cabling. Ayre includes BNC-to-RCA adapters
for convenience, but the typical impedance of
an RCA connector is roughly 30 ohms and will
degrade the performance slightly by creating
reflections which can increase the jitter.
Optical Inputs (6, 7, and 8)
Connect your source to one of these inputs with a
high quality optical cable.
USB Input (9)
The USB input uses the square “B” type
connector designed for computer peripheral
devices. The rectangular “A” type connector at
the other end of the cable plugs directly into
the computer. The maximum recommended
17

If the Network input name
is set to OFF in the setup
menu, the network module
will be disabled and powered
off, potentially improving
sound quality of other inputs
due to reduced electrical noise,
but the QX-5 will no longer
be seen on the network.
Please note that the maximum
length of Ethernet cable is
100 meters (328’).
Any USB flash drive will
need to use a FAT32 or
NTFS file format in order to
be recognized .
cable length is 10 feet (3 meters). It is not
recommended to use extenders or hubs with the
QX-5 Twenty. For proper configuration of the
USB input on the QX-5 Twenty, please see our
computer audio setup page www.ayre.com/usb.
htm.
Ethernet Input (10)
The Ethernet Input on the QX-5 Twenty will
immediately attempt to communicate with
your home network as soon as it is physically
connected. The unit will appear on your network
as “Ayre QX-5” and can be controlled with any
UPnP control app.
If the QX-5 Twenty does not appear on your
network, please refer to the troubleshooting
section, see Network (pg. 44).
The Ethernet input utilizes a ubiquitous Ethernet
cable terminating in four pairs of copper wire
with a locking end connector. Extended lengths
of cable may be used for longer runs if your home
network is not in close proximity to the chosen
location of the QX-5 Twenty.
There are also two USB “A” ports provided as part
of the Ethernet module. The ports may be used
to connect the supplied Wi-Fi antenna or a USB
flash drive. Music on the USB flash drive can be
streamed to the QX-5 Twenty directly via this
connection using the mconnect control app.
18

Wireless Ethernet connections
are not as reliable as wired
Ethernet connections. If you
are experiencing unreliable
wireless Ethernet connectivity,
please try locating your
Wi-Fi router closer to the
QX-5 Twenty.
USB Host
If you are using the included Wi-Fi antenna to
connect the QX-5 Twenty to your network, please
see the instructions for “Connecting Wirelessly”
below.
Connecting Wirelessly
The three methods below will allow you to
connect to your home network via Wi-Fi, without
the need for a physical connection between the
QX-5 Twenty and your Wi-Fi router.
A wireless connection is not optimal for high
performance. For a higher level of performance,
connect your router to the QX-5 Twenty with an
Ethernet cable.
AP Mode
AP mode will initiate and authenticate the QX-5
Twenty’s Wi-Fi communication protocol so that
it is wirelessly connected to your network. Before
commencing the sequence of instructions for
AP mode, please ensure you’ve downloaded the
mconnect control app, see Apps (pg. 31).
1) Turn the QX-5 Twenty off via the rocker switch
on the rear panel.
2) Insert the included Wi-Fi antenna into one of
the USB Host connectors.
19
Table of contents