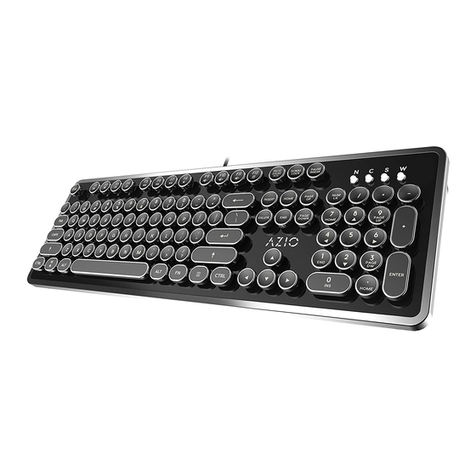
Azio RETRO CLASSIC User manual

VINTAGE TYPEWRITER BLUETOOTH/USB
BACKLIT MECHANICAL KEYBOARD
USER GUIDE

AZIO RETRO CLASSIC

00
AZIO
RETRO
CLASSIC
Vintage Inspired Luxury Mechanical Keyboard
A blast from the past. A nostalgic classic reborn with modern innovations. A timeless design
fit for composing literary masterpieces. Introducing the AZIO RETRO CLASSIC, a typewriter
inspired mechanical keyboard.
Inspired by vintage typewriters and crafted with ultramodern features, the AZIO Retro Classic
is the perfect amalgam of past, present and future. A backlit mechanical keyboard with round
keycaps that evoke nostalgia of yesteryear complemented with durable Zinc alloy frame and
a sumptuous genuine leather and wood surface. Utilizing feedback from our customers, we
present not only the evolution of our original MK Retro, but the most luxurious mechanical
keyboard available today.
01
THANK YOU FOR PURCHASING THE AZIO RETRO CLASSIC &
WELCOME TO THE AZIO FAMILY!

01
PRODUCT
BASICS
• Model: MK-RETRO-BT-L / MK-RETRO-BT-W / MK-RETRO-BT-S / MK-RETRO-BT-CF
MK-RETRO-BT-M / MK-RETRO-BT-F / MK-RETRO-BT-PL / MK-RETRO-BT-CE
MK-RETRO-BT-G / MK-RETRO-BT-P
• Interface: Bluetooth+USB Hybrid
• Mechanical Switch: Tactile & Clicky
• N-Key Rollover: 6KRO
• Backlight: Yes (Adjustable Brightness)
• Battery: 6000 mAh
• Rechargeable: Yes (USB Type-C Port)
• OS Support: Windows & macOS
• Dimensions (LxWxH): 147x455x40mm / 5.80x17.91x 1.58 inches
• Weight: 3.5 lbs / 1588 g
Specifications
Package Contents
• AZIO Retro Classic BT Edition
• User Guide
• Warranty Card
• USB Type-C Cable
• Keycaps for Mac-specific Keys
• Cleaning Cloth
02 AZIO RETRO CLASSIC
System Requirements
• Available USB port or Blutooth HID
• IBM-compatible PC or Mac
• Windows XP, Vista, 7, 8, 10 or macOS

USB Type-C Charging Port
Charging the keyboard is made simplified with Type-C port. Unlike older USB ports, it
doesn’t matter which side of the connector is up or down. Just plug it in and charge.
Duel USB and Bluetooth Interface
Connect via Bluetooth or USB. When USB mode is selected, simply connect the
included Type-C cable to the computer and type away.
Long Usage Time
Built-in is a high-capacity 6,000 mAh Lithium Ion rechargeable battery. With the
backlight off, usage time is about 1 year. With the backlight on, about 1 to 3 months
depending on backlight intensity.
02
PRODUCT
FEATURES
03
Tactile. Clicky. Backlit
The mechanical keys are tuned to be tactile and “clicky”, reminiscent of the vintage
typewriter. Each mechanical switch is customized so that the backlight LED is in
the center of each key, allowing the keyboard to illuminate evenly and beautifully.
Genuine & Luxurious
Genuine top plate. Leather and wood has always been associated with high-end
customized goods and exclusiveness. It reflects taste, craftsmanship, and culture
while emitting a unique charm that inspires.
Supports Both PC & MAC Layouts
Both Windows and Mac layouts are supported. When Mac mode is selected, simply
pop on the included Mac-specific keycaps.
03
SETUP Setting Up
The Retro Classic BT is a very versatile keyboard that supports both MAC/PC and can be
connected wirelessly via Bluetooth or wired via USB. The operating system selection and
interface mode switches are both located on the back side of the keyboard.
Pairing the Keyboard in Bluetooth Mode
Switch the keyboard to BT mode. The mode switch is located on the back side of the
keyboard.
Put the keyboard in Pairing Mode by holding down (FN) key and the ( - ) key on the
number pad. Hold down these two keys for a few seconds until the blue LED (Marked
“W”) changes from a quick flash to a slow continuous flash. The keyboard is now in
Pairing Mode.
On your Mac, navigate to ‘System Preferences’ and select ‘Keyboard’. Next, click on
‘Set Up Bluetooth Keyboard’. For Windows 10, go to Bluetooth Settings and select ‘Add
Bluetooth or other device’.
Once the setup wizard finds ‘AZIO Retro Classic BT’, click on ‘Pair’.
Once pairing is successfully completed, the blue flashing LED (Marked “W”) will stop
flashing. The keyboard is now ready for use.
1.
2.
3.
4.
5.
04 AZIO RETRO CLASSIC

03
SETUP Charging the Keyboard
Battery Life
When the battery is less than 20%, the status indicator LED labeled ‘S’ will start blinking in
red. Plug the included USB cable into the keyboard and a USB port or a USB charger. The
same LED will stop blinking and light up a steady red, indicating the keyboard is charging.
Once fully charged, the red LED will turn off. Charging a completely drained battery to full on a
USB 3.0 port will take approximately 8+ hours due to its large power capacity. Actual charging
time may vary depending on the power output of the charging source. The keyboard can only
be charged under BT or USB mode.
This keyboard uses an industry leading 6,000mAh Li-ion rechargeable battery and will only be
used when in Bluetooth mode. With the backlight off, the keyboard can last for about 7 months
to a year on a single charge. With the backlight on, depending on intensity, can last for about
1 to 3 months on a single charge. Under Bluetooth mode, the keyboard backlight will turn off
after 5 minutes of inactivity to conserve battery. After an hour of inactivity, the keyboard will
enter sleep mode. Press any key to wake up the keyboard and reestablish connection. The ‘W’
status indicator LED may flash blue during re-connection and stop flashing once connection is
reestablished.
05

MODES
04
MAC/PC Modes
Device Layout - Back
By default, the keyboard will be in PC mode. To change it to Mac mode, please toggle the
switch to “MAC” position. Once in Mac mode, replace the PC key caps with the included Mac
key caps according to the diagram on the DEVICE LAYOUT section.
1. PC mode 2. MAC mode
06 AZIO RETRO CLASSIC
Interface Mode MAC/PC Mode USB/Charging Port

LED Indicator Abbreviations
MODES &
INDICATOR
05
N: Steady White Light / Number Lock (PC mode)
C: Steady White Light / Caps Lock (Mac & PC mode)
S: Steady White Light / Scroll Lock (PC mode)
Blinking Red light / Low on battery (PC/Mac modes)
Steady Red light / Keyboard charging (PC/Mac modes)
W: Steady White Light / Windows Key Lock (PC mode)
Fast Blinking Blue light: Bluetooth Reconnecting
Slow Blinking Blue Light: Bluetooth Pairing Mode
1.
2.
3.
4.
07
Interface Modes
BT: Bluetooth mode allows you to connect the keyboard to your computer
wirelessly. In BT mode, the backlight will automatically turn off after 5
minutes of inactivity to conserve battery.
USB: In USB mode, please connect the included USB Type-C cable to the
keyboard and your computer. The status indicator LED labeled ‘S’ may
light up red, indicating the keyboard is simultaneously charging. In USB
mode, the keyboard will not go into battery saver mode.
OFF: In OFF mode, all circuitry will be off. This is ideal if the keyboard
will not be used for an extended duration of time. Please note that the
keyboard cannot be charged in OFF mode.
1.
2.
3.

06
L AYOUT
PC MODE
08 AZIO RETRO CLASSIC

06
09
L AYOUT
PC MODE
(FN) + (F1)
Homepage
(FN) + (F2)
File Explorer
(FN) + (F3)
E-Mail
(FN) + (F4)
Media Player
(FN) + (F5)
Previous Track
(FN) + (F6)
Next Track
(FN) + (F7)
Play/Pause
(FN) + (F8)
Stop
(FN) + (F9)
Volume -
(FN) + (F10)
Volume +
(FN) + (F11)
Mute
(FN) + (F12)
Calculator
(FN) + (Win)
Windows Key Lock
(FN) + (UP)
Backlight Brightness +
(FN) + (DOWN)
Backlight Brightness -
(FN) + ( - )
Enter BT Pairing Mode

10 AZIO RETRO CLASSIC
07
L AYOUT
MAC MODE

07
Interface Modes
Instruction to bind custom Shortcuts under Mac OS.
L AYOUT
MAC MODE This Retro Classic BT keyboard comes preconfigured with PC layout key caps by default. 23
Mac layout replacement key caps are included for use in Mac mode. In this diagram, the key
caps with gray highlight indicates the keys that are swappable using the replacement key
caps.
Open Keyboard setup screen by following path, APPLE Icon > System Preferences >
Keyboard.
In Keyboard section, select the Shortcuts Tab.
In Shortcuts Tab, select the Type of Shortcuts you want to use from the left window. Once
the Shortcuts Type been selected, all the available Shortcuts will display in the window to
the right.
Click to select the desire Shortcut, then click on the key combination at the far right of
the Shortcut.
Once the key combination is selected and highlighted, enter new key combination.
If change is successful, the new key combination will display and replace the previous
combination.
1.
2.
3.
4.
5.
6.
11

SUPPORT&
WARRANTY
08
Azio Corporation warrants only to the original purchaser of this product, when purchased from an Azio authorized reseller or dis-
tributor, that this product will be free from defects in material and workmanship under normal use and service for the length of the
warranty period after purchase. Azio reserves the right, before having any obligation under this warranty, to inspect the damaged
Azio product. Initial shipping costs of sending the Azio product to the Azio service center in Los Angeles, California, for inspection
shall be borne solely by the purchaser. In order to keep this warranty in effect, the product must not have been mishandled or
misused in any way.
This warranty does not cover any damage due to accidents, misuse, abuse or negligence. Please retain the dated sales receipt as
evidence of the original purchaser & date of purchase. You will need it for any warranty services. In order to claim under this war-
ranty, purchaser must contact Azio and obtain an RMA # which is to be used within 15 days of issuance and must present accept-
able proof of original ownership (such as original receipt) for the product. Azio, at its option, shall repair or replace the defective
unit covered by this warranty. This warranty is non-transferable and does not apply to any purchaser who bought the product from
a reseller or distributor not authorized by Azio, including but not limited to purchases from internet auction sites. This warranty
does not affect any other legal rights you may have by operation of the law. Contact Azio through email, chat, or through one of the
technical support numbers listed for warranty service procedures.
No AZIO supplier, dealer, agent, or employee is authorized to alter or extend the terms of this Limited Warranty or to make any
representation whatsoever. AZIO reserves the right to amend the terms of this Limited Warranty at any time without notice.
Here’s How To Reach Us
By phone: 866.468.1198
On FB: www.facebook.com/aziocorp
Multi-Language Instruction available for download at
www.aziocorp.com > Support > Retro Classic BT
12 AZIO RETRO CLASSIC

13
Help Resources.
Before lodging a claim on the Limited Warranty, please review the online help resources at aziocorp.com / support. If the Prod-
ucts is still not functioning properly after making use of these resources, please contact AZIO through aziocorp.com / support or
your authorized distributor or dealer. You may be required to assist with the diagnosis process to verify and ascertain any issues
which you may be facing with the Product. Service options, parts availability and response times may vary depending on the
country in which the Limited Warranty claim is lodged.
How to make a Limited Warranty claim.
IF YOU PURCHASED THE PRODUCT FROM A AZIO RESELLER, PLEASE CONTACT THE AZIO RESELLER IN REGARDS TO YOUR LIMITED
WARRANTY CLAIM.
If you are unable to return the Product to the AZIO reseller for whatever reason, or if you have purchased the Product directly
from AZIO at aziocorp. com, then please follow the steps below:
a. Go to aziocorp. com/email to obtain a return Merchandise Authorization Number (“RMA Number”).
b. Note the RMA Number in a visible place on the outside of the Product’s package.
c. Enclose a Valid Proof of Purchase inside the product’s package. Please visit aziocorp.com /warranty for examples of a Valid
Proof of Purchase.
d, Send the Product to the following address:
AZIO CORP
19977 Harrison Ave, City of Industry, California 91789
DO NOT SEND AZIO ANY PRODUCT WITHOUT A VALID RMA NUMBER.
We advise that you select a method of shipping that is traceable (eg. UPS, DHL FedEx). Any expense of claiming under this Limited
Warranty will be borne by the person making the claim (including any shipping and handling charges in returning the product
to AZIO, as well as any applicable customs, duties or taxes in relation to the claim). If the Product is validly returned under the
terms of this Limited Warranty,
AZIO will be responsible for postage expenses for shipping the Product back to you (but not any customs charges, duties, or
taxes). You are responsible for ensuring that the Product is properly packaged and will bear the full risk of loss or damage for
any Product that is returned improperly packaged. Risk of loss or damage in the returned Product only passes to AZIO when
the Product is received by AZIO and AZIO shall not be responsible for items lost m transit to us. In the event that the procedure
herein is not followed, AZIO reserves the right to accept the delivery of the product on such terms that it may determine at its
sole discretion.
Returns Not Covered by this Limited Warranty. If AZIO receives a Product from you that does not meet the requirements of this
Limited Warranty, including (but not limited to) a Product that (a) lacks a valid RMA Number, (b) is not accompanied by a valid
Proof of Purchase, (c) is no longer covered under the Warranty Period, or (d) does not have a defect covered by this Limited
Warranty, you may be responsible for an assessment fee, return shipping and handling fees, and other reasonable fees as may be
required by AZIO prior to the Product being returned to you.
General, This Limited Warranty applies only to the original purchaser of the product and is non-transferable. This Limited War-
ranty is only valid in Australia. No AZIO reseller, agent, distributor, or employee is authorized to make any modification, extension
or addition to this held to be illegal or unenforceable the legality or enforceability of the remaining terms shall not be affected
or impaired.
08

14 AZIO RETRO CLASSIC
09
CHINESE 快速入門指南
電子郵件:support@aziocorp.com.tw
臉書:www.facebook.com/AzioTaiwan
多國語言版詳細操作指南請上www.aziocorp.com下載
技術支援與售後服務
Retro Classic BT無線鍵盤可透過藍芽或有線連接模式全方位支援Mac及PC介面,其系統
切換和USB連接模式開關皆位於鍵盤背面。
支援介面
原廠設定為PC介面,如您要切換為Mac介面,請先將開關切換到”Mac”位置。進入Mac
模式後,可按照Mac鍵盤輸出圖檔搭配AZIO附贈的Mac鍵帽替換原有的PC鍵帽,即可流
暢使用!
MAC / PC介面切換
藍芽模式下,可以讓您體驗無線操控帶來的方便!如靜置五分鐘不使用,鍵盤將自動關閉
背光幫您節省電量。
USB模式下,可讓您無礙操作並同時處於充電模式不會自動進入省電模式,若標有”S”的
指示燈亮起屬正常現象。
關閉模式:如您長期不使用無線Retro,建議您關閉開關使鍵盤電路處於休置狀態。請特別
注意當鍵盤處於關閉模式下將無法進行充電。
鍵盤模式說明
無線Retro可在BT或USB模式下進行充電;一開始使用建議在USB3.0模式先充電約8+個
小時,您可以用隨附的USB線插入鍵盤及連接電腦的USB孔,或是直接連接使用USB充電
器,鍵盤右上方標有”S”的狀態指示燈將亮起穩定的紅色LED燈,表示Retro正在充電,一
旦充電完成,紅色LED燈將熄滅。
當鍵盤使用一陣子,如果電池電量小於20%時,標有”S”的狀態指示燈將開始閃爍,此時
您記得再充電即可!
鍵盤充電模式
1. 先打開位於鍵盤背後的藍芽模式開關。
2. 請持續按住(FN)鍵和數字鍵盤上的( - )鍵直到藍色LED燈開始持續閃爍,代表鍵盤已
進入配對連結模式。
3. 若您是Mac介面,請先選擇”系統偏好設置”,再點選”鍵盤”之後,進入畫面點擊”設置藍
芽鍵盤”。若您是Windows 10介面,請點”藍芽裝置”,並選擇”新增藍芽裝置或其他設備”。
4. 當藍芽介面搜尋到”AZIO Retro Classic BT”時,請點選此裝置進行配對。
5. 恭喜您,可開始使用無線Retro鍵盤了!
啟動鍵盤連結
MULTI-LANGUAGE
INSTRUCTION
• CHINESE
• CHINESE SIMPLIFIED
• SPANISH
• PORTUGUESE
• FRENCH
• FRENCH CANADA
• GERMAN
• SWEDISH
• NORWEGIAN
• DANISH
• TURKISH
• RUSSIAN
• KOREAN
• JAPANESE

15
CHINESE SIMPLIFIED 快速入门指南
电子邮件: [email protected]om
脸书:www.facebook.com/AzioTaiwan
多国语言版详细操作指南请上www.aziocorp.com下载
技术支援与售后服务
Retro Classic BT无线键盘可透过蓝芽或有线连接模式全方位支持Mac及PC接口,其系统
切换和USB连接模式开关皆位于键盘背面。
支援介面
无线Retro可在BT或USB模式下进行充电;一开始使用建议在USB3.0模式先充电约8+个
小时,您可以用随附的USB线插入键盘及连接计算机的USB孔,或是直接连接使用USB充
电器,键盘右上方标有”S”的状态指示灯将亮起稳定的红色LED灯,表示Retro正在充电,
一旦充电完成,红色LED灯将熄灭。
当键盘使用一阵子,如果电池电量小于20%时,标有”S”的状态指示灯将开始闪烁,此时
您记得再充电即可!
鍵盤充電模式
原厂设定为PC接口,如您要切换为Mac界面,请先将开关切换到”Mac”位置。进入Mac模
式后,可按照Mac键盘输出图文件搭配AZIO附赠的Mac键帽替换原有的PC键帽,即可流
畅使用!
MAC / PC介面切換
蓝芽模式下,可以让您体验无线操控带来的方便!如静置五分钟不使用,键盘将自动关闭
背光帮您节省电量。
USB模式下,可让您无碍操作并同时处于充电模式不会自动进入省电模式,若标有”S”的
指示灯亮起属正常现象。
关闭模式:如您长期不使用无线Retro,建议您关闭开关使键盘电路处于休置状态。请特别
注意当键盘处于关闭模式下将无法进行充电。
鍵盤模式說明
1. 先打开位于键盘背后的蓝芽模式开关。
2. 请持续按住(FN)键和数字键盘上的( - )键直到蓝色LED灯开始持续闪烁,代表键盘已进入
配对链接模式。
3. 若您是Mac接口,请先选择”系统偏好设置”,再点选”键盘”之后,进入画面点击”设置蓝芽键
盘”。若您是Windows 10接口,请点”蓝芽装置”,并选择”新增蓝芽装置或其他设备”。
4. 当蓝芽接口搜寻到”AZIO Retro Classic BT”时,请点选此装置进行配对。
5. 恭喜您,可开始使用无线Retro键盘了!
啟動鍵盤連結
SPANISH Guía de inicio rápido
En Facebook: www.facebook.com/aziocorp
Instrucción en varios idiomas disponible para descargar en www.aziocorp.com
Soporte / Servicios
Por defecto, el teclado estará en modo PC. Para cambiarlo a modo MAC, por favor mueva
el switch a la posición “MAC”. Una vez en modo MAC, reemplace las teclas con las incluidas
para MAC de acuerdo con el diagrama en la sección DISEÑO.
Modo MAC/PC
BT: El modo bluetooth te permite conectar el teclado a tu computadora de manera inalámbrica.
En modo BT, la luz de las teclas se apagará automáticamente después de 5 minutos de inactivi-
dad para conservar batería.
USB: En modo USB, por favor conecte le cable USB Tipo-C incluido al teclado y a su computado-
ra. El LED indicador de estatus marcado “S” se pondrá en rojo, indicando que el teclado se está
cargando simultáneamente. En modo USD, el teclado no pasara al modo de ahorro de batería.
OFF: En modo OFF, todo circuito estará apagado. Esto es idea si el teclado no sea usando por un
periodo muy largo de tiempo Por favor note que el teclado no puede ser cargado en el modo OFF.
Modos de Interfaz
Cuando la batería este debajo de 20%, el LED indicador marcado “S” empezara a titilar en
rojo. Conecta el teclado con el cable USB a la computadora o a un cargador USB. El mismo
LED dejará de titilar y se encenderá en rojo fijo, indicando que el teclado se está cargando.
Una vez esté cargado, el LED rojo se apagará. Cargar una batería completamente vacía en
un puerto USB 2.0 tomará aproximadamente 8+ horas dada la gran capacidad de poder. El
teclado solo puede ser cargado en modo BT o USB.
Cargando el Teclado
1. Enciente del teclado a modo BT. El switch de modo está localizado en la parte de atrás del teclado.
2. Pon el techado en modo sincronización dejando presionada la tecla (FN) y el ( - ) en el pad de
números. Mantén presionadas estas dos teclas por unos segundos hasta que el LED azul
empiece a titilar continuamente.
3. En tu Mac, navega a “Preferencias de Sistema” y selecciona “Teclado”. Luego, haz clic en
“Configurar Teclado Bluetooth”. Para Windows 10, ve a la Configuración Bluetooth y
selecciona “Agregar Bluetooth u otro dispositivo”.
4. Una vez que la configuración encuentre “AZIO Retro Classic BT”, haz clic en “Sincronizar”.
5. El teclado está listo para usar.
Sincronizando el Teclado
El Retro Classic BT es un teclado muy versátil que trabaja bien con MAC/PC y se puede
conectar de manera inalámbrica vía Bluetooth o conectado vía USB. Los switch the cambio
de sistema operativo e interface están localizados en la parte de atrás del teclado.
Configurando

16 AZIO RETRO CLASSIC
PORTUGUESE Guia de consulta rápida
No FB: www.facebook.com/AzioBrasil
Instrução Multilingues disponível para download em www.aziocorp.com
Suporte / Serviço
Por definição, o teclado estará em modo PC. Para alterar para modo MAC, por favor alterne
o interruptor para a posição “MAC”. Uma vez em modo Mac, substitua as teclas de PC pelas
teclas MAC incluídas, de acordo com o diagrama da secção ESQUEMA.
Modo MAC/PC
BT: O modo Bluetooth permite-lhe conectar o teclado ao seu computador por ligação sem
fios. No modo BT, a luz traseira irá desligar-se automaticamente após 5 minutos de inativi-
dade para conservar bateria.
USB: Em modo USB, por favor conecte o cabo USB Tipo-C incluído ao teclado e ao seu
computador. O indicador de estado identificado com um ‘S’, pode ligar uma luz vermelha,
indicando que o teclado está simultaneamente a carregar. Em modo USB, o teclado não
entrará em modo de poupança de bateria.
OFF: Em modo OFF, todos os circuitos estarão desligados. Isto é ideal caso o teclado não
seja usado por um longo período de tempo. Por favor tenha em atenção que o teclado não
pode ser carregado em modo OFF.
Modos da Interface
Quando a bateria for inferior a 20%, o indicador de estado LED identificado com um “S”
vai começar a piscar com uma luz vermelha. Conecte o cabo USB incluído ao teclado e à
porta USB no computador ou carregador USB. O mesmo LED irá parar de piscar e acender
uma luz fixa vermelha, indicando que o teclado está a carregar. Uma vez completamente
carregado, a luz vermelha irá desligar-se. Carregar por completo uma bateria totalmente
vazia numa porta USB 3.0 irá demorar aproximadamente 8+ horas devido à sua grande
capacidade de energia. O teclado só pode ser carregado em modo BT ou USB.
Carregar o Teclado
1. Ligue o teclado no modo BT. O interruptor de opções está localizado na parte traseira do teclado.
2. Coloque o teclado no Modo de Emparelhamento ao pressionar a tecla (FN) e a tecla ( - ) no teclado
numérico. Mantenha estas duas teclas pressionadas por alguns segundos até que a luz LED azul
comece a piscar ininterruptamente.
3. No seu Mac, navegue até ‘Preferências do Sistema’ e selecione ‘Teclado’. A seguir, clique em
‘Configurar Teclado Bluetooth’. No Windows 10, vá até Definições Bluetooth e selecione ‘Adicionar
Bluetooth ou outro dispositivo’.
4. Assim que o assistente de configuração encontre o ‘AZIO Retro Classic BT’, clique em ‘Emparelhar’.
5. O teclado está agora pronto para usar.
Emparelhamento do Teclado
O Retro Classic BT é um teclado bastante versátil que suporta na totalidade Mac/PC e pode ter
ligação sem fios via Bluetooth ou ligação com fios via USB. Os interruptores para a escolha do
sistema operativo e modos da interface estão ambos localizados na parte traseira do teclado.
Configuração
FRENCH Guide de démarrage rapide
Sur FB : www.facebook.com/aziocorp
Instruction multilingue disponible en téléchargement sur www.aziocorp.com
ASSISTANCE/SERVICES
Le Retro Classic BT est un clavier très polyvalent qui supporte pleinement MAC/PC et peut
se connecter sans fil via Bluetooth ou câblé via USB. La sélection du système d’exploitation
et de mode d’interface se trouvent tous deux au dos du clavier.
Installation
Lorsque la batterie est inférieure à 20%, le voyant d’état LED « S » clignote en rouge.
Branchez le câble USB fourni dans le clavier et le port USB d’un ordinateur ou d’un chargeur
USB. La même LED cesse de clignoter et s’allume en rouge fixe, indiquant que le clavier
se charge. Une fois complètement chargé, le voyant rouge s’éteint. Charger une batterie
complètement vide sur un port USB 3.0 prend environ 8+ heures en raison de sa grande
capacité d’alimentation. Le clavier ne peut être chargé qu’en mode BT ou USB.
Charger le clavier
1. Mettez le clavier en mode BT. Le sélecteur de mode se trouve à l’arrière du clavier.
2. Mettez le clavier en mode d’appairage en maintenant la touche (FN) enfoncée et la touche
(-) du pavé numérique. Maintenez ces deux touches enfoncées pendant quelques sec
ondes jusqu’ à ce que la LED bleue commence à clignoter en continu.
3. Sur votre Mac, accédez à «Préférences système» et sélectionnez «Clavier». Ensuite,
cliquez sur «Configurer le clavier Bluetooth». Pour Windows 10, allez dans les Paramètres
Bluetooth et sélectionnez «Ajouter Bluetooth ou autre périphérique».
4. Une fois que l’assistant d’installation trouve «AZIO Retro Classic BT», cliquez sur
«Appairer».
5. Le clavier est maintenant prêt à l’emploi.
Appairer le clavier
Par défaut, le clavier est en mode PC. Pour le changer en mode Mac, veuillez mettre le
sélecteur de mode sur la position « MAC ». Une fois en mode Mac, remplacez les touches PC
par les touches Mac inclus selon le schéma de la section DISPOSITION/LAYOUT.
Modes MAC/PC
BT: Le mode Bluetooth vous permet de connecter le clavier à votre ordinateur sans fil.
En mode BT, le rétroéclairage s’éteint automatiquement après 5 minutes d’inactivité pour
économiser la batterie.
USB: En mode USB, connectez le câble USB de type C fourni au clavier et à votre ordinateur.
Le voyant d’état LED « S » peut s’allumer en rouge, indiquant que le clavier se charge simul-
tanément. En mode USB, le clavier ne passera pas en mode économie de batterie.
OFF: En mode OFF, tous les circuits sont désactivés. Ceci est idéal si le clavier ne doit pas être
utilisé pendant une période.
Modes d’interface

17
FRENCH CANADA Guide de démarrage rapide
Sur FB : www.facebook.com/aziocorp
Instruction multilingue disponible en téléchargement sur www.aziocorp.com
ASSISTANCE/SERVICES
Le Retro Classic BT est un clavier très polyvalent qui supporte pleinement MAC/PC et peut
se connecter sans fil via Bluetooth ou câblé via USB. La sélection du système d’exploitation
et de mode d’interface se trouvent tous deux au dos du clavier.
Installation
Lorsque la batterie est inférieure à 20%, le voyant d’état LED « S » clignote en rouge.
Branchez le câble USB fourni dans le clavier et le port USB d’un ordinateur ou d’un chargeur
USB. La même LED cesse de clignoter et s’allume en rouge fixe, indiquant que le clavier
se charge. Une fois complètement chargé, le voyant rouge s’éteint. Charger une batterie
complètement vide sur un port USB 3.0 prend environ 8+ heures en raison de sa grande
capacité d’alimentation. Le clavier ne peut être chargé qu’en mode BT ou USB.
Charger le clavier
1. Mettez le clavier en mode BT. Le sélecteur de mode se trouve à l’arrière du clavier.
2. Mettez le clavier en mode d’appairage en maintenant la touche (FN) enfoncée et la touche
(-) du pavé numérique. Maintenez ces deux touches enfoncées pendant quelques sec
ondes jusqu’ à ce que la LED bleue commence à clignoter en continu.
3. Sur votre Mac, accédez à «Préférences système» et sélectionnez «Clavier». Ensuite,
cliquez sur «Configurer le clavier Bluetooth». Pour Windows 10, allez dans les Paramètres
Bluetooth et sélectionnez «Ajouter Bluetooth ou autre périphérique».
4. Une fois que l’assistant d’installation trouve «AZIO Retro Classic BT», cliquez sur
«Appairer».
5. Le clavier est maintenant prêt à l’emploi.
Appairer le clavier
Par défaut, le clavier est en mode PC. Pour le changer en mode Mac, veuillez mettre le
sélecteur de mode sur la position « MAC ». Une fois en mode Mac, remplacez les touches PC
par les touches Mac inclus selon le schéma de la section DISPOSITION/LAYOUT.
Modes MAC/PC
BT: Le mode Bluetooth vous permet de connecter le clavier à votre ordinateur sans fil.
En mode BT, le rétroéclairage s’éteint automatiquement après 5 minutes d’inactivité pour
économiser la batterie.
USB: En mode USB, connectez le câble USB de type C fourni au clavier et à votre ordinateur.
Le voyant d’état LED « S » peut s’allumer en rouge, indiquant que le clavier se charge simul-
tanément. En mode USB, le clavier ne passera pas en mode économie de batterie.
OFF: En mode OFF, tous les circuits sont désactivés. Ceci est idéal si le clavier ne doit pas être
utilisé pendant une période.
Modes d’interface
GERMAN Schnellanleitung
E-mail: [email protected]
Auf FB: www.facebook.com/aziocorp
Mehrsprachiger Unterricht zum Download unter www.aziocorp.com
Support / Service
Retro Classic BT ist eine sehr vielseitige Tastatur, mit vollständiger Unterstützung für MAC / PC
und drahtloser Verbindung per Bluetooth oder Anschluss per USB. Die Betriebssystemauswahl
und die Schnittstellenmodusschalter befinden sich auf der Rückseite der Tastatur.
Einrichtung
Standardmäßig befindet sich die Tastatur im PC-Modus. Um in den Mac-Modus zu wechseln,
schalten Sie bitte den Schalter auf “MAC”. Im Mac-Modus ersetzen Sie die PC-Tasten mit den
mitgelieferten Mac-Tastenkappen gemäß dem Diagramm im Abschnitt LAYOUT.
MAC / PC-Modi
BT: Mit dem Bluetooth-Modus können Sie die Tastatur drahtlos an Ihren Computer anschließen.
Im BT-Modus schaltet sich die Hintergrundbeleuchtung automatisch nach 5 Minuten Inaktivität
aus, um den Akku zu schonen.
USB: Im USB-Modus schließen Sie bitte das mitgelieferte USB-Typ-C-Kabel an die Tastatur und
Ihren Computer an. Die mit “S” gekennzeichnete Statusanzeige-LED leuchtet rot und zeigt an,
dass die Tastatur gleichzeitig geladen wird. Im USB-Modus schaltet die Tastatur nicht in den
Energiesparmodus.
AUS: Im AUS-Modus ist die Tastatur komplett ausgeschaltet. Dies ist ideal, wenn die Tastatur
für längere Zeit nicht benutzt wird. Bitte beachten Sie, dass die Tastatur im OFF-Modus nicht
geladen werden kann.
Schnittstellenmodi
Wenn die Batterie weniger als 20% geladen ist, beginnt die mit “S” gekennzeichnete Statusan-
zeige-LED rot zu blinken. Stecken Sie das mitgelieferte USB-Kabel in die Tastatur und einen
USB-Port eines Computers oder USB-Ladegeräts. Die gleiche LED hört auf zu blinken und
leuchtet konstant rot, was bedeutet, dass die Tastatur aufgeladen wird. Sobald der Akku voll
aufgeladen ist, schaltet sich die rote LED aus. Das Laden eines völlig leeren Akkus, über einen
USB 3.0 Port, dauert ungefähr 8+ Stunden da der Akku eine große Leistungskapazität hat. Die
Tastatur kann nur im BT- oder USB-Modus aufgeladen werden.
Aufladen der Tastatur
1. Schalten Sie die Tastatur in den BT-Modus. Der Modusschalter befindet sich auf der
Rückseite der Tastatur.
2. Schalten Sie die Tastatur in den Pairing-Modus, indem Sie die Taste (FN) und die (-) Taste auf
dem Ziernblock gedrückt halten. Halten Sie diese beiden Tasten für einige Sekunden
gedrückt, bis die blaue LED ständig zu blinken beginnt.
3. Auf Ihrem Mac rufen Sie dann ‘Systemeinstellungen’ auf und wählen ‘Tastatur’. Klicken Sie
anschließend auf “Bluetooth-Tastatur einrichten”. Für Windows 10 rufen Sie die Blue
tooth-Einstellungen auf und wählen Sie “Bluetooth oder anderes Gerät hinzufügen”.
4. Sobald der Setup-Assistent ‘AZIO Retro Classic BT’ findet, klicken Sie auf ‘Pair’.
5. Die Tastatur ist nun betriebsbereit.
Pairing der Tastatur

18 AZIO RETRO CLASSIC
SWEDISH Snabbstarts Guide
På FB: www.facebook.com/aziocorp
Multi-Language Instruction tillgänglig för nedladdning på www.aziocorp.com
Support / Service
Som standard hamnar tangentbordet i PC-läge. För att ändra till Mac-läge, vänligen växla
reglaget till ”MAC” position. När du väl är i Mac-läge, ersätt de PC-viktiga knapparna med de
medföljande Mac knapparna enligt diagrammet på avsnittet LAYOUT.
MAC/PC-lägen
BT: Bluetooth-läge tillåter dig ansluta tangentbordet till datorn trådlöst. I BT-läge stängs
bakgrundsbelysningen automatiskt av efter 5 minuters inaktivitet för att bevara batteriet.
USB: I USB-läge ansluter du den medföljande USB Type-C-kabeln till tangentbordet och da-
torn. Statusindikatorn LED märkt ‘S’ kan lysa rött, vilket indikerar att tangentbordet laddas
samtidigt. I USB-läge går inte tangentbordet in i batterisparläget.
AV: I AV-läge kommer alla kretsar vara avstängda. Detta är perfekt om tangentbordet inte
kommer för att användas under en längre tid. Observera att tangentbordet inte kan laddas
i AV-läge.
Interface lägen
När batteriet är mindre än 20%, börjar statusindikeringen märkt ”S” att blinka rött. Anslut den
medföljande USB-kabeln till tangentbordet och en USB-port på en dator eller USB-laddare.
Samma lampa slutar blinka och lyser med ett fast rött sken, laddas som visar tangentbordet.
När det är fulladdat, slocknar den röda lysdioden. Att ladda ett helt tomt batteri till fullt på en
USB 3.0 port, tar ca 8+ timmar på grund av sin stora kraftkapacitet. Tangentbordet kan endast
laddas under BT eller USB-läge.
Ladda tangentbordet
1. Aktivera tangentbordet till BT-läge. Läges-omkopplaren finns på baksidan av tangentbordet.
2. Placera tangentbordet i parkopplingsläge genom att hålla ned tangenten (FN) och knappen (-)
på det numeriska tangentbordet. Håll in dessa två nycklar i några sekunder tills den blå
lampan börjar blinka kontinuerligt.
3. På din Mac, navigera till ‘Systeminställningar’ och välj ‘Tangentbord’. Nästa, klicka på ”Ställ
in Bluetooth-tangentbord’. För Windows 10, gå till Bluetooth-inställningar och välj ‘Lägg till
Bluetooth- eller annan enhet’.
4. När installationsguiden finner ‘AZIO Retro Classic BT’, klicka på ‘Para ihop’.
5. Tangentbordet är nu klart för användning.
Koppla ihop tangentbordet
Retro Classic BT är ett mycket mångsidig tangentbord som fullt ut stöder MAC/PC och kan
ansluta trådlöst via Bluetooth eller kabelanslutet via USB. Ändring av operativsystem och
gränssnitt finns båda på baksidan av tangentbordet.
Ställa in
NORWEGIAN Hurtig start guide
På FB: www.facebook.com/aziocorp
Multi-Language Instruction tilgjengelig for nedlasting på www.aziocorp.com
Kundestøtte/Service
Retro Classic BT er et meget anvendelig tastatur med full støtte for Mac/PC, og kan tilkobles
trådløst via Bluetooth eller med kabel via USB. Valg av operativsystem og knapper for
grensesnitt-modus er plassert på baksiden av tastaturet.
Oppsett
Tastaturet er i PC-modus som standard. For å bytte til Mac-modus skyves bryteren til
“MAC”-posisjon. Når tastaturet er i Mac-modus byttes PC-tastene med de medfølgende
Mac-tastene i henhold til diagrammet i LAYOUT-seksjonen.
MAC/PC modi
BT: Du kan koble tastaturet trådløst til din datamaskin via Bluetooth. I BT-modus vil baklyset
slås av automatisk etter 5 minutters inaktivitet for å spare batteriet.
USB: I USB modus, koble den medfølgende USB Type-C kabelen til tastatturet og datamaski-
nen. Statusindikatoren merket ‘S’ kan begynne å lyse rødt, noe som betyr at tastaturet lader
samtidig. Tastaturet vil ikke gå i batterilagringsmodus når det er i USB-modus.
OFF: I OFF-modus er alle strømkretser slått av. Dette er ideelt hvis tastaturet ikke er i bruk I
en lengre periode. Merk at tastaturet ikke kan lades i OFF-modus.
Grensesnitt-modi
Når batterikapasiteten er mindre enn 20% vil statusindikatorlyset merket “S” begynne å
blinke rødt. Plugg den medfølgende USB-kabelen i tastaturet og i en USB-port i en datam-
askin eller USB-lader. Det samme LED-lyset vil stoppe å blinke og i stedet lyse jevnt rødt
under lading. Når tastaturet er fullt oppladet vil det røde LED-lyset slukke. Lading av et helt
tomt batteri til fullt via en USB 3.0-port, tar ca. 8+ timer pga. batteriets store lagringskapa-
sitet. Tastaturet kan kun lades i BT- eller USB-modus.
Lading av tastaturet
1. Sett tastaturet I BT-modus. Modusknappen er plassert på baksiden av tastaturet.
2. Sett tastaturet i paring-modus ved å holde nede (FN)- og (-)-tastene på det numeriske
tastaturet i noen sekunder til det blå LED-lyset blinker kontinuerlig.
3. For Mac, naviger til ‘Systempreferanser’ og velg ‘Tastatur’. Klikk på ‘Oppsett av Bluetooth
tastatur’. For Windows 10, gå til Bluetooth-innstillinger og velg ‘Legg til Bluetooth eller
annen enhet’.
4. Når setup wizard finner ‘AZIO Retro Classic BT’, klikker du på ‘Pair’.
5. Tastaturet er nå klart til bruk.
Paring av tastaturet
Table of contents
Other Azio Keyboard manuals

Azio
Azio VISION KB505U User manual

Azio
Azio MGK L80 RGB User manual

Azio
Azio vision kb506w User manual

Azio
Azio KB505U User manual

Azio
Azio MK-RETRO-L series User manual

Azio
Azio KB333BM User manual

Azio
Azio KB506 User manual

Azio
Azio MECH5 KB577U User manual

Azio
Azio KB351RT User manual

Azio
Azio KB336RP User manual