B. Braun FAV5 User manual
B. Braun Vet Care
Instructions for use/Technical description
Clipper FAV5
Gebrauchsanweisung/Technische Beschreibung
Schermaschine FAV5
Mode d’emploi/Description technique
Tondeuse FAV5
Instrucciones de manejo/Descripción técnica
Esquiladora FAV5
Istruzioni per l’uso/Descrizione tecnica
Tosatrice FAV5
Gebruiksaanwijzing/Technische beschrijving
Scheermachine FAV5
Инструкция по примению/Техническое
описание
Машинка для стрижки FAV5

7
6
7
1
3
5
4
4
2
10
12
9
8
9
11
11

B. Braun Vet Care
Clipper FAV5
2
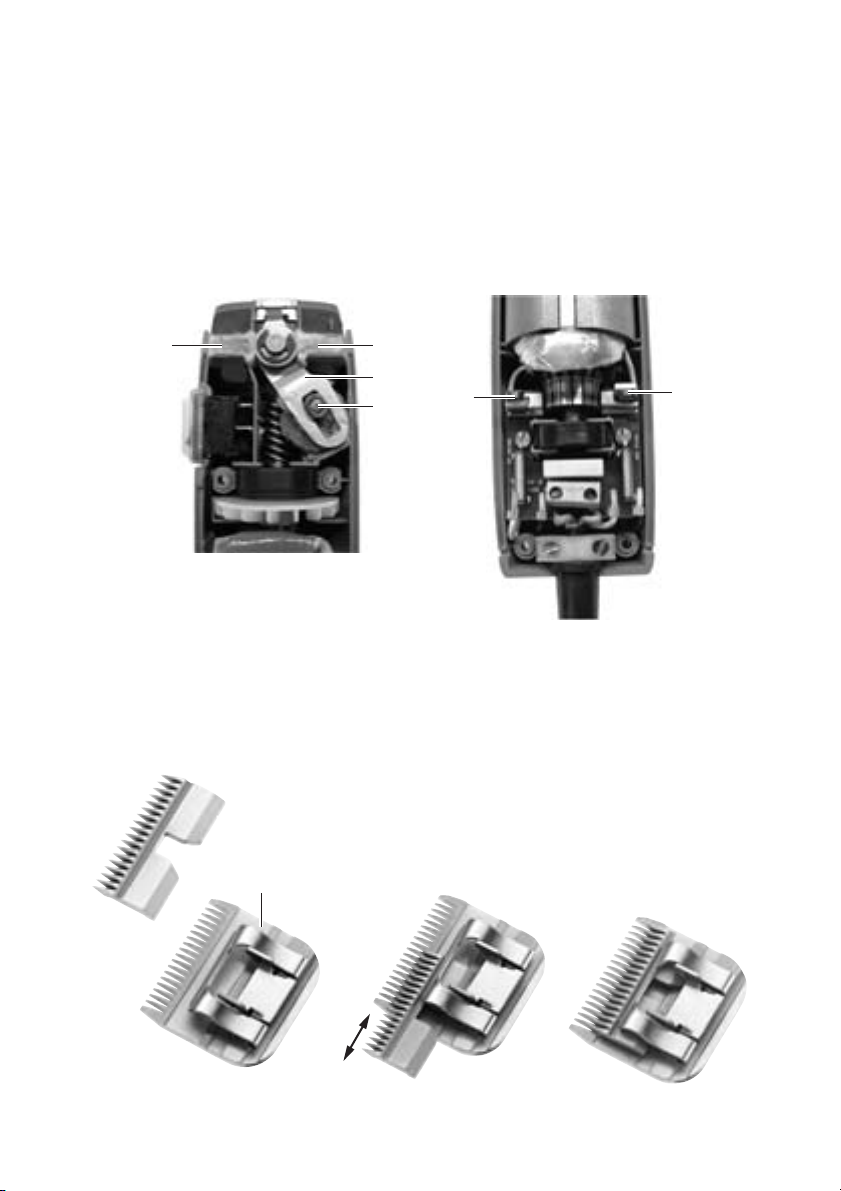
Legend
1Hinge (complete)
2Shearing head lock
3ON/OFF switch
4Screws (x4)
5Type plate
6Upper housing shell
7Air filter
8Rocker arm
9Oil felts
10 Guide piece
11 Carbon brush
12 Shearing head
Symbols on product
Contents
1. Safe handling ........................................................... 3
2. Product description ................................................ 3
2.1 System components ............................................... 3
2.2 Components necessary for use ........................... 3
2.3 Intended use of Clipper FAV5 .............................. 3
2.4 Operating principle of Clipper FAV5 .................. 3
3. Preparation and setup ........................................... 4
4. Working with Clipper FAV5 ................................. 4
4.1 System set-up .......................................................... 4
4.1.1 Accessories................................................................ 4
4.1.2 Attaching the shearing head............................... 5
4.2 Function checks for Clipper FAV5 ...................... 5
4.3 Treatment of the cutting set ............................... 6
4.3.1 Sharpening the cutting plate .............................. 6
4.3.2 Changing the shearing head................................ 6
4.3.3 Lubricating the shearing head ............................ 6
5. Processing ................................................................. 7
5.1 Cleaning/Disinfecting ............................................ 7
5.2 Control, care and inspection ............................... 7
6. Maintenance ............................................................ 8
7. Troubleshooting list ............................................... 9
8. Technical Service ..................................................10
9. Accessories/Spare parts ......................................10
9.1 Shearing heads ......................................................11
10. Technical specifications ......................................11
10.1 Clipper FAV5 ...........................................................11
10.2 Declaration of conformity ..................................11
11. Disposal ...................................................................12
11.1 For EU countries only ..........................................12
12. 2 Years warranty ...................................................12
Adhere to instructions for use
Labeling of electric and
electronic devices according to
directive 2002/96/EC (WEEE),
see Chapter Disposal

3
1. Safe handling
¾Prior to use, check for proper condition and
functioning of the product.
¾Observe our “Notes on Electromagnetic
Compatibility (EMC)“.
¾To prevent damage caused by improper setup or
operation, and in order not to compromise
warranty and manufacturer liability:
– Use the product only according to these
instructions for use.
– Observe all safety information and maintenance
advisories.
– Ensure the manufacturer’s approval before using
accessories that are not mentioned in the
instructions for use.
¾Ensure that the product and its accessories are
operated and used only by persons with the
requisite training, knowledge or experience.
¾Keep the instructions for use accessible for the
user.
¾Always adhere to applicable standards.
¾Ensure that the electrical facilities in the room in
which the device is being used conform to IEC
norms.
¾Unplug the device by pulling the plug, but never by
pulling the power cord.
¾Do not operate the product in explosion-hazard
areas.
¾Do not use the product if it is damaged or
defective. Set aside the product if it is damaged.
2. Product description
2.1 System components
Note
The shearing head GT330 #10 (USA+UK) for Clipper
FAV5 is included in the scope of delivery. Various
shearing heads (SNAP ON type) can be used for
different applications!
2.2 Components necessary for use
• Clipper FAV5
• Shearing head
2.3 Intended use of Clipper FAV5
Note
This machine is intended exclusively for cutting animal
hair!
The Clipper FAV5 is used for clipping small animals.
The Clipper FAV5 is used with a shearing head to be
selected according to the respective application.
2.4 Operating principle of Clipper FAV5
The Clipper FAV5 is switched on (off) by pushing the
ON/OFF switch up (down).
DANGER
Risk of death by electric shock!
¾Do not open the product.
¾Only ever connect the product
to power mains with equipment
grounding conductor.
Designation Art. no.
Clipper FAV5 GT105G
GT105J
GT105K
GT330 #10 (USA+UK)
Instructions for use TA012748
B. Braun Vet Care
Clipper FAV5
4
3. Preparation and setup
Non-compliance with these rules will result in
complete exclusion of liability on the part of Aesculap.
¾When setting up and operating the product, always
observe:
– national regulations for installation and
operation,
– the national regulations on fire and explosion
protection,
– operating advisories according to IEC-/VDE
regulations.
¾Prior to connecting the Clipper to mains power,
ensure that the voltage specified on type plate 5
matches the mains voltage.
4. Working with Clipper FAV5
4.1 System set-up
4.1.1 Accessories
Combinations of accessories that are not mentioned in
the present instructions for use may only be employed
if they are specifically intended for the respective
application, and if they do not compromise the
performance and safety characteristics of the
products.
¾Please contact your B. Braun/Aesculap Partner or
Aesculap Technical Service (address: see Chapter
Technical Service) with any inquiries in this
respect.
DANGER
Fire and explosion hazard!
¾Do not operate the product in
explosion-hazard areas.
CAUTION
Malfunction of, or damage to the
product caused by improper setup!
¾Do not expose the product to
direct sunlight or moisture.
¾Do not cover the ventilation
slots of the product.
¾Ensure that the mains power
socket used for supplying the
product is freely accessible.

5
4.1.2 Attaching the shearing head
Note
The shearing head GT330 #10 (USA+UK) for Clipper
FAV5 is included in the scope of delivery. Various shear-
ing heads are available for different applications!
Fig. 1
¾If the hinge is closed: Open hinge 1with a
screwdriver, see Fig. 1.
Fig. 2
¾Install shearing head 12 on open hinge 1, see Fig. 2.
¾Press ON/OFF switch 3.
Fig. 3
¾Slightly push shearing head 12 towards Clipper
FAV5, see Fig. 3.
Shearing head 12 will click into position.
¾Check that shearing head 12 is correctly seated on
Clipper FAV5.
4.2 Function checks for Clipper FAV5
¾Carry out a visual inspection.
¾Check the switch position.
¾Install the cutting set correctly and lubricate it if
necessary, see Chapter Treatment of the cutting
set.
¾Clean the Clipper FAV5 prior to use, see Chapter
Cleaning/Disinfecting.
WARNING
Risk of injury caused by sharp cut-
ting plates!
¾Handle the shearing head of
Clipper FAV5 with appropriate
caution.
1
12
1
12

B. Braun Vet Care
Clipper FAV5
6
4.3 Treatment of the cutting set
4.3.1 Sharpening the cutting plate
Note
For sharpening the cutting plate, please contact
Technical Service, see Chapter Technical Service.
4.3.2 Changing the shearing head
Fig. 4
¾Press ON/OFF switch 3to switch off Clipper FAV5,
see Fig. 4.
¾Press shearing head lock 2, see Fig. 4.
Fig. 5
¾Press forward shearing head 12, see Fig. 5.
¾Detach shearing head 12.
¾Clean open hinge 1with a brush.
¾Install shearing head 12 on hinge 1.
¾Plug in the power cord of Clipper FAV5.
¾Press ON/OFF switch 3.
¾Slightly push shearing head 12 towards Clipper
FAV5.
Shearing head 12 will click into position.
¾Check that shearing head 12 is correctly seated on
Clipper FAV5.
4.3.3 Lubricating the shearing head
¾Clean the upper and lower cutting plates with a
soft cloth or brush. Make certain that the gaps
between the cutting teeth are cleaned properly.
¾Slightly lubricate the upper and lower cutting plates
with special lubricant for shearing heads GT604.
WARNING
Risk of injury caused by sharp
cutting plates!
¾Handle the shearing head of
Clipper FAV5 with appropriate
caution.
3
2
3
12

7
5. Processing
5.1 Cleaning/Disinfecting
Note
Always follow disposal and hygiene instructions and
regulations!
Manual cleaning/disinfecting
¾Wipe the shell of the product with a lint-free cloth
moistened with a commercial disinfectant for wipe
disinfection.
¾If necessary, after the appropriate exposure time,
wipe off any residue of the cleaning/disinfecting
agent with a lint-free cloth moistened with clean
water.
¾Dry the product with a clean, lint-free cloth.
¾If necessary, repeat the cleaning/disinfecting
process.
Cleaning the air filter
Note
The air filter must be cleaned once a week or whenever
necessary!
¾Slide back and remove air filter 7.
¾Blow through or wash air filter 7.
¾Slide dry air filter 7into its seating.
5.2 Control, care and inspection
¾Allow the product to cool down to room
temperature.
¾Inspect the product after each cleaning and
disinfecting cycle to be sure it is clean, functional
and undamaged.
¾Lubricate the shearing head as appropriate, see
Chapter Lubricating the shearing head.
¾Check the product for any damage, a typical
running noise, overheating or excessive vibration.
¾Inspect the cutting set for broken, damaged or
blunt cutting edges.
¾Set aside the product if it is damaged.
CAUTION
Damage to, or destruction of the
product caused by mechanical
cleaning/disinfecting or steriliza-
tion!
¾Only clean and disinfect the
product manually.
¾Do not sterilize the product
under any circumstances.
DANGER
Risk of electric shock and fire
hazard!
¾Unplug the unit before cleaning.
¾Make certain that no fluids will
penetrate the product.
¾Leave the product exposed to
air for at least 1 minute after
cleaning/disinfecting.
CAUTION
Damage to the product due to
incorrect cleaning or inappropriate
cleaning/disinfecting agents!
¾Use any commercial detergent
for surface cleaning.
¾Never immerse the product in
water or detergent.
¾Do not introduce any fluid into
the charging bays.
¾Clean the contacts in the charg-
ing bays, applying extreme care.

B. Braun Vet Care
Clipper FAV5
8
6. Maintenance
To ensure reliable operation, Aesculap recommends
servicing the product at least once a year.
For services to that end, please contact your national
B. Braun/Aesculap agency, see Chapter Technical
Service.
Service addresses
In the UK
KG PRODUCTS
243-251 City Road, Fenton
Stoke-on-Trent, Staffs
ST4 2PX
United Kingdom,
Phone (44) - 01782 844 866
DIAMOND EDGE
126 Gloucester Rd.
Brighton, BN1 4BU.
United Kingdom
Phone (44) - 01273 605 922
Or in Germany
Aesculap Suhl GmbH
Fröhliche-Mann-Straße 15
98528 Suhl / Germany
Phone: +49 (0) 3681 49820
Fax: +49 (0) 3681 498234
E-Mail: suhl@aesculap.de
Other service addresses can be obtained from the
address indicated above.
9
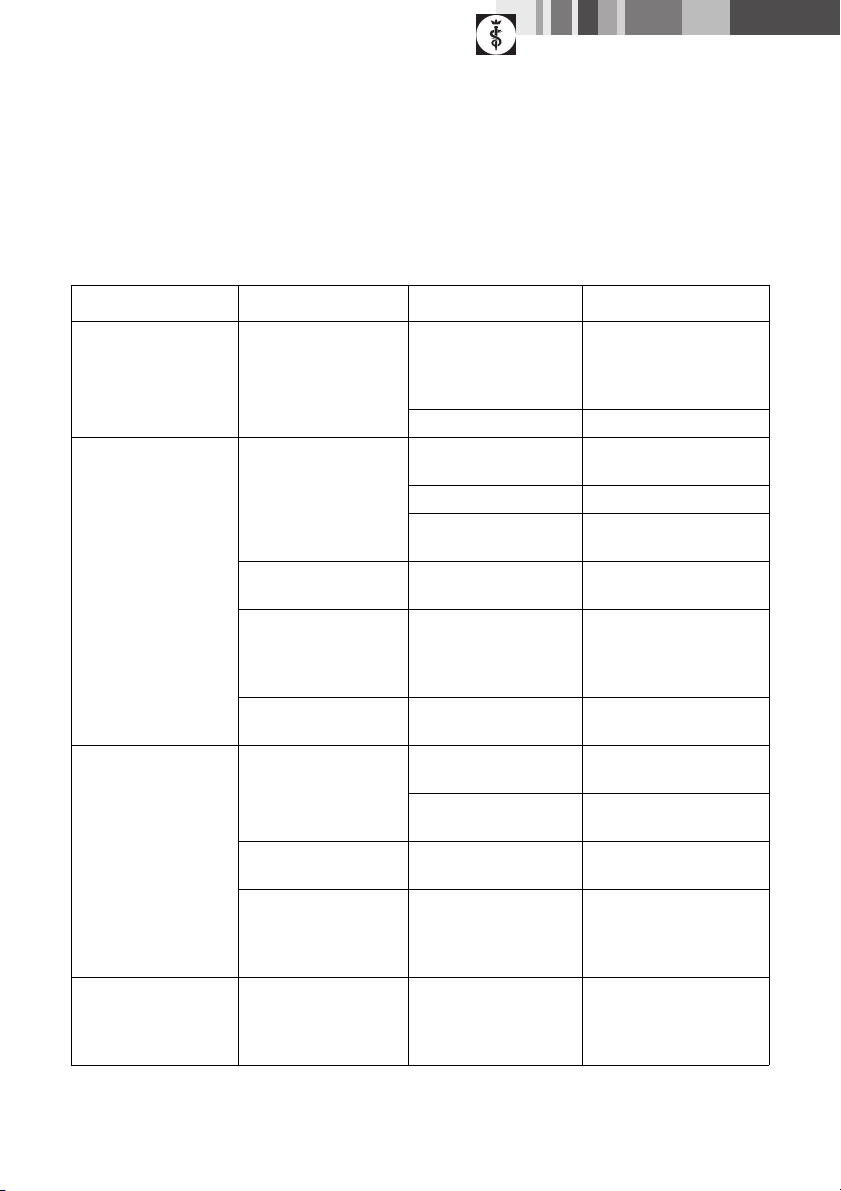
7. Troubleshooting list
Malfunction Finding Cause Remedy
Shearing head not mov-
ing
Shearing head jammed Shearing head not prop-
erly engaged in its seat-
ing
Properly engage the shear-
ing head, see Chapter
Attaching the shearing
head
Rocker arm defective Replace rocker arm
Clipper FAV5 cutting
poorly or not at all
Clipper FAV5 not cutting Cutting edges of shearing
head blunted
Have product repaired by
the manufacturer
Animal hair too wet Only cut dry animal hair
Shearing head lacking
shearing pressure
Have product repaired by
the manufacturer
Cutting performance
insufficient
Cutting edges of cutting
head not honed correctly
Have product repaired by
the manufacturer
Overheating of shearing
head
Lack of lubrication of
shearing head edges
Lubricate cutting edges of
shearing head, see Chapter
Lubricating the shearing
head
Shearing head jammed Animal hair jammed in
shearing head
Demount shearing head and
remove animal hair
Motor of Clipper FAV5
not running
Clipper FAV5 not cutting Debris on electric con-
tacts
Switch off Clipper FAV5 and
clean the contacts
Motor/Electronics defec-
tive
Have product repaired by
the manufacturer
Smell of burning from
the machine housing
Motor burnt Have product repaired by
the manufacturer
Shearing head jammed Debris in shearing head Clean and lubricate the
shearing head, see Chapter
Lubricating the shearing
head
Motor of Clipper FAV5
running very slowly
Atypical motor noises Lack of lubrication of
shearing head edges
Lubricate cutting edges of
shearing head, see Chapter
Lubricating the shearing
head

B. Braun Vet Care
Clipper FAV5
10
8. Technical Service
For service, maintenance or repairs, please contact
your national B. Braun/Aesculap agency.
Modifications carried out on medical technical
equipment may result in loss of guarantee/warranty
rights and forfeiture of applicable licenses.
Service addresses
In the UK
KG PRODUCTS
243-251 City Road, Fenton
Stoke-on-Trent, Staffs
ST4 2PX
United Kingdom,
Phone (44) - 01782 844 866
DIAMOND EDGE
126 Gloucester Rd.
Brighton, BN1 4BU.
United Kingdom
Phone (44) - 01273 605 922
Or in Germany
Aesculap Suhl GmbH
Fröhliche-Mann-Straße 15
98528 Suhl / Germany
Phone: +49 (0) 3681 49820
Fax: +49 (0) 3681 498234
E-Mail: suhl@aesculap.de
Other service addresses can be obtained from the
address indicated above.
9. Accessories/Spare parts
Art. no. Designation
GT604 Lubricant
GT605 Grease
GT104614 Carbon brushes
GT104803 Air filter
GT105808 Rocker arm
GT105415 Hinge (complete)

11
9.1 Shearing heads
Note
Detailed descriptions of the shearing heads can be
found in brochure V06902.
10. Technical specifications
10.1 Clipper FAV5
10.2 Declaration of conformity
Shearing head (complete) Size EU
GT305 0,2 mm
GT310 0,25 mm
GT315 0,5 mm
GT317 0,5 mm
GT320 0,8 mm
GT323 0,8 mm
GT326 1,2 mm
GT330 1,5 mm
GT333 2,0 mm
GT336 2,4 mm
GT339 2,4 mm
GT341 2,8 mm
GT343 3,2 mm
GT345 3,2 mm
GT349 3,2 mm
GT353 2,4 mm
GT357 6,3 mm
GT360 6,3 mm
GT366 9,5 mm
Model GT105
Stroke rate 2 300 1/min
Protection class
(acc. to IEC 60601-1)
II
Weight
(without shearing head)
approx. 800 g
We declare under our sole
responsibility that this product
conforms to the following standards or
other normative documents:
2006/95/EC EC Low Voltage Directive
EN 60335-1
EN 60335-2-8 Safety of household
and similar electrical appliances
Aesculap Suhl GmbH
B. Braun Vet Care
Clipper FAV5
12
11. Disposal
Power tools, accessories and packaging should be
recycled through environmentally compatible
processes.
11.1 For EU countries only
12. 2 Years warranty
Dear customer,
Thank you for choosing one of our products. The
Aesculap brand has been trusted for quality and first-
class service for many years. Aesculap Suhl GmbH is
certified according to DIN EN ISO 9001. We are known
to provide innovative, high-performance products for
our customers.
Aesculap produces top-quality devices and promises to
use only high-grade materials and meticulous
manufacturing. As the manufacturer, we undertake
warranty covering any quality defects of the product
for a period of 2 years from the date of purchase
(invoice date).
In addition to your contractual and statutory warranty
rights, Aesculap offers manufacturer’s warranty on the
following terms:
The present manufacturer’s warranty will be valid for
2 years from the date of purchase. It applies to faults
or defects caused by deficiencies of materials or
manufacturing of the product.
The following instances are excluded from our
manufacturer’s warranty:
Faults caused by improper use, normal wear,
inappropriate intervention in the product by
unauthorized persons, or assembling of the product
using third-party products that do not fit or function
properly. Also excluded are defects that do not, or not
significantly affect the value or usability of the
product.
Should a fault or defect covered by the manufacturer’s
warranty arise within the warranty period of 2 years,
starting from the purchase date, we will either repair
or replace, according to our discretion, the faulty or
defective product.
Our manufacturer’s warranty is subject to receipt of
the product and proof of purchase (invoice) by the
respective Aesculap national distribution agency or
service center.
Do not dispose of power tools with
household waste!
According to European Directive
2002/96/EG on waste electric and
electronic devices, and its
implementation in national
legislation, power tools that have
reached the end of their service life
must be collected separately and
recycled through environment-
friendly processes.

13
For addresses of our service centers, see Chapter
Technical Service.
Naturally, independent of our manufacturer’s
warranty, you can still claim warranty rights against
the vender, e.g. cure (amendment, repair or
replacement), cancellation or price reduction, as far as
such claims are within your statutory or contractual
rights. These rights are not affected by our additional
manufacturer’s warranty.

B. Braun Vet Care
Schermaschine FAV5
14
Legende
1Messerscharnier (komplett)
2Scherkopf-Verriegelung
3Ein-/Aus-Schalter
4Schrauben (4 Stück)
5Typenschild
6Gehäuseoberschale
7Luftfilter
8Schwinghebel
9Ölfilze
10 Gleitstein
11 Kohle
12 Scherkopf
Symbole am Produkt
Inhaltsverzeichnis
1. Sichere Handhabung ............................................15
2. Gerätebeschreibung .............................................15
2.1 Lieferumfang ..........................................................15
2.2 Zum Betrieb erforderliche Komponenten ......15
2.3 Verwendungszweck Schermaschine FAV5 .....15
2.4 Funktionsweise Schermaschine FAV5 .............15
3. Vorbereiten und Aufstellen ................................16
4. Arbeiten mit der Schermaschine FAV5 ...........16
4.1 Bereitstellen ...........................................................16
4.1.1 Zubehör.................................................................... 16
4.1.2 Scherkopf aufstecken........................................... 17
4.2 Funktionsprüfung Schermaschine FAV5 .........17
4.3 Handhabung Schneidsatz ...................................18
4.3.1 Schneidplatte schleifen....................................... 18
4.3.2 Scherkopf austauschen ....................................... 18
4.3.3 Scherkopf ölen....................................................... 18
5. Aufbereitung ..........................................................19
5.1 Reinigung/Desinfektion .......................................19
5.2 Kontrolle, Pflege und Prüfung ...........................19
6. Wartung ..................................................................20
7. Fehler erkennen und beheben ...........................21
8. Technischer Service ..............................................22
9. Zubehör/Ersatzteile ..............................................22
9.1 Scherköpfe ..............................................................23
10. Technische Daten ..................................................23
10.1 Schermaschine FAV5 ...........................................23
10.2 Konformitätserklärung ........................................23
11. Entsorgung ..............................................................24
11.1 Nur für EU-Länder ................................................24
12. 2 Jahre Gewährleistung ......................................24
Gebrauchsanweisung einhalten
Kennzeichnung von Elektro-
und Elektronikgeräten entspre-
chend Richtlinie 2002/96/EG
(WEEE), siehe Kapitel Entsor-
gung
15
1. Sichere Handhabung
¾Vor der Anwendung des Produkts Funktionsfähig-
keit und ordnungsgemäßen Zustand prüfen.
¾„Hinweise zur elektromagnetischen Verträglichkeit
(EMV)“ beachten.
¾Um Schäden durch unsachgemäßen Aufbau oder
Betrieb zu vermeiden und die Gewährleistung und
Haftung nicht zu gefährden:
– Produkt nur gemäß dieser Gebrauchsanweisung
verwenden.
– Sicherheitsinformationen und Instandhaltungs-
hinweise einhalten.
– Zubehör, das nicht in der Gebrauchsanweisung
erwähnt wird, nur mit Zustimmung des Herstellers
verwenden.
¾Produkt und Zubehör nur von Personen betreiben
und anwenden lassen, die die erforderliche Ausbil-
dung, Kenntnis oder Erfahrung haben.
¾Gebrauchsanweisung für den Anwender zugäng-
lich aufbewahren.
¾Gültige Normen einhalten.
¾Sicherstellen, dass die elektrische Installation des
Raums den IEC-Anforderungen entspricht.
¾Netzverbindungen durch Ziehen am Gerätestecker
lösen, nie durch Ziehen am Kabel.
¾Produkt nicht in explosionsgefährdeten Bereichen
einsetzen.
¾Kein beschädigtes oder defektes Produkt verwen-
den. Beschädigtes Produkt sofort aussortieren.
2. Gerätebeschreibung
2.1 Lieferumfang
Hinweis
Der Scherkopf GT330 #10 (USA+GB) der Scherma-
schine FAV5 ist im Lieferumfang enthalten. Je nach
Anwendung können verschiedene Scherköpfe (Typ
SNAP ON) eingesetzt werden!
2.2 Zum Betrieb erforderliche Kompo-
nenten
• Schermaschine FAV5
• Scherkopf
2.3 Verwendungszweck Schermaschine
FAV5
Hinweis
Die Maschine ist nur zum Schneiden von Tierhaaren
vorgesehen!
Die Schermaschine FAV5 wird zum Scheren von Klein-
tieren verwendet.
Die Schermaschine FAV5 muss je nach Anwendung mit
einem Scherkopf eingesetzt werden.
2.4 Funktionsweise Schermaschine
FAV5
Die Schermaschine FAV5 wird mit dem Ein-/Aus-
Schalter nach oben eingeschaltet und nach unten aus-
geschaltet.
GEFAHR
Lebensgefahr durch elektrischen
Stromschlag!
¾Produkt nicht öffnen.
¾Produkt nur an ein Versorgungs-
netz mit Schutzleiter anschlie-
ßen.
Bezeichnung Art.-Nr.
Schermaschine FAV5 GT105G
GT105J
GT105K
GT330 #10 (USA+GB)
Gebrauchsanweisung TA012748

B. Braun Vet Care
Schermaschine FAV5
16
3. Vorbereiten und Aufstellen
Wenn die folgenden Vorschriften nicht beachtet wer-
den, übernimmt Aesculap insoweit keinerlei Verant-
wortung.
¾Beim Aufstellen und Betrieb des Produkts einhal-
ten:
– die nationalen Installations- und Betreiber-Vor-
schriften,
– die nationalen Vorschriften über Brand- und
Explosionsschutz,
– Anwendungshinweise gemäß IEC-/VDE-Bestim-
mungen.
¾Vor dem Anschluss der Schermaschine an das
Stromnetz sicherstellen, dass die Spannung, die auf
dem Typenschild 5angegeben ist, mit der Netz-
spannung übereinstimmt.
4. Arbeiten mit der Scher-
maschine FAV5
4.1 Bereitstellen
4.1.1 Zubehör
Zubehörkombinationen, die nicht in der Gebrauchsan-
weisung erwähnt sind, dürfen nur verwendet werden,
wenn sie ausdrücklich für die vorgesehene Anwendung
bestimmt sind. Leistungsmerkmale sowie Sicherheits-
anforderungen dürfen nicht nachteilig beeinflusst
werden.
¾Bei Fragen wenden Sie sich an Ihren B. Braun/
Aesculap-Partner oder den Aesculap Technischen
Service, Adresse siehe Kapitel Technischer Service.
GEFAHR
Brand- und Explosionsgefahr!
¾Produkt nicht in explosionsge-
fährdeten Bereichen einsetzen.
VORSICHT
Beeinträchtigung der Funktion oder
Beschädigung des Produkts durch
unsachgemäße Aufstellung!
¾Produkt keiner direkten Son-
neneinstrahlung oder Nässe
aussetzen.
¾Lüftungsschlitze des Produkts
nicht abdecken.
¾Sicherstellen, dass die Netz-
steckdose des Versorgungsnet-
zes, die zur Spannungsversor-
gung des Produkts genutzt wird,
frei zugänglich ist.

17
4.1.2 Scherkopf aufstecken
Hinweis
Der Scherkopf GT330 #10 (USA+GB) der Scherma-
schine FAV5 ist im Lieferumfang enthalten. Je nach
Anwendung können verschiedene Scherköpfe einge-
setzt werden!
Abb. 1
¾Bei geschlossenem Messerscharnier: Messerschar-
nier 1mit Schraubendreher aufklappen, siehe Abb. 1.
Abb. 2
¾Scherkopf 12 auf geöffnetes Messerscharnier 1
stecken, siehe Abb. 2.
¾Ein-/Aus-Schalter 3drücken.
Abb. 3
¾Scherkopf 12 leicht in Richtung Schermaschine
FAV5 drücken, siehe Abb. 3.
Der Scherkopf 12 rastet hörbar ein.
¾Sicherstellen, dass der Scherkopf 12 korrekt auf der
Schermaschine FAV5 sitzt.
4.2 Funktionsprüfung Schermaschine
FAV5
¾Sichtprüfung durchführen.
¾Schalterstellung prüfen.
¾Schneidsatz korrekt aufstecken und ggf. ölen, siehe
Kapitel Handhabung Schneidsatz.
¾Schermaschine FAV5 vor Gebrauch reinigen, siehe
Kapitel Reinigung/Desinfektion.
WARNUNG
Verletzungsgefahr durch scharfe
Schneidplatten!
¾Scherkopf der Schermaschine
FAV5 vorsichtig behandeln.
1
12
1
12

B. Braun Vet Care
Schermaschine FAV5
18
4.3 Handhabung Schneidsatz
4.3.1 Schneidplatte schleifen
Hinweis
Zum Schleifen der Schneidplatte an den Technischen
Service wenden, siehe Kapitel Technischer Service.
4.3.2 Scherkopf austauschen
Abb. 4
¾Ein-/Aus-Schalter 3drücken, um Schermaschine
FAV5 auszuschalten, siehe Abb. 4.
¾Scherkopf-Verriegelung 2drücken, siehe Abb. 4.
Abb. 5
¾Scherkopf 12 nach vorne aufklappen, siehe Abb. 5.
¾Scherkopf 12 abnehmen.
¾Aufgeklapptes Messerscharnier 1mit Pinsel reini-
gen.
¾Scherkopf 12 auf Messerscharnier 1stecken.
¾Netzanschlussleitung der Schermaschine FAV5
einstecken.
¾Ein-/Aus-Schalter 3drücken.
¾Scherkopf 12 leicht in Richtung Schermaschine
FAV5 drücken.
Der Scherkopf 12 rastet hörbar ein.
¾Sicherstellen, dass der Scherkopf 12 korrekt auf der
Schermaschine FAV5 sitzt.
4.3.3 Scherkopf ölen
¾Mit weichem Lappen oder Pinsel obere und untere
Schneidplatte reinigen. Dabei sicherstellen, dass
die Lücken zwischen den Zähnen sauber sind.
¾Obere und untere Schneidplatte leicht mit Spezialöl
für Schneidköpfe GT604 einölen.
WARNUNG
Verletzungsgefahr durch scharfe
Schneidplatten!
¾Scherkopf der Schermaschine
FAV5 vorsichtig behandeln.
3
2
3
12
Table of contents
Languages:


