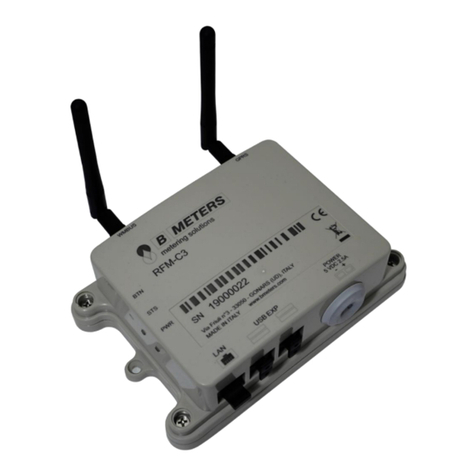
B meters RFM-C2 WMBUS User manual

RFM-C2 WMBUS – GPRS/Ethernet Gateway
User Manual – Manuale d’uso
RFM-C2

RFM-C2 WMBUS – GPRS/Ethernet Gateway User Manual – Manuale d’Uso v1.1
pag. 2
Table of Contents - Indice
1. Product Overview – Panoramica prodotto................................................................................................................................................................................................ 3
1.1 Product Description – Descrizione Prodotto .......................................................................................................................................................................................... 3
1.2 Upgrades – Aggiornamenti ....................................................................................................................................................................................................................5
1.3 Terms and Symbols Used – Termini e Simbili Utilizzati .......................................................................................................................................................................... 5
2. Description and Installation – Descrizione ed Installazione..................................................................................................................................................................... 7
2.1 Description – Descrizione....................................................................................................................................................................................................................... 7
2.2 Before you start – Prima di iniziare......................................................................................................................................................................................................10
2.3 Mounting - Montaggio.........................................................................................................................................................................................................................11
3. Function and Use – Funzionamento ed Utilizzo ...................................................................................................................................................................................... 13
3.1 Putting into Operation – Messa in servizio .......................................................................................................................................................................................... 13
3.2 LED indicator – Indicatore LED .............................................................................................................................................................................................................15
3.3 Wireless M-BUS – Wireless M-BUS ......................................................................................................................................................................................................16
4. Configuration - Configurazione .................................................................................................................................................................................................................17
4.1 Configuration by Software – Configurazione da Software...................................................................................................................................................................17
5. Server Application – Applicazione Server ................................................................................................................................................................................................ 23
6. AMR system scheme – Schema sistema AMR ..........................................................................................................................................................................................28

RFM-C2 WMBUS – GPRS/Ethernet Gateway User Manual – Manuale d’Uso v1.1
pag. 3
1. Product Overview
In this section, we introduce the RFM-C2 product, outline its application options
and highlight the advantages following from its use. The section also includes
safety precautions.
Here is what you can find in this section:
Product Description
Upgrades
Terms and Symbols Used
1.1 Product Description
RFM-C2 communication unit is a new product developed and manufactured to
provide the maximum utility value, quality and reliability. Use RFM-C2 in
accordance herewith for the purposes it was designed and manufactured for.
RFM-C2 is designed for Internet connection via the GPRS/ETHERNET network and
data retransmission from peripherals connected via RS 232/485/M-Bus/WM-Bus
via the IP protocol and GPRS or Ethernet network to a data requesting. Two relay
outputs can be controlled and switched and parameters can be measured on two
galvanically connected inputs.
1. Panoramica prodotto
In questa sezione, verrà introdotto il prodotto RFM-C2, vengono delineate le varie
possibilità di applicazione e vantaggi derivati dal suo utilizzo. Questa sezione
include inoltre le precauzioni di sicurezza.
Ecco cosa è possibile trovare in questa sezione:
Descrizione prodotto
Aggiornamenti
Termini e Simboli utilizzati
1.1 Descrizione Prodotto
L’unità di comunicazione RFM-C2 è un nuovo prodotto sviluppato e prodotto per
fornire il massimo valore d'uso, qualità e affidabilità. Utilizzare sempre l’RFM-C2
in conformità alle funzioni qui descritte, per le quali è stato progettato e costruito.
L' RFM-C2 è stato progettato per la connessione a Internet tramite GPRS/rete
Ethernet. I dati vengono ritrasmessi da periferiche RS232/485/M-Bus/ WM-Bus
tramite il protocollo IP e GPRS o rete Ethernet a un server di richiesta dati.
Due uscite a relè possono essere controllate e attivate. Inoltre i parametri possono
essere misurati su due ingressi galvanicamente collegati.

RFM-C2 WMBUS – GPRS/Ethernet Gateway User Manual – Manuale d’Uso v1.1
pag. 4
Safety Precautions
Do not switch on RFM-C2 in the vicinity of medical apparatuses to avoid
interference. The minimum distance of the antenna and pacemakers should be
0.5m at least.
Do not switch RFM-C2 aboard a plane.
Do not switch RFM-C2 near petrol stations, chemical facilities or sites where
explosives are used.
Any mobile telephone use prohibition based on RF energy radiation applies
to RFM-C2 too.
RFM-C2 may disturb the function of TV sets, radio sets and PCs.
Never exceed the voltage value specified on the adapter. Check the available
voltage range before connecting RFM-C2 to a different power supply.
When RFM-C2 comes to the end of its operational life, dispose of it in
accordance with applicable regulations.
RFM-C2 is equipped with an external antenna connector. The antenna has to be
located indoors for safety reasons.
Precauzioni di Sicurezza
Non accendere l’RFM-C2 nelle vicinanze di apparecchi medici per evitare
interferenze. La distanza minima dell'antenna e pacemaker deve essere di almeno
0,5 m.
Non accendere l’RFM-C2 a bordo di aerei.
Non accendere l’RFM-C2 nei pressi di stazioni di servizio, impianti chimici o siti in
cui vengono utilizzati esplosivi.
Ogni divieto sull’utilizzo di telefoni cellulari basato sulla radiazione di radio
frequenze, si applica anche all’RFM-C2.
L’RFM-C2 può disturbare il corretto funzionamento di TV, radio e PC.
Non superare mai la tensione prescritta. Controllare l’intervallo della tensione
approvato prima di collegare l’RFM-C2 ad una sorgente diversa.
Quando l’RFM-C2 raggiunge la fine del periodo di attività, rottamare secondo le
norme vigenti.
L’RFM-C2 è equipaggiato con un connettore antenna esterno. L’antenna deve
essere installata all’interno degli edifici per ragioni di sicurezza.

RFM-C2 WMBUS – GPRS/Ethernet Gateway User Manual – Manuale d’Uso v1.1
pag. 5
WARNING
Do not place the unit near heat sources (such as space heaters, hot air heaters,
etc.).
RFM-C2 only works reliably under the conditions specified in this User Manual.
Any unauthorized interventions and/or changes in use and operation may
result in malfunction or destruction of the product.
1.2 Upgrades
The manufacturer reserves the right to modify RFM-C2 in order to improve its
qualities.
Manual Version
v 1.0
The User Manual corresponds to RFM-C2 FW version:
v 1.12.x
CAUTION
The manufacturer is committed to upgrading the firmware according to the
clients' requirements. Refer to the BMETERS website
www.bmeters.com
for
the most updated User Manual.
Refer to the B METERS Customer Service
support@bmeters.com
for any
clarification.
1.3 Terms and Symbols Used
Symbols Used in Manual
The following symbols and pictograms are used in the manual:
AVVERTENZA
Non installare vicino sorgenti di calore (come radiatori, condizionatori,
convettori ecc).
L’RFM-C2 funziona in modo affidabile solo nelle condizioni specificate in questo
manuale. Eventuali interventi non autorizzati e/o cambiamenti di uso e
funzionamento può provocare malfunzionamenti o la distruzione del prodotto.
1.2 Aggiornamenti
Il produttore si riserva il diritto di modificare l’RFM-C2 al fine di migliorarne le
qualità.
Versione Manuale
v 1.0
Il manuale corrisponde alla versione FW dell’RFM-C2:
v 1.12.x
ATTENZIONE
Il produttore si impegna a aggiornare il firmware in base alle esigenze dei
clienti. Fare sempre riferimento al sito web B Meters www.bmeters.com per il
Manuale d'uso più aggiornato.
Fare riferimento al Servizio Clienti B Meters support@bmeters.com per
qualsiasi chiarimento.
1.3 Termini e Simboli Utilizzati
Simboli utilizzati nel Manuale
I seguenti simboli e pittogrammi vengono utilizzati nel manuale:

RFM-C2 WMBUS – GPRS/Ethernet Gateway User Manual – Manuale d’Uso v1.1
pag. 6
SAFETY WARNING
Always abide by this information to prevent persons from injury.
WARNING
Always abide by this information to prevent damage to the device
CAUTION
Important information for system functionality.
TIP
Useful information for quick and efficient functionality
NOTE
Routines or advice for efficient use of the device.
Future Functions and Features
The grey-marked text in this document designates the functions and features
that are under preparation or development at present.
AVVERTENZA SICUREZZA
Sempre rispettare queste informazioni per evitare danni a persone
AVVERTENZA
Sempre rispettare queste informazioni per evitare danni al dispositivo
ATTENZIONE
Informazione Importante per le funzionalità del sistema
CONSIGLIO
Informazione Utile per funzionalità veloce ed efficiente
NOTA
Consigli per un utilizzo efficacie del dispositivo
Funzioni e Caratteristiche Future
Il testo di colore grigio in questo documento indica le funzioni e le caratteristiche
che sono allo stato attuale in fase di preparazione o di sviluppo.

RFM-C2 WMBUS – GPRS/Ethernet Gateway User Manual – Manuale d’Uso v1.1
pag. 7
2. Description and Installation
In this section we describe the RFM-C2 product and its installation.
Here is what you can find in this section:
2.1 Description
2.2 Before You Start
2.3 Mounting
2.1 Description
RFM-C2 consists of a PCB carrying a power supply and RS 232, RS
485/pulses/relays/M–Bus/WMBUS interfaces. The GSM module provides
continuous Internet connection via GPRS. Two relays are available for output
contact control. Pulses connectors for optional devices are located in the upper
part of RFM-C2. Refer to the figures below for description. There is a gel–lead–
acid accumulator connector on the bottom panel. The board also includes a real
time clock backup and Wireless M-Bus modules. An Ethernet connector is
mounted on the bottom too. The whole RFM-C2 system is enclosed in a solid
aluminium case. Mount the case on a DIN rail for easier installation.
2. Descrizione e Installazione
In questa sezione si descrive il prodotto RFM-C2 e la sua installazione.
Ecco cosa si può trovare in questa sezione:
2.1 Descrizione
2.2 Prima di iniziare
2.3 Montaggio
2.1 Descrizione
L’RFM-C2 consiste in una scheda elettronica su cui vengono installati i moduli di
alimentazione, RS232, RS 485/impulsi/relè/M–Bus/WMBUS. Il modulo GSM
garantisce continua connessione internet attraverso la rete GPRS. Due relè sono
disponibili per il controllo del contatto di uscita. Connettori per ingressi impulsi
opzionali si trovano nella parte superiore dell’RFM-C2. Fare riferimento alle figure
sottostanti per la descrizione. E’ presente un connettore per un pacco batterie a
gel nella parte inferiore del pannello. La scheda include inoltre un modulo
Wireless M-BUS. Il connettore Ethernet è montato nella parte inferiore. L’intero
dispositivo RFM-C2 è racchiuso in un solido contenitore in alluminio.
Montare il dispositivo su un DIN rail per una più facile installazione.

RFM-C2 WMBUS – GPRS/Ethernet Gateway User Manual – Manuale d’Uso v1.1
pag. 8
RFM-C2
(Bottom View)
(Vista Inferiore)
1. RS 232 connector
9-pin D-sub
2. Power supply and battery terminal board
+ Uin, - Uin – input supply voltage terminals
+ Batt, - Batt – gel–lead–acid accumulator terminals
3. RS 485/M-Bus/RS232 connector (bus type according to the selected version)
+,-,GND for RS 485
A,B,GND for M-Bus
4. Ethernet interface
RJ-45
1. Connettore RS 232
9-pin D-sub
2. Morsettiera connessione alimentazione e batteria
+ Uin, - Uin – input alimentazione elettrica
+ Batt, - Batt – input accumulatore
3. Connettore RS 485/M-Bus/RS232 (Tipo bus dipende da versione selezionata)
+,-,GND for RS 485
A,B,GND for M-Bus
4. Interfaccia Ethernet
RJ-45

RFM-C2 WMBUS – GPRS/Ethernet Gateway User Manual – Manuale d’Uso v1.1
pag. 9
RFM-C2
(Top View)
(Vista superiore)
1. Wireless M-Bus antenna SMA connector (included)
2. Signalling LEDs
3. Input/output circuit terminal board (from left):
RE1 – closing relay contacts
RE2 – switching relay contacts
Uin+, Uin- – auxiliary supply voltage contacts, used e.g. for connecting supply
voltage to the relays (galvanically connected to the Uin+, Uin– contacts on the
4–pin power supply connector on the bottom side)
GND – ground used with the IN1 and IN2 input circuits
IN1, IN2 – input circuits (input type according to the jumper settings)
4. SIM holder
5. GSM antenna SMA connector (included).
1. Connettore SMA per antenna Wireless M-Bus (inclusa)
2. LED notifica
3. Morsettiera circuito Input/output (da sinistra):
RE1 - chiusura contatti relè
RE2 - commutazione contatti relè
Uin+, Uin- - contatti ausiliari di alimentazione, utilizzato ad esempio per il
collegamento della tensione aggiuntiva per i relè (galvanicamente collegati al
Uin, contatti Uin- sul connettore di alimentazione a 4 pin sul lato inferiore)
GND - terra utilizzato con i circuiti di ingresso IN1 e IN2
IN1, IN2 - circuiti di input (tipo di ingresso in base alle impostazioni dei jumper)
4. Alloggiamento SIM
5. Connettore SMA per antenna GSM (inclusa).

RFM-C2 WMBUS – GPRS/Ethernet Gateway User Manual – Manuale d’Uso v1.1
pag. 10
2.2 Before You Start
Installation Conditions
Install the RFM-C2 antenna with respect to the signal quality in the location. If
is poor, use a higher gain antenna, i.e. mod.RFM-RX2 antenna (not included in
the box).
Install RFM-C2 off sensitive devices and human bodies to avoid EM
interference.
Refer to the Technical Parameters for the allowed range of working
temperatures.
RFM-C2 may not be operated on sites exposed to direct sunshine or in the
nearby of heat sources.
RFM-C2 is designed for indoor use only. Never expose it to rain, running water,
condensation moisture, mist, etc.
RFM-C2 may not be exposed to aggressive gases, acid vapours, solvents and
similar chemicals.
TIP
Use an IP65 Installation Box with a DIN rail with grounding terminals if you
need to RFM-C2 in such adverse conditions.
CAUTION
Make sure that you are equipped with all necessary technical means,
particularly a GPRS supporting SIM card with PIN request disable or a PIN
identical with that set in the RFM-C2 configuration
2.2 Prima di Iniziare
Condizioni installazione
Installare l’antenna dell’RFM-C2 in dipendenza della qualità del segnale in
campo. Se dovesse esserci cattiva ricezione, utilizzare un’antenna di dimensioni
maggiori, ad esempio l’antenna dell’RFM-RX2 (non inclusa).
Installare l’RFM-C2 lontano da dispositivi sensibili e corpi umani per evitare
interferenze.
Fare riferimento ai parametri tecnici per l'intervallo di temperatura di esercizio
consentito.
L’RFM-C2 non deve essere utilizzato su siti esposti alla luce del sole diretta o in
prossimità di fonti di calore.
L’RFM-C2 è stato progettato per il solo uso interno. Non esporlo a pioggia,
acqua corrente, formazione di condensa, nebbia, ecc
L’RFM-C2 non deve essere esposto a gas aggressivi, vapori acidi, solventi e
sostanze chimiche simili.
CONSIGLIO
Utilizzare una scatola IP65 con una guida DIN con messa a terra se è
necessario utilizzare l’RFM-C2 in condizioni avverse.
ATTENZIONE
Assicurarsi di avere tutti i mezzi tecnici necessari, in particolare una scheda SIM
GPRS, con PIN disabilitato o un PIN identico a quello impostato nella
configurazione dell’RFM-C2

RFM-C2 WMBUS – GPRS/Ethernet Gateway User Manual – Manuale d’Uso v1.1
pag. 11
2.3 Mounting
External Antenna Connection
Screw the enclosed antenna into the SMA antenna connector.
2.3 Montaggio
Connessione Antenna Esterna
Avvitare l’antenna fornita nel connettore SMA.
Antenna SMA Connector
Connettore SMA antenna
CAUTION
Tighten the antenna connector gently with your hand; never use a tool!
SIM Card Installation
You can find the SIM card holder in the upper part of the RFM-C2.
ATTENZIONE
Avvitare cautamente l’antenna a mano; non utilizzare mai un utensile!
Installazione SIM Card
L’alloggiamento della scheda SIM è situato sulla parte superiore dell’RFM-C2.
SIM Card Installation
Installazione SIM card

RFM-C2 WMBUS – GPRS/Ethernet Gateway User Manual – Manuale d’Uso v1.1
pag. 12
Insert the SIM card in the holder.
Make sure the SIM contacts are facing the back side of the RFM-C2, as shown
in the picture.
Push the card in until it clicks into position.
CAUTION
Make sure that the GSM provider's SIM card is intended for the GSM network
supported by your RFM-C2 version and that GPRS-based data transmission is
correctly activated.
Make sure that the SIM card does not request the PIN or that the PIN is
identical with that set in the RFM-C2 configuration.
Remember to verify the relevant SIM and provider's services (call forwarding,
call barring, preferred networks, APN, etc.) before inserting the SIM card in
RFM-C2.
Power Supply
RFM-C2 is 5–50 V DC power supplied. Make sure that the voltage value and
polarity comply with the data specified at the RFM-C2 power connector before
connecting your RFM-C2 to an adapter other than that included in the delivery.
Connect the supply voltage to the 2–pin connector (Uin+, Uin-) next to the RS 232
connector. You can also connect a gel–lead–acid accumulator as a power supply
backup. The supply voltage is also present on the 10–pin input circuit terminal
block on the opposite side of the device. These contacts can be used as auxiliar
contacts, e.g., for connecting supply voltage to the relays.
WARNING
Do not connect power supply before connecting an antenna to RFM-C2 to
avoid the GSM module damage.
Do not connect any incompliant power supply to avoid electric accident or
system damage.
Inserire la SIM card nell’alloggiamento.
Accertarsi che i contatti della SIM siano rivolti verso il retro del dispositivo,
come mostrato in figura.
Spingere la SIM nel dispositivo fino al raggiungimento della sua posizione.
ATTENZIONE
Assicurarsi che il provider della SIM card fornisca un servizio GSM compatibile
con la versione dell’RFM-C2 utilizzata e che la trasmissione dati GPRS sia
correttamente attivata.
Assicurarsi che la SIM non richieda alcun PIN o che il PIN utilizzato sia identico
a quello impostato nella configurazione dell’RFM-C2.
Ricordarsi di verificare i servizi rilevanti della SIM e del provider (inoltro
chiamate, blocco chiamate, reti preferite APN ecc) prima di inserire la SIM
nell’RFM-C2.
Alimentazione
L’RFM-C2 è alimentato a 5–50 V DC. Assicurarsi che la tensione e la polarità siano
compatibili con i dati prescritti per il connettore dell’alimentazione dell’ RFM-C2
prima di connettere il Vs. RFM-C2 ad un alimentatore non incluso nella confezione.
Connettere l’alimentazione al connettore a due pin (Uin+, Uin-) a fianco del
connettore RS232. E’ inoltre possibile collegare un accumulatore al gel come
batteria di backup. La connessione a 10 pin per l’alimentazione è inoltre presente
nell’altro lato del dispositivo. Questi contatti possono essere utilizzati come
connessione ausiliaria, ad esempio per collegare l’alimentazione ai relé.
AVVERTENZA
Non connettere l’alimentazione al dispositivo prima di collegare l’antenna
RFM-C2 al fine di evitare danni al modulo GSM.
Non collegare sorgenti di alimentazione incompatibili al fine di evitare indicenti
elettrici e/o danni all’impianto.

RFM-C2 WMBUS – GPRS/Ethernet Gateway User Manual – Manuale d’Uso v1.1
pag. 13
SAFETY
Do not connect the batteries before making sure that the charger has a correct
voltage value or is off to avoid device damage and battery destruction!
3. Function and Use
In this section we provide the functions of the RFM-C2 and how to use it.
Here is what you can find in this section:
Putting in Operation
LED Indicator
Wireless M-Bus
3.1 Putting in Operation
Operational state (always on and alway listening) is RFM-C2’s main function. In this
state, the device responds to queries from the RFM-C2 server, monitors events on
the RS 232 / RS 485 / pulse inputs / M-Bus / Wireless M-Bus interfaces and sends
back the acquired data to the server via GPRS or Ethernet.
Initialisation
Insert the data SIM card in RFM-C2 and connect the GSM antenna, then power
supply as instructed in Subs. 2.3., Mounting.
AVVERTENZA DI SICUREZZA
Non collegare il pacco batterie prima di essersi assicurati che il caricatore
abbia una tensione corretta oppure che sia spento, al fine di evitare danni o
distruzione della batteria.
3. Funzionamento ed Utilizzo
In questa sezione vengono descritte le funzioni dell’RFM-C2 e come utilizzarlo.
Ecco cosa viene descritto:
Messa in Servizio;
Indicatore LED
Wireless MBUS
3.1 Messa in servizio
Lo stato „Operativo” (sempre attivo e sempre in ascolto) è la funzione principale
dell’RFM-C2. In questo stato, il dispositivo risponde alle richieste del Server RFM-
C2, monitora i consumi attraverso le interfacce RS 232 / RS 485 / impulsi / M-Bus /
Wireless M-Bus e re-invia i dati di lettura al server attraverso la rete GPRS o
Ethernet.
Installazione
Inserire la SIM card nell’RFM-C2 e collegare l’antenna GSM, poi collegare
l’alimentazione come descritto nel paragrafo 2.3 Montaggio.

RFM-C2 WMBUS – GPRS/Ethernet Gateway User Manual – Manuale d’Uso v1.1
pag. 14
When the RFM-C2 power supply is connected, the LED indicator on the upper side
of the module flashes three times quickly and then starts flashing in longer
intervals. Refer to Subs. 3.2. for LED status details. The GPRS module starts
communicating with the provider in about 10 seconds trying to log in and obtain
the IP address. The LED starts shining constantly to indicate a successful login.
TIP
RFM-C2 is working if the LED indicator is shining, thus indicating a successful
mobile provider connection and IP address assignment.
To identify the RFM-C2 IP address assigned by the mobile provider you just need
perform the basic configuration upon power up, get connected via the serial port
(RS 232).
TIP
For additional information on the RFM-C2 Configurator software use, see
subs. 4.1
Quando l’RFM-C2 è collegato alla rete elettrica, gli indicatori led sulla parte
superiore lampeggiano tre volte velocemente e poi iniziano a lampeggiare ad
intervalli più ampi. Fare riferimento al paragrafo 3.2 per i dettagli. Il modulo GPRS
inizia a comunicare col provider dopo 10 secondi di tentativi di collegamento e
ottenimento dell’IP. Il led rimane acceso per indicare l’avvenuto collegamento.
CONSIGLIO
L’RFM-C2 funziona se il LED è acceso, indicando così una connessione col
gestore di telefonia mobile e l'assegnazione dell’indirizzo IP.
Per identificare l’indirizzo IP assegnato dal provider, sarà sufficiente rilevare da
software la configurazione del dispositivo attraverso porta seriale (RS232), dopo
averlo alimentato.
CONSIGLIO
Per informazioni aggiuntive sull’uso del software RFM-C2 configurator, vedere
paragrafo 4.1

RFM-C2 WMBUS – GPRS/Ethernet Gateway User Manual – Manuale d’Uso v1.1
pag. 15
3.2 LED Indicator
Here the variable statuses of the wireless interface state indicating LEDs are
described. The first LED from the right (when viewed from the front, see the figure
below) indicates the GSM module state. The function of this LED is to signal
terminal connection to the GPRS network and RFM-C2 Server in the TCP client
mode.
3.2 Indicatore LED
Qui di seguito vengono descritti gli status variabili dei LED indicanti lo stato delle
interfacce wireless. Il primo LED da destra (se visto da davanti, vedere immagine di
seguito) indica lo stato del modulo GSM. Questo LED può avere ha la funzione di
segnalare la connessione del dispositivo alla rete GPRS e la comunicazione col
server in modalità TCP client.
Front Panel with LED Indicators
Pannello frontale con indicatori LED
1. NO LIGHT – POWER OFF – indicates that the 12V GPRS module power supply
is disconnected or has a malfunction or that the fuse is defective.
2. THREE QUICK FLASHES – START or RESTART – indicates the device
start/restart. This state must always be indicated upon power supply
connection.
3. SLOW FLASHING – INITIALISATION – indicates that the module is being
connected to the provider, IP network and RFM-C2 Server. If this happens
when the ETH activity is being monitored, the network is unavailable. The link
is missing, the cable is disconnected or interrupted between the device and
the nearest switch.
4. VERY QUICK FLASHING – ERROR - indicates an error state: wrong PIN, no SIM
card, etc.
5. ILLUMINATED – OK – RFM-C2 is connected to the provider, IP address is
1. LED spento – DISPOSITIVO SPENTO – indica che l’alimentazione 12V è
scollegata oppure presenta malfunzionamenti o un fusibile è difettoso.
2. TRE LAMPEGGI VELOCI – ACCENSIONE o RIAVVIO – indica l’avvio/riavvio del
dispositivo. Questo stato deve sempre indicato a seguito del collegamento
dell’alimentazione.
3. LAMPEGGI LENTI – INIZIALIZZAZIONE – Indica che il modulo si sta connettendo
al provider, al server RFM-C2 e sta ottenendo l’IP. Se ciò accade quando
l’attività Ehternet è monitorata, la rete non è disponibile. Il collegamento
potrebbe essere assente, il cavo disconnesso o interrotto tra il dispositivo e lo
switch più vicino.
4. LAMPEGGI MOLTO VELOCI – ERRORE – indica un errore nello stato: errato PIN,
nessun SIM card ecc.
5. ACCESO – OK – L’RFM-C2 si è collegato al provider, l’indirizzo IP è stato

RFM-C2 WMBUS – GPRS/Ethernet Gateway User Manual – Manuale d’Uso v1.1
pag. 16
assigned, server connection is established. A quick flash indicates data
transmission in this state.
The other LED from the left indicate the WMBUS module states.
The LED states are as follows:
1. NO LIGHT — POWER OFF – no power supply.
2. SLOW FLASHING — INITIALISATION - the module starts. This state is visible
upon power up only.
3. ILLUMINATED — OK - the module is ready, waiting for incoming data.
4. QUICK FLASHING — DATA - data transmission in progress. A short message
makes the LED flash very shortly.
3.3 Wireless M-Bus
Wireless M-Bus Interface
You can define up to 64 meters for which the device will collect readings. Having
received a WM-Bus message from a meter defined in the meter list, RFM-C2 will
store it into a circular buffer in the internal memory. The stored data can only be
retrieved and deleted starting from the oldest record. When the memory is full,
the oldest data will be deleted automatically to make space to new records. It is
then important to define the proper minimum reading time interval for each
meter. Any meter reading coming before the end of this interval will not be stored
on board.
The 868MHz WM-Bus module can work in four modes: T1, S1, C1 and T1+C. All B
METERS radio modules work according to T1 mode.
It supports encrypted messages too in all the modes. In the basic configuration,
the terminal does not decrypt messages and stores them as they are received.
Enter the correct encryption key and enable decryption to make the messages be
decrypted by the module and stored in the decrypted format in the terminal
memory. For security reasons, encryption keys are not stored in the memory, but
written directly into the module. Therefore, if decryption does not work, check the
device transmission and device settings in the terminal and re-enter the
encryption key.
assegnato e la connessione al server è stata stabilita. Un lampeggio veloce
indica la trasmissioni di dati in questo stato.
L’altro LED da sinistra indica lo status del modulo Wireless MBUS.
Gli stati del LED sono:
1. LED SPENTO – DISPOSITIVO SPENTO – nessuna alimentazione.
2. LAMPEGGI LENTI – INIZIALIZZAZIONE – Il modulo di accende. Questo stato è
visibile durante l’accensione soltanto.
3. ACCESO – OK – il modulo è pronto e in attesa di ricevere dati.
4. LAMPEGGI VELOCI – TRASMISSIONE DATI – trasmissione dati in corso. Un
messaggio farà lameggiare il LED molto brevemente.
3.3 Wireless M-Bus
Interfaccia Wireless M-BUS
E’ possibile impostare fino a 64 contatori per i quali il dispositivo raccoglierà le
letture. Dopo aver ricevuto un pacchetto WM-Bus da un contatore inserito in lista,
L’RFM-C2 lo salverà in un buffer nella memoria interna. I dati memorizzati possono
essere recuperati e cancellati a partire da i record più vecchi. Quando la memoria
sarà piena, i dati più vecchi verranno eliminati automaticamente per far spazio ai
nuovi record. E’ dunque importante impostare un adeguato intervallo minimo di
lettura per ogni contatore. Ogni lettura ricevuta prima della fine dell’intervallo non
verrà salvata a bordo.
Il modulo WM-Bus a 868MHz può funzionare in modalità T1, S1, C1 e T1+C. I moduli
radio B METERS funzionano tutti in modalità T1.
E’ supportata la criptatura dei dati in tutte le modalità. Nella configurazione base,
il dispositivo non decripta i messaggi e li memorizza così come vengono registrati.
Inserire la chiave di criptatura e abilitare la decriptatura per decodificare i
messaggi e memorizzarli nel dispositivo nel formato decriptato.
Per questioni di sicurezza, le chiavi di criptatura non vengono memorizzate nella
memoria interna, ma vengono scritte direttamente nel modulo. Perciò, se la
decodifica non dovesse funzionare correttamente, sarà necessario controllare le
impostazioni di trasmissione e del dispositivo e re-immettere la chiave.

RFM-C2 WMBUS – GPRS/Ethernet Gateway User Manual – Manuale d’Uso v1.1
pag. 17
4. Configuration
In this section we describe the RFM-C2 configuration.
Here is what you can find in this section:
Configuration by Software
4.1 Configuration by Software
The RFM-C2 Configurator software is used for basic configuration of the terminal.
This subsection provides details on its environment and basic functions. Launch
the application from the directory into which you installed it.
4. Configurazione
In questa sezione viene descritta la configurazione dell’RFM-C2.
Ecco cosa è possibile trovare:
Configurazione da Software
4.1 Configurazione con Software
Il software RFM-C2 Configurator viene utilizzato per la configurazione base del
dispositivo. Ciò che segue fornisce i dettagli sulle schermate e funzioni base.
Avviare il software dalla directory in cui è stato salvato.
Software Panel - Pannello del software

RFM-C2 WMBUS – GPRS/Ethernet Gateway User Manual – Manuale d’Uso v1.1
pag. 18
The figure above shows the RFM-C2 Terminal Configuration Program window. The
main toolbar helps you select the Serial port for connection to RFM-C2. This list
includes all available serial ports installed in the PC on which the application is
running.
La figura qui sopra mostra il pannello del software di configurazione dell’RFM-C2.
La barra degli strumenti aiuta a selezionare la porta COM per collegarsi all’RFM-
C2. Questa lista include tutte le porte COM disponibili e installate nel PC sul quale
il software è in esecuzione.
Communication Settings - Impostazioni comunicazione
Having selected a port, set the communication settings to adjust transmission
parameters for the serial port. The RFM-C2 factory values are set here by default.
Refer to the Communication Settings figure above.
No password is requested by default for the RS 232 port and so nothing has to be
filled in. Passwords may be different for different terminals. If a password is
requested, enter the password into the dialogue window displayed during the
connecting process. The last main toolbar button helps you Load configuration
from the terminal connected - the application gets connected and reads out all
relevant data directly from the device.
Dopo aver selezionato la porta corretta, settare tutte le impostazioni di
comunicazione per regolare i parametri di trasmissione seriale. I parametri di
default del dispositivo sono riportati nella figura qui sopra.
Di default non è richiesta password per la porta RS232, dunque non è necessario
compilare il campo. Le password possono essere diverse a seconda dei dispositivi.
Se viene richiesta una password, inserirla nella finestra di dialogo mostrata turante
il collegamento. L’ultimo pulsante della barra degli strumenti principale permette
di scaricare la configurazione impostata dal dispositivo collegato. Il software
dunque si collega e legge tutti i parametri direttamente dal dispositivo.

RFM-C2 WMBUS – GPRS/Ethernet Gateway User Manual – Manuale d’Uso v1.1
pag. 19
The State section displays the most important information on the given device.
The IP address, serial number, firmware version, logged-in provider and signal level
are displayed. The SIM ICCID (Integrated Circuit Card ID) is displayed, which is not
the SIM telephone number, but a unique SIM serial number.
Moreover, the section provides information on the GSM module: type,
manufacturer and firmware version.
The Parameters section helps you view and set parameters for the RFM-C2
terminals. Via the Options menu you can adjust communication parameters
and/or change the default language. The View section helps you disable/enable
the tabs.
La sezione Stato, mostra le informazioni principali del dispositivo.
Vengono mostrati l’indirizzo IP, il numero di serie, la versione firmware, il provider
e il segnale radio. Viene anche mostrato l’ICCID (Integrated Circuit Card ID) della
SIM, che non è il numero di telefono, ma un numero di serie univoco della scheda.
Inoltre la sezione fornisce informazioni sul modulo GSM: tipo, produttore e versione
firmware.
La sezione Parametri permette di vedere e impostare i parametri del dispositivo
RFM-C2. Attraverso il menu opzioni è possibile configurare i parametri di
comunicazione e cambiare la lingua di default. La sezione vista permette di
disabilitare/abilitare tutte le schermate.
View Menu
Vista menu

RFM-C2 WMBUS – GPRS/Ethernet Gateway User Manual – Manuale d’Uso v1.1
pag. 20
Use of Application – Utilizzo dell’Applicazione
General Menu
General Menu
Menu principale
Here you can set all parameters comfortably, i.e. GSM commands parameters.
Push Save to save the values. Push Save and restart to apply the changes
immediately.
Set the mode (TCP client) from the drop down menu, APN (and user/password if
required), then check the RFM-C2 server IP, port and device password.
Da qui è possibile impostare agilmente tutti i parametri, ad esempio i comandi
GSM. Premere il pulsante Salva per salvare i valori. Premere il pulsante Salva e
Riavvia per applicare le modifiche immediatamente.
Impostare la modalità (TCP client) dal menu a tendina, APN (e user/password se
richiesti), poi controllare l’IP e la porta del server RFM-C2 e la password del
dispositivo.
Table of contents
Other B meters Gateway manuals
