manuals.online logo
Brands
  1. Home
  2. •
  3. Brands
  4. •
  5. Babel Buster
  6. •
  7. Gateway
  8. •
  9. Babel Buster X2 User manual

Babel Buster X2 User manual

User Guide for Babel Buster X2 and IP/XL
Control Solutions’ earliest gateways were non-web based, e.g. twisted pair only. User
guides many pages long were written about them. Technical support questions seemed to
suggest it was too much reading for most. Therefore, when we came out with web based
gateways, we thought it would be a good idea to put the user guide online within the device
itself. With online documentation available, we thought hard copy was unnecessary and
wasteful, so gateways like Babel Buster X2 and IP/XL had no printed user guide.
The user guide information can still be found in the web pages within the gateways
themselves and there never was a formal printed user guide for either the X2 or IP/XL.
From time to time, we created supplemental online user guides intended to augment the
pages found in the device itself. Configuring LonWorks is one topic that had extra web
pages at csimn.com; however, some years after the X2 and IP/XL were discontinued, those
pages got removed from our web site. That content has been recovered and reprinted here.
The Babel Buster IP/XL did not have the information in this document replicated for that
model in part because it is largely the same. The only difference between configuring X2
and IP/XL is that on X2 you reference Modbus registers and on IP/XL you reference BACnet
objects. But the LonWorks part is all the same.
Use of the XIF to CSV conversion utility is optional. If you choose to use that utility, it is still
available in the Legacy section of our Library page. There are two versions, one for X2 and
one for IP/XL.
Configuring the Babel Buster X2
The primary function of X2 is mapping LonWorks network variables to Modbus registers, and
do this without "binding" or network management on the LonWorks side. In the short series
of pages that follows, we will look at the sequence of actions required to "learn" a LonWorks
device and map some of its data.
When you first log into Babel Buster X2, the home or index page that appears will look like
the image below. Start by clicking the I/O Devices tab. You will be asked for a user name
and password. As shipped, the default user name is "system" and its password is "admin".
NOTE: The LonWorks interface has been rewritten as of July 2008 to provide support for
structured SNVT's. The upgrade includes a requirement to re-program the Neuron Chip, and
its application has a different program interface. This means you must have LonMaker in
order to do a field upgrade to v2.81 or higher from v2.57 or lower. The discussion on pages
that follow apply to the new v2.81 interface.
The default page that comes up when you click on the I/O Devices tab is the LonWorks
LON data tab. This page will display nothing until at least one device is configured into X2.
Click on the LON Devices tab next.
The LON Devices page shows a list of all of the presently known devices. When first
configuring the X2, this page will start with an empty list.
The devices are numbered. The device number is a link to detailed information about that
device. Click on the number one next.
The LON Device expands out to the detail shown below when a device number is clicked. At
first this page is also empty. You will go through a series of 4 steps to get the page
populated as shown below. In this example, we are "learning" about an AddMe II.
Step 1: Click the "Get Service Pin" button. Node status will show "Waiting for service pin."
Now press the service button (or install button) on the device you want to learn. Click the
Update button, and status will return to "ok" if the message was received. In addition,
Neuron ID and Program ID will now have non-zero numbers. (If you don't have physical
access to the device but do know its Neuron ID, you can type it into the list on the
LON Devices page.)
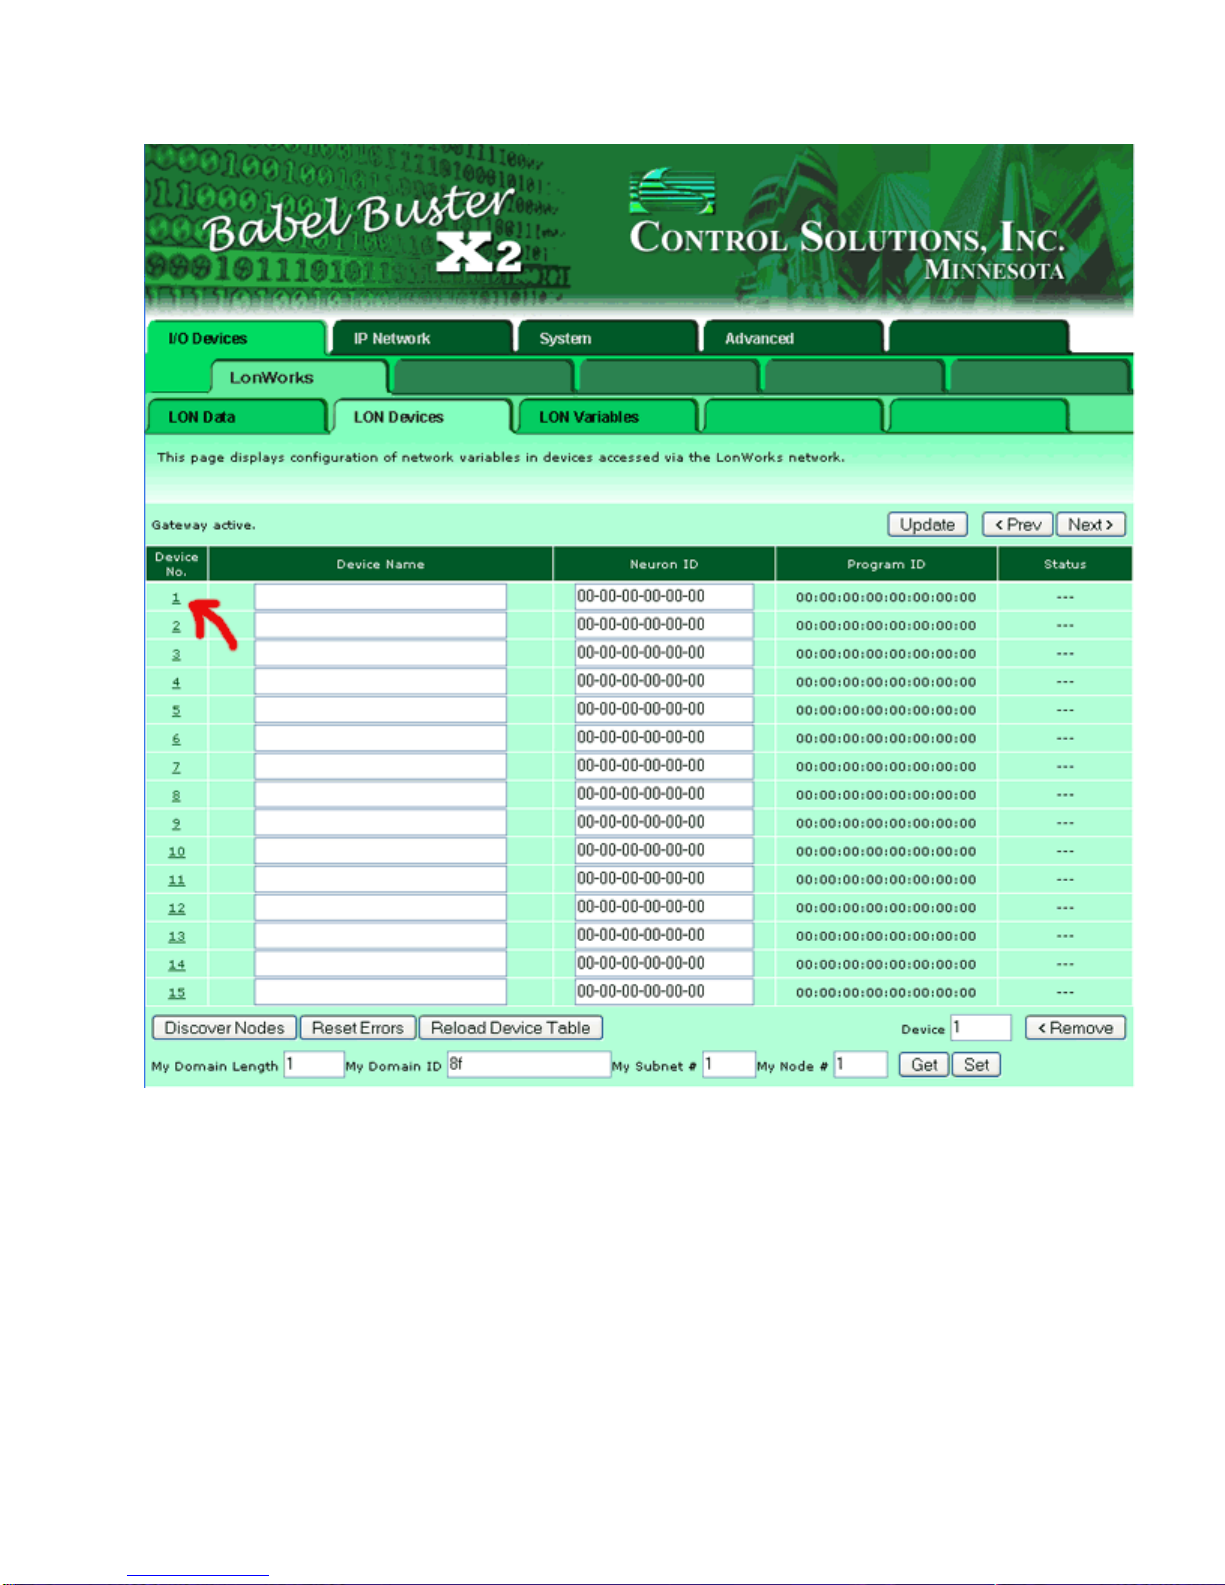
Step 2: Click the "Auto Config" button. This will reconfigure the device to be on the same
domain and subnet as X2 and also assign the next sequential node number. You find the
X2's domain and subnet at the bottom of the devices page (click Previous below). If you
want to set an explicit subnet and node, enter the values and click "Set Config".
WARNING: Using "Set Config" or "Auto Config" will break any network
connections previously put there by a system integrator. If you are adding X2 to a
managed network, you must install the X2 as a node on that network to force X2
onto the existing domain, then ONLY use "Get Config" to cause X2 to learn where
the devices are.
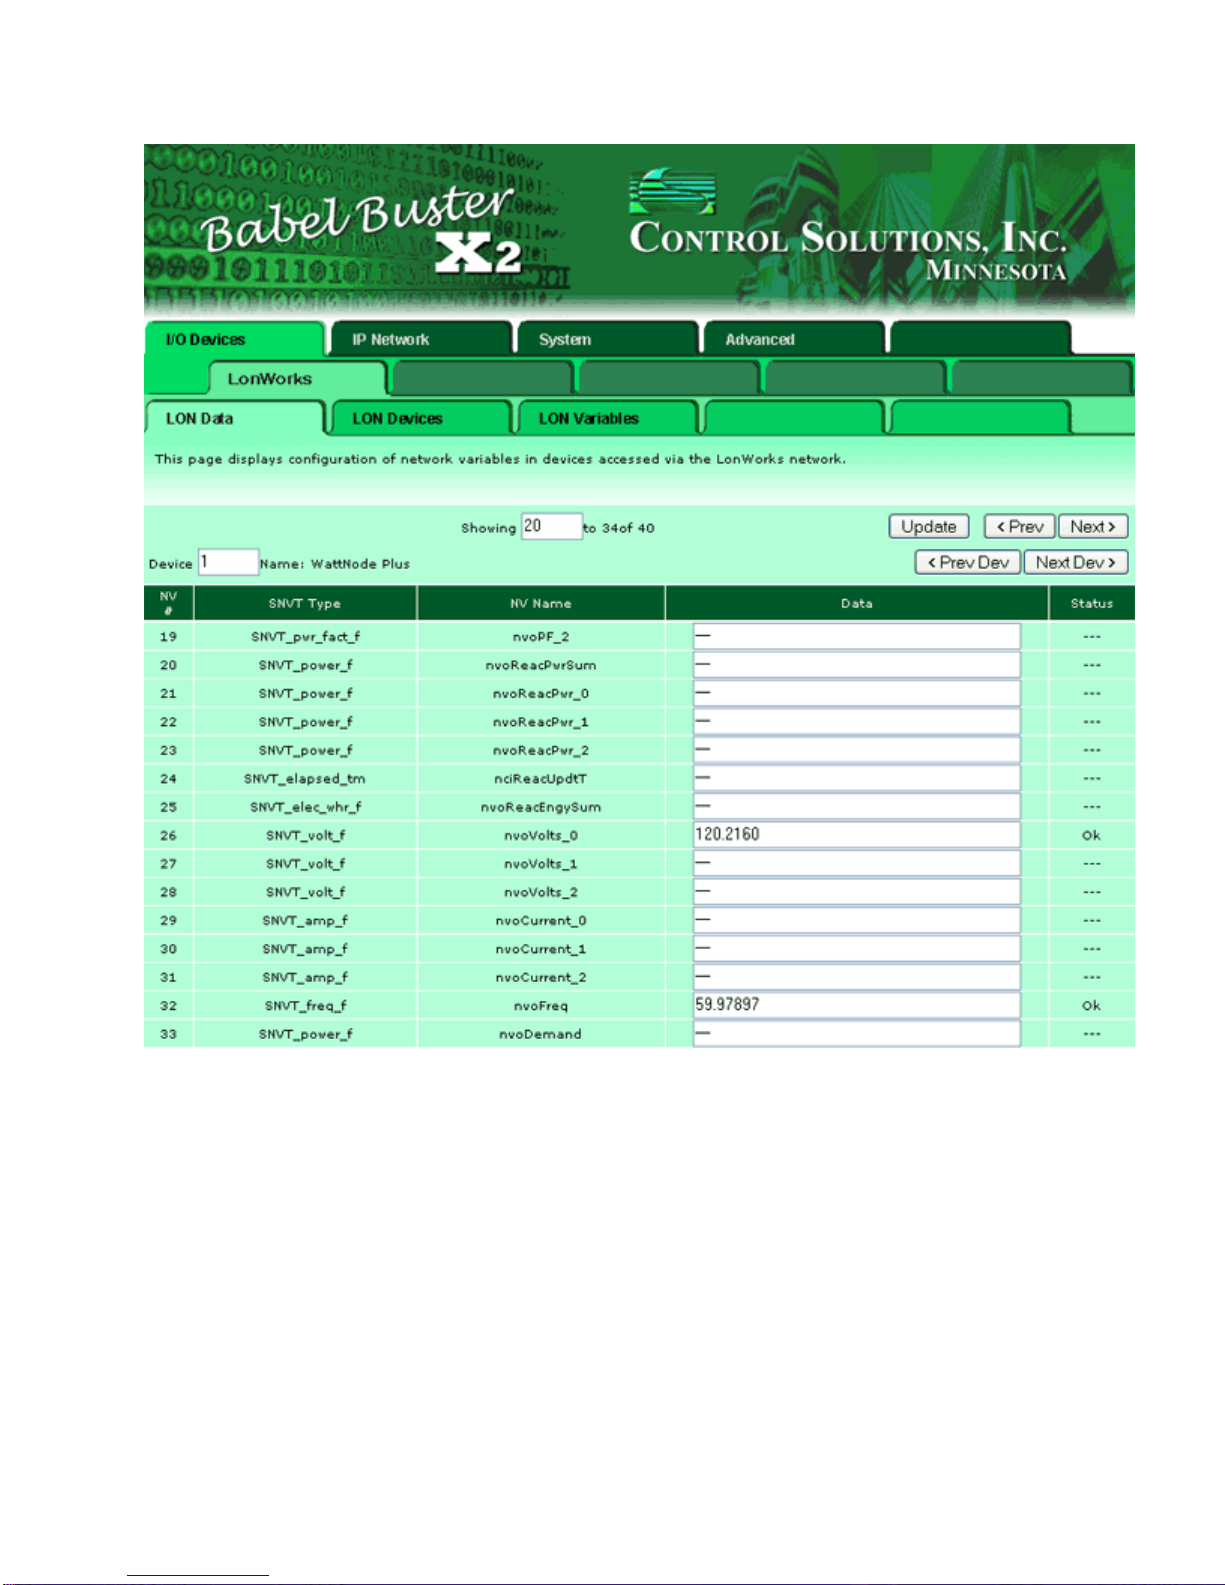
Step 3: Click the "Get XIF from Device" button. This process will take a minute or two.
(Note: Devices having more than the standard set of 62 network variables are not currently
supported by Babel Buster X2.) During the import, the status will indicate "Importing XIF",
and will indicate "XIF Import Done" when finished. Click the Update button to refresh this
status.
The purpose of the XIF import is to "learn" what network variables are in the LonWorks
device. If you wish to preconfigure an X2 without being connected to the LonWorks device,
you can upload its XIF file if you have that.
NOTE: The X2 is not able to import the XIF form a device which has structured network
variables. If the status comes back "Cannot import XIF" you will need to obtain the XIF file
and upload it to the X2.
You may also use the external (free) utility from Control Solutions that converts the XIF to a
CSV file, then upload the CSV file instead. The advantage of using the CSV is that you can
insert as many rows as needed to read structured UNVT's.
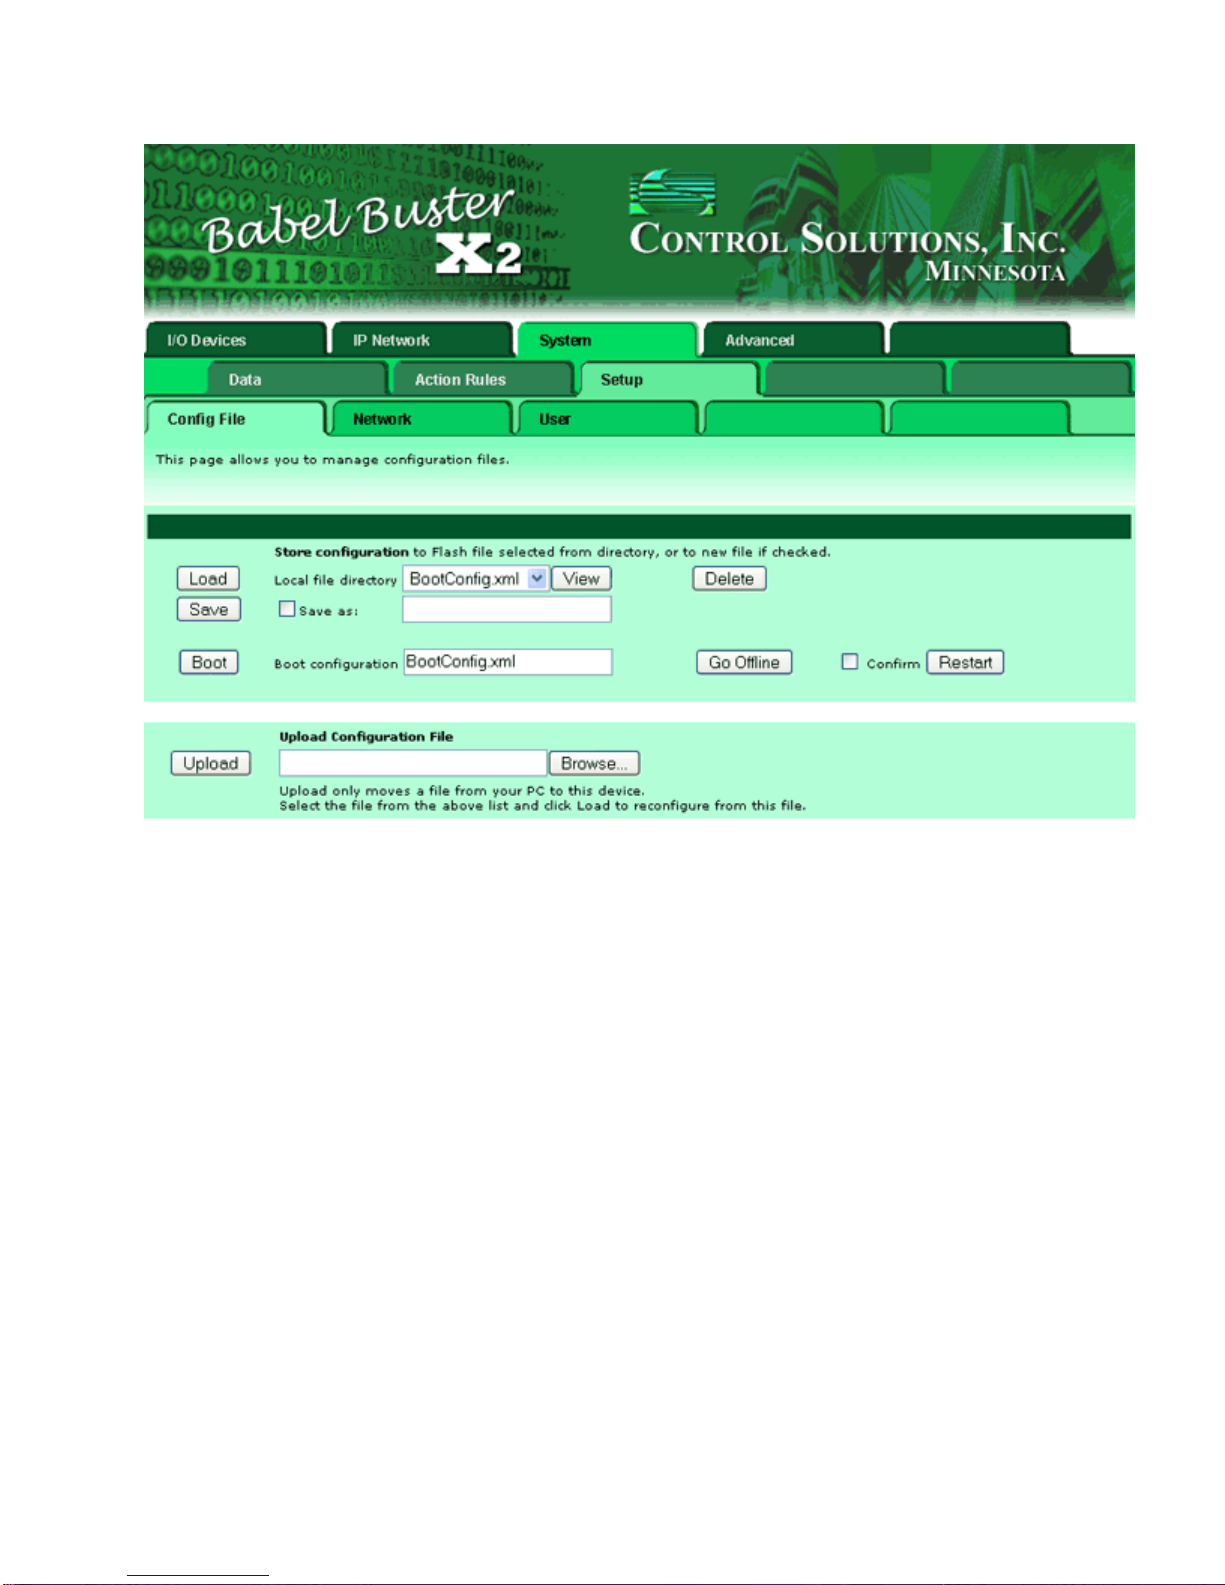
Step 4: (optional) Enter a name for this device and click Update to register it. Once
everything has been entered and/or learned, be sure to go to the System->Setup->Config
File page and click the Save button.
Once you have done these steps and successfully imported the XIF, click on the
LON Variables tab. (The NV count will be nonzero once the XIF import is done.)
The LON Variables page lists the network variables found in the device just learned. Initially
all of the check boxes will be unchecked, and the register number boxes will be
empty (contain zero). This is where you choose which variables you will map to which local
registers.
Start by clicking the check boxes to select the variables you want mapped. You may then
click the "Auto Allocate" button to have X2 pick registers for you. It will pick floating point or
integer registers based on what the variable type is inside the LonWorks device. You can
select registers manually if desired.
Once you have completed these steps, the variables are now mapped. Our over simplified
example below shows that we are only going to retrieve a single phase of volts, plus
frequency, from a WattNode Plus. Assuming the device is connected, you are now polling for
data. Click on the LON Data tab to go look at the data.
We return to the LON Data page, and this time it should mean something. The data is listed
on this page according to network variable position in the respective LonWorks device.
Assuming you see data as illustrated in the first screen shot below, you will also see the
data shown in the second screen shot, which you get to by clicking the System tab.
You should now save your configuration, which will include the device and network variable
mapping information. Go to the Config File page and click Save.
When you return to the X2 after a restart, or after reloading the configuration file by clicking
Load on the page above, you will now only see those variables that have been mapped for a
given device as illustrated in the examples below. If you want to retrieve the entire variable
list to map additional variables not originally included, you will need to re-import the XIF
file.
Version v2.81 of the Babel Buster X2 supports structured SNVT's. When an XIF file is
imported which includes structures, the total "NV count" is really a count of data fields in
the NV's. The example below, showing a Trane chiller, has a total of 119 data fields that can
potentially be mapped to Modbus registers.
Structured SNVT's will show up as a series of Raw NV's, consisting of the various fields of
the structure broken down into their component parts. The item at NV index 31 in the
example below is a SNVT_chlr_status type variable.
You may click on the NV index, which is a link, to look at the details of any NV on the list
above. Clicking on the instance of "31" in front of "nvoChillerStat.Limited" brings us to the
page shown below. The Group check box means this entry in the list is a member of a
structure that must be read along with its other members.
XIF to CSV conversion
An alternative to manipulating NV to register mapping via the web interface is to convert
the XIF to a CSV file, then use your standard spread sheet software to manipulate the
spread sheet. Once you have done all of the necessary editing of the CSV file, you can
upload that to the X2 in place of an XIF file.
To begin with, you need to obtain a copy of the XIF file for the LonWorks device you are
going to integrate. If you do not have a copy, you can export it from the device itself using
the Nodeutil.exe tool available for free download at www.echelon.com.
The first step is to convert the XIF file to a CSV file. The purpose of this intermediate step is
to allow you to review the mapping in "bulk" form using Excel or equivalent spread sheet
program.
Open a command prompt (start->Programs->Accessories->Command Prompt) and type in
this command:
xif2csvX2 mynode.xif
where "mynode.xif" is the XIF file for your LonWorks device. If the XIF file is not in the
same directory as the program, you will need to provide the full path. The program will
create a new file named <file>.csv where <file> is the name of the original file excluding
suffix. In the above example, we would get mynode.csv.
At this point, you should open the csv file and make any changes you want. The file will look
like the example below if the XIF for WattNode Plus is processed. Editing this CSV file can
be an in-depth exercise, and is described here.
CSV File Editing
Do you need to do any editing?
Note the Y or N under the Enable column. If "Y", this object will be included. If "N", this
object will be excluded. Certain things found in a LonWorks device are not suitable for
mapping to a BACnet object, such as nvoFileDirectory commonly found in most devices (it is
a pointer to LonWorks configuration properties, and these are not accessible from BACnet.)
If you do not need the network variable listed, replace Y with N. If you believe you want a
variable that defaulted to N, determine whether you can appropriately interpret that value
as a BACnet object before changing it to Y. DO NOT change NVindex or Direction. A
mismatch here will cause unpredictable results, including failure to communicate.
All scalar network variable types will have their conversion recognized automatically by
Babel Buster X2. The term "scalar" means it is a single data element, such as integer,
floating point, enumeration, etc. Some network variables are structures, meaning a single
"network variable" contains several data elements. These structures are mapped to multiple
Modbus registers and require explicit interpretation using the fields in the 7 columns
following the SNVTindex (which is set to 0 for a structure). More detail about this follows
below.
The NV name is taken from the XIF file, and this will be shown as the register name in the
Babel Buster X2. You may change this to any name that is meaningful to you, and it may be
up to 40 characters in length.
Line 1: Program ID for this device. There can be only one SPID in the CSV file and it must
be on line 1. If you intend to map multiple devices in a single gateway, create one CSV per
device.
Line 2: Comment line with labels, skipped (line 2 skipped regardless of content).
Lines 3-N: One or more lines per network variable mapping the variables to BACnet objects.
Each line represents one BACnet object whose type is shown in the first column.
Column 1 (NV index): This is the network variable index as defined by LonWorks protocol,
and will be found in the XIF file or manufacturer's documentation. You will have no need to
edit this column unless creating a device manually.
Column 2 (Direction): The direction here refers to direction as defined at the remote
LonWorks node. NVO is network variable output, meaning we can read this data. NVI is
network variable input, meaning we can write this data. Direction will be found in the XIF
file and MUST NOT be changed. Communication failure will result if direction is incorrect.
Column 3 (SNVT index): This is the Standard Network Variable Type as published in
LonWorks standards. Manufacturer defined network variables will translate to SNVT index
zero and must be interpreted as raw data. If a Manufacturer defined NV type is really a
renamed standard type, you can enter the standard type code here. (Note: You can
download a pdf file containing a complete definition of all network variable types at
www.lonmark.org. You WILL need this document to do anything more than the default
mapping created for you by xif2csvX2.exe. Due to copyright restrictions, we cannot provide
it for you.)
Column 4 (Raw type): When parsing a structured variable into multiple Modbus registers,
this field specifies the raw data type found in the respective field of the structure. These are
the enumerated NVT_CAT types (found in the enumeration section of the pdf document
mentioned above).
Column 5 (Offset): Structured variables are multiple bytes in length. This column provides
the byte offset from the first byte of the structure where this field or object is found.
Column 6 (Bit offset): Some structured variables treat individual bits as data elements, and
often there is a set of multiple bits in such a structure. The Offset column is used to access
the correct byte. The Bit offset is used to specify which bit this object refers to. Bit offsets
are 0..7 bit positions from the left (MSB of byte). To reiterate, a bit offset of 0 will result in
a byte mask of 0x80. Keep in mind that LonWorks SNVT bit structure definitions identify "bit
1" as the left most bit.
Columns 7, 8, 9 (Scale): These are the scale factors A, B, and C whose usage is as defined
for standard network variable types (see note about pdf file available above).
Column 10 (Group): This column flags the respective line as being a member of a "group"
or structured network variable. When the group flag is set, the gateway sees that it needs
to process multiple maps to arrive at a complete network variable for transmission on the
LonWorks network. This is especially important when writing a network variable to a
LonWorks device - all fields must be transmitted together.
Column 11 (Lock): This flag is only used in conjunction with the Group flag. When multiple
Modbus registers are mapped to a single network variable that will be written to the
LonWorks device, you have the option of that variable being updated when any member of
the structure is written from Modbus (default). You also have the option of causing the
entire structure to be updated ONLY when a certain member of the structure is updated. Set
the Lock field to 1 to indicate which member of a group is the Lock field. The structure will
only be written when this single Lock field is updated. This allows all Modbus registers to be
updated before the Lock object to result in a completely synchronous update. Do not set
more than one Lock field per group as this will defeat the purpose.
Column 12 (NV name): Originally taken from the XIF file, this can be edited to your liking,
and shows up as the Modbus register name stored in the gateway.


Popular Gateway manuals by other brands

ZyXEL Communications P-661HNU-FX quick start guide

ZyXEL Communications

ZyXEL Communications P-661HNU-FX quick start guide

PEHA 940/16 MLS-G Installation and operating instructions

PEHA

PEHA 940/16 MLS-G Installation and operating instructions

LPN Plant lpnGate LoRaWAN manual

LPN Plant

LPN Plant lpnGate LoRaWAN manual

CONTROL SOLUTIONS Babel Buster 2 quick start guide

CONTROL SOLUTIONS

CONTROL SOLUTIONS Babel Buster 2 quick start guide

CARLO GAVAZZI SIUTCP2 Installation and operation manual

CARLO GAVAZZI

CARLO GAVAZZI SIUTCP2 Installation and operation manual

Philio PSC05 manual

Philio

Philio PSC05 manual

Nice FIBARO YH-001 user manual

Nice

Nice FIBARO YH-001 user manual

Synway SMG1002-2S installation manual

Synway

Synway SMG1002-2S installation manual

Enterasys Aurorean ANG-3000 Application note

Enterasys

Enterasys Aurorean ANG-3000 Application note

Patton SmartNode SN5550 user manual

Patton

Patton SmartNode SN5550 user manual

Wintec WW-5D20 Connection guide

Wintec

Wintec WW-5D20 Connection guide

ZyXEL Communications ZyAIR G-4100 user guide

ZyXEL Communications

ZyXEL Communications ZyAIR G-4100 user guide

SMC Networks LEC-GMJ2 Series instruction manual

SMC Networks

SMC Networks LEC-GMJ2 Series instruction manual

Simple PGHFD1 owner's manual

Simple

Simple PGHFD1 owner's manual

Billion SG6200NXL quick start guide

Billion

Billion SG6200NXL quick start guide

Vega BS-1 user manual

Vega

Vega BS-1 user manual

Honeywell W8735G installation instructions

Honeywell

Honeywell W8735G installation instructions

Mediatrix 1102 Administration manual

Mediatrix

Mediatrix 1102 Administration manual

manuals.online logo
manuals.online logoBrands
  • About & Mission
  • Contact us
  • Privacy Policy
  • Terms and Conditions

Copyright 2025 Manuals.Online. All Rights Reserved.