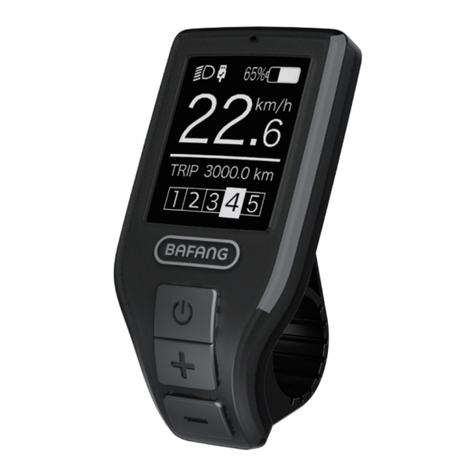
BAFANG DP C230.CAN User manual

1
DISPLAY MANUAL DP C230.CAN
CONTENT
Content 1
Introduction 2
Overview drawing 3
Specifications 4
Functions overview 5
Normal indication area 6
Button definition 7
Normal operation 8
Functions setting 11
BESST connection 15
Error code definition 16
Installation 17
DP C230.CAN
CONTENT

2DISPLAY MANUAL DP C230.CAN
INTRODUCTION
• Name: Intelligent display
• Model: DP C230.CAN
• Scope: EN15194 electrical power assistance
cycle
• Appearance: Black ABS housing body, acrylic
top cover, silicon rubber button.
• Number rule on the back of the display
Number on the middle of display back,
number is divided into two lines:
A. Up line (as below)
DP C230.C 1.0
①DP C230.C: BAFANG display mode
②1.0: Hardware version number
B. Down line (as below)
607K1R7280001
①607: Wire length and connector model
is 750mm M5.2
②K1: Internal identity number
③Q7280001: Production date is
28st July, 2016; SN is 0001
• Display P type wire label number rule:
Number on the middle of P type label, num-
ber is divided into up row and down row
and QR code is at right side (as shown in the
below figure)
Content of QR code:
DPC230K10101.1
PD2526051205
DP C230.C 1.0
607K1Q7280001
The first line:
DPC230K10101.1 - Software version
The second line:
PD2526051205 - Parameter code
The last two lines:
DP C230.C 1.0 / 607K1Q7280001 - SN

3
DISPLAY MANUAL DP C230.CAN
OVERVIEW DRAWING
OVERVIEW DRAWING

4DISPLAY MANUAL DP C230.CAN
SPECIFICATIONS
• Rated voltage: 36V/43V/48V DC
• Rated current: 10mA
• Maximum operating current: 30mA
• Power-off leakage current: <1uA
• Operating current supplied to controller:
50mA
• Operation temperature: -20℃~45℃
• Storage temperature: -30℃~70℃
• IP level: IP65
• Storage ambient humidity: 30%-70%

5
DISPLAY MANUAL DP C230.CAN
FUNCTIONS OVERVIEW
• Intelligent battery capacity indication.
• Indication for power assistance level.
• Speed indication (Includes maximum speed,
average speed, unit switch between km and
mile)
• Indication for motor output power.
• Trip indication (Includes single-trip distance,
total distance and remaining distance)
• Control and indication for push assistance.
• Control and indication for the headlight.
• Check the battery data.
• Record and indication for the error informa-
tion.
• Indication for the consumption of energy
CALORIES. (Note: If the display has this
function)
• Indication for the remaining distance.(Note:
If the display has this function)
• Dual Bluetooth integreted.
• USB charging port: ≤1A.
FUNCTIONS OVERVIEW

6DISPLAY MANUAL DP C230.CAN
NORMAL INDICATION AREA
1 2
3
6
5
4
1Headlight indication:
Indicate the working status of headlight.
2USB connection indication:
Indicate the status of USB connection to
peripheral device.
3Battery capacity indication:
Indicate the current remaining capacity.
4Real-time speed indication:
To indicate the real-time speed.
5Multiple data indication:
To indicate single (TRIP), Total range (ODO),
max speed (MAX), average speed (AVG),
remaining distance(RANGE), output power
(POWER), energy consumption(Cal), riding
time(TIME). (Notice: Calory data will only
come out when the display recognize the
sensor as torque sensor or the signal of
torque in 10s after switch on. Remaining
distance will only come out when the display
get the data of range.)
6Assistance level indication:
To indicate the current support level, this dis-
play has 0/1/2/3/4/5 mode, the chosen level
will be indicated in amplifying and reverse
color Arabic number; No chosen level indica-
tion means level 0, no power assistance,
means push assistance mode.

7
DISPLAY MANUAL DP C230.CAN
BUTTON DEFINITION
Up
Down
ON/OFF, Mode
BUTTON DEFINITION

8DISPLAY MANUAL DP C230.CAN
NORMAL OPERATION
“Press and hold” means press and hold for
more than two seconds, briefly press means
press for less than 0.5 second.
• ON/OFF:
Press and hold” ON/OFF” button, then
display is working and offering power to
controller; On the contrary, press and hold
this button,then display is off and the cur-
rent consumption is less than 1uA .
Welcome interface
• Power assistance level switch:
After switching on the display, briefly press
”+” or ”-” to switch the level to change the
assistance output power. The weakest level
is 0, the most powerful level is 5. When the
display is on, the default mode is level 1,
here “0” means no power assistance. (as
shown in the figure below)
• Headlight/Display backlight switch:
Press and hold ”+” to turn on the display
backlight as well as headlight, this moment
you will see the symbol of headlight in the
screen; On the contrary, press and hold ”+”
again to turn off the display backlight and
the headlight (If the display is turned on in
a dark environment, the display backlight/
headlight are turned off manually, they also
need to be turned on manually afterwards).
Interface of headlight and backlight
• Push assistance mode:
Press and hold ”-” button to enter into
push assistance mode, the symbol is
displayed, when release ”-” button, will exit
the push assistance mode and go back to
the current assistance level.
Push assistance function
9
DISPLAY MANUAL DP C230.CAN
NORMAL OPERATION
• Multiple function interfaces switch:
Briefly press ”ON/OFF” button to switch to different data interfaces, then circularly to show single
trip distance (Trip,km) → total distance (ODO,km) → maximum speed (MAX,km/h) → average speed
(AVG,km/h) → remaining distance (RANGE,km) → energy consumption (CALORIES/CAL,KCal) → real-
time output power (POWER,w) → riding time (TIME,min).

10 DISPLAY MANUAL DP C230.CAN
• Battery capacity indication:
The battery remaining capacity will be indi-
cated as the exact percentage, in addition,
the frame of the symbol will flash at 1Hz
when capacity is less than 5%, means the
battery needs to be charged.
• USB charging:
Plug the USB cable to display and smart
peripheral devices to charge,but the display
must be switched on.(≤5V, ≤1A)
USB charging indication
• Bluetooth connection:
①This display has Bluetooth module inte-
grated and connectable to BAFANG’s own
smart phone application “BAFANG GO”. In
addition, the SDK is open for customer to
develop APP individually.
②This display is also connectable to the
chest belt and catch real-time heart beat
data from the chest belt and display it and
send the data to smart phone.
③The list of data transmit from display to
smartphone as below:
Item Data
1 Speed
2 Capacity
3 Support level
4 Data of battery
5 Output of sensors
6 Remaining range
7 Calory
8 Component info.
9 Current
10 Heart beat
11 Trip
12 ODO
13 Headlight status
14 Error code

11
DISPLAY MANUAL DP C230.CAN
FUNCTIONS SETTING
FUNCTIONS SETTING
• Data review and Setting
EXIT
SETTING
Display Setting
sSetting
Information
BACK
Speed Limit
Battery info.
Error Code
Wheel
Brightness
Default Mode
TRIP Reset
Unit
Sensitivity
Auto Off
Vibration
BACK
Press and hold “+” & “-” button synchronously to enter into Display Setting interface, and briefly press
“+” or “-” to switch to from “Setting” to “EXIT“ and then briefly press “ON/OFF” button to confirm the
operation.
Interface for selection Setting menu “Information”review

12 DISPLAY MANUAL DP C230.CAN
• Trip reset - to clear the single trip
distance
Briefly press “+” or “-” to go to “TRIP Reset”,
and then briefly press ”ON/OFF” to switch
between ”NO”/“YES” (“YES”-to clear, “NO”-
no operation), then briefly press ”ON/OFF”
to confirm selection; After confirmation,
briefly press ”ON/OFF” again to save the set-
ting and exit back to the ”TRIP Reset”. Press
and hold “+” and “-” synchronously to save
and exit back to the main interface, or you
can also select “BACK” →“EXIT” to exit back
to the main interface.
Notice:The riding time (TIME), average speed
(AVG) and maximum speed (MAXS) will be
reset simultaneously when you reset TRIP.
• “Unit”- unit switch between km/mile
Briefly press “+” or “-” to go to “UNIT”,
and then briefly press ”ON/OFF” to switch
between “Metric”/“Imperial”, then briefly
press ”ON/OFF” to confirm selection and
save the setting and exit back to the“UNIT”.
Press and hold “+” and “-” synchronously to
save and exit back to the main interface, or
you can also select “BACK” →“EXIT”to exit
back to the main interface.
• Light sensitivity setting
Briefly press “+” or “-” to go to “Sensitivity”,
and then briefly press ”ON/OFF” to select
among“0”/ “1”/“2”/“3”/“4”/“5” five levels,
then briefly press ”ON/OFF” to confirm
selection and save the setting and exit back
to the “Sensitivity”. Press and hold “+” and
“-” synchronously to save and exit back to
the main interface, or you can also select
“BACK” →“EXIT” to exit back to the main
interface.
Notice: “0” means light sensor is off. Level
1 is the weakest sensitivity and level 5 is the
strongest sensitivity.
• Brightness setting
Briefly press “+” or “-” to go to “Brightness”,
and then briefly press ”ON/OFF” to select
among “100%”/“75%”/“50%”/“30%”/
“10%”five levels, then briefly press ”ON/
OFF” to confirm selection and save the set-
ting and exit back to the “Brightness”. Press
and hold “+” and “-” synchronously to save
and exit back to the main interface, or you
can also select “BACK” →“EXIT” to exit back
to the main interface.
Notice: “10%” is the weakest brightness and
100%” is the strongest brightness.

13
DISPLAY MANUAL DP C230.CAN
FUNCTIONS SETTING
• Auto Off
Briefly press “+” or “-” to go to “Auto Off”,
and then briefly press ”ON/OFF” to select
among “OFF”/“9”/“8”/“7”/“6”/“5”/“4”/“3”/“
2”/“1”ten levels, then briefly press ”ON/OFF”
to confirm selection and save the setting and
exit back to the “Auto Off”. Press and hold
“+” and “-” synchronously to save and exit
back to the main interface, or you can also
select “BACK” →“EXIT” to exit back to the
main interface.
Notice: “OFF” means this function is off, the
unit is minute.
• Vibration setting
Briefly press “+” or “-” to go to “Vibration”,
and then briefly press ”ON/OFF” to select
between ON and OFF (ON means vibration
button is on; OFF means vibration button is
off), then briefly press ”ON/OFF” to confirm
selection and save the setting and exit back
to the“Vibration”. Press and hold “+” and
“-” synchronously to save and exit back to
the main interface, or you can also select
“BACK” → “EXIT” to exit back to the main
interface.
• Wheel size review
After entering into “Information” menu,
then briefly press “+” or “-” to go to ” Wheel
Size”, and then briefly press ”ON/OFF” to
review the wheel size default, then briefly
press ”ON/OFF” to exit back to the “Wheel
Size”. Press and hold “+” and “-” synchro-
nously to exit back to the main interface, or
you can also select “BACK” → “EXIT” to exit
back to the main interface.
• Speed limit review
After entering into “Information” menu,
then briefly press “+” or “-” to go to ” Speed
Limit”, and then briefly press ”ON/OFF” to
review the speed limit default, hen briefly
press ”ON/OFF” to exit back to the “Speed
Limit”. Press and hold “+” and “-” synchro-
nously to exit back to the main interface, or
you can also select “BACK” → “EXIT”to exit
back to the main interface.
• Check record of error code
After entering into “Information” menu,
then briefly press “+” or “-” to go to ” Error
Code”, and then briefly press ”ON/OFF” to
review the last ten error codes record from
“E-Code0” to “E-Code9”, then briefly press

14 DISPLAY MANUAL DP C230.CAN
”ON/OFF” to exit back to the “Information”.
Press and hold “+” and “-” synchronously to
save and exit back to the main interface, or
you can also select “BACK” → “EXIT”to exit
back to the main interface.
• Battery data review
After entering into “Information” menu,
then briefly press “+” or “-” to go to “Battery
Info.”, and then briefly press ”ON/OFF” to
enter, then briefly press “+” to review the
battery data from b01 → b04 → b06 → b07 →
b08 → b09 → b10 → b11 → b12 → b13 → d00
→ d01 → d02 → … → dn, then briefly press
”ON/OFF” to exit back to the “Battery Info.”.
Press and hold “+” and “-” synchronously to
save and exit back to the main interface, or
you can also select “BACK” → “EXIT” to exit
back to the main interface.
Notice: If the the battery is not a smart bat-
tery, you won’t see any data from battery.
Code Code definition unit
b01 Current temperature ℃
b04 Total voltage V
b06 Average current A
b07 Remaining capacity Ah
b08 Full charge capacity Ah
b09 Relative SOC %
b10 Absolute SOC %
b11 Cycle times
b12 Maximum not charg-
ing time Hour
b13 Recently not charging
time Hour
d00 Cell quantity
d01 Voltage of cell 1 V
d02 Voltage of cell 2 V
… … V
dn Voltage of cell n V

15
DISPLAY MANUAL DP C230.CAN
BESST CONNECTION
BESST CONNECTION
• If it is successful for display to connect to
BESST BOX, the display will show: “Con-
nected OK!”.
• If the display show “Read OK!”, it means it is
successful for BESST BOX to read informa-
tion from the display. The information
includes customer’s number, display type,
wheel size, speed limit, software number
and hardware number.
• If the display show ”Write OK”, it means it
is successful for BESST BOX to write basic
information into the display. The informa-
tion includes customer’s number, wheel size,
speed limit.
• When writing SN, if the display show “Write
OK!”, it means it is successful for BESST BOX
to write SN into the display.
• When reading SN, if the display show “Read
OK”, it means it is successful for BESST BOX
to read SN from the display.
• If the display enters into test mode, it will
switch to normal operation interface.
• Firmware update.

16 DISPLAY MANUAL DP C230.CAN
ERROR CODE DEFINITION
DP C230.CAN display can show e-bike faults. When a fault is detected, the icon will be displayed. One of the
following error codes will be displayed.
Error Explanation Troubleshooting
03 Brakes enabled Check whether a brake cable is stuck.
07 High voltage protection Bring your Pedelec to your dealer or to a
specialist to have the error fixed.
08 Fault with motor hall sensor inside Bring your Pedelec to your dealer or to a
specialist to have the error fixed.
10 The motor temperature reaches to
the max protection value Stop the e-bike for a rest.
12 Fault with current sensor inside
controller
Bring your Pedelec to your dealer or to a
specialist to have the error fixed.
13 Fault with temperature sensor inside
battery
Bring your Pedelec to your dealer or to a
specialist to have the error fixed.
21 Fault with wheel speed detecting
sensor
Bring your Pedelec to your dealer or to a
specialist to have the error fixed.
22 BMS communication fault Bring your Pedelec to your dealer or to a
specialist to have the error fixed.
25 Torque sensor torque signal fault Bring your Pedelec to your dealer or to a
specialist to have the error fixed.
26 Torque sensor speed signal fault Bring your Pedelec to your dealer or to a
specialist to have the error fixed.
30 Communication fault Bring your Pedelec to your dealer or to a
specialist to have the error fixed.
Note: Error Code 10 will probably appear on the
dispaly when the e-bike is climbling for a long
time. This indicates that the motor temperature has
reached the protection value, in which case the user
needs to stop the e-bike for a rest. If the user con-
tinues to run the e-bike, the motor will automati-
cally cut off the power.

17
DISPLAY MANUAL DP C230.CAN
INSTALLATION
INSTALLATION
• Pull the clamp out and slide around the
handlebar to an optimal position.(dedicated
for φ22.2mm)
• Fix the clamp with a M3 hex socket screw.
(1N.m )
• Plug the female connector H from display to
the male side h from the controller extension
bus cable.
h
H

18 DISPLAY MANUAL DP C230.CAN
Other manuals for DP C230.CAN
3
Table of contents
Other BAFANG Monitor manuals

BAFANG
BAFANG UB400 User manual

BAFANG
BAFANG Ebike Essentials DPC18 User manual

BAFANG
BAFANG C961 User manual

BAFANG
BAFANG DP C01.UART User manual

BAFANG
BAFANG DP C230.CAN User manual

BAFANG
BAFANG DP E12.UART User manual

BAFANG
BAFANG DP C11.UART User manual

BAFANG
BAFANG DP C010.CB User manual

BAFANG
BAFANG DP C18.UART User manual

BAFANG
BAFANG C963 User manual