Baintech Power Board 3000 Ultimate User manual

www.baintech.com.au
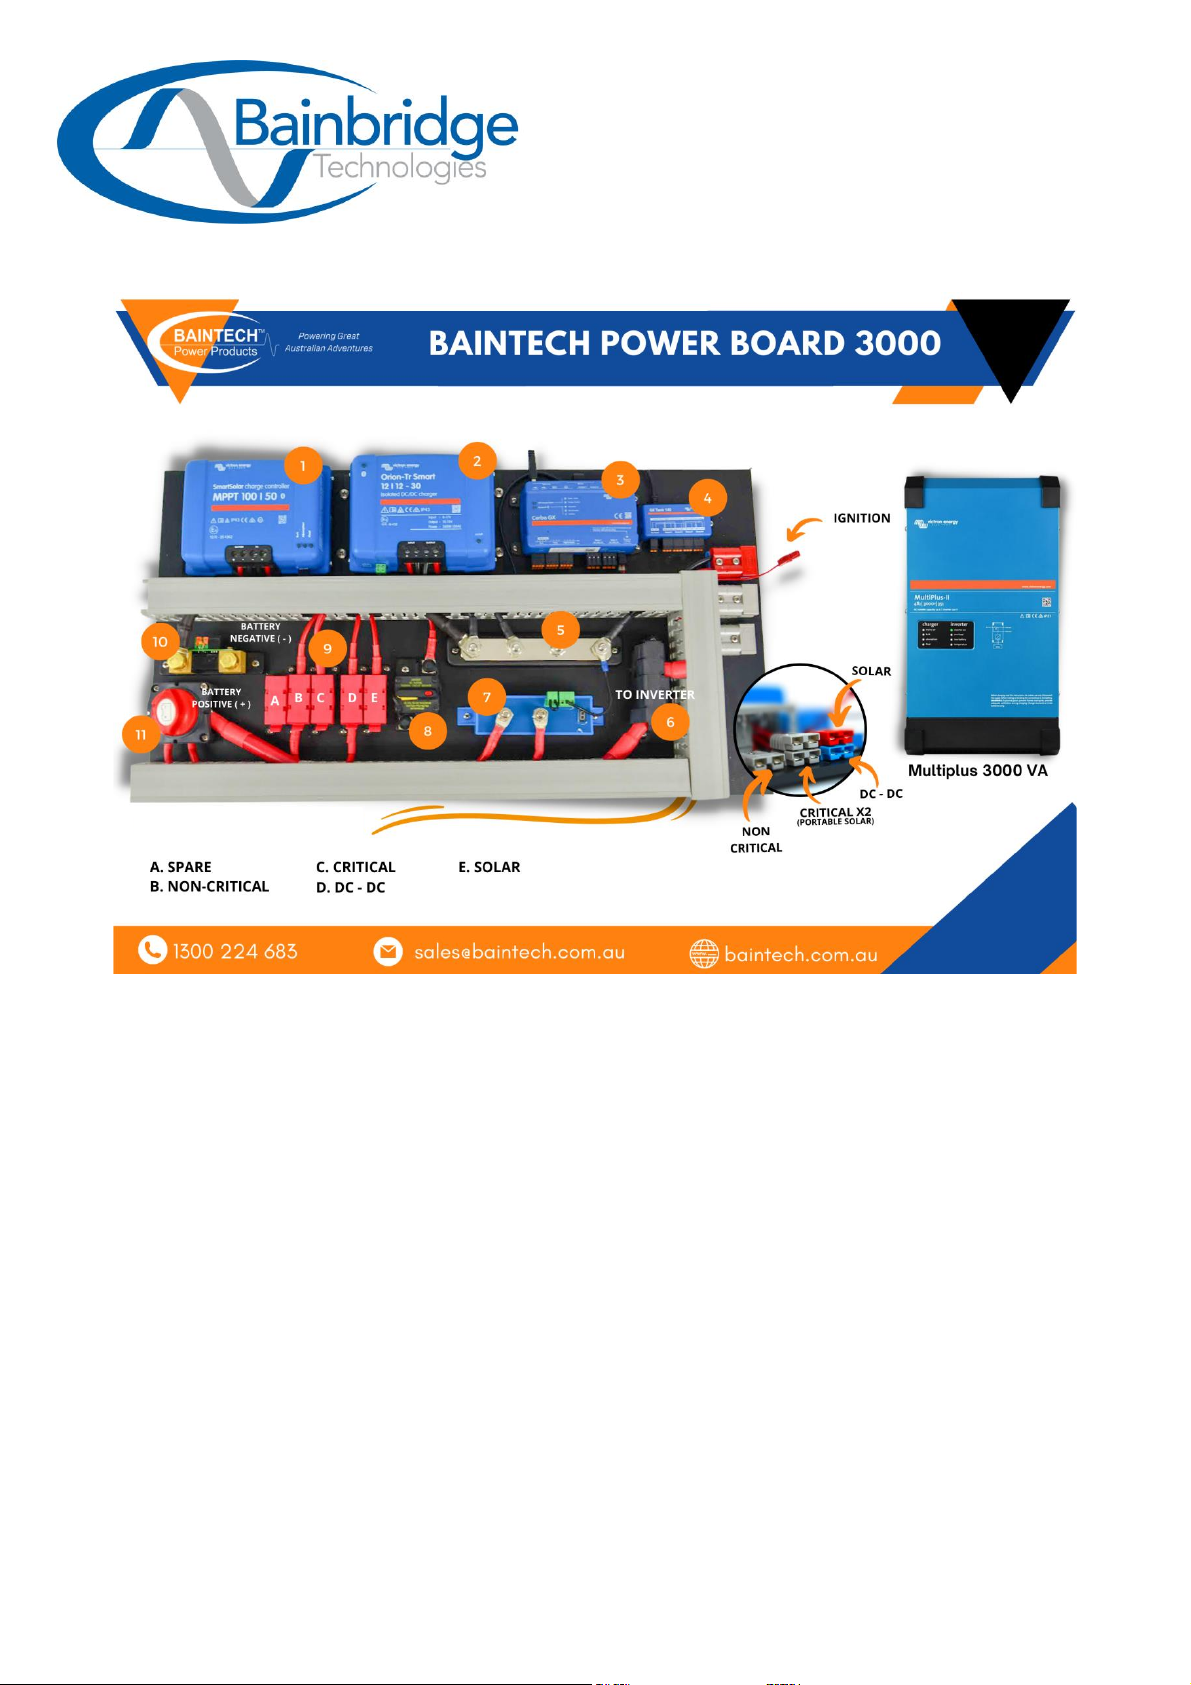
Baintech Ultimate Off-Grid Board Quick Start
Congratulations on purchasing the Baintech Ultimate Off-Grid Board, the all-in-one solution for
your off-grid adventures! Our ultimate Off-Grid Board is Powered by Victron Energy products and
features DC-DC Charging, Solar Charging and shore power for your battery bank. It also features
an inverter for 240v appliances and air conditioning. All of this is protected with circuit breakers,
fuses and low voltage cut-outs. The entire system is then controlled and monitored through either
the Touch Panel or through your Smartphone via Bluetooth.
This is a simple Quick Start guide to get your system installed and to get you adventuring as soon as
possible.
www.baintech.com.au
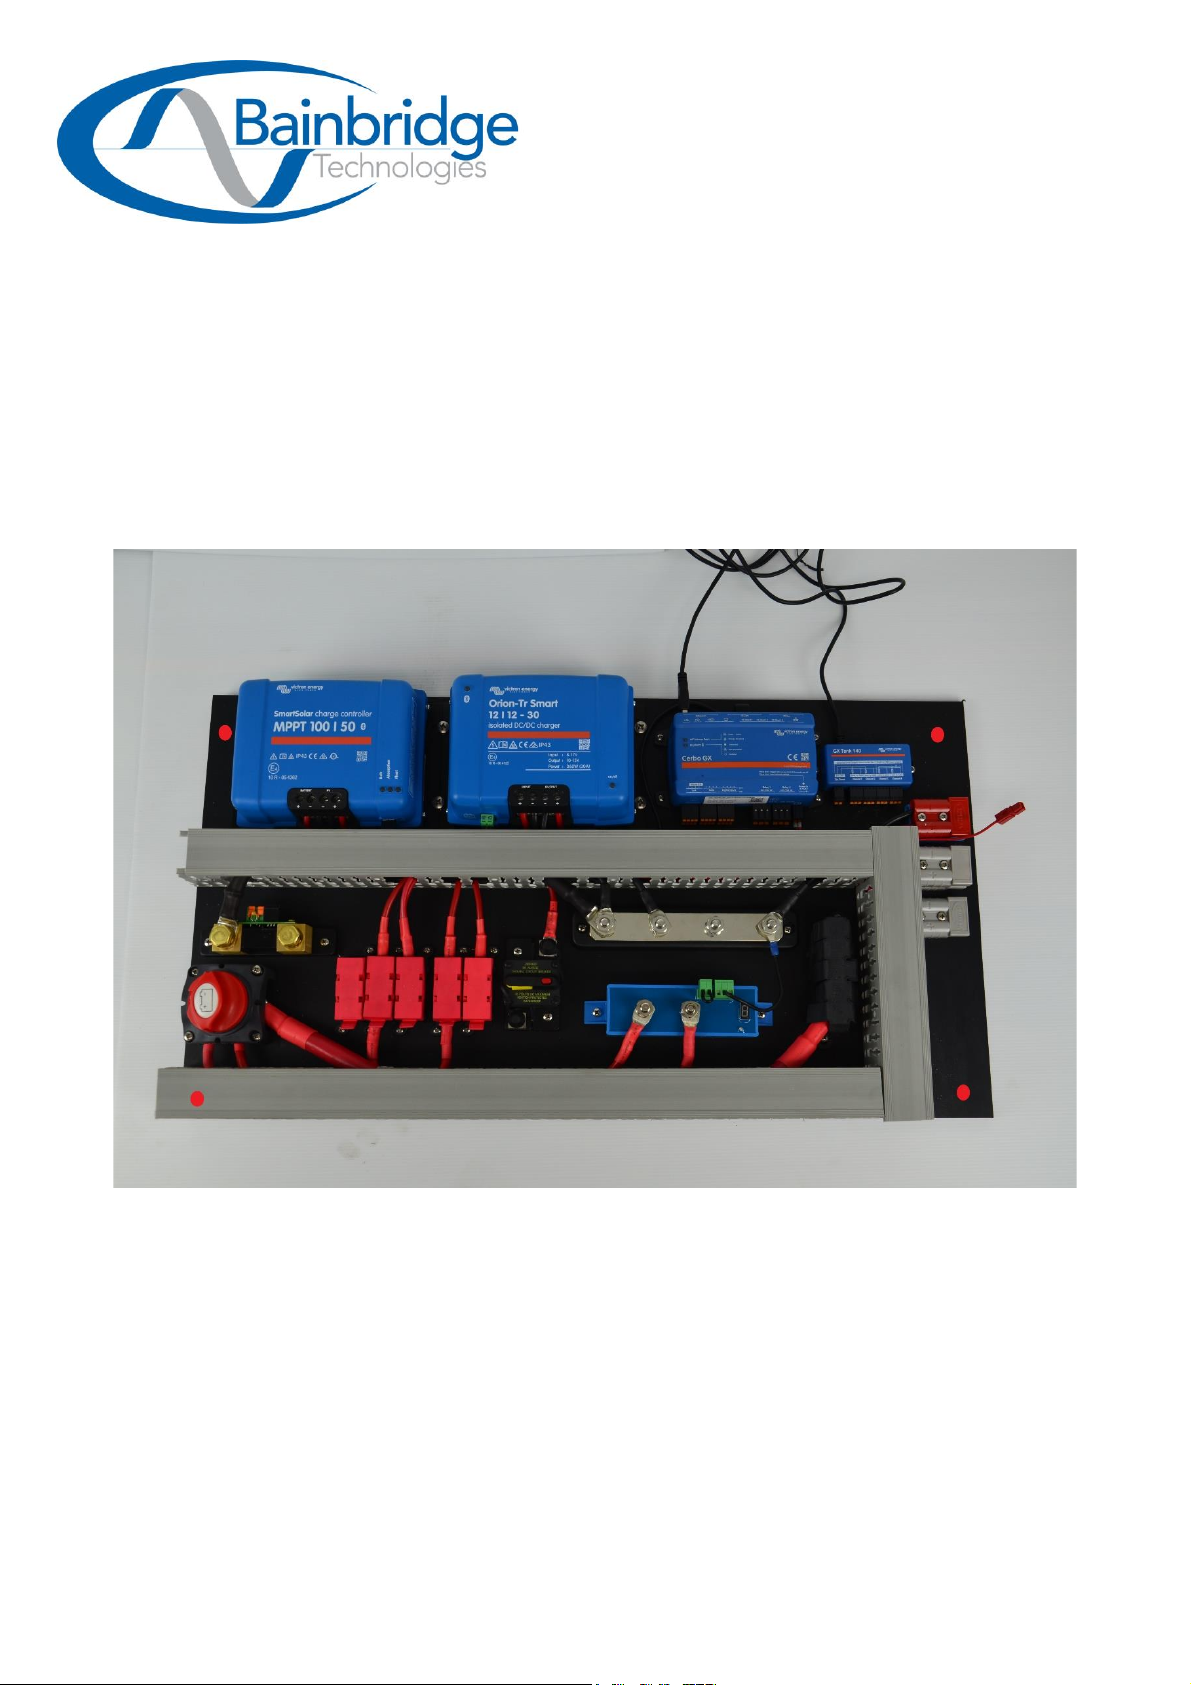
Step 1 –Mounting the board
The first step is mounting the Power Board in the desired location in your canopy/camper.
You will need to drill your own mounting points on the board, we have left space on each of
the 4 corners to do so (red dots on the diagram below). Then securely mount the board in the
desired location. The board can only be mounted vertically or flat on the ground, under NO
circumstances should the board be mounted facing down.
www.baintech.com.au
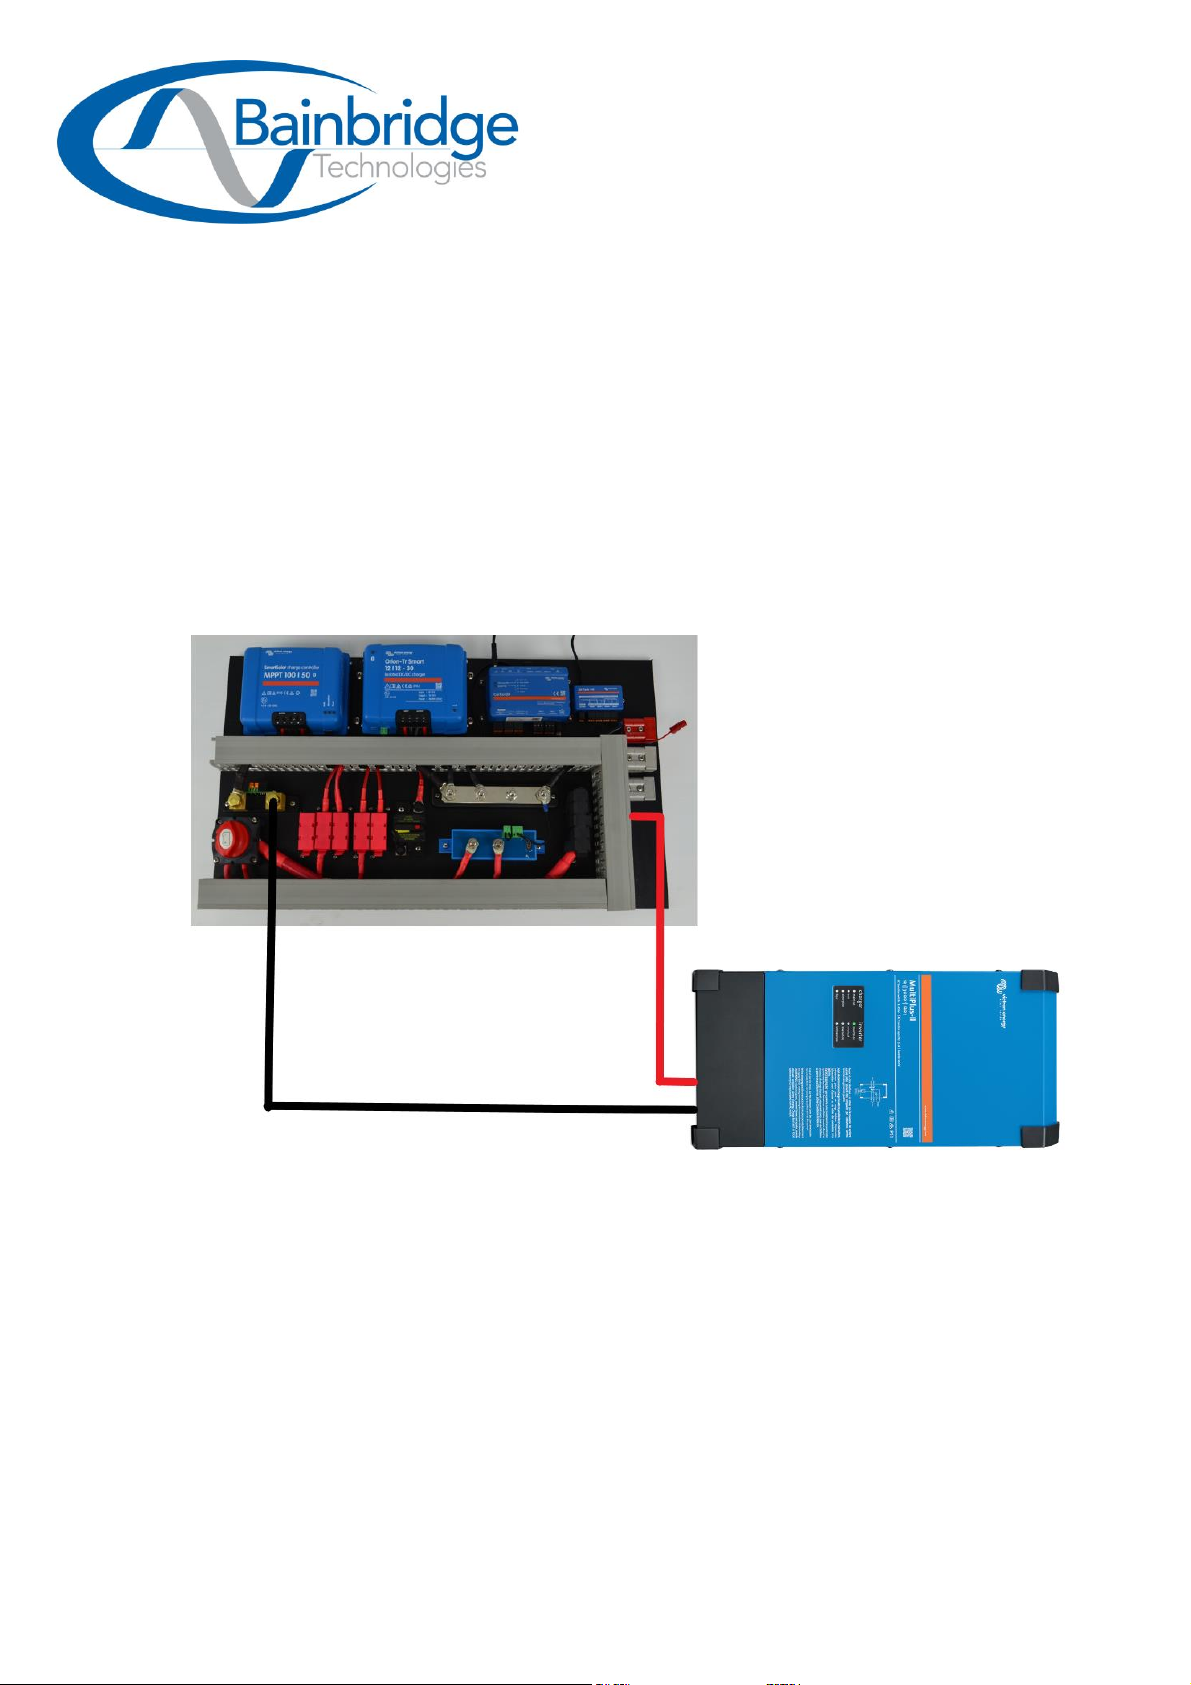
Step 2 –Mounting and Connecting the Victron Multiplus
The next step is mounting and then connecting your Victron Multiplus to the Power Board.
The Multiplus should be mounted as per specifications provided in the provided Multiplus
Manual, which is either flat on the ground or vertical with the use of the provided mounting
bracket. Once mounted, you can then connect the board to the Multiplus. This can be done
through the supplied cables, with the red cable labelled “To Inverter +” to be connected to the
positive of Multiplus, and the black cable labelled “To Inverter -” should be connected to the
negative of the Multiplus. It should look something like the following diagram.
To connect the AC In & Out to the unit, please consult a licensed electrician. UNDER NO
CIRCUMSTANCES SHOULD THE AC IN & OUT BE CONNECTED BY UNQUALIFIED PERSONNEL,
ONLY BY A LICENSED ELECTRICIAN.
www.baintech.com.au
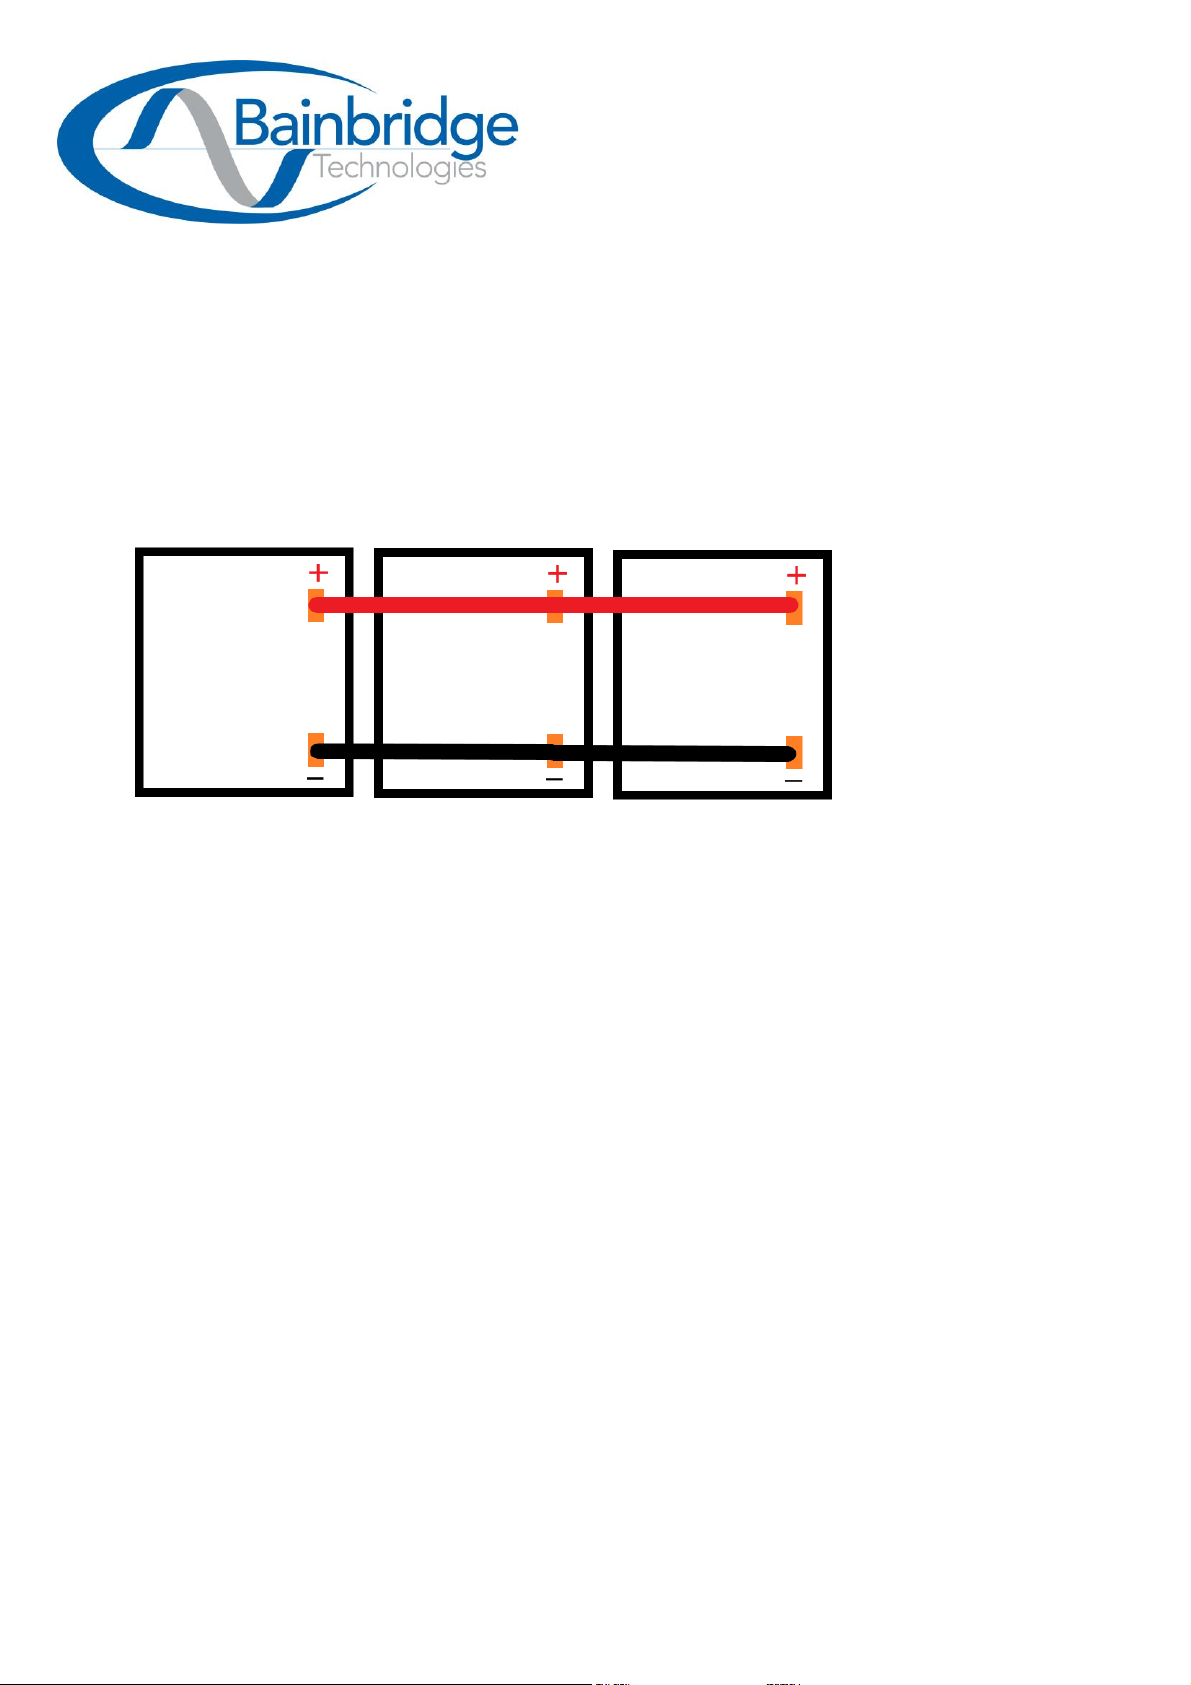
Step 3 –Connect the Baintech 110aH Lithium batteries in Parallel
The next step is to run your supplied Baintech Lithium Batteries in parallel. This can be done
by connecting the supplied cables, with the red cables labelled “Parallel +” to be connected to
the positive terminals of all 3 batteries, and the black cables labelled “Parallel -” should be
connected to the negative terminals of all 3 batteries. (Ensure the black negative cables are
connected LAST). Once the batteries are connected in parallel, mount the batteries to the floor
in your desired spot.
www.baintech.com.au
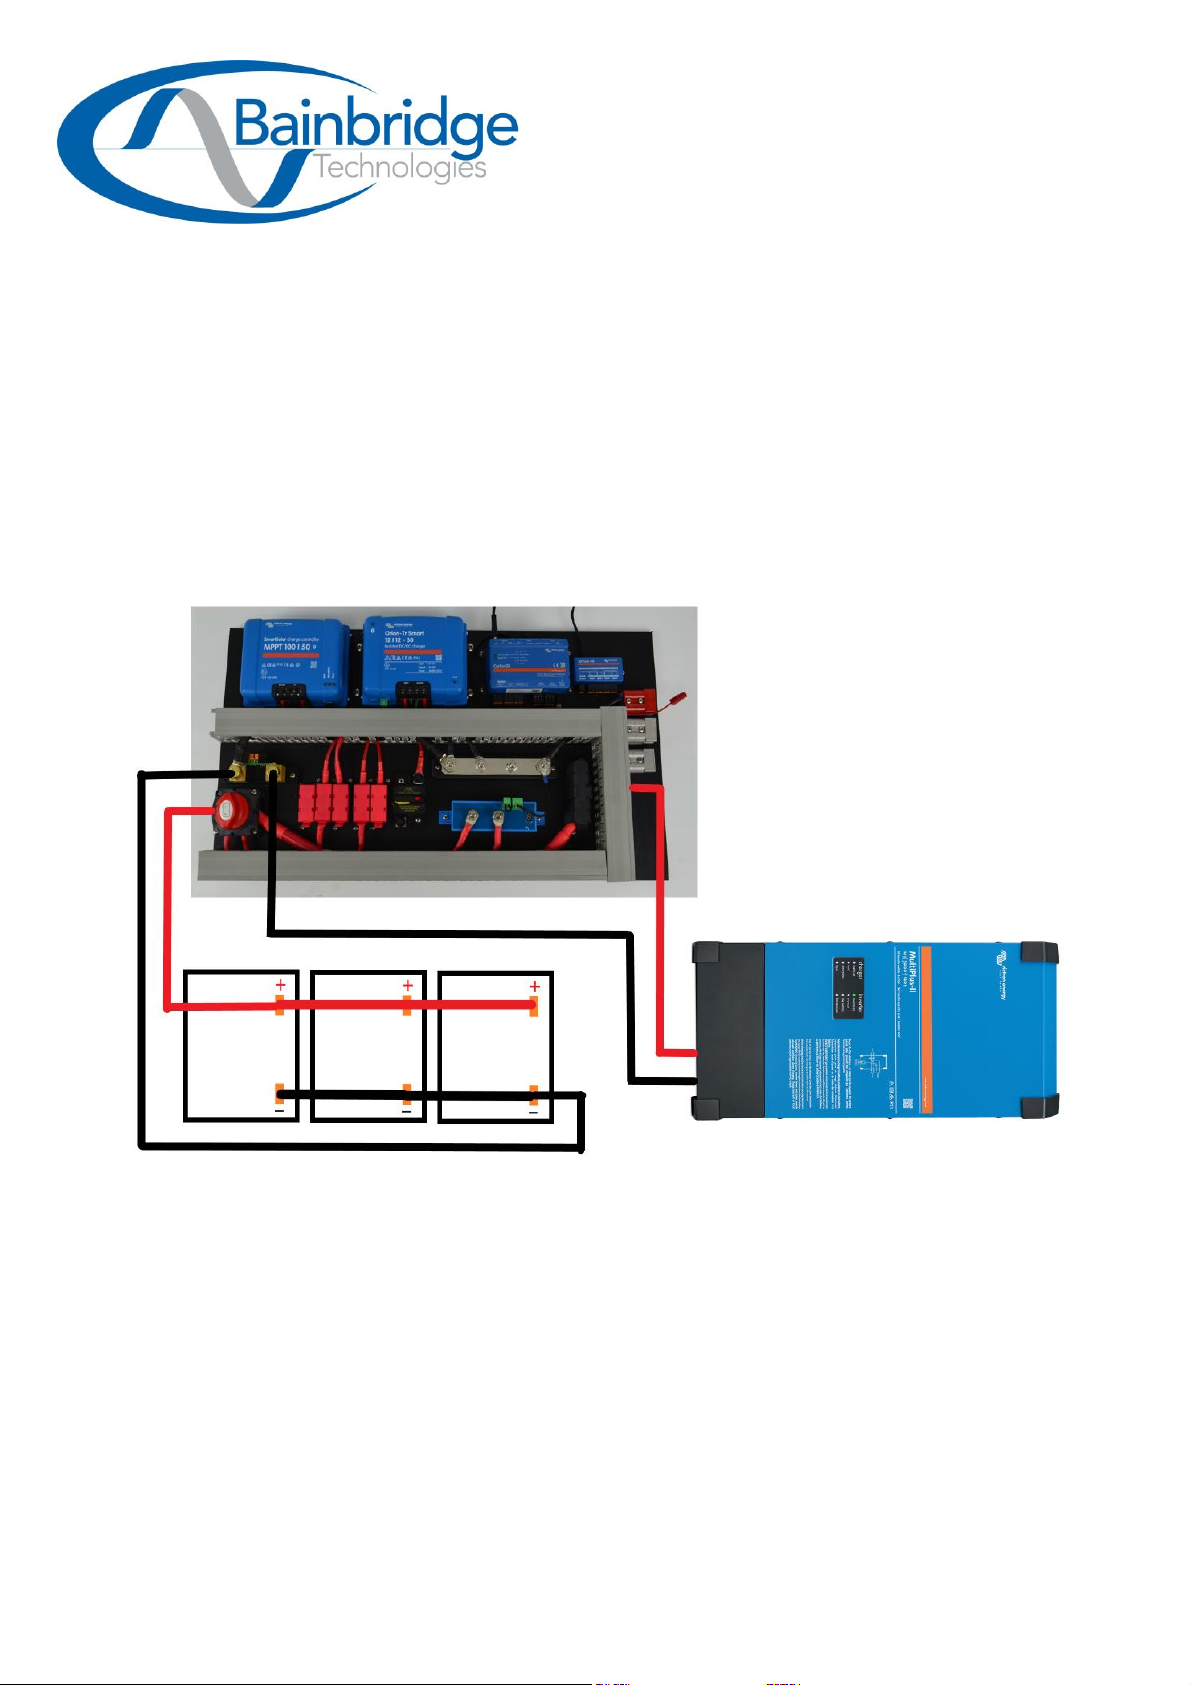
Step 4 –Connect the batteries to the Baintech Ultimate Off-Grid Board
The next step is to connect your batteries to the board. This can be done by connecting the
supplied cables, with the red cable labelled “Battery +” to be connected to the positive
terminal on the left of the battery bank, and the black cables labelled “Battery -” should be
connected to the negative terminals on the right side of the battery bank. (Ensure the black
negative cables are connected LAST). Once the batteries are connected to the board, you can
turn the battery switch on and you’re all set up to go on your next outdoor adventure!!
www.baintech.com.au
Anderson Connection Summary
In the above picture, the round zoomed-in photo of the Anderson plugs has a detailed
description of what each Anderson plug is for
Solar (Red Anderson): to connect the system via your unregulated solar input
DC-DC (Blue Anderson): to connect the system via your Vehicles Starter Battery/Alternator
Non-critical (Single Grey Anderson): this is for your accessories that don’t matter if they
lose power e.g. 12v TV or certain lighting.
Critical (Double Grey Anderson): This is for accessories that need to have power all the
time e.g. fridges, CPAP machines, emergency lighting

www.baintech.com.au
Links to product manuals
Victron SmartSolar 100/50 MPPT:
https://www.victronenergy.com/upload/documents/Manual_SmartSolar_MPPT_100-
30__100-50/MPPT_solar_charger_manual-en.pdf
Victron Orion-TR Smart 12/12-30 DC-DC Charger:
https://www.victronenergy.com/upload/documents/Orion-Tr_Smart_DC-DC_Charger_-
_Isolated/Orion-Tr_Smart_DC-DC_Charger-en.pdf
Victron Cerbo GX:
https://www.victronenergy.com/upload/documents/Cerbo_GX/GX_Device_Manual-
en.pdf
Victron GX Tank:
https://www.victronenergy.com/upload/documents/GX_Tank_140/GX_Tank_140-en.pdf
Victron Smart Battery Protect:
https://www.victronenergy.com/upload/documents/Manual-Smart-Battery-Protect-12V-
24V-65-A-100-A--220-A-EN-NL-FR-SV-DE-PT-ES-IT-TR.pdf
Victron Multiplus-II 3000VA:
https://www.victronenergy.com/upload/documents/MultiPlus-II_230V/MultiPlus-
II___Quattro-II_120V-230V-en.pdf
Victron SmartShunt:
https://www.victronenergy.com/upload/documents/SmartShunt/Manual_BMV_and_Sma
rtShunt-en.pdf
Table of contents


