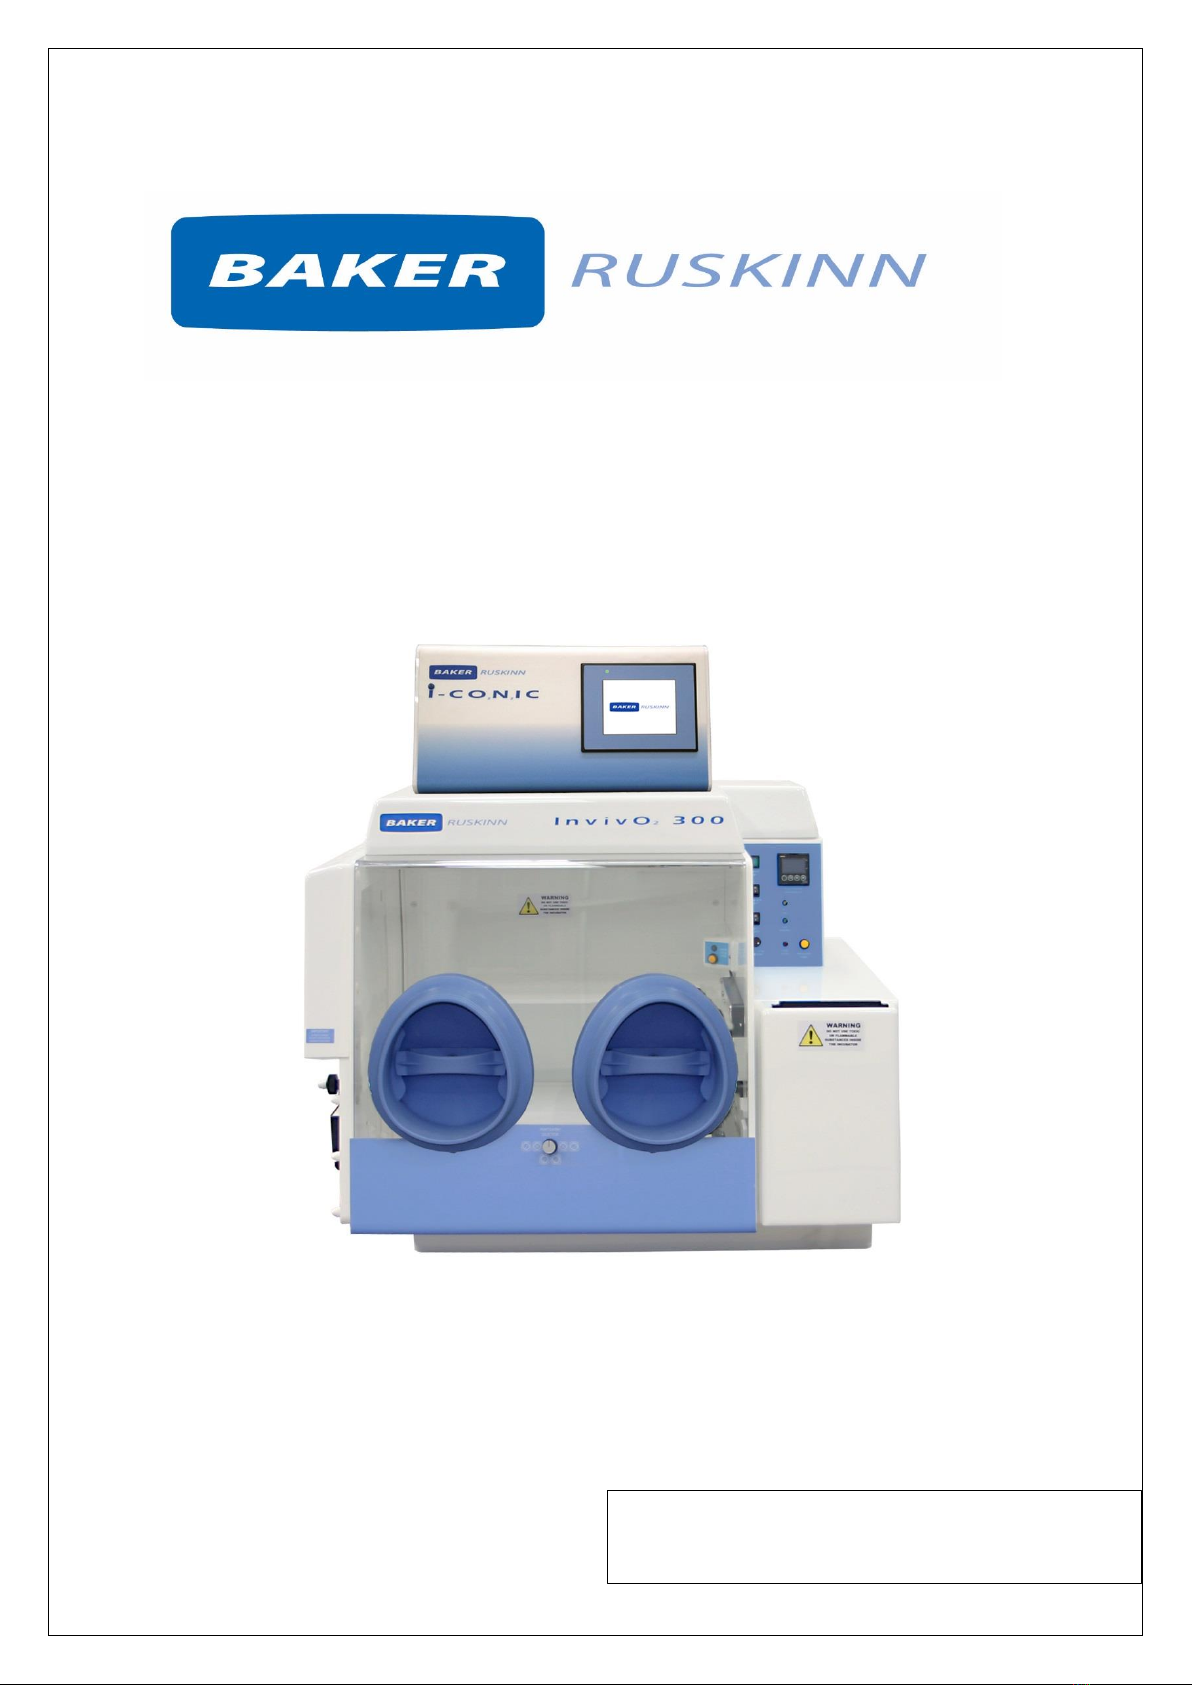
Baker Invivo2 300 UM-010 User manual

Invivo2 300
UM-010
Invivo2300 User Manual
Affix Serial Number Sticker Here

Invivo2 300
UM-010 R4.0 Page 2of 48 Invivo2300 User Manual
Product Summary
Baker Ruskinn's Invivo2hypoxia workstation allows you to isolate cells in a chamber that accurately
maintains and controls temperature, humidity, oxygen and carbon dioxide. With the Invivo2, you can
study even the most complex cell interactions under perfect microaerophilic or anaerobic
conditions. The Invivo2300 is tailored to interface with the ICO2N2IC Advanced Gas Mixing System.
Features and Benefits
Quick and easy direct access with the gloveless, cuffed Ezee Sleeve system.
Single plate entry system (SPES) - standard on most models, this mailbox-like slot allows quick
side entry or exit of individual plates, bypassing the interlock cycling process.
Read plates easily without exposure to oxygen - energy-saving lighting provides perfect
illumination.
Up to 180 90mm plate capacity
Petri dish holders for quick plate transfer included.
Interlock transfer 18 plates in 35 seconds.
Utilised with the ICO2N2IC Advanced Gas Mixing System to offer a microaerophilic
environment in which to grow facultative anaerobes.
Optimum cell environment
oAccurate temperature control - from ambient + 5˚C to 45˚C.
oAccurate and automated humidity control - no dry spots.
oPalladium catalyst maintains anaerobic environment -anaerobic colour-indicator
strips verify anoxic conditions.
oEzee Sleeve system allows access without disrupting atmosphere within the chamber.
Economic and reliable long-term savings
oStandard dual gas operation - low gas consumption and running costs.
oLower cost per plate compared to anaerobic jars.
oMinimal maintenance and downtime - with annual or biennial preventative
maintenance kits available.
The ICO2N2IC provides accurate control over O2(0.1% - 20.9% in 0.1% increments, can reach 23.0%
using separate 25% O2cylinder) and CO2(0.1% - 30% in 0.1% increments).
*Note. The use of the word Interlock in this manual is medical terminology, and refers to the
environmental working area between both chambers. It does not refer to the engineering safety
interlock switch mechanism.

Invivo2 300
UM-010 R4.0 Page 3of 48 Invivo2300 User Manual
Table of Contents
Product Summary ...................................................................................................................................2
Features and Benefits ............................................................................................................................. 2
Overview ....................................................................................................................................6
Safety Instructions ........................................................................................................ 6
Regulatory compliance .................................................................................................7
Symbols......................................................................................................................... 7
Installation and relocation............................................................................................ 8
Weight and dimensions ................................................................................................9
Gas and electrical supply requirement....................................................................................10
Gas supply requirements ............................................................................................10
Gas regulator requirements........................................................................................10
Electrical supply requirements ...................................................................................10
Voltage and frequency requirements.........................................................................10
Power consumption....................................................................................................10
Powering the workstation .......................................................................................... 11
Workstation overview..............................................................................................................12
Workstation layout .....................................................................................................12
Component layout ......................................................................................................12
Front view .......................................................................................................12
Rear view ........................................................................................................13
Left side view –Standard humidifier.............................................................. 14
Left side view –Ultrasonic humidifier ............................................................15
Right side view................................................................................................16
Control system layout................................................................................................. 17
Control panel ..................................................................................................17
Temperature controller ..................................................................................18
Port selector knob controller.......................................................................... 18
Interlock inner door control panel..................................................................19
Foot switch control panel ...............................................................................19
Power entry panel .......................................................................................... 20
Temperature and humidity control .........................................................................................21
Temperature control...................................................................................................21
Setting the temperature; ............................................................................................21

Invivo2 300
UM-010 R4.0 Page 4of 48 Invivo2300 User Manual
Humidity control ......................................................................................................... 21
Humidity control overview .............................................................................21
Humidistat humidity control........................................................................... 21
Environmental gas composition control.................................................................................. 21
Using the workstation chamber...............................................................................................22
Using the interlock......................................................................................................22
Interlock overview ..........................................................................................22
Opening the interlock outer door................................................................... 22
Opening the interlock inner door ...................................................................23
Transferring material into the workstation chamber via the interlock..........23
Removing material from the workstation chamber via the interlock ............23
Hand access to the main chamber.............................................................................. 24
Ezee Sleeve overview...................................................................................... 24
Entering the workstation chamber using the Ezee Sleeves............................25
Exiting the workstation chamber using the Ezee Sleeves...............................26
Arm gas displacement volume and pressure changes ...................................26
Single Plate Entry System (SPES).................................................................................27
SPES overview.................................................................................................27
Using the SPES ................................................................................................27
Internal power socket.................................................................................................28
Internal lights .............................................................................................................. 28
Rear shelf ....................................................................................................................29
Optional extras............................................................................................................30
Cable gland .....................................................................................................30
Universal cable gland......................................................................................30
Gas sample port..............................................................................................31
Vacuum port ...................................................................................................31
Online video user guides.............................................................................................32
Cleaning and maintenance ......................................................................................................33
Cleaning the workstation............................................................................................33
Cleaning agents...............................................................................................33
Cleaning procedure –during and after each use............................................33
Cleaning procedure –deep clean ................................................................... 34
Maintaining the workstation –End user maintenance ..............................................35

Invivo2 300
UM-010 R4.0 Page 5of 48 Invivo2300 User Manual
Filling the pressure relief/ humidifier tank..................................................... 35
Replacing an Ezee Sleeve................................................................................36
Replacing detox sachets .................................................................................37
Installing/ replacing a catalyst sachet.............................................................38
Replacing the mains plug fuse –UK users only .............................................. 39
Replacing the mains fuses .............................................................................. 40
Service requirements.................................................................................................. 41
Spare parts and accessories........................................................................................ 41
Overview.........................................................................................................41
Spare parts and cleaning agents.....................................................................42
Accessories......................................................................................................42
Workstation malfunction............................................................................................43
Common problems and solutions...............................................................................43
Workstation general problems.......................................................................43
Interlock problems..........................................................................................44
Gas mixer and gas consumption problems.....................................................45
Warranty information.............................................................................................................. 46
Disposal information................................................................................................................ 47

Invivo2 300
UM-010 R4.0 Page 6of 48 Invivo2300 User Manual
Overview
Please read this manual carefully to familiarise yourself with the operation and maintenance of the
Invivo2 300 workstation. Note: The workstation should be located in a well-ventilated area.
Safety Instructions
For your safety, the safety of others using the workstation and those around you;
The covers on both ends and the top of the workstation must not be removed by anyone other
than a qualified service engineer. There are no end user serviceable parts within these covers.
The AC Mains outlet that the Invivo2300 workstation is connected to, MUST not be obstructed
by the Invivo2300 workstation or any other equipment, and MUST be accessible in case of
emergency. In case of emergency, disconnect the Invivo2300 workstation from the AC Mains
Outlet.
In case of damage to the Invivo2300 workstation, disconnect the Invivo2300 workstation from
the AC Mains Outlet and contact your local distributor for advice.
The workstation must be connected to a protective earth.
Only the power cord supplied with the workstation should be used to connect the workstation
to the mains supply.
Only Ruskinn Technology Limited replacement parts should be used.
Gas regulators must be used for each gas supply. A 2 stage regulator should be used for a bottled
gas supply. The maximum supply pressure permissible is 4 bar gauge.
The maximum permissible concentration of Hydrogen in the anaerobic mixed gas is 5.5%
Hydrogen.
The mains supply voltage fluctuations must not exceed +/- 10% of the nominal mains voltage.
Only the gasses specified in this manual may be used.
The maximum power rating of the internal socket must not be exceeded.
The exhaust valve outlet must not be covered or blocked.
The humidifier screw cap must not be covered or blocked.
The humidifier/ pressure relief tank must not be overfilled.
The cooling fan covers and cooling vents must not be covered or blocked.
The workstation should not be lifted by the glove ports, the interlock or the Single Plate Entry
System.
If an Uninterruptable Power Supply (UPS) system is used, both the Invivo2300 workstation and
the ICO2N2IC must be connected to the Uninterruptable Power Supply (UPS) system.
The weight limit for the interlock floor tray is 4kg.
The weight limit for the rear shelf is 5.5kg. The weight must be evenly distributed.
The workstation must be disconnected from the mains supply before removing the front cover.
The spot light should not be used continuously for a period of more than 10 minute. The spot
light should be allowed to cool for a period of 10 minutes after each use.
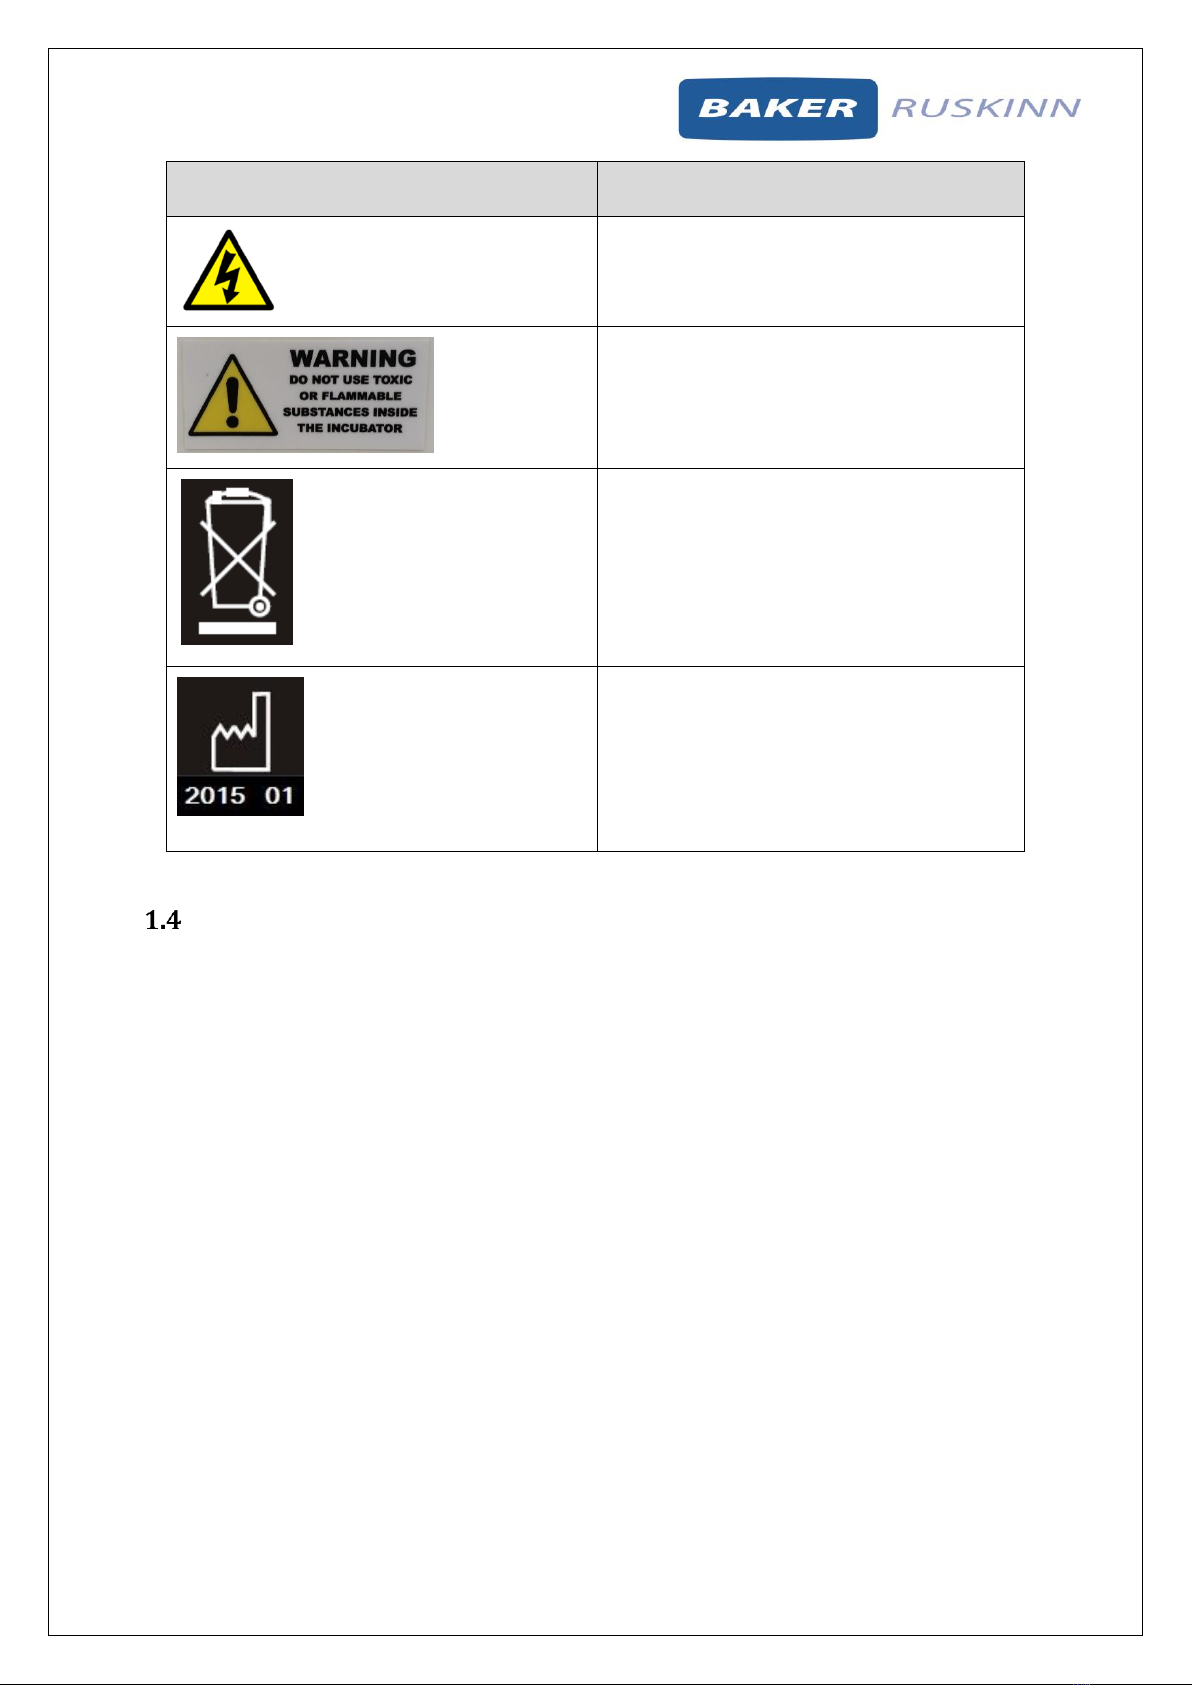
The use of Radioactive materials in the Invivo2300 is strictly prohibited.
FAILURE TO ADHERE TO THESE SAFETY INSTRUCTIONS COULD CAUSE SERIOUS INJURY AND WILL
INVALIDATE THE WORKSTATION WARRANTY. RUSKINN TECHNOLOGY LIMITED ACCEPTS NO
RESPONSIBILITY FOR ANY ACCIDENT, INJURY OR LOSS CAUSED BY UNSAFE OPERATION OF THE
WORKSTATION

Invivo2 300
UM-010 R4.0 Page 7of 48 Invivo2300 User Manual
Regulatory compliance
This product complies with the essential EEA requirements for Electrical Safety and the Low Voltage
Directive 2006/95/EC as well as Electromagnetic compatibility as set out in the EMC Directive
204/108/EC.
Symbols
Before using the Invivo2300, please ensure that you are familiar with the symbols on the Invivo2300.
Note: The workstation should be located in a well-ventilated area.
Figure 1: Invivo2 300 symbols
Symbol
Meaning
Refer to user manual.
~
Alternating current
O
Off
I
On
Primary earth connection
This product complies with the essential EEA
requirements for Electrical Safety and
Electromagnetic compatibility as set out in
the EMC directive 2004/108/EC and the Low
Voltage Directive 2006/95/EC
Caution, do not remove covers. No end user
serviceable parts behind covers. Please refer
to this manual in all cases where this symbol
appears, in order to find out the nature of the
Potential Hazard and actions to be taken in
order to avoid the Hazard.

Invivo2 300
UM-010 R4.0 Page 8of 48 Invivo2300 User Manual
Symbol
Meaning
Warning, this equipment contains high
voltage circuitry.
Warning:
Do not use toxic or Flammable substances
inside the incubator.
Invivo2300 contains hazardous components
and must not be disposed of at a household
waste site. Instead it should be taken to the
appropriate collection point for the recycling
of electrical and electronic equipment.
Date of manufacture in format
YYYY MM
Installation and relocation
Invivo2300 should not be installed or relocated by anyone other than a qualified engineer. To arrange
installation or relocation, please contact your local distributor.

Invivo2 300
UM-010 R4.0 Page 9of 48 Invivo2300 User Manual
Weight and dimensions
The Invivo2300 workstation weighs approximately 75kg. Figure 2 lists the dimensions of the Invivo2
300 workstation;
Figure 2: Invivo2 300 workstation dimensions
External width
830 mm
External height
650 mm
External depth
660 mm
Workstation chamber internal width
500 mm
Workstation chamber internal height
420 mm
Workstation chamber internal depth
460 mm
Interlock internal width
150 mm
Interlock internal height
190 mm
Interlock internal depth
230 mm
Interlock outer door clear opening width
155 mm
Interlock outer door clear opening height
200 mm
Interlock inner door clear opening width
185 mm
Interlock inner door clear opening height
180 mm

Invivo2 300
UM-010 R4.0 Page 10 of 48 Invivo2300 User Manual
Gas and electrical supply requirement
Gas supply requirements
The Invivo2300 workstation requires;
Oxygen free nitrogen.
In addition to this, the Invivo2300 workstation should be connected to ICO2N2IC (supplied
with the Invivo2300 workstation). All other gas connections should be made to the ICO2N2IC.
See UM-011 ICO2N2IC user manual for more details.
The maximum permissible concentration of hydrogen in the anaerobic mixed gas is 5.5%. The use
of any other gas(ses) will invalidate the warranty and may cause serious injury. The Gas supplies
must be securely fastened after installation.
Gas regulator requirements
Gas regulators must be used with all gas supplies to the workstation. A 2 stage regulator must be used
for each bottled gas supply. Regulators should be available from your local gas supplier. Ruskinn
Technology Limited does not supply gas regulators.
The gas regulator should provide a minimum supply pressure of 3(42psi) Bar Gauge. The maximum
supply pressure permissible is 4 bar gauge. A supply pressure greater than this will damage internal
components of the workstation and will invalidate the warranty.
The gasses are connected to the ICO2N2IC Advanced Gas Mixer. See UM-011 ICO2N2IC user manual for
more details.
Electrical supply requirements
The workstation must be connected to a mains power supply. A power cord is supplied to connect the
workstation to the mains supply. Only the power cord supplied should be used to connect the
workstation to the mains supply. It is advised that the workstation be located no greater than 1 metre
from the plug socket. The plug socket should not be obstructed by the Invivo2300 workstation. The
workstation must be connected to a protective earth.
NOTE: If an Uninterruptable Power Supply (UPS) system is used, both the Invivo2300 workstation and
the ICO2N2IC Advanced Gas Mixer must be connected to the Uninterruptable Power Supply (UPS)
system.
Voltage and frequency requirements
To ensure safe operation of the workstation, it must be connected to a supply of the correct voltage
and frequency, as shown in the rating label (item 4, Figure 8). The mains supply voltage fluctuations
must not exceed +/- 10% of the nominal mains voltage.
Power consumption
Figure 3 shows the power consumption ratings;
Figure 3: Power consumption ratings
Supply voltage and frequency
Power consumption
240V AC, 50Hz
150 W
120V AC, 60Hz
200 W

Invivo2 300
UM-010 R4.0 Page 11 of 48 Invivo2300 User Manual
Note: The power consumption is for normal operating conditions with no equipment connected to
the internal power supply. Power consumption will vary dependent upon the conditions inside the
workstation chamber and the conditions inside the room the workstation is located in.
Powering the workstation
To switch the workstation on, press the power switch (item 2 Figure 14).
To switch the workstation off, press the power switch (item 2 Figure 14).
Note: A glove port should be left open when the workstation is switched off, as the pressure inside
the workstation will decrease as the workstation cools. The open glove port will allow the pressure
inside the workstation chamber to equalise with the external pressure.

Invivo2 300
UM-010 R4.0 Page 12 of 48 Invivo2300 User Manual
Workstation overview
Workstation layout
The Invivo2300 workstation consists of 2 main areas; the workstation chamber and the interlock
chamber. The workstation chamber is the main working area of the workstation. Access to the
workstation chamber is provided by the glove ports, the Single Plate Entry System (SPES) and the
interlock. The interlock consists of the interlock chamber, with an inner and an outer door. The Invivo2
300 workstation is controlled via the control panel. The ICO2N2IC Gas Mixer controls the gaseous
composition of the internal environment. See UM-011 for more information on the ICO2N2IC Advanced
Gas Mixer.
Component layout
Please familiarise yourself with the layout of your Invivo2300 workstation.
Front view
Figure 4 below shows the front view of the Invivo2300 workstation;
Figure 4: Invivo2300 workstation front view
1. Single Plate Entry System (SPES).
2. Glove ports (shown without Ezee Sleeves).
3. Port entry selector switch.
4. Interlock inner door control panel.
5. Interlock outer door.
6. Control panel.
1
4
5
3
2
6

Invivo2 300
UM-010 R4.0 Page 14 of 48 Invivo2300 User Manual
Left side view –Standard humidifier
Figure 6 shows the left side view of the Invivo2300 workstation with the standard humidifier;
Figure 6: Invivo2 300 workstation left side view
1. Pressure relief tank cover (pressure relief tank bung).
2. Pressure relief tank.
3. Pressure relief tank overflow pipe.
4. Cable gland (optional extra).
5. Exhaust valve outlet.
6. Vacuum line connection port (optional extra).
7. Condenser fan.
8. Single Plate Entry System (SPES).
Note: Please locate a suitable container below the tubing to collect any excess water from the
overflow tube.
1
7
8
2
4
5
6
3

Invivo2 300
UM-010 R4.0 Page 15 of 48 Invivo2300 User Manual
Left side view –Ultrasonic humidifier
Figure 7 shows the left side view of the Invivo2300 workstation with the ultrasonic humidifier;
Figure 7: Invivo2 300 workstation left side view with ultrasonic humidifier
1. Exhaust valve outlet
2. Cable gland (optional extra)
3. Humidifier screw cap.
4. Humidifier tank.
5. Pressure relief tank overflow
6. Vacuum line (optional extra).
7. Single Plate Entry System (SPES).
8. Condenser fan.
1
6
7
2
3
4
8
5

Invivo2 300
UM-010 R4.0 Page 16 of 48 Invivo2300 User Manual
Right side view
Figure 8 shows the right side view of the Invivo2300 workstation;
Figure 8: Invivo2 300 workstation right side view
1. Mixed gas inlet.
2. Sample gas return.
3. Sample gas out.
4. Serial number label.
5. Portable Appliance Test (PAT test) label.
6. Power entry panel label.
7. Power entry panel.
1
4
2
3
5
6
7

Invivo2 300
UM-010 R4.0 Page 17 of 48 Invivo2300 User Manual
Control system layout
The control system layout varies by model. Please familiarise yourself with the control system layout
of your Invivo2300 workstation.
Control panel
Figure 9 shows the control panel of the Invivo2300 workstation;
Figure 9: Invivo2 300 workstation control panel
1. Power indicator. Illuminates to indicate the workstation is connected to the mains and is
switched on.
2. Chamber light switch. Press to switch the chamber light on / off.
3. Gas Alarm switch. Press to switch the gas alarm on/ off.
4. Humidistat. Controls the level of humidity inside the workstation chamber.
5. Lock active indicator LED. Flashes to indicate that the interlock purge cycle is in progress.
6. Interlock purge button. Press to initiate the interlock purge cycle.
7. Gas demand indicator. Illuminates when there is a low pressure condition inside the
workstation chamber.
8. N2low indicator. Illuminates to indicate that the nitrogen supply has run out.
9. Temperature controller. See section 3.3.2 for more details.
1
5
6
7
2
3
4
6
8

Invivo2 300
UM-010 R4.0 Page 18 of 48 Invivo2300 User Manual
Temperature controller
Figure 10 shows the temperature controller;
Figure 10: Temperature controller
1. Not user accessible (For service personnel only)
2. Not user accessible (For service personnel only)
3. Number scrolling button. Use to move across digits. Use with buttons 4
& 5 to increase and decrease the temperature.
4. Decrease temperature (0.1°C increments) or humidity.
5. Increase temperature (0.1°C increments) or humidity.
For temperature control, the white value (PV- Process Value) is the actual temperature. The green
value (SV- Set Value) is the required value (the set point). All temperatures are in oC.
For ultrasonic humidity control, the white value is the actual relative humidity and the green value the
required relative humidity (the set point). All humidity’s are percentage relative humidity.
Port selector knob controller
Figure 11 shows the port selector knob controller;
Figure 11: Port selector knob controller
1
2
3
4
5

Invivo2 300
UM-010 R4.0 Page 19 of 48 Invivo2300 User Manual
Interlock inner door control panel
Figure 12 shows the interlock inner door control panel;
Figure 12: Interlock inner door control panel
1. Inner door LED indicator. Illuminates to indicate when the interlock inner door is available.
2. Inner door button. Press to unlock the interlock inner door (when available).
Foot switch control panel
Figure 13 shows the foot switch controller which is used to operate the spot light, vacuum control and
interlock purge control.
Figure 13: Foot switch controller
1. VAC for glove port vacuum control
2. LOCK for interlock purge control
3. SPOT for spotlight operation
1
2
3

Invivo2 300
UM-010 R4.0 Page 20 of 48 Invivo2300 User Manual
Power entry panel
Figure 14 shows the power entry panel and label;
Figure 14: Power entry panel
1. Mains fuse holder.
2. On/ off switch.
3. Mains lead connection.
4. Nitrogen inlet
5. Primary earth stud.
6. ICO2N2IC Gas mixer umbilical connection.
3
4
2
1
5
6
Table of contents
Other Baker Desktop manuals