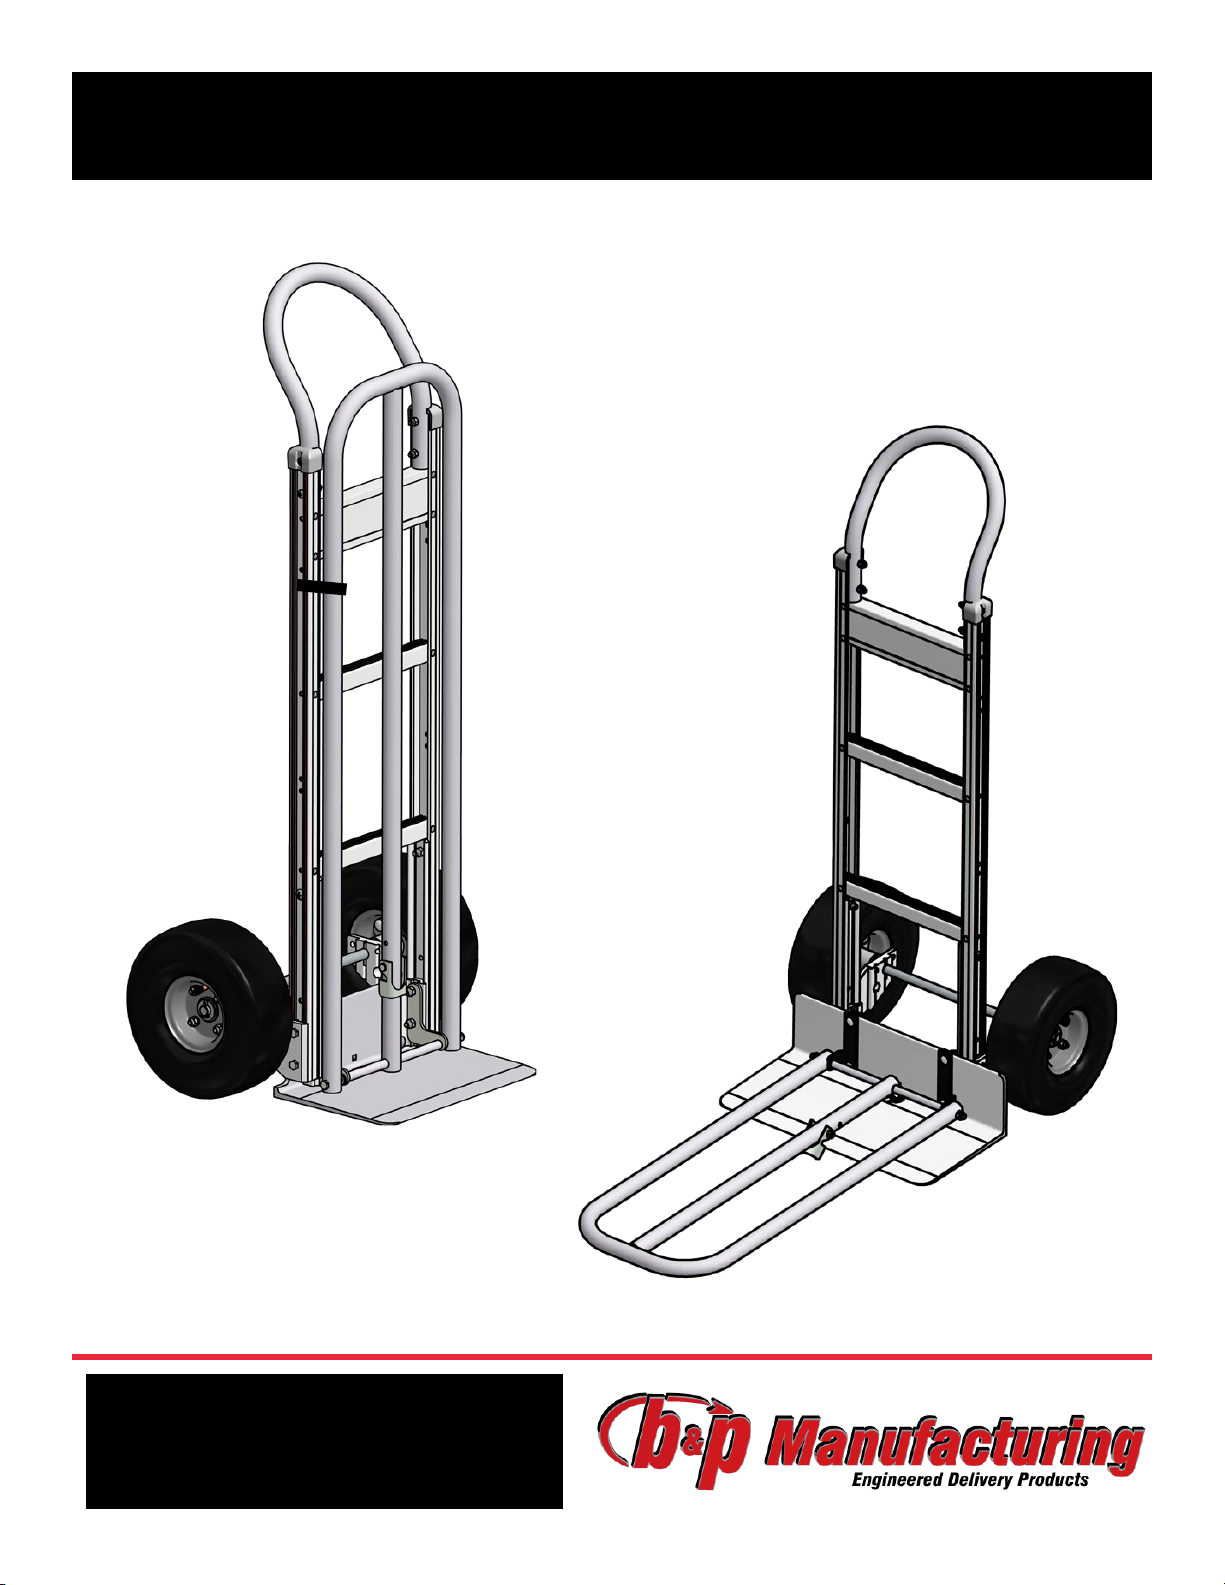
B&P E4 User manual
Created: 1/22/2009, Revision: B 7/29/2016
8200-066 E4-E5-E6 Tubular Folding Nose Assembly Instructions Page 1 of 5
E4-E5-E6 Tubular Folding Nose
Assembly Instructions
www.bpmfg.com
8051 East Boon Road | Cadillac, MI 49601
(800) 334-7141
Table of Contents:
Rear Mount Folding Nose………..2-3
Front Mount Folding Nose ….....4-5
*Handle, frame, nose pate, and wheels will vary based on the options selected at the time of purchase.
Created: 1/22/2009, Revision: B 7/29/2016
8200-066 E4-E5-E6 Tubular Folding Nose Assembly Instructions Page 2 of 5
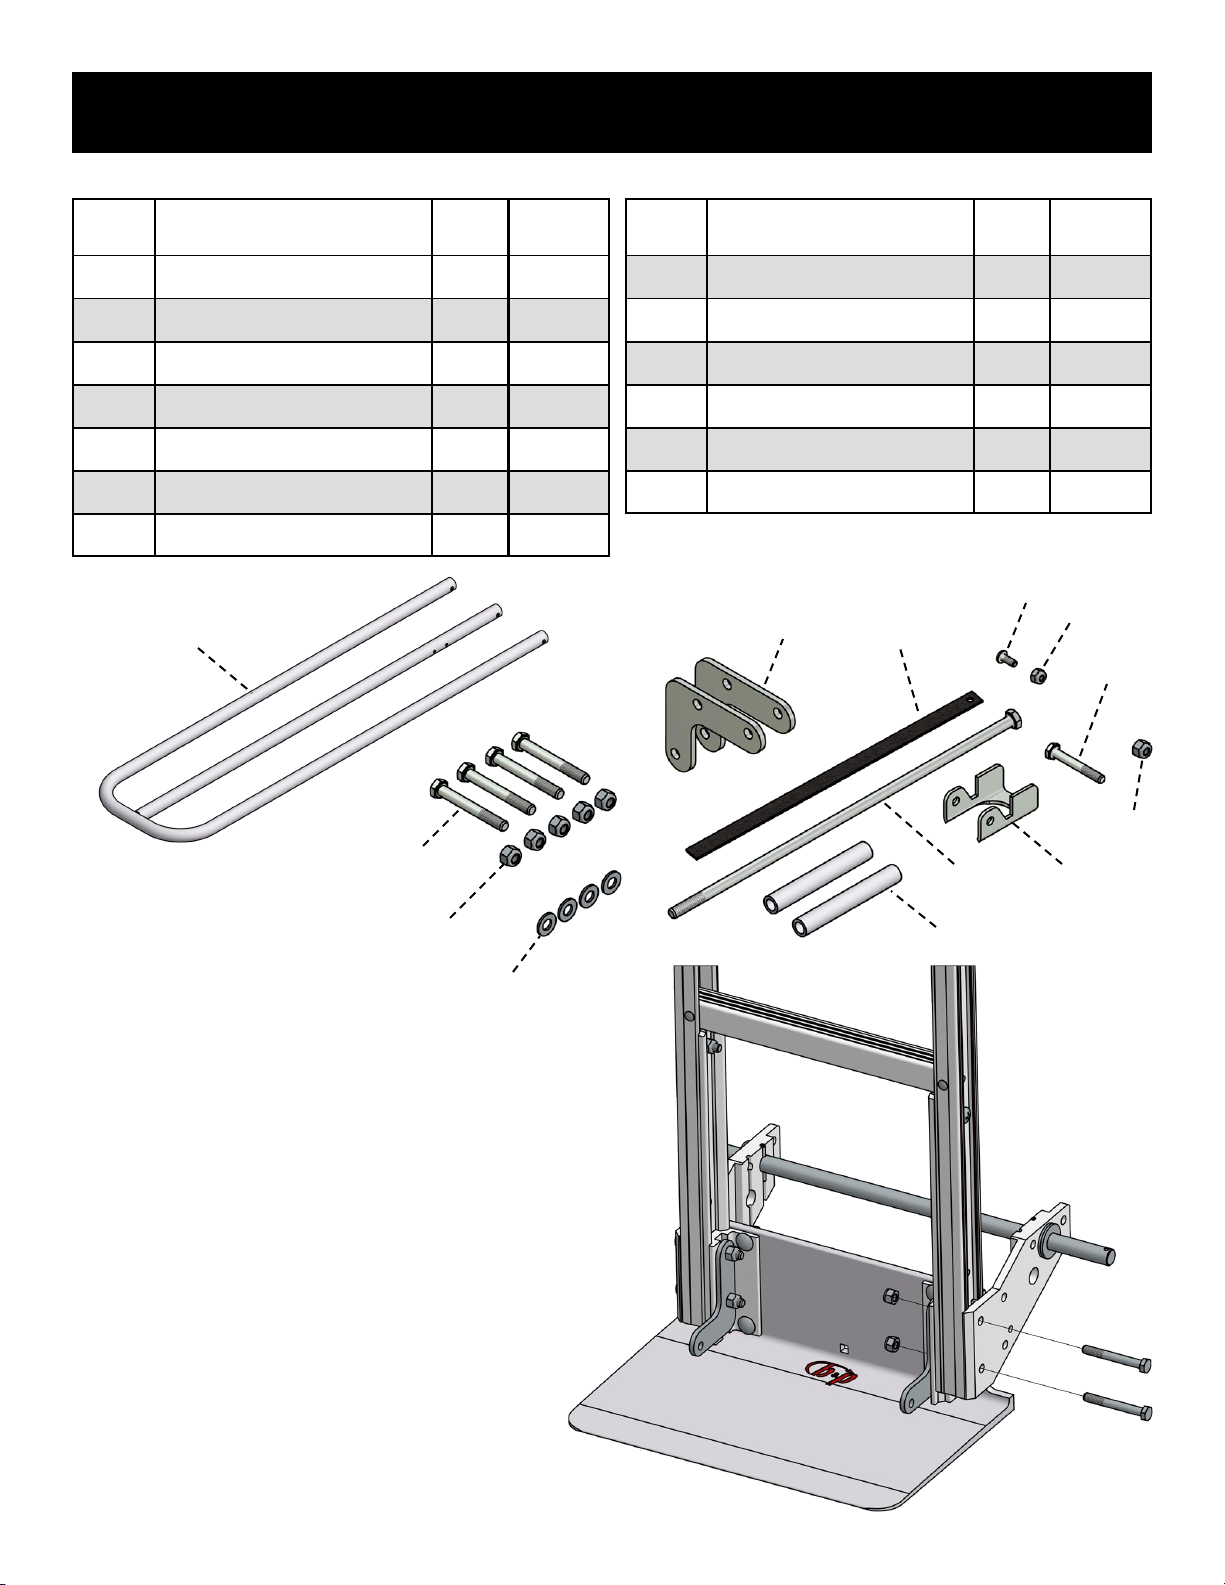
Item Description Qty. Part No.
A Folding Nose 1 Various*
B Bracket 2 2001-742
C Spacer 2 2001-208
D Velcro 1 2002-502
E Lever Latch 1 2450-203
F Bolt, 5/16”-18 x 2-1/2” 4 8007-013
G Bolt, 1/4”-20 x 1-3/4” 1 8007-036
A D
B
Rear Mount Folding Nose
F E
C
L
Tools Required:
(2) 1/2” Wrench/Socket
(2) 7/16” Wrench/Socket
(1) 3/8” Wrench/Socket
(1) #2 Phillips screwdriver
(2) (1) Needle nose pliers
1. To add a folding nose to your hand truck
with a rear mount nose plate first remove
both wheels from the axle, providing access
to the nose plate fasteners. Set the wheels,
washers and cotter pins aside.
2. Next remove the nuts/bolts that attach the
nose plate to the frame and discard. Attach
the folding nose brackets (B) to the inside
of the frame with bolts (F) and nuts (J)
passing thru the wheel brackets.
Item Description Qty. Part No.
H Bolt, 5/16”-18 x 12” 1 8007-056
I Bolt, #10-24 x 1/2” 1 8068-018
J Lock Nut, 5/16”-18 5 8001-005
K Lock Nut, #10-24 1 8001-002
L Lock Nut, 1/4”-20 1 8001-004
M Washer, 5/16” Flat 4 8003-005
K
J
I
H
G
*Part number will vary based on the option selected at the time
of purchase.
M
Created: 1/22/2009, Revision: B 7/29/2016
8200-066 E4-E5-E6 Tubular Folding Nose Assembly Instructions Page 3 of 5
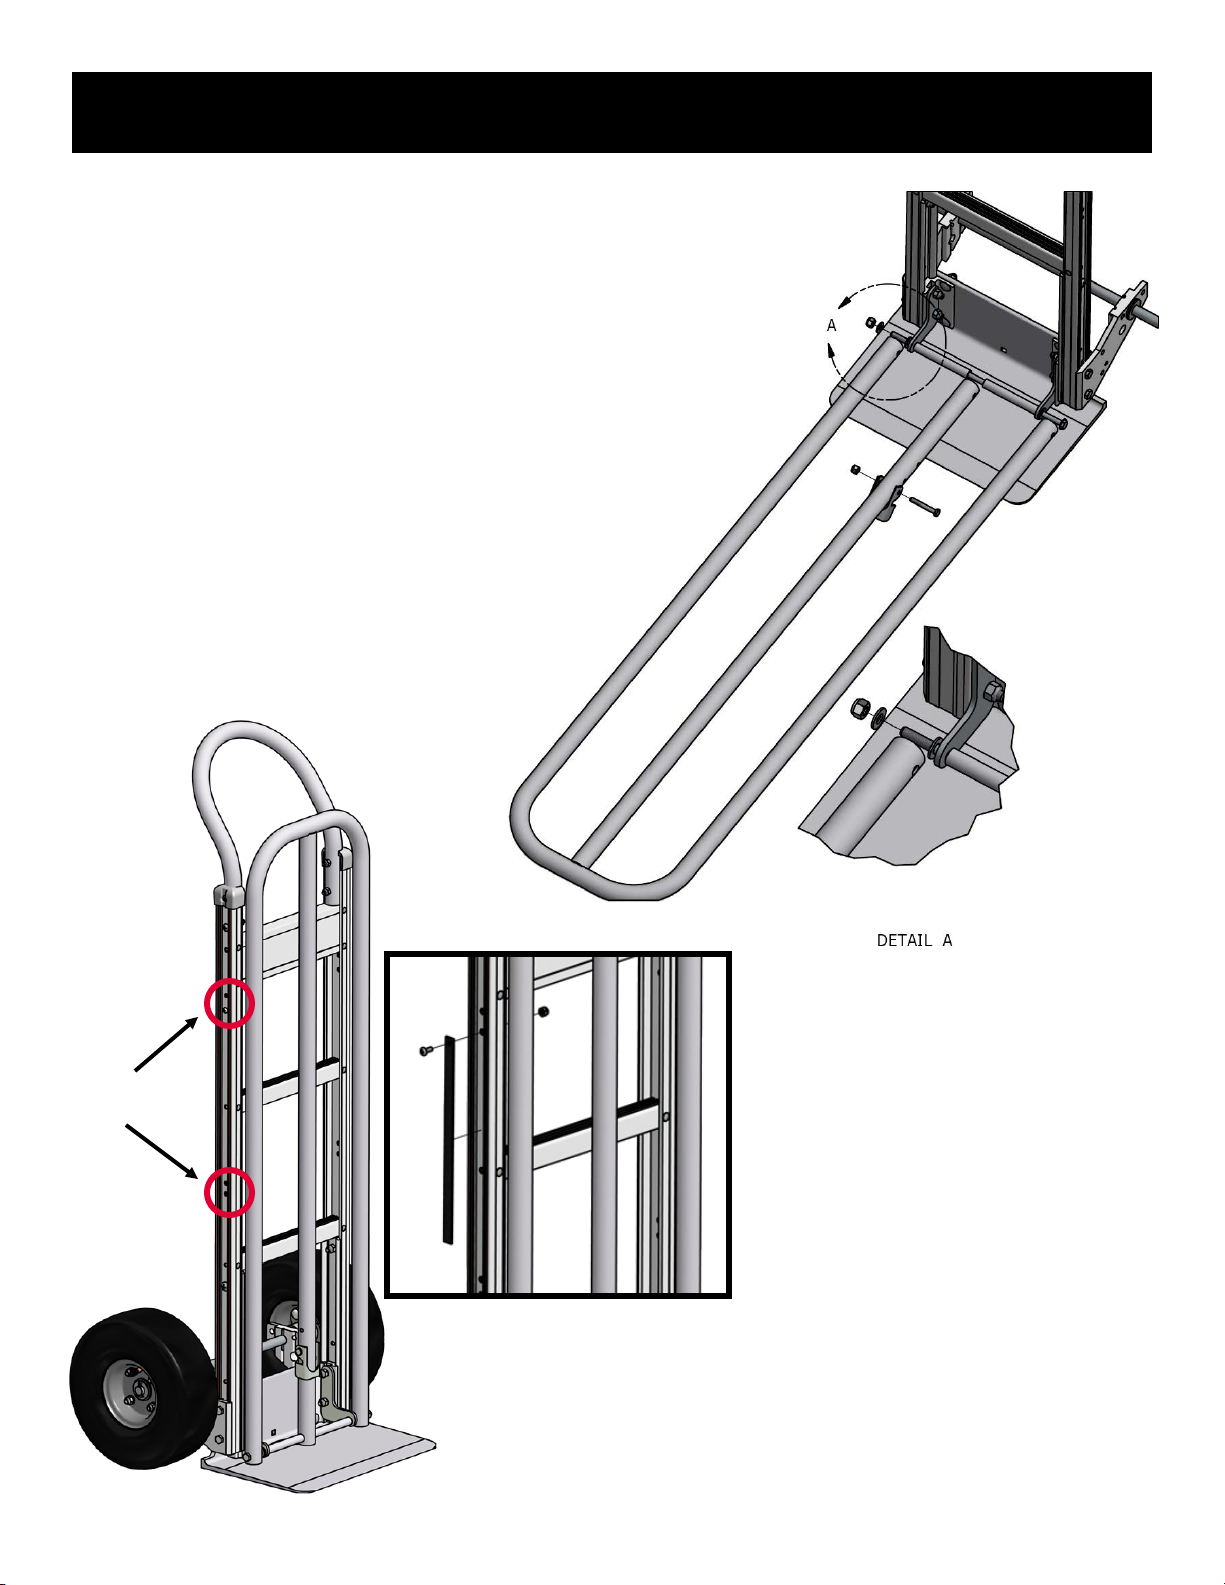
3. Attach the folding nose (A) to the outside of the
brackets in the order shown: 5/16”-18 x 12” bolt
(H), flat washers (M), folding nose (A), flat
washer (M), bracket (B), spacer (C ), folding nose
center, spacer (C ), bracket (B), flat washer (M),
folding nose, flat washer (M), and 5/16”-18 lock
nut (J). Tighten, the folding nose should rotate
up and down freely.
4. Attach the lever latch (E) thru the closest hole of
the folding nose with 1/4”-20 bolt (G) and 1/4”-20
lock nut (L). The latch should rotate freely.
5. Reassemble the wheels on the hand truck with the
removed fasteners.
Rear Mount Folding Nose
Velcro strap
mounting holes
6. Fold up the folding nose to the
stored position. Based on the
height of the folding nose
purchased, select a hole in the
frame to attach the Velcro strap.
7. Pass the #10-24 bolt (I) thru the end
of the Velcro (D), thru the frame and
secure with #10-24 nut (K). Then
wrap the Velcro around the folding
nose, around the frame and back on
to itself, securing the folding nose in
the stored position.

Created: 1/22/2009, Revision: B 7/29/2016
8200-066 E4-E5-E6 Tubular Folding Nose Assembly Instructions Page 4 of 5
A
B C
Front Mount Folding Nose
1. To add a folding nose to your hand truck with a front
mount nose plate first remove the nuts and carriage
bolts that attach the nose plate to the mounting
brackets and discard.
2. Attach the folding nose brackets (B and C) to the front
of the nose plate with carriage bolts (H) passing thru
the nose plate mounting brackets and securing with
5/16”-18 lock nuts (K).
E
G
D
F
H
Item Description Qty. Part No.
A Folding Nose 1 Various*
B Bracket, LH 1 2001-743
C Bracket, RH 1 2001-744
D Velcro 1 2002-502
E Lever Latch 1 2450-203
F Rod 1 2001-210
G Spacer 2 2001-209
H Carriage Bolt, 5/16”-18 x 1-1/4” 4 8005-014
Item Description Qty. Part No.
I Bolt, 1/4”-20 x 1-3/4” 1 8007-036
J Bolt, #10-24 x 1/2” 1 8068-018
K Lock Nut, 5/16”-18 4 8001-005
L Lock Nut, #10-24 1 8001-002
M Lock Nut, 1/4”-20 1 8001-004
N Acorn Nut, 5/16”-18 2 8069-005
O Washer, 5/16” Flat 2 8003-005
P Washer, 5/16” Conical 2 8036-005
Tools Required:
(2) 1/2” Wrench/Socket
(2) 7/16” Wrench/Socket
(1) 3/8” Wrench/Socket
(1) #2 Phillips screwdriver
L
I
K
J
M
N
O
P
*Part number will vary based on the option selected at the time
of purchase.

Created: 1/22/2009, Revision: B7/29/2016
8200-066 E4-E5-E6 Tubular Folding Nose Assembly Instructions Page 5 of 5
Front Mount Folding Nose
Velcro strap
mounting holes
3. Attach the folding nose (A) to the outside of the
brackets in the order shown: acorn nut (N), rod (F),
flat washer (O), folding nose (A), conical washer
(P), bracket (B), spacer (G ), folding nose center,
spacer (G ), bracket (C), conical washer (P), folding
nose, flat washer (O), and acorn nut (N). Tighten,
the folding nose should rotate up and down freely.
4. Attach the lever latch (E) thru the farthest hole of
the folding nose with 1/4”-20 bolt (I) and 1/4”-20
lock nut (M). The latch should rotate freely.
6. Fold up the folding nose to the stored position. Based on
the height of the folding nose purchased, select a hole in the
frame to attach the Velcro strap.
7. Pass the #10-24 bolt (J) thru the end of the Velcro (D), thru
the frame and secure with #10-24 nut (L). Then wrap the
Velcro around the folding nose, around the frame and back
on to itself, securing the folding nose in the stored position.
This manual suits for next models
2
Table of contents


