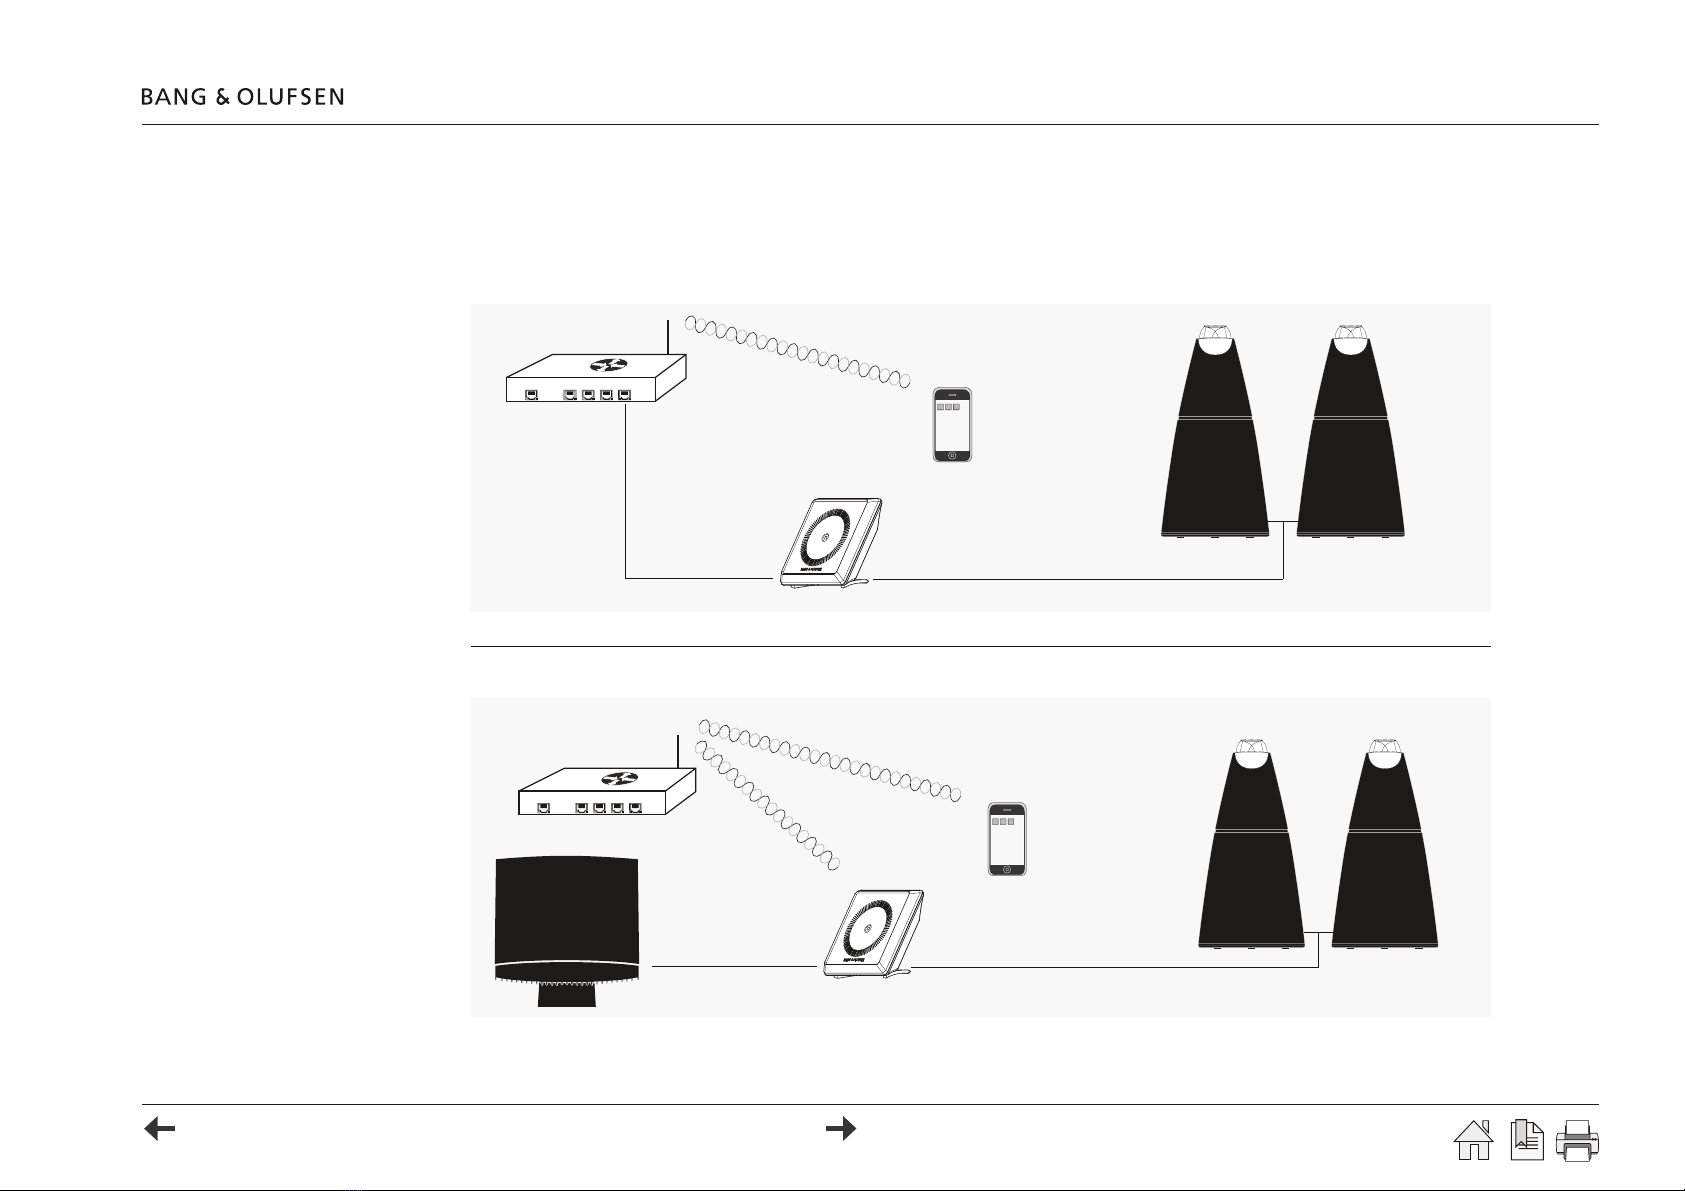
Setting up Playmaker - Other device 9
WLAN setup - Auto
> Connect the mains cable from the product to the mains supply.
> Press the Easy wireless setup button on the Playmaker.
> Press the WPS button on the router or activate the function from the routers web interface
Wi-Fi PROTECTED
SETUP
.
3GDMDSVNQJHMCHB@SNQ×@RGDRFQDDMVGHKDRD@QBGHMFSGDMDSVNQJ6GDM/K@XL@JDQ@MCSGDQNTSDQ@QDBNMMDBSDCSGDMDSVNQJHMCHB@SNQADBNLDRRNKHCVGHSD
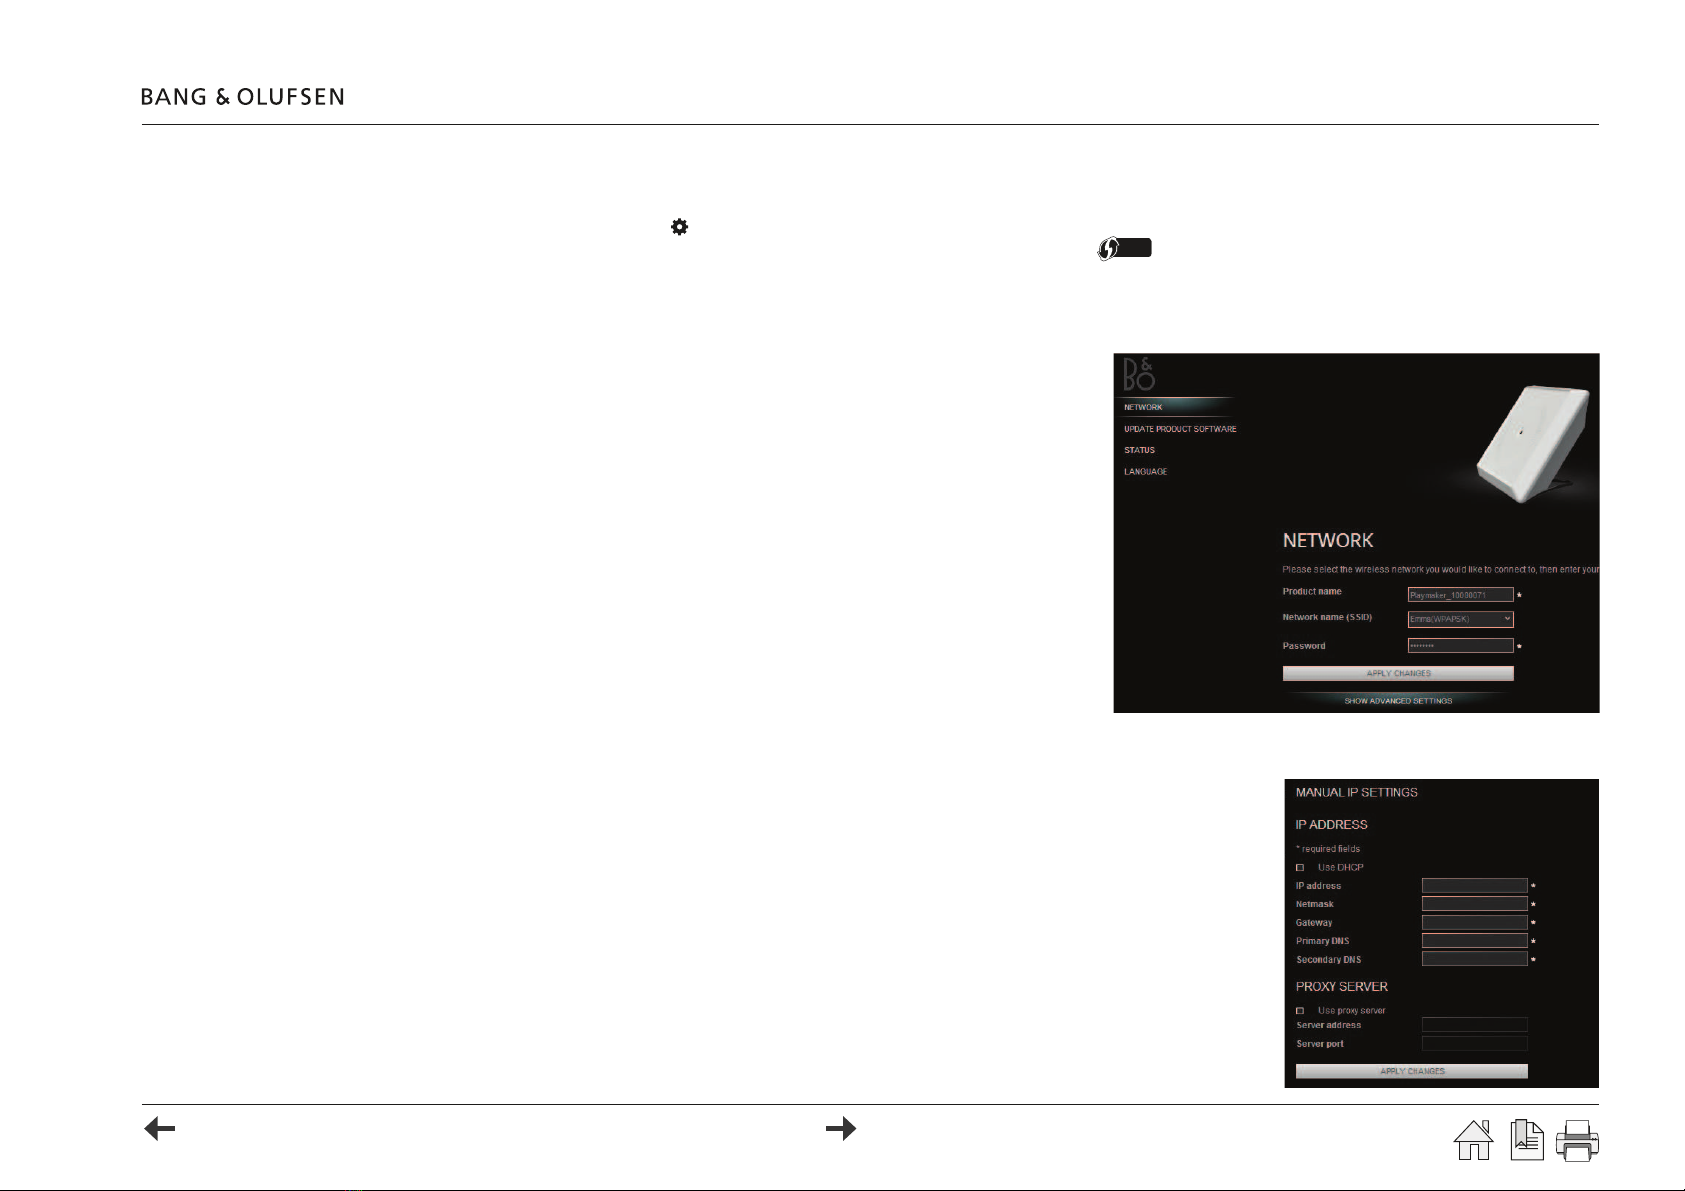
WLAN setup
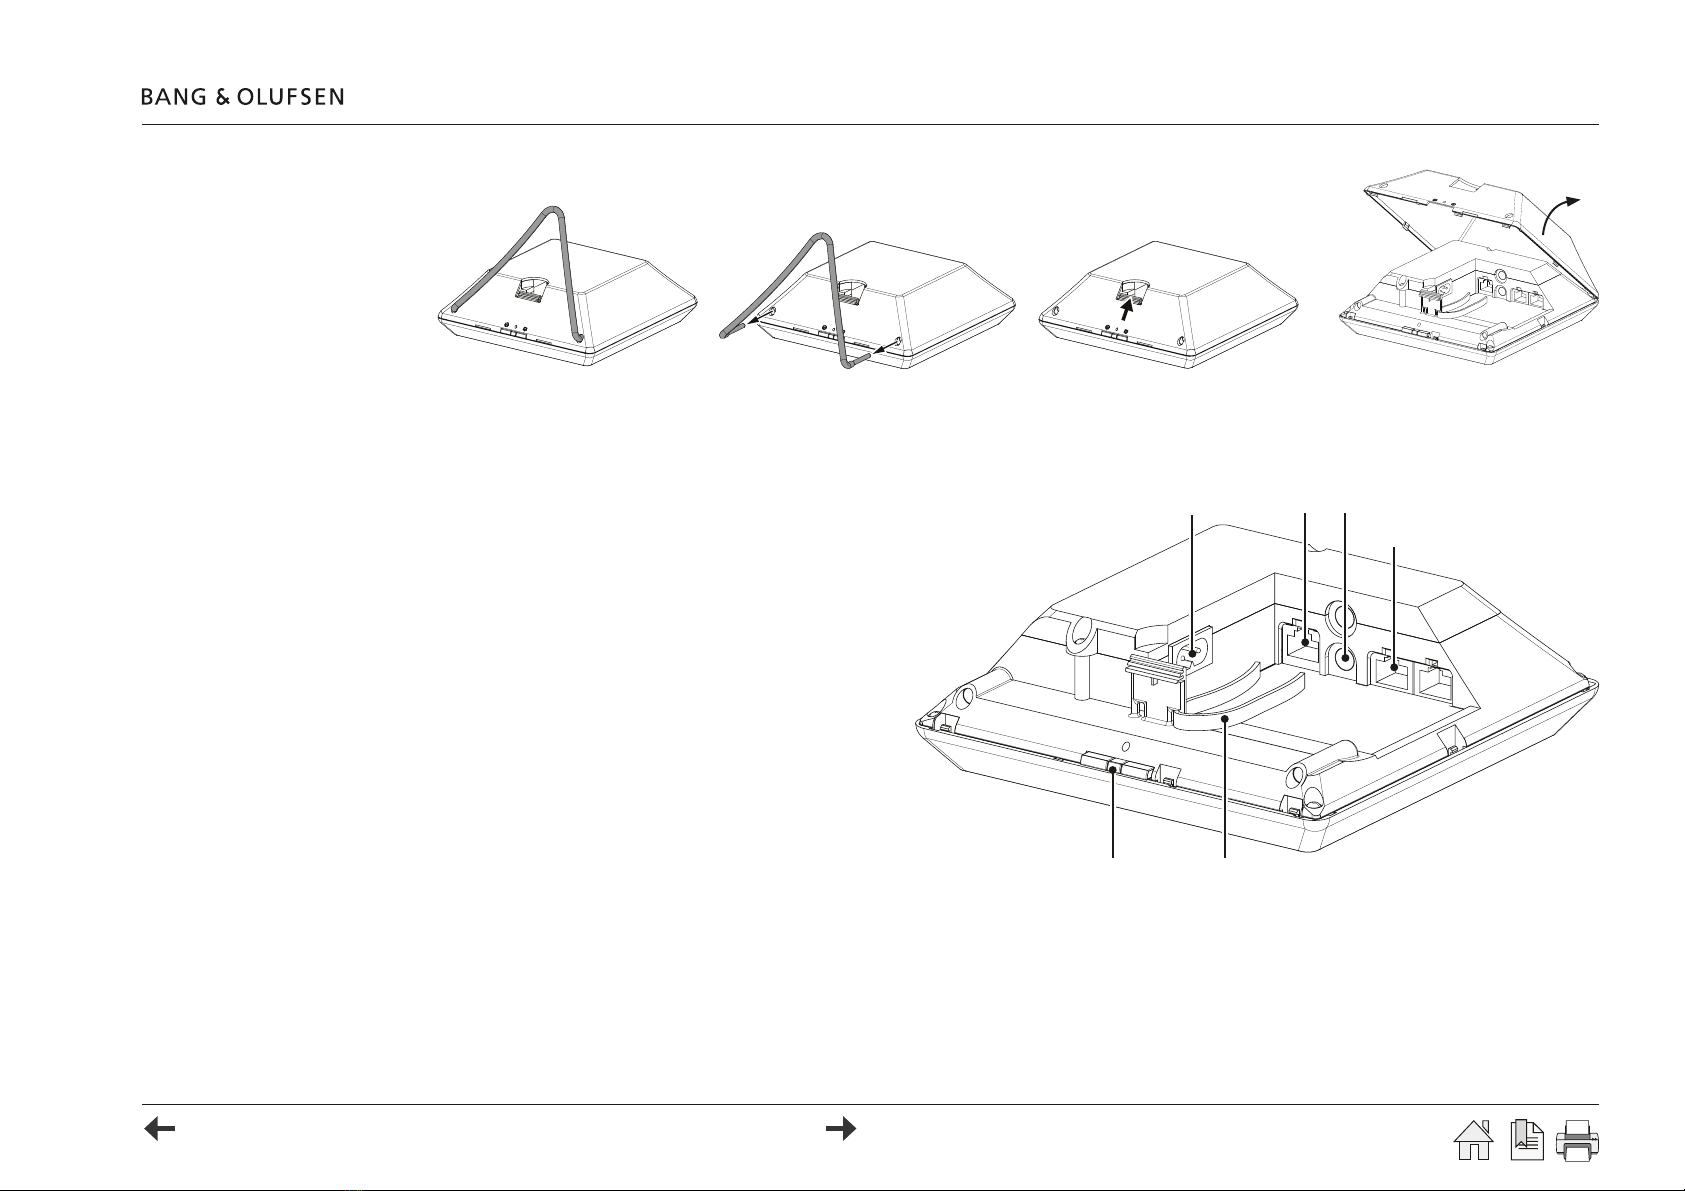
> Disable the wireless network on the computer and connect the computer directly to
Playmaker, using an Ethernet cable.
> Connect the mains cable from Playmaker to the mains supply and switch on the product.
3GDMDSVNQJHMCHB@SNQ×@RGDRVGHSDENQ@ANTSRDBNMCR@MCSGDMADBNLDRRNKHCVGHSD
> Enter the IP address 'http://169.254.11.22' in the address bar of an internet browser, and
press enter.
The setup page with network settings appears. If not, wait a while and refresh the page.
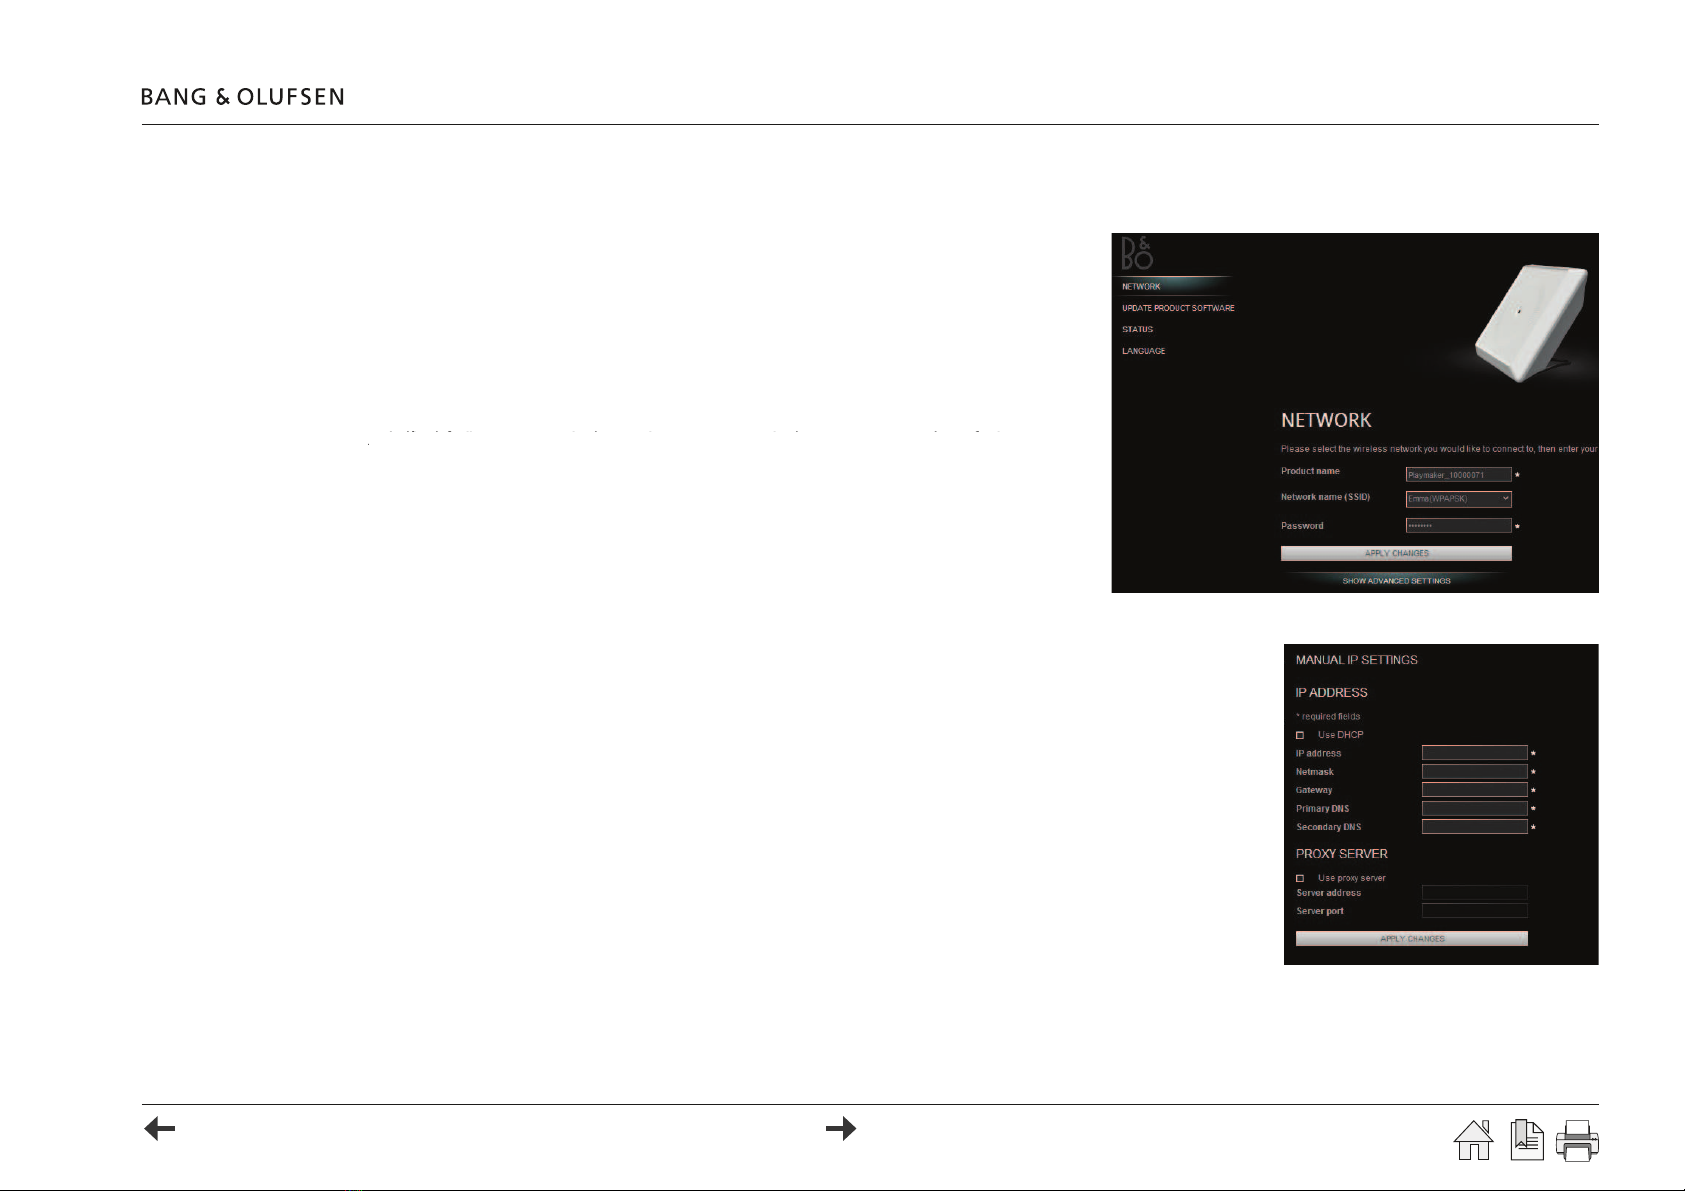
> Click on the drop-down list for Network name (SSID) and choose the desired network.
! If necessary, press the Refresh list... to perform a new network scan.
! If the SSID is hidden, click SHOW ADVANCED SETTINGS, checkmark MANUAL
SETTINGS and type in the SSID.
> Press the PasswordÖDKCSNDMSDQSGDO@RROGQ@RDENQSGDVHQDKDRRMDSVNQJ
> Press the APPLY CHANGES button to save settings*.
,@MT@KBNMÖFTQ@SHNM
Static IP address (DHCP disabled) ...
(ESGDQNTSDQHRBNMÖFTQDCVHSG#'"/CHR@AKDCSGD/K@XL@JDQLTRSADRDSTOVHSG@RS@SHB(/@CCQDRR
> Choose SHOW ADVANCED SETTINGS to open the section for manual IP settings (illustrated to the right).
> Remove the checkmark for Use DHCP SGDÖDKCRENQL@MT@K(/RDSSHMFRADBNLDR@BSHUD
%HKKHMSGDÖDKCRENQ(/RDSSHMFRL@QJDCVHSG*@BBNQCHMFSNSGDQNTSDQBNMÖFTQ@SHNM
> If a proxy server is needed, checkmark Use proxy server @MCÖKKHMSGDQDPTHQDCÖDKCR*.
> Press the APPLY CHANGES button to save settings*.
*The Playmaker reboots after the APPLY CHANGES button is pressed. Allow up to two minutes for Playmaker to
connect to the network.